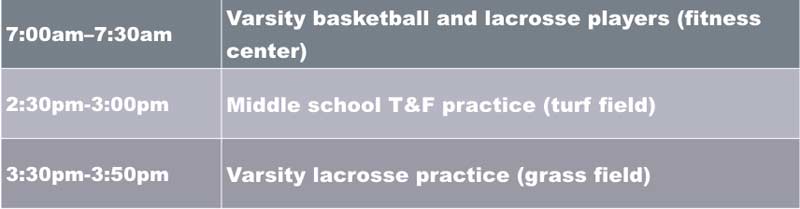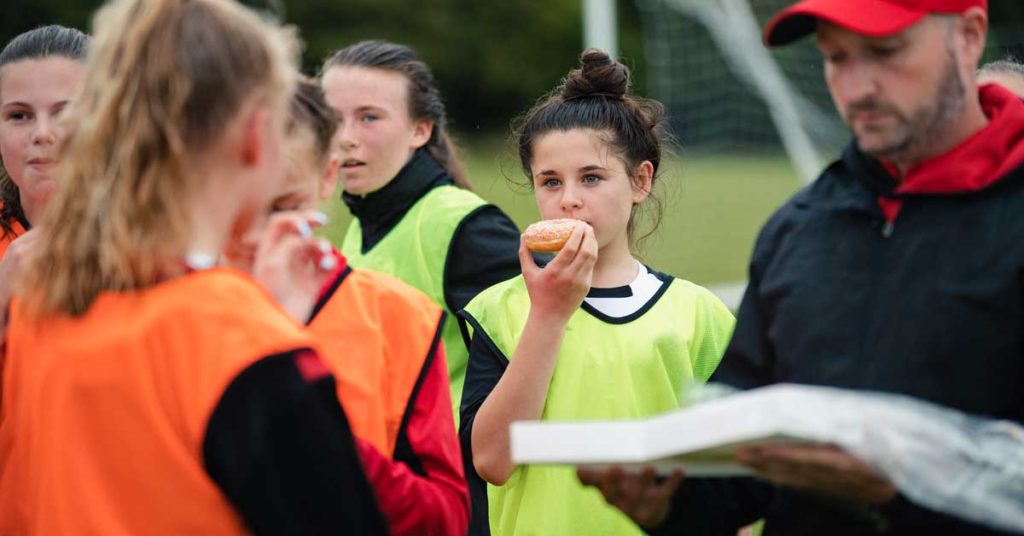
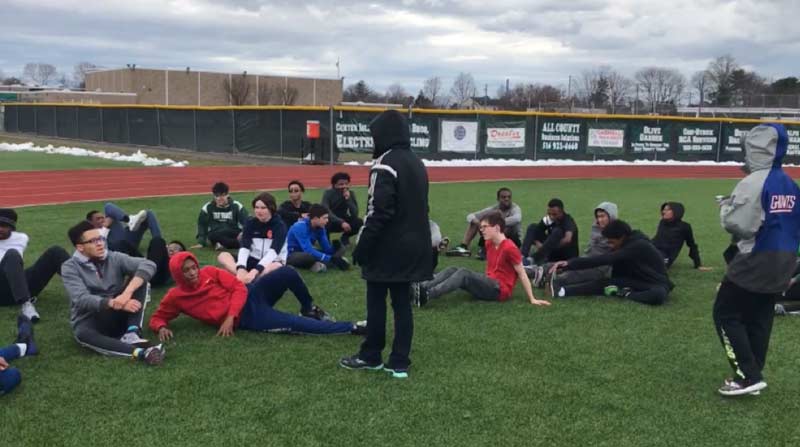
It was the beginning of the season, and my team was getting ready to practice. As I walked alongside them to the track, the athletes were talking about how hungry they were. Some mentioned they hadn’t eaten since 10 a.m., and others couldn’t wait until after practice to run across the street to grab a donut because it was “buy one, get one free” day. As we passed the long jump pit and headed to the spot under the scoreboard where we meet before warm-up, they continued to talk about how hungry and tired they were.
At that moment, I realized that if my team is distracted every day by feelings of hunger and fatigue, something needs to change.
Even though we talk about the importance of a good diet and its impact on health and performance, these high school kids still don’t know HOW to implement the information. Share on XI was surprised, because I make a point of constantly discussing the importance of a good diet and its impact on health and performance. Even though we talk about it, however, these high school kids still don’t know how to implement the information. I also realized that they were student-athletes, and their schedule isn’t meal friendly.
The reality for many high school kids is that they want to eat better, but since they are overscheduled with school, sports, and social activity, nutrition gets put on the back burner. Most of their meals are on the go from fast food restaurants, and many parents are busy working so they order out. You listen as athletes tell their friends about skipping breakfast because they aren’t hungry in the morning, then running across the street after practice to grab some fast food because by that point they are starving. They barely drink water during the day and often don’t know the difference between a carbohydrate and a protein.
I realized, “Oh boy, I need to do something. After all, I am the coach, and athletic performance depends on nutrition!” I decided I needed to condense the ABCs of nutrition and lay it out for them: It would be important to give them strategies on how to implement nutritional priorities into their already busy schedule.
Where Do You Start?
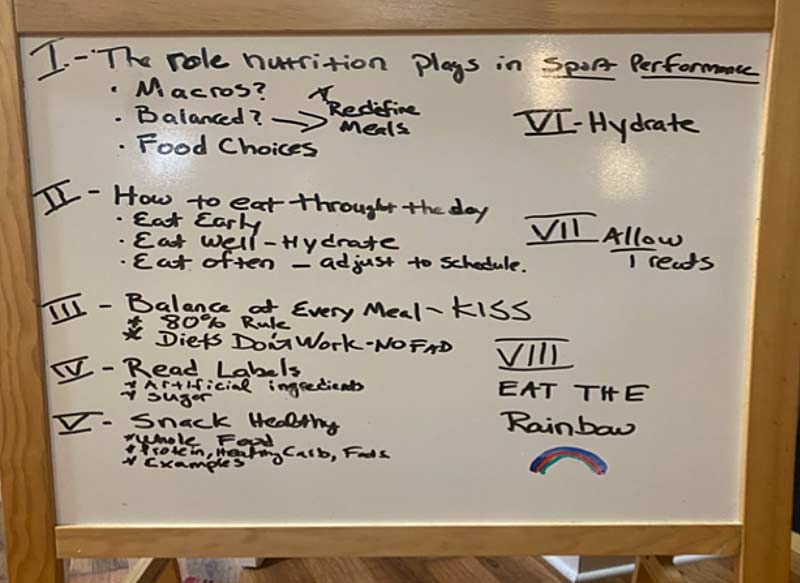
First, communicate with your athletes about how it can affect them if they don’t eat right versus what it can do for their performance if they do. Below is an outline of the information I speak about—I simply write it on a whiteboard and work my way down.
You don’t need to make a slide presentation—you can do it on the field in a relaxed environment and make it interactive. This might be a good thing to do on a light day of practice or a recovery day. In the end, I provide strategies on how to implement nutritional priorities one at a time. I start with how to stay hydrated; once they have achieved that, I layer on another one. I keep it simple and attainable, so they feel successful and not defeated. I also learned they will need constant reminders; it’s not a one-time conversation.
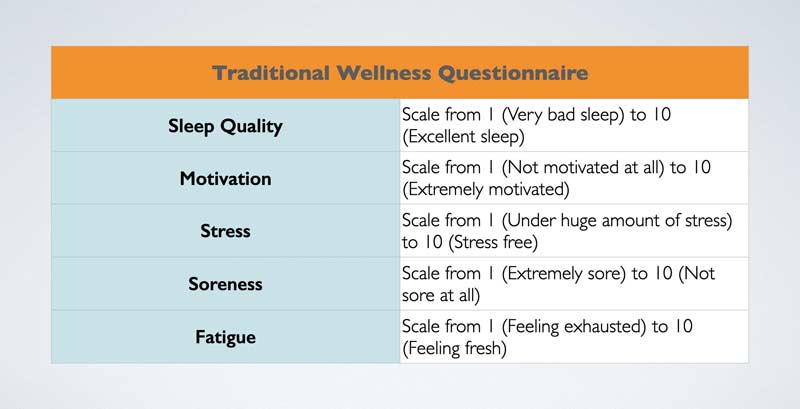
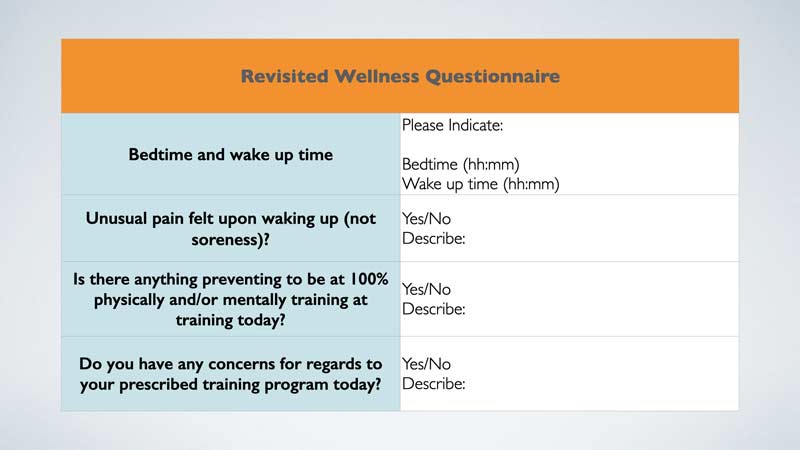
The reality is that the schedule for a high school student-athlete doesn’t make it easy to eat a balanced diet. Some work and preparation are definitely needed. Begin with a conversation and ask the athletes how they are feeling, how is their sleep, what have they eaten during the day, whether they understand how those eating habit may impact performance, etc.
The reality is that the schedule for a high school student-athlete doesn’t make it easy to eat a balanced diet. Share on XI also include links with infographics that are great references for the athletes—I find it beneficial to email or send them in a group text so they can pull them up on their phone.
What We Think Athletes Know About Nutrition and the Reality Are Two Different Things
After talking to my high school athletes, I realized they don’t truly understand how poor nutritional habits can affect them on and off the field. When we started to talk about nutrition, they shared with me how they are too busy with school, social life, and athletics to think about what they are going to eat. Here is a perfect example of how teenagers operate—one day, I noticed an athlete struggling with training. He continued to stop and complain of cramping. The first things I asked was whether he drank enough water and what did he eat today? He told me he’d had an apple and a cup of water, and that was it!
Common habits amongst these athletes were skipping meals, grabbing the first thing they see, and not giving nutrition a second thought. As far as macro nutrients, most didn’t have a clue—they had no idea that food could affect how they felt or how they performed. As a coach, I found this to be the perfect opportunity to make a difference and educate them.
I start the conversation with facts about poor versus healthy habits and how each can make them feel. A few of my athletes shared how when they stopped eating fried food at lunch, they didn’t get stomach cramps anymore and didn’t have to run to the bathroom in the middle of practice.
I explained to my athletes that eating a poor diet could result in:
- Low energy levels.
- Reduced athletic and academic performance.
- Trouble focusing and concentrating and poor memory recall.
- Increased risk for injury, illness, and infection.
- Fatigue and reduced reaction time.
- Muscle loss and an inability to gain lean mass.
- Reduction in strength, power output, and speed.
Then some facts about how a good diet can benefit them:
- Increased ability to focus and memory recall.
- Better ability to recover.
- Increased strength and power.
- Reduced risk of injury and illness.
- Better long-term health.
- Increased overall energy.
- Ability to get the most out of your training.
Give them a convenient visual of what a balanced diet looks like.
I also find it beneficial to educate them on the specific nutritional demands of their sport. For example, if they are a distance athlete, they will benefit from a diet with a higher percent of carbs versus a strength or power athlete who will need more protein.
We’ve Educated Them: Now Let’s Offer Strategies on How to Eat Throughout the Day
As coaches, we need to remember high school students don’t have a meal-friendly time schedule. They usually are up very early and may have lunch at 10 or 11 a.m. (and some students don’t have a lunch period because they’re overloaded with honors classes). By the time they get to practice, they have low energy and can’t focus. These are some of the strategies I recommend:
- Eat early: Train the digestive system to tolerate food in the morning just like we train to get stronger and faster.
- Choose wisely: Give them morning options that are time-efficient and nutrient dense. For example, Ezekiel bread with peanut butter and banana, Greek yogurt with berries and granola, eggs on whole grain toast and fresh fruit, a protein shake with frozen or fresh fruit. I also suggest if they want leftover steak and veggies from last night’s dinner, it’s better than a sugary cereal.
- Eat well: Healthy carbohydrates, proteins, and fats to meet the nutritional demands of their growth and sport.
- Eat often: When possible, a high carb and easily digestible snack approximately 30 minutes before training and simple carbs when training is longer then two hours (fresh or dried fruit, fig bars, granola).
- Consume recovery nutrition: This should be 0-2 hours post training. (If an athlete is unable to have a nutritious meal soon after practice, suggest they have chocolate milk or a protein shake post training to help them with recovery instead of going hungry).
- Time full meals: Consume a full meal 3-4 hours before a training session and don’t try new foods with this meal.
I’ve used the information below as examples of ways they could implement this information:
- It could look something like this: meal-meal-snack-snack-snack-meal. Meal in the morning before school, or if they have lunch at 10:30, then pack snacks for the day. Have one at noon, then another an hour or so before practice, and another after. When they get home, they have another meal. The high school setting is never optimal, but neither is life—we must adapt and prepare accordingly.
- Replenish protein to repair muscle damage accumulated during training and carbohydrates to replace glycogen for energy used during training.
- Rehydrate—drink fluids to replace fluid during training in addition to about half their weight in ounces. Example: a 140-pound female should drink about 70 ounces on a regular basis.
- Get in the habit of reading food labels (e.g., how does sugar hide in ingredients, the importance of fewer ingredients, “low fat” means nothing, whole foods better than processed, etc.). I did this when we traveled and made a food stop…
1. When we travel with the team, we can teach them how to snack! (Coaches too!)
- Teach them how to eat a healthy meal before traveling. If athletes will be on the go for several hours, they should eat something satisfying beforehand, so they don’t end up hungry and reaching for junk.
- 1-2 palms of lean protein.
- 1-2 cupped hands of carbs.
- 1-2 fists of veggies.
- 1-2 thumbs of fats.
- Pack a snack or several: nuts, seeds, hard-boiled eggs, celery with nut butter, raw veggies or fruit, quality protein bars.
- At a travel stop, make good choices: Greek yogurt, string cheese, raw veggies and hummus, fruits.
- In a hotel? Consider booking a room with a kitchenette or arrange the team meals at a restaurant with healthier choices.
2. Let’s get them to understand the importance of hydration. (See this infographic on what to drink more of, some of, and less of.)
- Teach your athletes to look at the color of their urine. They may not associate the headache, cramping, and fatigue with dehydration, but they will remember this. Explain to them it should be pale yellowish and clear. If it’s darker, they need to drink more water. Depending on how much info you want to give your athletes, you can explain further. I use the example of a dry sponge and a sponge soaked in water and how it can bend without damage compared to the dry one—I tell them now imagine the sponge is your muscle.
- I explain that if their output of fluids exceeds their intake of fluids, an imbalance occurs, and dehydration can develop. I discuss how much they sweat, how this influences dehydration, and how it can be measured by weight loss as a percentage. The weather, the activity, and the length of the activity will impact how much the athlete sweats. Have the athletes look at their clothes after practice—some sweat so much they can ring out their shirts. I use this visual, so they know they need to replace what they lost.

I talk about how dehydration can cause these symptoms:
- Thirst
- Dry skin
- Fatigue and weakness
- Increased body temperature
- Muscle cramping
- Headaches
- Nausea
- Darker-colored urine
- Dry mouth
Next, I go over what severe dehydration can feel like:
- Muscle spasms
- Vomiting
- Dark urine
- Vision problems
- Loss of consciousness
- Kidney and liver failure
When you end practice, ask your athletes is anyone thirsty? Wouldn’t an ice-cold glass of lemonade be great right now? Tell them if you’re thirsty, it’s a signal you’re dehydrated.
If some of your athletes have a tough time drinking during practice, figure 1 below is a guide on hydrating for coaches. If they don’t drink during practice, use this as a guideline to teach them:
- 500 milliliters (16 ounces) of fluid the night before exercise.
- 500 milliliters in the morning.
- 500 to 1,000 milliliters (16-32 ounces), one hour before exercise.
- 250 to 500 milliliters (8-16 ounces), 20 minutes before exercise.
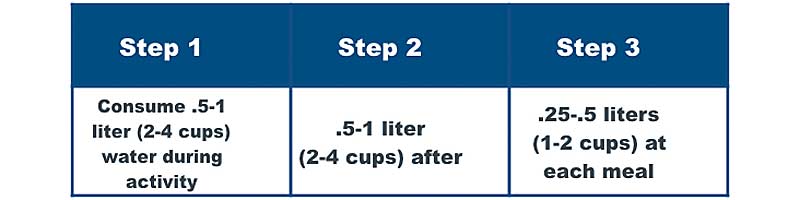
It’s a good idea to have your athletes get in the habit of eating nutrient-dense foods/beverages after exercise to assist in the rehydrating process.
- Those with a history of cramping and “salty sweat” should consider adding salt to foods/beverages after exercising (a quarter to one-half teaspoon).
- For every pound of sweat lost during exercise, rehydrate with two cups of fluid.
- Dark-colored urine can be a sign of a low water reserve in the body. Make sure your urine is light-colored and clear.
- Watermelon, strawberries, peaches, cucumbers, celery, pickles, coconut water, and oranges are good suggestions for hydration post training.

3. Convey the importance of allowing treats.
I find it valuable to teach our athletes that *treats* are something we eat on occasion. We don’t want teenagers to think they can never have ice cream or pizza; we educate them on eating nutritiously most of the time, and that food is our friend. If they know what a healthy diet looks like, then they can have those foods in moderation. I use the 80/20 rule with my athletes: eat a healthy, sound, nutritious diet 80% of the time, then the other 20% you can eat treats in moderation.
If teenagers know what a healthy diet looks like, then they can have foods like ice cream and pizza in moderation. Share on X4. It’s not one conversation; it’s an ongoing process with constant reminders.
I have found if they know why they should eat better, then they’ll want to. (When they start performing better, they are even more motivated.) Giving them the how strategies is extremely important. Shortcuts I have shared with my athletes are to eat more fresh fruit and also put fruits like bananas, grapes, and any kind of fresh berry in the freezer—they can reach for it when they want something sweet or throw it in a smoothie.
I also suggest eating more veggies, such as cut-up carrots, celery, and peppers as a quick snack with some hummus or whatever dip they might have in the house. I recommend they share the info with their parents so the whole family is onboard. I have had athletes ask me for recipes, because I regularly post meals I make at home and nutrition tips. Sharing nutritional information on social media or group chats has also worked well for me.
Seeing an Impact on the Track
We all know we can’t out-train a bad diet and healthy habits should start young. I have found the best way to do this is to be a resource for my athletes and to sift through the information and give them the facts. For teen athletes, most just eat when they are hungry and don’t give much thought to what it is. I have found that when I start to bring up the subject of nutrition, they start to ask questions and want to know more about how to eat better.
My presentation to my athletes about nutrition has always been positive and prompts them to ask follow-up questions. I bet most coaches would be surprised their athletes don’t know the difference between a carb and a protein. At the end, I always leave time for questions, and there are always plenty that lead to more conversations and education. When we travel for meets and stop to get food, I find this a perfect time to help them make better choices. An athlete of mine brought this up years later, telling me she remembered me explaining how unhealthy soda was and then she stopped drinking it.
When we travel for meets and stop to get food, I find this a perfect time to help them make better food choices. Share on XOver the years, one behavior I have noticed that has made an impact is improved hydration—with better hydration habits, the athletes who would complain of headaches and muscle cramps stopped complaining and had fewer of these. The athletes who had stomach cramps at practice after eating fries and chicken fingers for lunch changed that dietary habit to a healthier, more digestible choice and didn’t have to run to the bathroom in the middle of practice.
I always remind them on the night of a competition to not try any new foods and to stick with what works for them. We teach our athletes to reach for the low-hanging fruit of nutritional habits and layer one on top of the other. Not overwhelming them with info and giving them other options is key—it’s an ongoing process, so let’s keep the conversation going and MANGIA BENE!
Since you’re here…
…we have a small favor to ask. More people are reading SimpliFaster than ever, and each week we bring you compelling content from coaches, sport scientists, and physiotherapists who are devoted to building better athletes. Please take a moment to share the articles on social media, engage the authors with questions and comments below, and link to articles when appropriate if you have a blog or participate on forums of related topics. — SF