• Skip to content
  • Skip to primary sidebar
SimpliFaster

SimpliFaster

cart

Top Header Element

  • Facebook
  • Instagram
  • Twitter
  • YouTube
  • Login
  • cartCart
  • (925) 461-5990
  • Shop
  • Request a Quote
  • Blog
  • Buyer’s Guide
  • Freelap Friday Five
  • Podcast
  • Job Board
    • Candidate
    • Employer
    • Facebook
    • Instagram
    • Twitter
    • YouTube
You are here: Home / Blog

Blog

Nic Shimonek QB

Transitioning from Pro Athlete to Strength Coach with Nic Shimonek

Freelap Friday Five| ByNic Shimonek, ByNicole Foley

Nic Shimonek QB

After his time as a collegiate and professional athlete, Nic Shimonek decided to pursue his true calling: performance coaching for elite athletes. Since beginning his career in Los Angeles, Nic’s desire to help individuals reach their highest potential has expanded beyond just elite athletes, and he now works with clients from all walks of life. His credentials include Certified Strength and Conditioning Specialist (CSCS) through the NSCA, Injury Resiliency and Performance Course through the Professional Football Strength and Conditioning Coaches Association (PFSCCA), Exercise Physiology at Stanford Center for Health Education (SCHE), Certification in Applied Functional Science (CAFS) from the Grey Institute, and functional range conditioning and assessment.

Freelap USA: You’re someone who has seemingly had a quick and unconventional development as a strength coach. For those who may not be familiar with you yet, what is your background and how do you see yourself gaining a strong foothold in this industry?

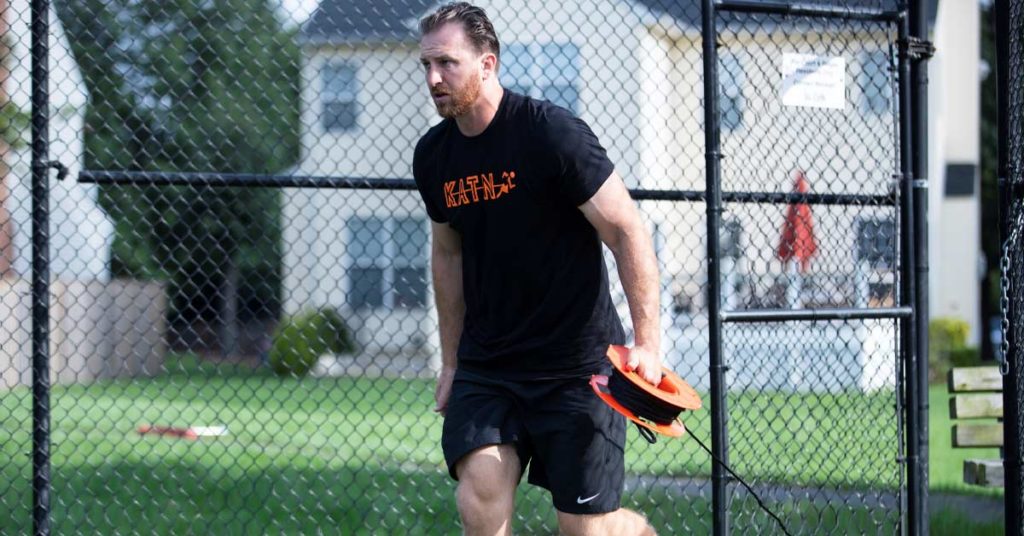
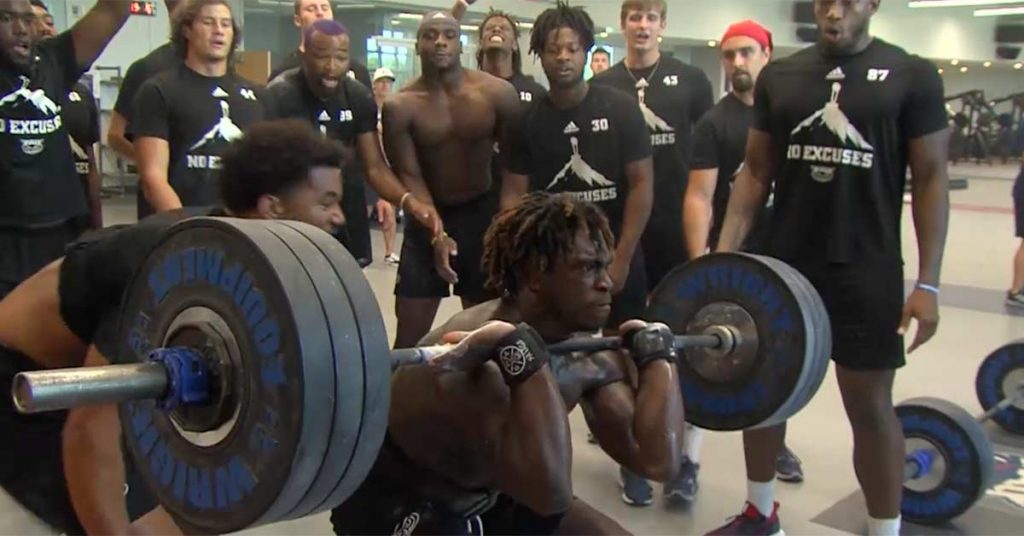
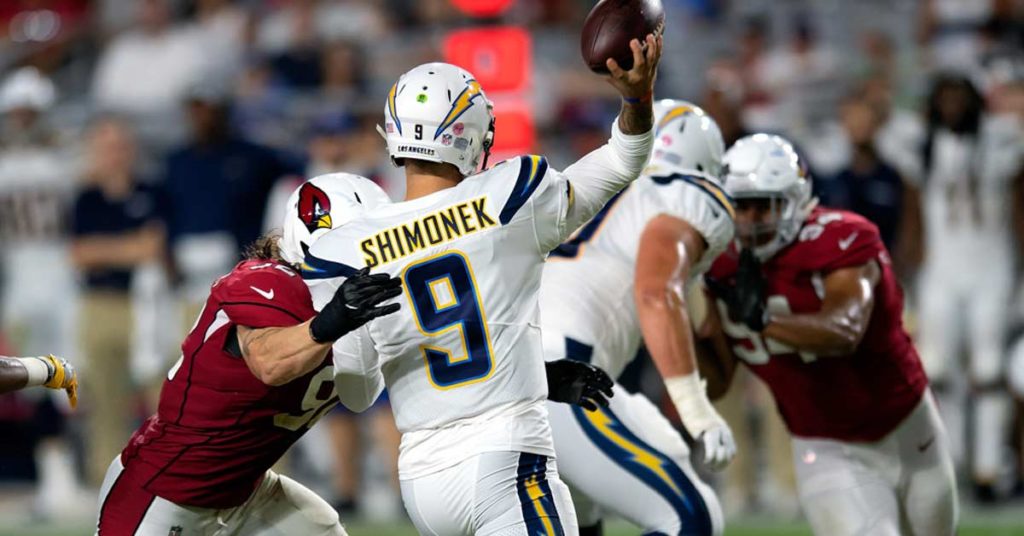
Nic Shimonek: I’m a former NFL quarterback, currently operating as a sports performance coach in Los Angeles, California. My time in the NFL was brief, but the impact it made on me was immense. From the relationships that were built to the opportunity to train at some of the best facilities around the country, it was an experience that has certainly provided value to my current career path.

Being a quarterback at the highest level requires an abundance of trust from your teammates. It’s up to YOU to communicate and lead by example in a way that creates instant buy-in. Very early on in my collegiate career, I tried to establish myself as the hardest worker in the room, and that reputation began to stick with me.

When deciding to retire from the NFL, I wanted to ensure that those communication channels and relationships stayed intact. Because of the reputation I built, I was extremely fortunate in having the ability to stay in contact with a lot of my college and professional teammates, as well as members of the strength and PT staffs, and I now work very closely with both. I train lots of old teammates and get lots of referrals for athletes in/visiting LA from previous staff members.

My experience as a professional athlete and the unique perspective I offer to sports performance allowed me to gain a foothold in this industry. I’ve lived it. I’ve breathed it, says @N_shim_9er. Share on X

My experience as a professional athlete and the unique perspective I offer to sports performance are what allowed me to gain a foothold in this industry. I’ve lived it. I’ve breathed it. I’ve been in the best facilities in the country and around world-class minds in this field as an athlete and now as a coach. While I’m still developing an elite coach’s eye and exhausting all of my resources to learn and grow as much as possible, my experiences and unique perspective on all things performance-related are what will set me apart.

Freelap USA: There are several advantages to being a former pro athlete as a strength coach but equally some disadvantages. Can you talk a little bit about how those advantages and disadvantages have played out for you so far?

Nic Shimonek: I think the number one advantage to being a professional athlete and then transitioning into this industry is the relationships that were built over the years. I’m still training athletes who I was direct teammates with and even athletes who are teammates of my former teammates. These clients have helped me build a foundation and trustworthy reputation to attract more athletes.

As for disadvantages, I think you alluded to it in the opening question. I’ve had a VERY quick and unconventional route to my current situation as a performance coach for some of the best athletes in their respective sports. The accelerated start to my career caused me to bypass very valuable moments that most people in this industry may go through.

For example, I’ve trained under and been around some of the best minds in the industry, but I never completed an internship (not yet anyway) or worked at a sports performance facility. Within four months of retiring from the league and starting my career, I started my own business and was on a world tour overseeing the health and wellness of a global rock star. It happened QUICK, but it was an opportunity that I couldn’t pass on! I had A LOT of downtime on tour (rock stars operate on a different sleep schedule than us regulars), which I filled with studying for the CSCS exam.

Completing the CSCS (and various other continuing education courses) while on tour gave me the confidence to begin reaching out and pursuing high-level athletes upon my arrival back in LA. One athlete turned into two, two turned into four, and so on. Here I am, three years later, having worked with over 40 professional athletes across the three major sports (NFL, MLB, NBA).

Freelap USA: Running your own business in such a big market like Los Angeles, what has been your early focus to establish your reputation and the growth of your business?

Nic Shimonek:  It was intimidating at first because there are so many “performance coaches” in LA. Some already established, some trying to carve out a lane like me. The main thing I’ve done from the very beginning is to provide a service that GENUINELY cares for and wants to see the athletes succeed. Obviously, we all want our athletes to have success and do huge things on the field or court, but that’s where it stops for a lot of coaches. There isn’t a deeper connection with the client.

When I was training as an athlete, I wasn’t a huge name or highly touted guy, so I was just another body in a large group setting at these huge performance facilities: “Get in the back of the line and follow the guy in front of you.” I didn’t want my athletes to feel like that. I wanted the attention to detail for every individual rep to be felt and noticed.

I capped my first NFL off-season at five athletes. I probably could’ve had 8-10 guys had I really done some recruiting, but I wanted the quality of service to be so high with that first group of five that they were sure to tell their teammates where they had spent the last few months. I also wanted to establish a relationship with that first group that went beyond the training sessions, and to this day, any athlete I’ve worked with knows that I’m just a phone call (or text) away. Sure enough, those five turned into eight in the subsequent off-season. COVID-19 definitely had an effect on my operation, but the foundation had been set and it was only up from there, global pandemic or not.

Freelap USA: You’ve had an opportunity to work with a lot of high-profile athletes. Can you talk about some of the difficulties you’ve experienced with this? And what was your breakthrough moment, if there is one?

Nic Shimonek: I’m not sure if I’d consider it a difficulty but working around the preexisting schedule of a high-profile athlete has probably been the biggest challenge. The reason I wouldn’t call it a difficulty is because it’s all about your perspective and how you view the situation. You MUST be ADAPTABLE if you want to succeed in this world.

For example, I oversee all things performance-related for a running back in the NFL. I travel all over the country for him to ensure we’re putting him in a position to be successful. Throughout the off-season, he works with the organization’s physical therapy and S&C teams, his personal physical therapist, and a position-specific coach. It’s on me to digest all of this information and be in constant communication with the others he’s working with (current phase of training, current rehab protocols, volume of position work, etc.) and adapt/adjust my training plans to fill in the gaps.

I’m reluctant to consider any of this a ‘big break.’ That phrase implies that I got lucky to be in this position. In reality, I put the work in and built the relationships, says @N_shim_9er. Share on X

I’m reluctant to consider any of this a “big break.” I feel as if that phrase implies that I got lucky to be in this position. In reality, I put the work in and built the relationships. I said what I wanted to accomplish out loud, and then made it happen. YOU control your destiny.

Don’t put a limit on what you can do or be in this field, or in any field for that matter. I’m constantly trying to learn, grow, and evolve as a coach and as a husband/father, regardless of the success early on in my career. Avoid a complacent mindset! Again, it’s about perspective and putting in the work to get where you want to be.

Freelap USA: You might have one of the coolest home gym setups in the entire country and have utilized your space very well. What are some of your favorite pieces of equipment and/or training applications to optimize a home gym space?

Nic Shimonek: I get asked all the time about my favorite piece of equipment in the gym. The Keiser machines are nice, and if I had unlimited space and budget, the Keiser Functional Trainer would be my number one machine because it’s so versatile. I also understand that’s not realistic for most “in-home” situations.

With that said, my go-to piece for home gyms would have to be a trap bar. With a TB, you can do strength and power work (deadlifts and loaded jumps), aerobic capacity work (carries/marches), upper body (overhead pressing or push-ups/rows), and everything in between. It’s just a matter of being creative and implementing the tool to achieve your desired outcome/adaptation. I like Kabuki’s trap bar because of the open face, but you can make it work with most trap bars on the market. It’s an awesome tool that will be a staple in my programming for a long time.

Lead photo by Carlos Herrera/Icon Sportswire.

Since you’re here…
…we have a small favor to ask. More people are reading SimpliFaster than ever, and each week we bring you compelling content from coaches, sport scientists, and physiotherapists who are devoted to building better athletes. Please take a moment to share the articles on social media, engage the authors with questions and comments below, and link to articles when appropriate if you have a blog or participate on forums of related topics. — SF


Brown Sprinters

Get Faster Now with Cluster Training

Blog| ByGabriel Mvumvure

Brown Sprinters

By Gabriel Mvumvure and Kim Goss

Athletic fitness magazines are packed with result-producing weight training methods promising to make you faster, stronger, and more powerful. Some are quite effective. Unfortunately, however, many are nearly impossible to implement with large groups—and with the popularity of weight training in high schools and colleges, pretty much all groups are large.

One workout system we’ve found to improve the quality of our workouts at Brown University is cluster training. Cluster training significantly increases the intensity of a workout by prolonging the rest time between repetitions. The good news is that it’s easy to administer and doesn’t require special equipment. The bad news is that it’s often prescribed incorrectly, leading to less-than-spectacular results.

Although cluster training is associated with weight training, forms of it can be found in other sports, such as the mile run.

A mile breaks down to 1,760 yards or 1,609 meters. The first official world record for the mile was 4:14.4, set by John Paul Jones on May 31, 1913. For many years, a sub-four-minute mile was considered by the coaching and scientific community to be unattainable. For example, in a paper published in 1935, respected track coach Brutus Hamilton wrote a piece called “The Ultimate of Human Effort.” Supporting his opinion with impressive tables and statistics, Hamilton predicted the fastest mile possible would be 4:01.66.

Ten years later, the record dropped to 4:01.4, slightly exceeding Hamilton’s prediction. Nine years later, on May 6, 1954, Roger Bannister of the United Kingdom proved all the skeptics wrong by crossing the finish line in 3:59.4.

Just a month after Bannister’s historic run, Australia’s John Landy ran 3:58, and the number of athletes who have broken the four-minute barrier since then is nearly 2,000. Bannister’s achievement thus became the go-to story for motivational speakers about overcoming mental and physical obstacles. Another story is how Bannister did it.

(Lead photo of Daniel Sarisky by Brian McWalters)

The Need…for Speed!

As neuroscientist Harold L. Klawans explained in Why Michael Couldn’t Hit, Bannister determined that the best way to approach his event was to run each quarter-mile as close as possible to one minute, so he asked the announcer to broadcast his splits and recruited pacers. During his record-breaking run, Bannister passed the three-quarter mark at exactly three minutes.

In Bannister’s era, many elite distance coaches believed it was necessary to develop an aerobic base before working on speed. Bannister thought differently. According to Klawans, Bannister focused on developing speed with 60-second quarter-miles, then he worked on improving his endurance to maintain that speed for four separate quarter-miles. Let’s break down Bannister’s approach with an exaggerated example.

An elite runner who has a goal of running a four-minute mile could start by running four quarter-miles in 60 seconds each but walking one minute between each rep. Thus, with their first workout, this athlete would run a four-minute mile…it just took them eight minutes to do it! When that workout becomes easy, their rest periods between reps would be decreased to 55 seconds, and so on, until that athlete develops the speed-endurance to run a four-minute mile!

Roger Bannister prolonged the rest time between quarter-miles, thus increasing each lap’s intensity. Therefore, by definition, he was performing cluster training. Share on X

In the years before Bannister’s historic run, no one could exceed the speed of four continuous, 60-second laps. However, Bannister could by prolonging the rest time between quarter-miles, thus increasing the intensity of each lap. Therefore, by definition, Bannister was performing cluster training.

So, what does Bannister’s approach to running the mile have to do with sprinter faster and lifting weights? Let’s start by expanding on the definition of intensity.

The Power of the Pause

Whereas training intensity on the track is measured by speed, training intensity in the weight room is defined by how much weight is lifted. Intensity has nothing to do with the difficulty of a set or how it, as Hans and Franz would say, “pumps…you up!”

If an athlete bench presses 200 pounds for one rep, the intensity is higher than if that same athlete grinds out 185 pounds for eight reps and bursts blood vessels in their nose. Yes, the eight-rep set may be more mentally challenging and create a high level of fatigue, but the intensity level is lower than the 200 pounds lifted for a single because it’s a lighter weight. Here’s where cluster training comes in.

Let’s say an athlete can bench press 190 pounds for three reps. By resting 15 seconds between reps, the athlete could load the bar to 195 pounds and might be able to complete three reps. Again, heavier weights = greater intensity.

In our first video, Brown sprinter Jaiden Stokes is shown performing six reps in the chin-up, resting 10 seconds between reps—that’s one cluster set. The rest period begins when Stokes’ feet touch the bench. Brown Head Sprint Coach Gabriel Mvumvure counts down backward between reps in this manner: 10, 9, 8… 


Video 1. Cluster training for chin-ups.

To ensure the optimal stimulus is applied during each cluster, a training partner or coach should be recruited. A stopwatch is a nice addition, but most smartphones have a built-in timer. At Brown, a large clock is available near the platforms that athletes can use when flying solo. (And if you happen to play the piano and don’t mind annoying your teammates, bring your metronome to the gym to help you count.)

We used Stokes as an example for our video because many female athletes give up on chin-ups because it’s such a challenging exercise for them. By using cluster training, however, they can perform more reps than they could otherwise. However, our focus with chin-ups is on strength and not muscular endurance, so as soon as an athlete can complete at least six reps on their own, we start adding resistance with a special belt that holds weight plates.

Our focus with chin-ups is on strength, not muscular endurance, so as soon as an athletes can complete at least six reps on their own, we start adding resistance. Share on X

For example, Stokes has done 21 chin-ups non-stop, but during normal training, we keep her reps low and use resistance—as a result, she has done one rep with an additional 40 pounds. Stokes is not the exception. We’ve had several other female sprinters use this much weight or more, and several male sprinters use over 90 pounds of resistance. (At the end of the video, Brown sprinter Abayomi Lowe is shown performing a chin-up in strict form with 100 pounds.)

Sprinter Strength: It’s All Relative!

The origin of cluster training in the weight room is a bit of a mystery. About 50 years ago, bodybuilding icon Joe Weider popularized a form of inter-rep rest training for muscle building he called rest-pause. And in the 1940s, Body Culture magazine editor Henry J. Akins introduced the multi-poundage system, now known as drop sets. With drop sets, you perform a set to failure, reduce the weight, then perform additional sets with lighter weights. But that’s bodybuilding. For sprinters, we need to look at the work of the late Carl Miller.

Miller was the National Coaching Coordinator for USA Weightlifting and the head coach of the USA Weightlifting Team for the 1978 World Championships. In the ’70s, Miller made presentations at his training camps and wrote articles about using cluster training to improve the relative strength of a weightlifter.

Relative strength is the ratio of strength to body weight. If two people lift the same weight, the one who weighs less has greater relative strength. In a 2002 paper, sports scientist Igor Abramovsky warned that additional body weight for a weightlifter “…creates additional loading on the sportsman’s muscles because the weightlifter has to lift this excess weight during the execution of the weightlifting exercises; second, the sportsman’s speed deteriorates.” That speed also relates to sprinting.

Two ways a sprinter can run faster are by reducing the time they spend on the ground (ground contact time) and increasing the distance between each stride (stride length). Both can be achieved by becoming stronger. However, the sprinter wants to become stronger without increasing their body weight, even if that additional weight is muscle, because the extra weight will negatively affect their speed.

To prove our point, have a sprinter run 60 meters, then see how fast they run while wearing a 10-pound weight vest—even a 5-pound weight vest will make them run significantly slower. For longer distances, consider that extra body mass increases the stress on the cardiovascular system.

One advantage of cluster training over many other training systems is that no special setup is required. It’s not like supersets or tri-sets (i.e., performing multiple exercises in a circuit fashion), where several exercise stations often have to be reserved. Nor does it require special equipment such as chains, bands, or eccentric hooks. You simply manipulate the rest periods between the reps.

One advantage of cluster training over many other training systems is that no special setup is required. You simply manipulate the rest periods between the reps. Share on X

Numerous scientific studies have proven the value of using longer rest periods between sets to increase strength and power; we’ve included several of them in our reference section. For example, one 2012 study published in the Journal of Strength and Conditioning looked at force, velocity, and peak power output using no rest between reps, 20 seconds’ rest, and 40 seconds’ rest. The exercise tested was the power clean.

The bottom line was that the 20-second-rest group was superior to the no-rest group, and the 40-second group was superior to the 20-second group. However, rather than discussing fascinating topics such as the desensitizing of Golgi tendon organs, let’s focus on the practical applications of cluster training.

Cluster Training Basics

Some coaches consider cluster training an advanced training method that should only be used by athletes with several years of experience and high strength levels. One reason for this belief is that Miller would prescribe as many as five sets of clusters with seven singles in each cluster, a protocol that is quite harsh and requires relatively lighter weights to be prescribed.

We use a different approach at Brown, believing that nearly all levels of athletes can perform cluster training. To get you started, here are seven guidelines we follow with our sprinters for cluster training:

  1. The length of the rest periods between reps is determined by the type of exercise. The more muscle mass involved in an exercise, and the more complex a movement, the more rest time needed. Whereas five seconds of rest between reps may be fine for chin-ups, you might need 30-45 seconds of rest between reps in the clean and push jerk to ensure optimal form.
  2. The number of clusters is determined by the conditioning of the athlete. You wouldn’t start an absolute beginner with five sets of clusters because they wouldn’t be able to recover. In contrast, an elite athlete might achieve their best results with five sets of clusters.
  3. The length of rest periods between clusters should be longer than with traditional sets. More rest is required between cluster sets. You wouldn’t perform max 60-meter sprints with 60-second rest intervals during a speed training workout, and likewise with cluster sets in the weight room. Whereas 2-3 minutes’ rest between sets may be fine for a conventional set of power cleans, 3-5 minutes’ rest may be necessary for cluster sets to maintain the highest intensity levels on subsequent sets.
  4. The weight used in each cluster is influenced by the total number of reps in each cluster and the total number of clusters. For Miller’s hardest workouts, the percentages for snatches were 80-85% of 1-repetition maximum, and for clean and jerks, 77-82%. However, higher percentages can be used if fewer reps are performed in each cluster and fewer clusters are performed.
Use conventional sets to warm up for clusters. Perform enough sets with conventional sets to get you near a max effort, then proceed with cluster training. Share on X
  1. Use conventional sets to warm up for clusters. Perform enough sets with conventional sets to get you near a max effort, then proceed with cluster training. For example, if you were to perform a cluster set using 200 pounds in an exercise (say, a deadlift), you might warm up as follows: 105 x 5, 135 x 4, 155 x 3, 175 x 2, and 190 x 1. Performing cluster sets for every warm-up set would create too much fatigue, reducing the amount of weight that could be used on the primary work sets.
  2. Limit cluster training to one exercise per workout. Cluster training is especially taxing on the nervous system, and the quality of your workout would suffer if you tried to use it with several exercises in the same workout. An exception would be if the second exercise was for an upper-body exercise, such as chin-ups.
  3. Make the first exercise the cluster set exercise. You want to use the heaviest weights in cluster sets, so clusters should be performed first in your workout when you are fresh. The exception is with smaller group exercises. For example, if using cluster sets on chin-ups, we would perform them after our major power and leg exercises, such as cleans and squats.

Pulling this together, Figure 1 shows an example of a workout with Brown sprinter Emma Gallant during her introduction to cluster training. Cluster training is performed during the last two sets of the first exercise, which is full cleans.

Cluster Training Workout
Figure 1. Brown University Cluster Training Workout.

From the Blackboard to the Lifting Platform

One key to success in cluster training with beginners is to start conservatively, using longer rest periods and just one set. The following are examples of cluster training progressions in various exercises. For these progressions, the rest periods between sets are 3-5 minutes. Note that the rest periods decrease in the second variations, allowing the athlete to get accustomed to this type of training.

One key to success in cluster training with beginners is to start conservatively, using longer rest periods with just one set. Share on X
    Chin-Ups

    1 set x (3 reps, 3 reps) x 10 seconds’ rest between reps

    2 sets x (3, 3, 3) x 5 seconds’ rest

    3 sets x (3, 3, 3, 3) x 5 seconds’ rest

    Power Clean

    1 set x (2, 2) x 30 seconds’ rest

    2 sets x (2, 2) x 20 seconds’ rest

    3 sets x (2, 2, 2) x 20 seconds’ rest

    Clean and Push Jerk

    1 set x (1, 1) x 45 seconds’ rest

    2 x sets (1, 1) x 30 seconds’ rest

    3 x sets (1, 1, 1) x 30 seconds’ rest

One way to determine when an athlete is ready for more training volume (total reps x sets) in cluster training is by measuring barbell speed. For sprinters, you have to be careful not to let fatigue reduce bar speed to ensure optimal transfer to their sport. For more on this topic, see our article “Using Fast Eccentric Squats to Sprint Faster and Jump Higher.”

Bar speed can be measured using a velocity-based training (VBT) device to determine what’s known as the critical drop-off point. Such a device is shown by hurdler Brooke Ury squatting in the second video. Ury’s lift is followed by a conventional squat performed by Maddie Frey, a sprinter who this year broke the 32-year-old school record in the 200m.


Video 2. Velocity-based training with squats.

The critical drop-off point—a term attributed to the late track coach Charles Francis—occurs when the quality of an exercise degrades to the point where the muscle fibers being targeted are no longer being stimulated. For bodybuilding, the late strength coach Charles R. Poliquin said the critical drop-off point occurs with 20% diminishing returns. For relative strength training, he said the range is 5-7%. Let’s look at an example of how this approach works.

Let’s say a sprinter is performing barbell back squats, and the cluster training protocol is 3 x (1, 1, 1) x 30 seconds’ rest, with 4 minutes’ rest between sets. If the barbell speed during the ascent portion of the squats during the second cluster does not decrease by more than 7%, the athlete should perform the third set. However, if the bar speed decreases by more than 7%, the athlete should not perform the third set. This decrease in bar speed could also suggest that this athlete may be better off going back to conventional training until their conditioning level improves.

In our third video, Stokes (who has cleaned 165 pounds) cleans four reps with 20 seconds between reps. Note that rather than counting down every second in a rest period (which can be quite annoying), Coach Mvumvure waits until 10 seconds remain before counting down. If 30 seconds of rest were prescribed, he would note when 10 seconds have passed, then count down from 10.


Video 3. Cluster training for cleans.

For a sprinter, it’s important to select exercises for cluster training that give these athletes the most “bang for their buck.” Weightlifting movements (snatches, cleans, jerks, and so on….) are the number one choice. Powerful leg exercises such as front squats (a Brown favorite!) and deadlifts are also good choices. Poor choices would be bicep curls or any isolation movement designed to “pump…you up!”

For a sprinter, it’s important to select exercises for cluster training that give these athletes the most ‘bang for their buck.’ Share on X

Sprinting is a fast-twitch activity requiring the performance of high-intensity workouts, both on the track and in the weight room. Roger Bannister inspired us with his historic mile run and revolutionary training methods, so take advantage of his pioneering work and incorporate cluster training into your workouts!

Since you’re here…
…we have a small favor to ask. More people are reading SimpliFaster than ever, and each week we bring you compelling content from coaches, sport scientists, and physiotherapists who are devoted to building better athletes. Please take a moment to share the articles on social media, engage the authors with questions and comments below, and link to articles when appropriate if you have a blog or participate on forums of related topics. — SF


Kim Goss
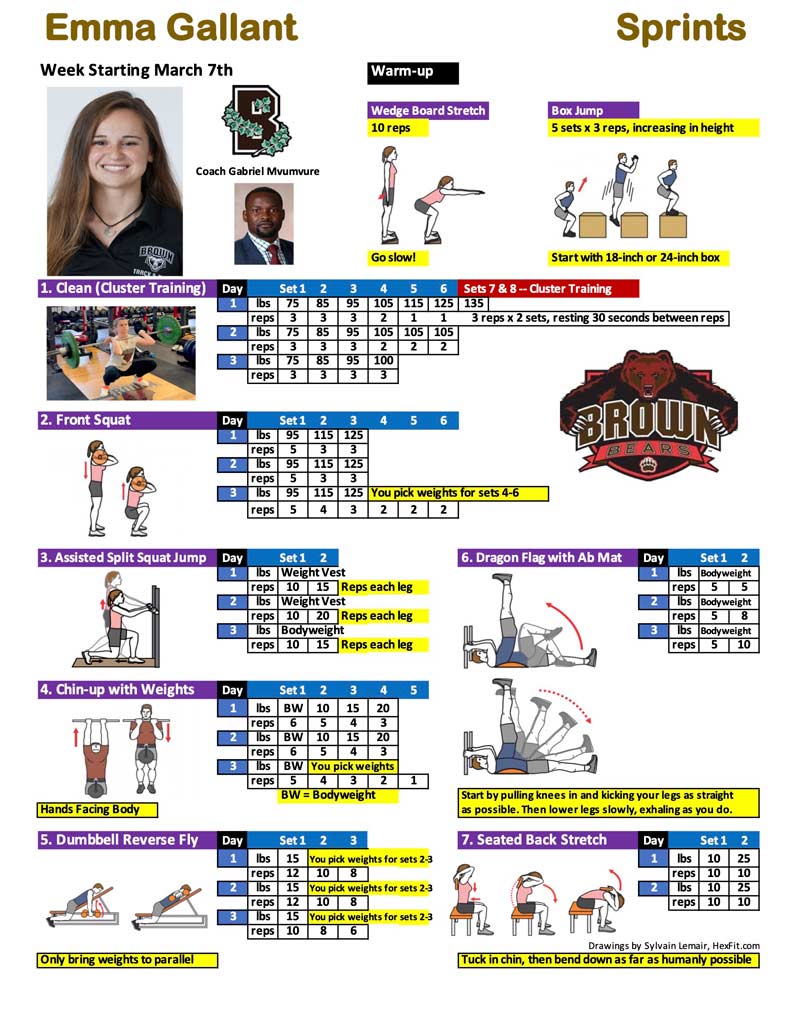
Kim Goss has a master’s degree in human movement and is a volunteer assistant track coach at Brown University. He is a former strength coach for the U.S. Air Force Academy and was an editor at Runner’s World Publications. Along with Paul Gagné, Goss is the co-author of Get Stronger, Not Bigger! This book examines the use of relative and elastic strength training methods to develop physical superiority for women. It is available through Amazon.com.

References

Abramovsky, I. “A weightlifter’s excess bodyweight and sport results,” Olimp magazine, 1:28-29:2002. Translated by Andrew Charniga, www.sportivnypress.com.

Baack, LJ, ed. “The Sport of Track and Field: Flights of Fancy,” Chapter 4 in The Worlds of Brutus Hamilton, Tafnews Press, 1975.

García-Ramos, A., Padial. P., Haff, G.G., et al. “Effect of Different Interrepetition Rest Periods on Barbell Velocity Loss During the Ballistic Bench Press Exercise.” The Journal of Strength and Conditioning Research. 2015;29(9):2388–2396.

Hamilton, Brutus. “The Ultimate of Human Effort,” 1935.

Hardee, J.P., Triplett, N.T., Utter, A.C., Zwetsloot, K.A., and McBride, J.M. “Effect of interrepetition rest on power output in the power clean.” The Journal of Strength and Conditioning Research. 2012;26(4):883–889.

Klawans, Harold L. Why Michael Couldn’t Hit: And Other Tales of the Neurology of Sports. W H Freeman & Co., Sep 1, 1996, p. 203–214.

Miller, Carl. The Sport of Olympic-Style Weightlifting, Training for the Connoisseur. Sunstone Press, Apr 10, 2011, p. 87–90.

Oliver, J.M., Jagim, A.R., Sanchez, A.C., et al. “Greater gains in strength and power with intraset rest intervals in hypertrophic training.” The Journal of Strength and Conditioning Research. 2013;27(11):3116–3131.

Prestes, J., Tibana, R.A., da Cunha Nascimento, D., et al. “Strength and Muscular Adaptations Following 6 Weeks of Rest-Pause Versus Traditional Multiple-Sets Resistance Training on Trained Subjects.” The Journal of Strength and Conditioning Research, 2017;33(suppl. 1).

Schoenfeld, B.J., Pope, Z.K., Benik, F.M., et al. “Longer Interset Rest Periods Enhance Muscle Strength and Hypertrophy in Resistance-Trained Men.” The Journal of Strength and Conditioning Research. 2016;30(7):1805–1812.

Jump Matrix

The Jump Matrix: Purpose and Application

Blog| ByKendall Green

Jump Matrix

When introducing certain qualities into strength and conditioning training programs, I’ve found it useful to stack (complex) and/or contrast them with other previously acquired abilities and movement skills. For athletes, this increases the rate and success of transferability to more sophisticated training protocols—and, inevitably, sport.

For example, an athlete who has mastered vertical medicine ball throws can recall and apply the extension that is required to efficiently maneuver through the first two pulls of an Olympic lift or weighted jump.

In this article, I will explain how and why I use the “Jump Matrix,” a concept and tool I acquired via social media from the phenomenal Sports Performance staff at Elon University. Additionally, I’ll cover:

  • How we put it to work within a training program to develop and prepare the athletes I work with for multi-contact jumps, multi-directional jumps, and change of direction exercises.
  • How this also leads to the more specific qualities and abilities that are foot and ankle stiffness, neuromuscular reactivity and force distribution changes, body awareness, and lower limb angles.

Key Terms

I always like to begin with definitions for clarity:

Jump – A plyometric (powerful and rapid stretch and contraction of muscles) activity that requires the athlete to jump and land on two feet – not to be confused with a hop or with single, same-leg jumping. Ex: vertical jump, broad jump.

Multi-Contact Jump – Jumps with repetitive take-offs and landings in-place or in various directions. Ex: consecutive vertical jump, triple broad jump.

Multi-Directional Jumps – Jumps with repetitive take-offs and landings that occur in various directions. Ex: Dot Drill, hourglass.

Change-of-Direction (CoD) – Various athletic movement patterns (running, shuffling, jumping) to and/or through various predetermined points that require virtually zero external reactionary cueing; points and timing of movement changes are unknown. Not to be confused with agility.

Purpose

In the realm of athletics, the powerful, reactive, and efficient movement of the body through space more than once, and in more than one direction, is a highly necessary skill and ability to develop.

The powerful, reactive, and efficient movement of the body through space more than once, and in more than one direction, is a highly necessary skill and ability to develop, says @KoachGreen_. Share on X


Video 1. Multi-Directional Jump.

Combining what was originally viewed via the Elon Sports Performance social media platform, the space we have available, and the continually improving abilities of the youth I work with, we currently have a chart of 30 different multi-jump, multi-directional jumps—The Jump Matrix—that consist of a mix of horizontal (forward/broad), lateral (sideways), diagonal, and rotational jumps which are numbered, assembled, and progressed by complexity and/or inversion.

These 30 variations are used at various times in a training program depending on athlete, sport, training phase, and ability.

Variations #1 and #2 are the simplest renditions of the matrix, and the foundation on which all the subsequent variations are based.

Jump #1 consists of a single horizontal jump immediately followed by a lateral jump.
Horizontal Lateral

Jump #2 is the inverse of #1. The athlete begins with a lateral jump immediately followed by a horizontal jump.
Lateral Horizontal

All jumps in the matrix, excluding those that require rotations, are performed facing and moving forward.

Shin Angles

Another goal of implementing the Jump Matrix into athletic development programs is to mature the function and robustness of shin angles for deceleration, agility, and change of direction.

Oftentimes, certain aspects of athletic performance—specifically in training—are best left up to trial and error on the part of the athlete. For younger athletes, words sometimes do not do justice in regards to what is expected for any given movement; thus, the athlete must organize themselves without too much, if any, outside assistance.

Oftentimes, certain aspects of athletic performance—specifically in training—are best left up to trial and error on the part of the athlete, says @KoachGreen_. Share on X

Understanding, however simple, the concept and tasks of these multi-contact and multi-directional jumps allows the athletes to maneuver and configure themselves in a way that usually yields the desired outcome: self-organization.

This allows for the foot, ankle and lower leg to get into positions that would otherwise take time elsewhere to reproduce.

Furthermore, the change in direction allows athletes to adjust where, how, and when forces are distributed or neutralized. The change in foot pressure is a major component in athletic performance, as it allows the redirection and faster responses to said force.

Below are still shots of a few Jump Matrix variations right as deceleration, amortization, or redirection forces are occurring. You can see the different lower limb and hip positions—dependent on previous or next movement—these athletes are getting put into.

Landings
Image 1. Lower limp and hip positions during deceleration, amortization, and redirection.

Application

For the vast majority of the athletes I have the privilege of training—speed/sprint dominant sport athletes—Wednesday (training day 2 or 3 depending on training frequency) is the lower body focus day of the SPS System I utilize, and coincidentally our plyometric focus day as well.

The athletes who go against the grain in this regard are the volleyball athletes I work with. Since volleyball is a jump and agility sport, we invert their high intensity day structure and provide them with two plyometric days (days 1 and 3 or 5) and one speed day mid-week. These individuals also have a lower total volume, since most play school, club, and/or pick-up games and tournaments.

But using the “80/20 Rule,” the majority of the athletes fall into the 2:1 speed:plyo category. Depending on the specific athlete, one to three variations of the matrix will be either done prior to the lifting portion (in the same manner as our speed work where full, freshly-primed efforts can be put into the jumps) or one variation and its inverse can be contrasted with the secondary (primary lift) lower body power/strength-speed movement.

But using the “80/20 Rule,” the majority of the athletes fall into the 2:1 speed:plyo category, says @KoachGreen_. Share on X

Being utilized as the high-intensity speed component of the training session following the dynamic warm-up and movement prep activities, one to three variations of 25-50 total ground contacts will be completed (ground contacts are how volume is calculated for multi-contact jumps, and 25-40 repetitions is the rough range I’ve found to be effective before quality diminishes).

Example plyometric jump set from the Jump Matrix: #3, #7, #15 2x ea.

Individual Jump Volumes:

#3 = 12 contacts (Forward, Forward, Lateral)
Multi-Jump

#7 = 16 contacts (Forward, Forward, Lateral Forward)
Counting Contacts

#15 = 20 contacts (Forward, Lateral, Return, Forward, Lateral)
Multi Directions

Total Volume: 48 contacts

Also, by adding in other components, like a vertical jump or obstacle (hurdle) jumps or hops before, during, or after the completion of the matrix variation, we can increase complexity.

Traditionally, when multi-contact jumps are the contrast to a lower body strength/power movement, we see those jumps executed in a single-direction. For example:

Squat and Jump

What I’ve found and become quite fond of for athletic development is that by continuing the use of traditional lower body power and strength lifts (squats, Olympic lifts, hex bar deadlifts/jumps, etc.), and contrasting them with multi-contact and multi-directional jumps, athletes can immediately transfer force production into the various positions and angles that are consistent with the chaos of sport.

Lunge Chart


Video 2. Lo-Hanging Step-Off Lateral Lunge

In this manner, as stated above, we program one variation, three to six sets of one to three reps on each side.

Return to Play and Extensive Plyometrics

As far as return to play protocols for field and court sports go, extensive plyometrics are a great “bang-for-your-buck” option. They are good for:

  • Preparing soft tissue of the lower leg;
  • Re-familiarization with ground contact; and
  • Immersion back into rhythm and coordination.

With extensive plyometrics, the focus is not covering ground through maximal efforts in any particular direction but rather reducing amortization time and building back the qualities and abilities mentioned above.

Reducing time on the ground while simultaneously increasing the repetitions and frequency of those ground contacts allows the plasticity of soft tissue (tendons, ligaments, and fascia) to mature through the recovery process leading back into full intensity play and training.

Similarly, the increase in ground contacts allows for the bones and joints to familiarize themselves once again with the impacts of the ground at lower intensities that can be increased over time.

Rhythm and coordination are the often-overlooked fourth and fifth qualities of athleticism (along with speed, power, and strength). Without rhythm and coordination, we can visibly see the awkwardness and purely unathletic movement expressions which can lead to injury. With extensive plyos, athletes are able to regain that ability through longer duration patterns, building not only the timing necessary to move fluidly, but also confidence.


Video 3. Applying the Jump Matrix.

Lastly, extensive plyometrics are a great conditioning tool. For the exact same reasons above, extensive plyos, especially for field athletes who may not spend much time jumping, are a great switch from the traditional running modalities that are normally used.

Extensive plyos, especially for field athletes who may not spend much time jumping, are a great switch from the traditional running modalities that are normally used, says @KoachGreen_. Share on X

The Jump Matrix is a great option for younger athletes, athletes returning from long seasons or injury, or introducing more complex plyometric variations, and there are a countless number of variations to be created. Although it is not designed to be a replacement for any traditional quality jumping, it is another highly useful tool in the toolbox.

Since you’re here…
…we have a small favor to ask. More people are reading SimpliFaster than ever, and each week we bring you compelling content from coaches, sport scientists, and physiotherapists who are devoted to building better athletes. Please take a moment to share the articles on social media, engage the authors with questions and comments below, and link to articles when appropriate if you have a blog or participate on forums of related topics. — SF


KATN Logan Paulsen

Different Approaches to a Training Plateau

Blog| ByLogan Paulsen

KATN Logan Paulsen

Maintaining progress is hard. Not only are there different protocols to help athletes achieve their goals, but athletes respond differently to the protocols—especially in sprint training. During my playing career, the most common advice I received was: “If you want to get fast, run fast.”

While true, this type of thinking will only take an athlete or coach so far. After improving for a time, the athlete will inevitably reach a training plateau, which may be caused by suboptimal technique, a lack of joint stiffness, or general strength. At this point, the training focus needs to be clarified. This clarification often comes with an increased specificity, whether through drill selection or coaching cues. These drills and cues are often derived from the teachings of elite sprint coaches who train sprinters and can then be insufficient for field sports athletes who, generally speaking, have different body types or experience levels when compared to a traditional sprinter. If the drills and cues are not effective for some athletes, how do we help them continue to progress when they have seemingly leveled out?

If the drills and cues are not effective for some athletes, how do we help them continue to progress when they have seemingly leveled out? Share on X

One way is to apply a horizontal load to the athlete with a weighted sled or tools like the Run Rocket, Vertimax Raptor, or KATN Strength Engine, which can provide external feedback that makes the cues more effective, manage the athlete’s technical deficiencies, lack of coordination, or deficient strength qualities.

Technical Proficiency

Field sport athletes are not required to master sprinting technique to become better at their sport. However, a proficiency can be helpful in achieving higher velocities, which if relevant, can increase sports performance. More importantly, proficient sprinting, when prescribed effectively, exposes the athlete to high rates of force development and higher contractile velocities which can be helpful in preventing injuries.

Now the question becomes how do you start developing proficiency when you are tasked with introducing the athlete to positions that they are not familiar with? Often, the coach is forced to rely on external verbal or tactile cues to encourage the athlete to find the correct positions, i.e., “Push harder into the ground” or “Keep the foot dorsiflexed.”

During my 10 year NFL career, I was coached by dozens of coaches and experienced firsthand the frustration with being unable to improve past a certain point based solely based on the coach-provided cues. And, as a coach in my post-playing career, I now understand the frustration from the other side: you feel you are communicating clearly, but the athlete is still unable to internalize the cue (thus, stunting the athlete’s progress).

One way to circumvent the language barrier—and in my experience the most effective—is to help the athlete feel the position associated with the cue. This allows the athlete and the coach to speak the same language—especially because athletes tend to be kinesthetic learners.

One way to circumvent the language barrier—and in my experience the most effective—is to help the athlete feel the position associated with the cue. Share on X

The question then becomes what is the best way to allow the athlete to feel the position? Isometrics, yielding or overcoming, are tools that not only help the athlete coordinate their position but also help with joint- and angle-specific motor unit recruitment and rate coding (the rate at which the motor unit discharges action potentials).

Perhaps the most common isometric exercise for sprinting are wall drills, which are often used to reinforce the position and tension required during the acceleration phase. While these exercises are outstanding, they can fall short. Often, young athletes get so infatuated with the wall they leave their hips behind, let their chest collapse, or lose postural integrity. One way to get a similar effect is to anchor the athlete from behind like they are pulling a sled—I use the KATN Strength Engine for this, but an anchored chain or cord would also work.

This technique differs from traditional wall drills in that the athlete is held from the back with a cord connected to a belt or chest harness. This different modality allows the athlete not only to feel the correct angle and tension, like a wall drill, but also forces them to stabilize through the hip and midsection in a way that is specific to sprinting. When prescribing this to new athletes, it is often helpful to have them use a dowel or a hurdle to help with balance.

KATN Iso
Image 1. Performing an iso exercise with the KATN Strength Engine for same training purpose as a traditional wall drill.

These exercises are also fantastic because they don’t require a lot of space. At the end of most college or professional workouts, there is the required midsection work. Often coaches program anti-rotation exercises like Pallof presses. Now, the Palloff press is an outstanding exercise, but why not use this opportunity to program single leg isometric holds and help your athletes get acclimated to positions relevant to sprinting while working midsection strength?

Once these foundational positions have been established, the athlete can move on to dynamic exercises such as heavy marches or sled pushes. These next exercises allow the athlete to work dynamically through sprint-relevant positions that have been coached isometrically, allowing the athlete to reinforce the specificity of the movement while also learning how to forcefully interact with the ground. This progression helps the athlete learn the tension and rhythms required for sprinting at slower contractile velocities.

Once these foundational positions have been established, the athlete can move on to dynamic exercises such as heavy marches or sled pushes. Share on X

Practical Solutions

As the athlete becomes stronger and more proficient in the required positions, you can reduce the load and determine if the athlete can maintain the correct positions at higher velocities. Once the athlete has reached a competency in the sprinting positions, the coach can work on triaging the elements of the athlete’s sprint.

Let’s look at three examples:

1. The athlete has a long amortization phase. The amortization phase is isometric in nature, occurring when the eccentric phase (or the force absorbing phase) of the ground contact is over and the concentric (or the force application phase) has not yet started. The athlete’s ground contact time will be long; it might look as if they are running in sand. It is important to verbally cue the athlete, i.e., “Be more reactive off the ground.”

However, some athletes—younger or larger athletes—have a difficult time internalizing this cue. To help the athlete internalize the reactive element, providing them with a physical cue can be beneficial. In this case, loading the athlete can be helpful. Often, coaches will prescribe reactive jumps such as pogos or skips to help coordinate the athlete’s reaction off the ground. This is fantastic, because they can show the athlete the requisite tension required when sprinting by increasing ground contact times. Just like the verbal cue, this might not be enough. Having athletes do these reactive jumps under a grounded, moderate horizontal load helps them feel the level of joint stiffness required but also helps condition the athlete’s motor unit patterning and encourage the appropriate rate coding.


Video 1. Loaded pogo jumps.

Video 2. Resisted A-skips.
To help the athlete internalize the reactive element, providing them with a physical cue can be beneficial. Share on X

The line of force should be vertical and horizontal, meaning the line of force should not be directly at the athlete’s waist. It should be anchored to the athlete’s waist or torso and have a line of force that works towards the ground at approximately 45 degrees. This force angle helps the athlete feel the vertical and horizontal force needed while sprinting.

Once they have physically experienced this feeling, the verbal cue is internalized and becomes more effective.

2. The athlete is not imparting force effectively during top end mechanics. Once they are out of the transition phase, it may look as if they are running in place. A common prescription for this issue is alternating bounds. Amongst high level track populations, this is almost an immediate fix. However, with field athletes who are looking to increase speed or athletes who do not have high transmutation ability, bounds under load not only help them feel the vertical and horizontal force required for propulsion, but the added load—whether light or heavy—helps with increased motor unit recruitment, which would be beneficial for coordination and force output. This prescription, in conjunction with an effective coach’s eye, can help the athlete understand the level of focus and force required to be effective at end mechanics.


Video 3. Loaded bounds.

3. The athlete is exhibiting a large amount of back kick while sprinting. Wickets often serve as an excellent corrective exercise in these situations. However, it is not applicable to all athletes. For novice athletes or athletes who are not efficient sprinters, another intervention may be appropriate.


Video 4. Loaded “Running A.”

One such intervention is loading a “Running A” or a repetitive high knee exercise, while coaching a cyclical heel action. With a weighted sled this would be jarring, but a device that provides smoother resistance, such as the Run Rocket or the KATN Strength Engine, would be extremely beneficial. The added tension, though light, helps the athlete feel the stacked position—shoulders over hips, hips over knees, knees over ankles—while also having tension on the leg which, like the loaded bounds, helps with the correct motor unit recruitment pattern.

The added tension, though light, helps the athlete feel the stacked position while also having tension on the leg. Share on X

My experience

My philosophy as a coach is largely shaped by my time as a player. I spent countless hours trying to get faster. I was privileged to work with some of the best coaches. They helped me but I didn’t see a true breakthrough until I was retired and started my own journey in pursuit of speed.

These coaches did everything they could for me. The issue was on my end—I could not internalize what the coach was saying. The coach would prescribe some type of plyometric to build ankle stiffness or a rhythm building exercise to help my coordination and I would do them to the best of my ability, but I know now I was not getting the desired response from the exercise. This is where horizontal loading entered my life. I started loading A-skips, bounds, pogos, broad jumps, and single-leg broad jumps and suddenly I could feel the tension and intent the exercises required.

If I were reading this article and heard a former NFL player talking about his personal experience, I would need more convincing. But let me assure you, I have seen these same principles work with the athletes that I now train. It helps all my athletes—young, old, professional, amateur, big, or small—understand how to coordinate their bodies in a forceful way and find the tension needed to sprint faster. While loading prescriptions are not the best solution for every athlete, they are another tool in the toolbox to help the coach effectively communicate with the athlete and help push past those pesky coaching plateaus.

Since you’re here…
…we have a small favor to ask. More people are reading SimpliFaster than ever, and each week we bring you compelling content from coaches, sport scientists, and physiotherapists who are devoted to building better athletes. Please take a moment to share the articles on social media, engage the authors with questions and comments below, and link to articles when appropriate if you have a blog or participate on forums of related topics. — SF


Rutgers Jump

Running Mechanics for Track and Field Athletes with Bobby Farrell

Freelap Friday Five| ByBobby Farrell, ByTyler Germain

Rutgers Jump

Bobby Farrell is currently the Director of XC/Track and Field for Rutgers University, entering his tenth season coaching there. During his tenure at Rutgers, Farrell has personally coached over 18 All-Americans, 13 individual conference champions, and 48 NCAA Qualifiers. As an assistant coach, he was awarded the 2015 and 2019 Mid-Atlantic Region Assistant Coach of the Year. His athletes have broken 14 school records during his time. Farrell spent his first eight years coaching the jumps, throws, and multi events; he now works primarily with the sprints and hurdles.

Before arriving at Rutgers, Farrell oversaw all sprints, hurdles, and jumps at Lafayette College. While there, Farrell guided student-athletes to 12 Patriot League Championships, including the fastest men’s 100m and 4x100m performances in Patriot League history. Under his tutelage, the Leopards placed in the top six individually at the Patriot League Championships 52 times. He also mentored 71 performances that ranked among Lafayette’s all-time top 10, with eight school records. In 2012, he coached the Patriot League Indoor and Outdoor Female Field Athlete of the Meet as well as the Outdoor Male Track Athlete of the Meet.

Freelap USA: You started out as a high school coach, and now you’re the head coach at Rutgers University. What has that journey been like, and what do you see as being the unique challenges at each of the various levels you’ve coached?

Bobby Farrell: It required a lot of sacrifice and humility, for sure. Every stop has been a major learning process, and I’ve been able to grow as a coach at each level. Coaching at the high school level for all those years really helped me teach from the ground up. I learned to make the most out of limited situations, and overall, it’s given me a good perspective of both levels. Now I have a lot of technology and resources at my fingertips, but it certainly didn’t start out that way, and it’s been a critical part of my development.

One thing is certain, you don’t need all the bells and whistles to develop athletes and help them improve. That can be done in any situation with enough knowledge and creativity. I think the heart of the program needs to boil down to fundamentals. No matter what level you’re coaching, the fundamentals don’t change. And that must be the foundation. And those fundamentals need to be consistently reviewed every day.

I think one of the greatest challenges of collegiate coaching is that if an athlete does something wrong for a long time, they can get very good at it, says @CoachFarrell_RU. Share on X

I think one of the greatest challenges of collegiate coaching is that if an athlete does something wrong for a long time, they can get very good at it. So, in other words, the athletes I recruit have had a lot of success doing things incorrectly, and it’s become a habit. And habits are tough to change, especially if the athlete is very comfortable doing it that way. You have to be very careful how you apply these changes, so I’ve learned to be very subtle and patient with how I apply them. Usually running mechanics are one of the more common sense items to tackle first.

Freelap USA: You’ve shared your approach to what you call the 3P’s of running: posture, placement, and push-off. Can you talk a little bit about each of these and why they’re so important to overall running mechanics?

Bobby Farrell: I wanted to make sure that athletes and coaches had a simple checklist to use when focusing on and identifying trouble spots in mechanics. All three P’s affect one another, so you just need to identify the proper cause and effect for that particular athlete. Each athlete tends to respond to instruction differently.

First and foremost, I believe posture is the “check engine light” of the movement patterns. If the posture is off, it’s giving you a signal that something is operating incorrectly. I understand that a lot is going on in the sprint process, but I think it’s important to keep it really simple. Once I review the posture, I like to work my way counterclockwise to foot placement and then work toward foot push-off.

I believe posture is the ‘check engine light’ of the movement patterns. If the posture is off, it’s giving you a signal that something is operating incorrectly, says @CoachFarrell_RU. Share on X

In regard to placement, we want to look at the direction of the foot and its landing spot. We want the foot to come back and down under the hips—so make sure the foot is not extending out ahead of the hips. Toe- and heel-first landings are a major issue you need to avoid. You want to strike down into the ground with a loaded, dorsiflexed ankle. The ground should strike the ball of the foot. And with that loaded ankle, the foot can spring back off the ground sooner. I think toe-first landings have a lot to do with athletes overemphasizing the knee lift and not committing to pressing down into the ground. The ankle almost naturally flexes when you strike down into the ground.

If the placement into the ground is done properly, the athlete will be able to apply pressure into the ground and then push off. You need to avoid the foot leaving the ground too far behind the hips and allowing too much ground contact time and pulling the pelvis down to the ground. Also, when done properly, the foot will bounce off the ground and the knee lift will begin naturally. Ultimately, this system is for beginning athletes. As the athletes become more competent in their mechanics, we are able to get into more complicated items.

Freelap USA: If the 3P’s are the goal for efficient and effective mechanics, what do you do when you have an athlete who doesn’t hit those standards? How do you first identify and then correct those mechanical issues, especially in sprinters?

Bobby Farrell: Posture is usually something that people can identify pretty quickly with the naked eye. Just look for long curvature from head to hips. But after that, video becomes useful to get an even closer look at cause and effect. I have a progression of drills I use to help teach them the positions, actions, and feel. I call it my Piston Run Series. Each Piston Run rep we do works on the 3P progression and helps them learn to apply it in their running.

Sprinting is a skill that needs to be learned. Certain species are built for speed, like a cheetah. The cheetah depends on its speed for survival, and it doesn’t need to learn to sprint. However, as humans, we are more long-range hunters who can outsmart our prey. We’re built more for walking.

With that understanding, I think it’s always going to be instinct for an athlete to put one foot out in front of the hips when they run. So, with running, they need to get comfortable knowing that they can move forward with a more vertical motion, and they need to bring the foot back under the hips and push. And pushing is not something that most athletes can do instinctively. They would rather pull their hips forward than push.

For me, the mechanics dictate the workout. We only go as long or as fast as they can maintain mechanics, says @CoachFarrell_RU. Share on X

Once they understand how to apply the proper technique, they need to apply it daily in their running. It has to be a constant, and it’s the coach’s job to keep a close eye on the form. Coaches get way too caught up in the priority of conditioning and don’t take the time for proper mechanics. However, for me, the mechanics dictate the workout. We only go as long or as fast as they can maintain mechanics. It takes patience and discipline from both coach and athlete, but in the end, it will be worth it.

Freelap USA: Your athletes have had tremendous success in a wide variety of events both on the track and in the field. What are your favorite events to coach, and how do you approach those? And, as a follow up, how do you manage to effectively coach athletes across the board, whether they’re throwing, sprinting, running, or jumping? 

Bobby Farrell: After coaching for 20 years, I see all the events as more similar than they are different. There are so many commonalities within all of them—the necessities of movement patterns and what is needed from a mechanical standpoint to accomplish a task all overlap within them. And, generally, the parameters of how a body adapts to different stresses and stimuli don’t vary a tremendous amount at the end of the day.

At all the schools I’ve coached, I’ve been asked to coach a large number of events, so it forced me to figure out how to effectively coach each of them at the same time. One constant in all of track and field, except the throwing circle events, is running mechanics. Ironically, running mechanics is sometimes the least-taught item in these events. Distance and sprints get caught up in conditioning, jumps get caught up in jumping, and javelin gets caught up in throwing. But probably the most critical element within all of them is learning to sprint and run efficiently and effectively.

One constant in all of track and field, except the throwing circle events, is running mechanics. Ironically, that is sometimes the least-taught item in these events, says @CoachFarrell_RU. Share on X

In distance and sprints, proper mechanics will help distribute energy more efficiently and improve overall speed. Also, it is critical for injury prevention since a majority of injuries, whether overuse or acute, can be traced back to a mechanical fault. The long jump, triple jump, pole vault, and javelin are mostly running, followed by the jump or throw at the end. The jump and throw are heavily predicated on the success of the approach, so it makes sense to me to spend the most time on the running.

Freelap USA: I feel like every coach has a favorite workout that they run each season, something that’s sort of a staple of their program. What is a staple in the Rutgers program? Give us the ins and outs of the workout from its design to implementation, as well as considerations that coaches might need if they’d like to try that workout with their program.

Bobby Farrell: There’s always a lot of debate about the training of the 400m. Some emphasize speed, while others emphasize strength. I think they’re both right because I think every athlete can be stronger and faster. But probably the biggest challenge athletes face with that race is how to properly run it.

I find that coaches like to break that up into several parts and instructions for the athletes to follow. From my own experience, I haven’t had a lot of luck with that approach. For me, the race is so built off rhythm, I want to think of it more holistically. So, I always use a 400m rhythm workout that tends to have a lot of success with helping them simplify the race.

I set up cones at every 50 meters of a 400-meter track. I instruct the athletes that we are going to do a 400m rhythm drill but not to worry about time or effort. I make sure I hammer home to them that this is simply a drill.

When they hear the whistle, they have to get out fast to the first cone. I just want them to get out and get themselves moving. After that first cone, I tell them they can settle down, regroup, and relax a bit. I remind them this is just a drill. From that point on, I tell them I want them to try and run even splits from cone to cone. I will take the splits, and we will look at how well they were able to do them. So, when they hit a cone, they may need to pick it up a little to keep their pace as fatigue begins to set in. It’s a gradual increase of effort and discomfort from cone to cone.

Once they are done, I walk over and show them the time. It’s always a huge surprise for them to see how fast they ran the 400m. In some cases, it can be a personal record. Their biggest surprise was that the race seemed easier. They also see that the 50-meter splits are actually a smooth deceleration in the second half of their race. This is usually a major breakthrough for them—both mentally and with their execution.

With the journey of coaching, I think the first thing that needs to be done is extensive learning and studying. Take advantage of networking, clinics, and courses. Then you can use that knowledge to build the structure of your program. However, with experience and failure, you can begin to develop your own style. In the end, we’re in the results business, and the final product should be personal records. The coach has to figure out how to make that happen. It always reminds me of one of my favorite quotes by Pablo Picasso: “Learn all the rules like a pro, so you can break them like an artist.”

Lead photo by Bill Streicher/Icon Sportswire

Since you’re here…
…we have a small favor to ask. More people are reading SimpliFaster than ever, and each week we bring you compelling content from coaches, sport scientists, and physiotherapists who are devoted to building better athletes. Please take a moment to share the articles on social media, engage the authors with questions and comments below, and link to articles when appropriate if you have a blog or participate on forums of related topics. — SF


Sprinter

Three Components of Sprinting (and How S&C Coaches Can Improve Each)

Blog| BySteve Haggerty

Sprinter

While there are many great coaches putting out helpful information on sprinting and how to run faster, I think we should simply look at what goes into sprinting. There may be others putting out this information in different terms than I do, but this is how my brain works and hopefully it makes sense to some of you as well. Let’s determine what aspects go into sprinting and how to improve them.

I think of sprinting as being made up of three components, which is obviously very simplified. The three buckets I use are:

  1. Strength
  2. Elasticity
  3. Technical

This is not necessarily a way to profile athletes, like neuro-typing or pushers versus pullers or many of the other ways we categorize athletes. I think pretty much all of these are useful as long as we realize most individuals are not just one thing or another but instead are on a spectrum. These tools can be used to identify an athlete’s strengths and weaknesses, and the way I break down sprinting can potentially be a useful tool as well.

1. Strength

Strength, or force, is needed in sprinting to horizontally displace our center of mass. Literally, you need some type of strength to push or pull your body forward. The person who can produce 10 Newtons of force into the ground will move faster and move their body more than the person who can only produce 1 Newton of force into the ground, assuming these two have the same body mass. I could bore all of you with some basic laws of physics, but I think we should all understand that if there is no force being produced, the runner will not move.

One important thing to consider is this should focus more on relative strength. While running, the athlete is fighting gravity pulling on their body mass. If you decide an athlete needs to get stronger, but they gain weight and muscle mass in the process, is that going to be beneficial? Are they going to be able to push their body mass better now, or did it really remain the same?

Barry Ross’ book Underground Secrets To Running Faster might have been the first time I heard this expressed. He wrote at length of the need to improve mass-specific force. You have to be able to move your body weight against gravity. Strength training is great for helping to produce more and more force. Now, a heavy squat might take five seconds from start to finish—a long time to produce force—but while sprinting, the athlete only has fractions of a second to produce force into the ground.

So, being able to produce high amounts of force relative to body weight is definitely important, but only the amount of force that an athlete can produce in one-tenth of a second really matters. An important strength quality to look to develop is power. Power is equal to force multiplied by velocity and takes into account strength and the amount of time the strength is produced.

The main production of force will come from the hip while sprinting, but the knee and ankle both need to be strong and stiff to transfer that force from the hip into the ground. I think of this like I think of playing pool. All of the power used to push the pool cue into the cue ball comes from your arm—specifically, your shoulder. The pool stick itself needs to be strong and stiff in order to transfer that force into the cue ball and move it. If the pool stick is stiff, but not strong—like a dry spaghetti noodle—it will transfer force well but break easily. If the pool stick is resilient, but not stiff—like a cooked spaghetti noodle—then it will not transfer much force, but it will be more difficult to break.

Some of the best methods I use to improve power pair together a strength movement and a speed movement. In the weight room, this could look like a heavy trap bar deadlift for 2-3 quality repetitions—moving as fast as possible—followed by a vertical jump. Use a movement that focuses more on strength and pair it with a movement that focuses more on moving quickly. On the field, for a more running-specific pair of exercises, I like to pair heavy sled or prowler pushes with free sprints. In my experience working with NFL Combine athletes, both of these examples have been staples in our program to help improve power and ultimately improve sprinting speed.

To be a fast sprinter, athletes need to be strong relative to their body weight, produce force quickly, and be strong & stiff down their whole leg to transfer that force into the ground. Share on X

To be a fast sprinter, athletes need to be strong relative to their body weight, produce force quickly, and be strong and stiff down their whole leg in order to transfer that force into the ground.

2. Elasticity

Being elastic typically refers to the stiffness of tendons—elastic athletes are your bouncy, long, and thin athletes. You can see their Achilles tendon pretty much climb from their ankle all the way up to the back of their knee. Strength and elasticity are two common ways we coaches categorize and profile athletes. I think it is, overall, a decent way of doing it; again, realizing they are all on a spectrum and need a balance of training both strength and elasticity.

How do you train elasticity? It is done primarily through plyometrics. Any bounce type of exercise will favor working the tendon over the muscle. Faster movements = more tendon, slower movements = more muscle. Low-level plyometrics like pogo hops, skipping, and line hops are a great way to build a foundation of elastic strength. More advanced exercises like bounds and depth jumps are great to maximize elastic strength.

It is a good idea to utilize low-level plyometrics early in the training cycle to prepare the tissues for the more advanced plyometrics yet to come. Then, progress your athlete from a simple A-skip to alternating bounds and even into assisted alternating bounds. Each progression will increase the amount of force put into the ground and have decreased ground contact times. The faster the ground contact time, the more the athlete is relying on elastic components of their tissue to transfer force into the ground.

Elasticity is important for maximizing sprinting speed because tendons help to transfer force into the ground effectively and efficiently, and they give you “free energy.” Tendons are like rubber bands. A brand-new, straight-out-of-the-pack rubber band is tight and stiff and can get shot across the room by stretching it an inch. That is what you want out of your tendons, minimal stretch or effort needed to go far. An old rubber band found between the couch cushions that is stretched out and loose needs a lot of pulling in order to get shot just to the other side of the room. The more we can improve tendon stiffness and elasticity, the more the athlete can take advantage of the free energy of the tendons and put force into the ground quickly, which we already know the importance of.

3. Technical

The last component I think about when coaching sprinting is technical. One part of this is how running should look, or the shapes an athlete should make while running, and the other is the direction in which they apply force. These two pretty much go hand and hand.

We all have an idea of how sprinting should look. Whether it’s the first step of a sprint or once an athlete is 40 yards down field, we coaches should have an idea of what the sprint motion should look like. I think we all agree that in the start and early acceleration, we should see more of a forward torso angle and more of a piston-like action in the lower leg; then, as they reach max velocity, we should see more of a cyclical motion in the leg and upright torso. Throughout the entire sprint, we want to see a relatively big arm swing, at least behind their body. You may have different ideas or more specific motions you want to see in your athletes, but I think we can agree on these.

Using something as simple as your phone camera to record sprints to more easily see the positions your athlete achieves while sprinting is an effective tool. After you determine what positions need improvement, use drills that get the athlete into these motions. Want more knee lift? Try A-skips. Need more cyclical motion? I like butt kick skipping drills or any clawing and pawing type of techniques. Something as basic as a standing arm drill, working on swinging the arms like they would while running with an emphasis on throwing the hand behind them, is effective to improve that motion.

If there is a certain range of motion you want the athlete to be able to achieve while running, but they cannot get into position, the best way to help them achieve it is with a medical professional: a physical therapist, athletic trainer, massage therapist, or whatever discipline you believe in. Let them assess the issue and what techniques are needed to open up the desired range of motion. Yes, maybe stretching, foam rolling, isometrics, or other strategies may work, but I have always been a big believer in using medical professionals and different specialties when needed.

The reason certain ranges of motion are important to sprinting is that they help provide the direction in which force is being applied. Meaning, if you want the athlete to move forward, they better be able to apply force in such a way that it moves them forward and not in a different direction.

You can apply all the relative force you want and as quickly as Usain Bolt, but if it isn’t being applied in the correct direction, it does you no good, says @Steve20Haggerty. Share on X

We know that, especially in the start of a sprint, force needs to be applied horizontally, but if an athlete does not have the ankle dorsiflexion range of motion to maintain a forward lean and push backward into the ground, then they are going to stand straight up. If you want a big hip flexion range of motion so the leg has more time to travel back toward the ground forcefully, then they better have adequate hip flexion ROM. You can apply all the relative force you want and as quickly as Usain Bolt, but if it is not being applied in the correct direction then it does no good.

Performance Outcomes

By improving strength and power, elasticity with plyometrics, and technical mechanics, you can expect to see improvements in sprinting speeds in your athletes. In this most recent NFL Combine and Pro Day season at Bommarito Performance, we saw an average improvement of .3 seconds in the 40-yard dash, with the best improvement being .6 seconds.

I hope this makes sense to you all. I believe these concepts not only carry over to sprinting, but also jumping, throwing, swinging, punching, changing direction, and pretty much every sport movement. The athlete needs to be able to produce adequate force in the necessary amount of time and in the proper direction.

Since you’re here…
…we have a small favor to ask. More people are reading SimpliFaster than ever, and each week we bring you compelling content from coaches, sport scientists, and physiotherapists who are devoted to building better athletes. Please take a moment to share the articles on social media, engage the authors with questions and comments below, and link to articles when appropriate if you have a blog or participate on forums of related topics. — SF


Crescendo Bounds

What I’ve Added and What I’ve Dropped from Training High School Jumpers

Blog| ByRob Assise

Crescendo Bounds

Part of the allure of coaching is that every season is unique. In narrowing the focus to high school track and field, we do have a portion of our athletes who are with us for four years and go through a “typical” progression. However, there are always new athletes in every class at the start of the season. In addition, maturation can make a returning athlete completely different than the year prior—for better or for worse.

Due to the variance in clientele, there are items we choose to emphasize that are specific to the needs of the group. These decisions tend to be made after the first couple of weeks and then are monitored throughout the course of our season. All this being said, the demands of the sprint, hurdle, and jump events remain constant, so the vast majority of what we do year to year is consistent. We tend to follow an 80/10/10 model.

I believe I’ve heard the following breakdown from ALTIS’ Stu McMillan, although his percentages may have been different:

  • 80% of items on your training menu should consist of what you know are effective.
  • 10% should be items you are confident will be effective.
  • 10% should be items you have a hunch will be effective.

What I’ve Added

Here are the items I’ve added over the past few years.

1. Crescendo Plyometrics

Carl Valle did us all a favor by producing numerous pieces on the Scandinavian Rebound Jump Test (SRJT).


Video 1: The SRJT has the athlete focus on progressively jumping higher as the rep progresses while trying to minimize ground contact time throughout. RSI (jump height/ground contact time or flight time/ground contact time) is the primary measurement.

After obtaining a MuscleLab Contact Grid, I began to utilize it and really liked its simplicity and how effective it was at getting athletes to learn to bounce. A lightbulb then clicked for me that it would be a fantastic option to use the same methodology of increasing intensity with all plyometrics. Crescendo skipping, bounding, galloping, and run-run-jumps have become a staple within our weekly programming. There are many reasons why I love them:

  • The lower intensity at the beginning of the rep allows for athletes to focus on a technical aspect (such as foot contact), and ideally, it gets locked in before the higher intensity found at the end of the rep.
  • Working through a bandwidth of intensities creates an athlete with better awareness of their outputs. I think it is common in track (and training in general) to be hyper-focused on maximal outputs—I certainly love watching athletes sprint and jump maximally! However, I think there is value to exposing athletes to a spectrum of intensity.
    I often reference the Rewzon long jump study, brought to my attention by Joel Smith, in which exposure to sub-max efforts allowed for a higher degree of improvement in maximum capability when compared to maximum effort-only training. Working through crescendo reps has the ability to take care of either sub-max-only efforts or sub-max to max efforts!
  • I find that they are a more logical way to manage intensities. For example, instead of having an athlete dive right into bounding maximally for eight contacts, a coach could have them focus on being maximal on the last two, then the last four, the last six, and then all eight over a four-week period.


Video 2. Here the crescendo plyometric of choice is a power bound. The athletes were instructed to begin with a 50% effort and work up to 75%.

2. Asymmetric Locomotion

I picked up the idea of asymmetric skipping from Nick Newman about two years ago, and like the crescendo plyometrics, I have applied it to a variety of other forms of locomotion. The asymmetric label comes to be because the goal is to focus on operating at a high intensity on one side and an easier intensity on the other.


Video 3. In this asymmetric skip for distance, I am focusing on operating at a maximum intensity with my left leg and an easy intensity with my right leg.

Here are the reasons I believe asymmetric locomotion has staying power in my programming:

  • It is a fantastic bridge between skills. Asking a novice athlete to bound or skip for distance often leads to unattractive visuals. Asking them to focus on pushing hard on one side and easy on the other tends to make for a much more appealing visual. Once they have the feeling of each side, they usually are more able to link the two sides together.
Asymmetric locomotion is a fantastic bridge between skills, says @HFJumps. Share on X
  • It is more specific to what they see within their event (referring to the unilateral jumps found in track and field). If I have an athlete who is struggling with projecting their hips to create quality hip displacement, an asymmetric skip or bound for distance is a fantastic way to drill the feeling they need. If any athlete has too shallow of a takeoff angle in long jump, asymmetric skips for height (along with gallops and run-run-jumps for height) would be part of the prescription to help correct that issue.
  • If an athlete has a nagging injury on one leg, but the other is fine, asymmetric locomotion is an option that can be considered to ensure there is not a big detraining effect on the healthy leg. Proceed with caution here!

What I’ve Dropped: Minimum Effective Dose

Before the haters of this phrase celebrate—and the lovers throw shade at me—I encourage all to walk down this path with me. First and foremost, this is highly specific to me, and my hope is that those on both sides of the issue can see where I am coming from.

I think the first time I heard the phrase “minimum effective dose” was around 2015. It was a concept that fit the trends I had noticed within the context of training female high school track and field athletes. (I was the head girls’ track coach at the time—the main events I coached were sprints, hurdles, and high jump.) I wrote about this trend in great detail here. I was all-in on the concept, and to this day I feel it is something that the majority of coaches of any sport at all levels need to hear, as junk volume is probably the biggest deterrent to high performance after mental health, diet, and sleep.

In 2016, I made the transition to being an assistant on the boys’ track and field staff, with an emphasis on coaching the long/triple/high jumps and the overlap that occurs with sprinters. I took the idea of minimum effective dose with me to the jumps, which was based on what I saw with the girls I coached and my own personal experience as a jumper (primarily high jump). Simply put, I knew that I never performed well in high jump if I was not feeling bouncy. There was no way for me to just grind through it—and as an athlete, I was a grinder.

The male athletes I coached trained at a very high intensity with low volume, and they performed well. However, if we fast forward to right now, seven years into the position I have with the boys, I can say with 100% certainty that the athletes I coached early on in my current stint were substantially undertrained.

While the ideal is to train every athlete the perfect amount, this is of course a challenge at the high school level, as we are only in direct contact with our athletes for around 5-10% of the time. A few athletes win the “other 22 hours” away from us, but the majority leave a lot of potential gains left on the table. I also subscribe to the Vern Gambetta and Harry Mara idea that I’d rather have an athlete trained at 90% of what is ideal than 1% over what is ideal. My personal problem was I may have trained some of the athletes I coached to 75%.

Here is an example, discussing flying sprints and the horizontal approach. But before that, I will outline some terminology:

  • 10-meter fly—A timed 10-meter window preceded by a 20- to 30-meter run-in.
  • Approach pop-off—A full approach rehearsal close to realistic penultimate and takeoff steps (rolling contacts). The jumper jumps off the board but lands in the pit upright (not undergoing a full landing).
  • Approach run-through—A full approach where the jumper simply runs through the board into the pit. Here, the penultimate and takeoff steps tend to be much less realistic (if they happen at all).

Early on in coaching jumpers, I equated long jump approach rehearsal to a 10-meter fly. So, if the sprint workout of the day was 3-4 x 10m fly, I would have jumpers run 2 x 10m fly and try to get approaches knocked out in three or less. I currently believe the fly-to-approach ratios are:

  • Pop-off – 1:1.5 or 1:2
  • Run-through – 1:2.5 or 1:3

When the jumper “pops off” the board and takes close to realistic penultimate and takeoff steps, there are greater braking forces than when compared to just “running through” the board. Most of the time, I prefer the jumper to “pop off” in the rehearsal. This is more like an actual jump, and the spacing of those last two steps can vary when compared to when the athlete just runs through. (I’ve seen up to an 18-inch difference.) However, for athletes who need reps to develop consistency in the body of the approach, running through the board makes sense at times to minimize the load presented on the last two steps. It is easiest to do this away from the jump pit, so the athlete is not tempted to pop off into the sand!

The reason that I feel more approaches can be accumulated than 10-meter flys is because a high school athlete typically attains 80-95% of their maximum velocity on the runway. This is due to the steering component from having a takeoff target. The trade-off for greater accuracy is submaximal velocity. Since the velocity is submaximal, the approach is less demanding from a neurological standpoint. Because of the jumper attaining submaximal velocity on the runway (unless there is a huge tailwind), I tend to classify either approach’s rehearsal style as acceleration work instead of maximum velocity work.

By using minimum effective dose as an identifying descriptor of training, I unintentionally undertrained athletes. I am certain this impacted their ability to become technically proficient. Share on X

Circling back to eliminating minimum effective dose as a descriptor of my training, I have found that athletes are able to tolerate quite a bit more acceleration volume than maximum velocity volume. By using minimum effective dose as an identifying descriptor of training, I was unintentionally undertraining athletes. I can say with certainty that this impacted their ability to become technically proficient. I could also argue that key metrics would have been better with a slightly larger training stimulus.

  • Old Long Jumper Maximum Velocity Workout
    • 2 x 10m fly
    • 3-4 approach rehearsals
  • Current Long Jumper Maximum Velocity Workout A
    • 3 cycles
      • 1 x 10m fly, rest 4 minutes
      • 2 approach pop-offs, rest 3 minutes between each
  • Current Long Jumper Maximum Velocity Workout B
    • 2 cycles
      • 1 x 10m fly, rest 4 minutes
      • 2 approach run-throughs, rest 3 minutes between each
    • 1 cycle
      • 1 x 10m fly, rest 4 minutes
      • 3-5 approach run-throughs, rest 3 minutes between each
  • A current “C” option could be a hybrid of “A” and “B”

Although it is not always possible, I prefer to toggle the maximum velocity work with the approach work (which I view as acceleration work) in this style whenever possible. I think it provides a challenge in coordination, which makes athletes more aware of their different gears. It also helps them deal with the demands presented to them during a meet: two jump attempts, sprint event, back for more jump attempts.

This training toggle-style was a carryover for me from coaching hurdles. Prior to the start of a meet, hurdlers would look great in warm-ups over the hurdles (utilizing a great shuffle technique). Then, they would run in the 4x100m relay and come back to hurdles with normal sprint mechanics, destroying the hurdles (and their bodies) in the process because their stride length was too great between the hurdles.

What Might Be Right for You, May Not Be Right for Some

The above example is how I let the phrase “minimum effective dose” have a negative influence on my training design. I firmly believe that I am in the minority here. Overtraining is certainly more common than undertraining at the high school level, and most likely also at levels below and above. There are no doubt coaches out there who need to hear the minimum effective dose message!

Overtraining is certainly more common than undertraining at the high school level. There are no doubt coaches out there who need to hear the minimum effective dose message, says @HFJumps. Share on X

As a math teacher, I often find myself instructing students to keep in mind where they need to go before they dive in and complete work. This bird’s-eye view often saves them from going down a suboptimal path. We can all better serve our athletes by being as vigilant as possible in seeing the entire picture.

Since you’re here…
…we have a small favor to ask. More people are reading SimpliFaster than ever, and each week we bring you compelling content from coaches, sport scientists, and physiotherapists who are devoted to building better athletes. Please take a moment to share the articles on social media, engage the authors with questions and comments below, and link to articles when appropriate if you have a blog or participate on forums of related topics. — SF


Athlete Posture

Neuromuscular Integration Approach for Two Chronic Posture Issues

Blog| BySamuel Lauman

Athlete Posture

The posture debate has grown among healthcare practitioners, with arguments being made for and against the validity of “poor postures” and their true impact on an individual. Regardless of which side of the fence you fall on this topic, two chronic postures have become increasingly notorious amidst a growing sedentary population—forward head posture (FHP) and rounded shoulder posture (RSP). The COVID-19 pandemic has changed work and study environments for a large number of us, and thus, there is a greater need to investigate rehabilitation specifically for these two postures.

The incidence of chronic forward head and rounded shoulder posture issues increased during the COVID-19 pandemic, leading to a greater need to investigate rehab specifically for these two postures. Share on X

For what has now become a staple of lower extremity rehabilitation, the implementation of neuromuscular integration techniques is considered the standard of care. Regardless of specific diagnosis or injury site, neuromuscular integration (NI) principles are adhered to with exercises designed to challenge an individual’s balance, proprioception, and coordination. Testing methods have even been developed to measure these attributes (which I will discuss later). Yet, we rarely see such emphasis placed on the rehabilitation of upper body dysfunctions.

Specifically, this post will be about the implementation of NI principles for the rehabilitation of these two common upper body postural dysfunctions—forward head (FHP) and rounded shoulder posture (RSP)—targeting the presentation, etiology, traditional treatment methods, and implementation of potential NI techniques.

Defining the Problem

FHP is typified by weakness in the deep cervical flexor muscles, namely the:

  • Longus capitis.
  • Longus colli.
  • Rectus capitis anterior.

Together, these muscles function to create flexion at the atlantooccipital joint and through the cervical spine. This weakness is accompanied by overactivity of the semispinalis cervicis and capitis muscles, in particular, which leads to an anterior head protrusion, whereby an individual’s head extends forward and in front of their torso. This is colloquially referred to as text neck.

RSP presents as an upward and rounded shoulder presentation of the individual, almost causing the chest to appear concave from the elevation and anterior tilt of the scapular, and internal rotation of the scapular and humerus. This is caused by weakness in those scapular downward rotators, such as the middle and lower trapezius, as well the serratus anterior, which helps to posteriorly tilt the scapular to keep it attached to the thoracic cavity. A common compensatory component of RSP is overactivity of the:

  • Upper trapezius.
  • Levator scapulae.
  • Pectoralis major/minor muscles.

We see these postures showing links to common presentations such as increased pain, decreased strength and range of motion, decreased upper extremity stability, reduced respiratory function, and muscle activation issues that impact the scapular kinematics. And, etiologically speaking, these postural abnormalities can be a precursor to pathologies such as temporomandibular joint dysfunction, chronic neck pain, thoracic outlet syndrome, scapular dyskinesis, and shoulder overuse injuries.

These two postural ailments present in a large number of individuals. FHP has been reported to affect 66% of healthy individuals aged 20-50 years of age, with RSP impacting anywhere from 66%-73% of individuals. The increase in sedentary lifestyle habits is often cited as a causing factor, with individuals hunched over screens and keyboards for large lengths of time. Couple this causation with the COVID-19 pandemic, which has altered the way many of us go to work or school, and the need for heightened awareness on this topic is paramount.

Identifying Solutions

Traditional rehabilitation techniques have focused on treating the presentations in isolation—strengthening the underactive muscles and stretching the overactive muscles. For FHP, this meant strengthening exercises such as the chin tuck (or “double chin”) and stretching the cervical extensors that cause that stooped head posture. The RSP treatment commonly saw strengthening of the periscapular muscles and humeral external rotators, while stretching the aforementioned overactive muscles present in RSP.

And that was it.

No postural cueing or training, no integration with functional movements, and no addressing of global muscles groups. Although positive results have been seen with this method, treating in isolation has long fallen out of favor in lower extremity rehabilitation, and I believe upper extremity postural rehabilitation should follow suit.

Treating presentations in isolation has long fallen out of favor in lower extremity rehabilitation, and I believe upper extremity postural rehab should follow suit. Share on X

Neuromuscular integration approaches have clinicians adopt a more holistic approach to rehabilitation by:

  • Optimizing an individual’s ability to stabilize joints and posture.
  • Improving muscle activation patterns.
  • Better reacting to proprioceptive changes.

This training philosophy has been shown to improve proprioception and stability and induce improvements in isokinetic strength while being used extensively in lower extremity rehabilitation.

Lower Extremity Work

Lower extremity work has routinely incorporated neuromuscular principles into rehabilitation protocols for a variety of injuries. Take anterior cruciate ligament (ACL) ruptures, for example. For exercise prescription immediately post-op, patients are often prescribed a series of open-kinetic chain exercises where they will have no weight-bearing limits. As strength, range of motion, and activation patterns improve, the patient will be progressed to weight-bearing activities such as assisted gait and balance exercises—early-stage neuromuscular integration implementation. Eventually, patients will progress to a variety of single leg tasks and plyometric exercises with a heavy focus on proprioception and limb/joint awareness—particularly, limiting knee valgus patterns.

Fast-forward to end stage rehabilitation, where many return-to-play requirements involve specific neuromuscular control tests such as the Y-balance test. The Y-balance test is an objective neuromuscular control measurement test consisting of an individual utilizing a single-leg stance to reach in three different planes of motion while satisfying certain performance requirements. The test is repeated on both involved and uninvolved limbs, and depending on the clinic or testing facility, a certain percentage of limb symmetry is required for clearance. Research has been done linking these neuromuscular asymmetries as predictors of future injury and even linking lower limb neuromuscular control to upper extremity injuries.

Upper Extremity Work

As you can see, there are clearly defined stages and instances where neuromuscular control is both trained and assessed in lower extremity rehabilitation protocols. Upper extremity neuromuscular protocols, on the other hand, are in their infancy.

An obvious limitation here is that the lower limb is used for gait and weight bearing due to our bipedal nature; as such, we cannot compare apples to apples. However, a level of stability and proprioception is required to complete activities of daily living and other sporting and performance tasks. Scapular dyskinesis testing is common to measure scapula-humeral rhythm to assess activation patterns during arm elevation tasks, and this test has specific criteria for qualification, although interpretation of these criteria is subjective in nature.

The upper quarter Y-balance test, which was developed by Gray Cook and Phil Plisky at Functional Movement Systems, is a more objective measure. It evaluates an individual’s ability to perform reaching movements while in the up position of a push-up. Similar to the lower extremity Y-balance test, participants must reach in three directions—medial, inferolateral, and superolateral—but we have to question the applicability of this test for the assessment of daily functionality and athletic performance.

Circling back to posture-based rehabilitation protocols for FHP and RSP, exercises have generally been isolated in nature, focusing on a single plane of movement and often a single muscular group to perform the movement. As such, further investigation into the implementation of neuromuscular principles for the treatment of upper extremity postural-based rehabilitation was necessary to probe the efficacy, applicability, and scope of these techniques.

Measurement Standards in the Research

Dr. David Anderson (San Francisco State University) and I performed an extensive literature search to examine this exact issue; these broad literature searches yielded 392 potential papers, which we then put through a variety of inclusion/exclusion criteria guidelines to finish with six eligible articles: four reporting on FHP and two on RSP.

Articles had to incorporate rehabilitation principles that were deemed to constitute neuromuscular integration, which was defined as utilizing rehabilitation methods that were more than just isolated strengthening and stretching techniques. This could include techniques such as proprioceptive neuromuscular facilitation (PNF) exercises, methods incorporating proprioception or stability training, and even core stability exercises to make rehabilitation more global in nature.

FHP is commonly measured by a technique called craniovertebral angle (CVA), which involves a subject having their photograph taken from a lateral angle, and the resultant photo is analyzed. This analysis involves two important landmarks:

  1. The seventh cervical vertebrae (C7).
  2. The tragus of the ear.

Once the photo is generated, a perpendicular line is drawn through the C7 vertebrae, and the angle from that intersection point to the tragus of the ear is measured. This process can be done manually or through a free software program such as Kinovea (used in image 1 below). CVA has been shown to be valid and reliable, and it is considered the gold standard of FHP measurement.

Posture
Image 1. Software such as Kinovea helps measure forward head posture (FHP) using the craniovertebral angle (CVA) technique. On a side-angle photo, the software draws a perpendicular line through the C7 vertebrae, and the angle from that intersection point to the tragus of the ear is measured.

Unlike FHP, RSP has no gold standard measurement for practitioners to use. We have used various methods to analyze RSP, each with their own flaws. The plumb line method doesn’t account for forward torso lean originating in the lower extremity and provides a cue for participants to use and address their posture. This is referred to as the Hawthorne effect—the notion that an individual will modify their behavior when they know they are being observed. An individual can use this plumb line as a reference point for their own posture, ultimately changing their natural stance, which will impact shoulder measurement marks.

Research has also incorporated supine techniques using a table to measure the distance in which the shoulders come off the table. Obvious flaws here include the table providing a resting position for the participant whereby gravity assists them into a “better” posture, and also that this technique does not measure a posture in a way that reflects daily life.

One method that does have promise, though, is the scapular index (SI) method, which uses a tape measure to measure two distances:

  1. Sternal notch to coracoid process (A).
  2. C7 vertebrae to posterior, lateral acromion (B).

Distance (A) is divided by distance (B) and then the answer is multiplied by 100 for a raw score. This method is obviously prone to the Hawthorne effect—whereby participants know they are being measured—but from an anatomical and functional standpoint, I believe it holds the most potential to accurately measure RSP without the use of expensive or motion capture equipment.

For FHP, a combination of stabilization and strengthening exercises1–3 and a denneroll traction device were used in conjunction with neuromuscular integration techniques4. The RSP studies utilized two different methodologies: one saw investigated single bout neuromuscular stretching techniques5, and the other implemented FHP techniques to measure their effects on RSP6.

There is one key limitation to this study’s findings: we have an established method of posture measurement for FHP, but no gold standard for RSP. There is a large need for universality when it comes to accurately and reliably measuring this posture.

The Results

Neuromuscular integration approaches were shown to be beneficial for the treatment of FHP in three out of four studies, regardless of the delivery style for the neuromuscular integration principles. One study saw improvements in CVA and respiratory function through the use of McKenzie techniques, another saw improvements in CVA with a combination of neuromuscular techniques and traction, and the third successful study used DNS techniques to yield CVA results (with the unsuccessful study being the shortest intervention period of only four weeks).

The two studies looking at RSP, however, varied in their methods for measuring RSP. One study was an acute intervention with post-testing occurring immediately after the single bout of exercise, and the other study implemented FHP-specific exercises to see the impact they had on RSP. The immediate intervention group split 40 participants into four groups with varying stretching and release techniques. Of these, the group that utilized contract-relax PNF techniques saw significant variance in pectoralis minor index scores (a measure of RSP).

Takeaways

A neuromuscular integration approach to the treatment of postural disorders provides mixed results and needs to be investigated further. Evidence suggests that such techniques are effective for FHP, but such efficacy is left to be desired for RSP. The lack of results for RSP interventions could at least partially be explained by the limitation listed earlier: lack of uniformity in testing procedures.

Promising results for FHP patients provides the rationale to further investigate the role neuromuscular integration techniques can plan on the alleviation of upper body disorders. Share on X

Examining the correlations postural dysfunction can have on physiological components, such as breathing and cardiovascular measures, further highlights the importance of correct diagnosis of these postures separate to the functional ramifications. Promising results for FHP patients provide the rationale to further investigate the role neuromuscular integration techniques can play on the alleviation of upper body disorders. As more valid and reliable RSP measurement techniques become available, we envision similar trends.

Since you’re here…
…we have a small favor to ask. More people are reading SimpliFaster than ever, and each week we bring you compelling content from coaches, sport scientists, and physiotherapists who are devoted to building better athletes. Please take a moment to share the articles on social media, engage the authors with questions and comments below, and link to articles when appropriate if you have a blog or participate on forums of related topics. — SF


References

1. Bae, W.-s., Lee, K.-C., and Lee, D.-Y. “The Effects of Dynamic Neuromuscular stabilization Exercise on Forward Head Posture and Spine Posture.” Medico Legal Update. 2019;19(2):670–675.

2. Kim, S., Jung, J., and Kim, N. “The effects of McKenzie exercise on forward head posture and respiratory function.” The Journal of Korean Physical Therapy. 2019;31(6):351–357.

3. Szczygiel, E., Blaut, J., Zielonka-Pycka, K., et al. “The Impact of Deep Muscle Training on the Quality of Posture and Breathing.” Journal of Motor Behavior. 2018;50(2):219–227.

4. Moustafa, I.M., Diab, A.A., Hegazy, F., and Harrison, D.E. “Does improvement towards a normal cervical sagittal configuration aid in the management of cervical myofascial pain syndrome: a 1-year randomized controlled trial.” BMC Musculoskeletal Disorders. 2018;19(1):396.

5. Birinci, T., Mustafaoglu, R., Kaya Mutlu, E., and Razak Ozdincler, A. “Stretching exercises combined with ischemic compression in pectoralis minor muscle with latent trigger points: A single-blind, randomized, controlled pilot trial.” Complementary Therapies in Clinical Practices. 2020;38:101080.

6. Do Youn Lee, C.W.N., Sung, Y.B., Kim, K., and Lee, H.Y. “Changed in rounded shoulder posture and forward head posture according to exercise methods.” Journal of Physical Therapy Science. 2017;29(10):1824–1827.

Bergles Header

The Keys to Maintaining High Athlete Engagement with Joey Bergles

Freelap Friday Five| ByJoey Bergles, ByNathan Huffstutter

Bergles Header

Joey Bergles is the Director of Strength & Conditioning at JJ Pearce High School in Richardson, Texas. In addition to his coaching responsibilities at the high school, he oversees the S&C programs at the two junior highs that feed into JJ Pearce High School and works with third through sixth graders at elementary schools within the district. Prior to his current position, he worked in the collegiate setting, with stops ranging from the NAIA to Division 1 levels. Joey can be found on social media at @joeybergles (Twitter/Instagram/TikTok). He holds the following certifications and/or has attended the following courses: FRCms, FRA, Kinstretch, FR Lower Limb (Non-Therapist), Metabolic Analytics, Poliquin Internship Hours, DNS A, Art of Coaching Apprenticeship, CSCS.

Freelap USA: You’ve presented on how critical it is to design activities that have a high level of engagement when working with athletes who are in their early teens—what’s your process for choosing or developing those exercises that promote genuine engagement and how do you determine what is and isn’t working?

Joey Bergles: First, I need to have an idea of how many kids I’m working with, what ages they are, have I worked with them before—those kinds of questions. One of the biggest keys with high school and junior high school kids is how everything is structured, even just in terms of sightlines. When you’re trying to do different activities in a big open space and there are no dividers, that’s where attention gets lost.

That’s one of the biggest issues I’ve seen, and sometimes I have to decide if we’re going to use dividers or go into a hallway, because there may be five or six coaching points I want to make and there will be distracted people in the back with wandering eyes. On the other hand, in a smaller, confined area, all they can do is focus on me.

I’m very lucky with the facility that I have—we have a weight room and then an indoor training area next to our weight room, and our weight room has dividers that let us section it off into quarters. That was one of the keys that helped me in my junior high program this past summer—okay, we’re going to go 20, 25, maybe 30 minutes between the weight room and the four sections and the turf room, and then I’m going to structure my entire workout around that constraint. There may be other stuff I want to do, but if I can’t figure out how to do it within that specific setting, then I’m not going to do it or I’m going to figure something else out.

I’ll be honest, that was probably THE biggest thing, regardless of the X’s and O’s, because if you have smaller groups, then you have to rotate, and it takes more time to rotate. Realistically, in an hour session, we would have four stations—you’re talking about 12-13 minutes with each group. So, when you only have 12-13 minutes, you don’t have a lot of time to do a lot of stuff. And, if we’re doing stuff for seven or eight weeks, that’s where, when we’re doing progressions, you really see things flow together. So, it’s probably not going to be perfect on week 1, but by week 5 or 6, we’ll be working these progressions, and we’ll keep getting better.

If I keep the focus high and the engagement high, it’s amazing what can be accomplished. It’s almost like cheating, says @joeybergles. Share on X

If I keep the focus high and the engagement high, it’s amazing what can be accomplished. It’s almost like cheating. Regardless of level—professional or high school or whatever—when people are not focused or not paying attention or not very engaged, then everyone’s like well, we haven’t made very much progress in the past seven or eight weeks. But then is it the fault of the program or the people doing the program?

Group photo
Image 1. Coach Joey Bergles on the turf with his athletes.

We’re not going to get 100 reps where I just walk around and coach everybody. When you have a large number of individuals and a relatively short amount of time, you have to be as efficient as possible. When you get individuals coaching each other, you’re going to get better execution out of everyone because I can’t coach 30 people at one time. If I can have partners where one person is in charge of another person, they’re coaching the things I’ve shown them they need to see: this, this, and this. Nothing super-hard, but they know what they’re looking for. Now that they’re actually good at coaching it, when the individual they’re coaching gets out of position or does something wrong, they’ll give feedback to make corrections on the subsequent reps so we can make quicker progress through the entire program.

People can say they’re going to have a 2.5-hour practice and the engagement level is going to be extremely high the entire time, day after day.… I’ve worked from high school to Division 1 in numerous sports; it is so hard mentally to be engaged and focused for that amount of time. I know for myself that I can’t be engaged for three hours. Even if it’s something strength and conditioning-related, if I’m reading a book or article, I can’t do that. So, do you really think 12-, 13-, 16-, 20-year-old kids will be able to do it? I’ll be honest, I think that’s a stretch.

We’ll make more progress with shorter rotations where the engagement is high. Athletes get so much better when they’re getting the feedback. People, in general, recognize what you praise. A lot of times, I will praise the individual doing the coaching more than the one doing the actual movement. I’m like, you’re doing an awesome job, you saw that even before I did, see that spot where their knee came in? That was perfect.

We make more progress with shorter rotations where the engagement is high. Athletes get so much better when they’re getting the feedback, says @joeybergles. Share on X

We’re having a dialogue while I’m walking along, coaching the whole group, and now they’re engaged and they’re seeing it—oh, I saw that mistake and now I’m able to help my partner correct it. If you never praise the coaching, will kids be motivated to do it? When we’re doing drills and other stuff, I make sure to praise the actions that I want to see—the coaching, the focus, things like that—because over the long run, those behaviors will drive the performance we’re trying to improve.

Freelap USA: When you’re doing speed, agility, and plyometrics with large groups in a large open space, there are very real challenges in terms of mapping how to start and space the athletes, how to maintain spacing with multiple kids all moving simultaneously, where do they end up and where do they start again, where do you intervene if something requires correcting.… How do you put all the variables together to design and execute that type of large group session?

Joey Bergles: I try to look first at what the weekly schedule looks like. For example, it could be that we just have speed, plyo, or agility sessions, and other days it could be a combo where we’re lifting with those things as well. I can have 110 kids on a day—we have really good facilities, but when you have 110 kids from 14-18 of all different levels of skills and abilities, that’s extremely challenging in terms of organizationally making everything flow.

Looking at that week, then, I’ll progress the plyometric and speed work based around what we can actually coach. For example, if you’re doing a broad jump, there are some coaching points we’ll go over on a broad jump, but after we’ve been doing it for a few weeks or a month, I don’t need to provide a thesis every rep. You’re trying to jump out as far as you can, all right? Drive your feet through the ground and get out.

Everyone at every level can do that. But what if we’re doing a stationary triple jump or a stationary triple jump from an elevated box, which is a pretty advanced plyometric movement where you’re getting more velocity coming out of that first contact? Okay, first of all, there are only a certain number of athletes who physically need and can handle that. I’m not going to do a stationary triple jump with a 280-pound offensive lineman. So that would be an example of a bad exercise to do with a large group.

Where I’m going with this is, when I structure my speed/plyo days, when we go into a four-station rotation, on those days if we have a little bit more time because the groups aren’t that big, then I can get more teaching in about the intricate details of those movements. I can also modify: for instance, when the O-Line/D-Line rotates to that group, I have another plyo that they do in place of something like a stationary triple jump.

On the days when we have 35 minutes to do our speed/plyo work and then 35 minutes to go in and do our lifts, if I take 5-7 minutes to explain something to a group of 110 people, that won’t work. I don’t have a riser to stand on. When you have 100 people gathered around you, it’s a challenge for them to actually see what you’re trying to show them. A lot of people don’t understand if they’ve never done it before, but it takes a while for everyone to get spaced out and actually see, and now we’ve wasted another 40 seconds.

I like setting up our broad jumps, our squat jumps, our pogo hops, different rudiment hops. We can do those things in those large group settings. Maybe we want to do different sprints or resisted work, some type of acceleration, and then get timed on the Freelap…. We have 20 chips, and we can roll through quickly.

I speak fast and have a sense of urgency, so I can roll through things very quickly when it’s going on my pace. But we have to plan the stations so we’re doing resisted work here and timed sprints here and then we’ll flip-flop. We can’t get 100 people doing resisted sprints at the same time because we don’t have the equipment to do that.

I like to program out long term, 8-12 weeks if I can, and that’s where experience comes into play, says @joeybergles. Share on X

I’m throwing all these variables out, but that’s how I look at the overall week and figure out what can we do on the specific days and then figure out the type of stuff we’re going to do. It might be that we’re going through a four-week block where we do potentiation work on one day. We have a facility that allows us to run a 10-yard sprint, so we’re potentiating that with our deadlifts. That then alters what we’re doing on other days. I like to program out long term, 8-12 weeks if I can, and that’s where experience comes into play. I can think of things that happened maybe five years ago at a college I worked at, and it was like, yeah, but we forgot to do this, and it created a massive issue.

If we’re running a 10-yard sprint, it’s not just the 10 yards, it’s how much space do they need to clear in both lanes? And, what’s the other drill on both sides? It could be a drill where there’s a ball being thrown, and it’s not supposed to go into that zone, but could it? Those are the types of factors you have to think through.

I like to draw it all out as diagrams so I can play out scenarios and figure out, oh, I’m going to need more space here, or we’re not going to be able to do this, or we’re going to have to switch these sides around. It’s almost like puzzle pieces, and it’s not just a matter of looking at it as part of a day, but I look at it over the course of a week.

Across the board, it’s not just a strength and conditioning issue; it’s true of most industries and organizations, they think they’re missing one specific thing. I need this drill, or I need this movement. And no, it’s probably how it’s actually being executed and how it’s being executed within the training program and where it’s being put in the training program, if it’s being run efficiently. If it takes 15 minutes to do it when it should take three minutes, that’s 12 minutes where you’re not doing something else that you could be.

Those are all factors that supersede the perfect movement. I could say great, we did the stationary triple jump, but I just saw it executed seven different ways. On the piece of paper, it said stationary triple jump, but his ground contact time on his first step was way too long, he overextended and was reaching, and it comes down to the coaching feedback and the execution and what we’re trying to get out of the actual training.

Freelap USA: When it was originally coined, the term “long-term athletic development” was being used for the process of developing Olympic-level athletes, but over time it’s often become a catchall for almost anything that’s the opposite of the specialized, year-round, “win today” club model in youth sports. How do you define LTAD and what major tenets of your definition inform how you train athletes from the younger levels on up?

Joey Bergles: How I look at long-term athletic development is similar to the Olympic model…. I’ve been fascinated with a lot of Olympic sports like gymnastics and training 3-year-olds all the way through to 17 and that thought process. So, when I look at long-term athletic development, I want the athlete to be their best and peaking when they’re 17 or 18 years old.

When I look at long-term athletic development, I want the athlete to be their best and peaking when they’re 17 or 18 years old, says @joeybergles. Share on X

Because, if you’re going to play in college, that’s when you’re getting a scholarship, and you’re going to be a varsity player—and we want our varsity teams to be the best. That’s what the ultimate goal is. Okay, you were good as a freshman, but does that mean your best freshman team will be the best varsity team in the district or the conference? No.

Lift
Image 2. Coach Bergles emphasizes proper technique in the lifts over big gains as part of a long term athletic development focus.

There are a lot of factors that go into it, but when I look at long-term athletic development, that’s the overarching goal in my head—if I’m working with an 8-year-old, what do we need to do over the next eight or nine years for them to be the best possible 17- or 18-year-old? So that if they do play in college or professionally or whatever it is, now that individual can take the torch and keep pushing their performance level.

It’s a holistic approach to that goal. We see it now, it could be from social media and just parenting, but people want their 8-year-old to be the best 8-year-old in the world. Yet burnout is a legitimate reality, and if you’ve been doing structured training from 8 to 12, when you get to 12, you’re just like this isn’t fun anymore, I don’t even want to go to practice. Okay, THAT. Whatever your long-term athletic development program was, that’s horrible. You get an “F” for that. That should not happen.

Working with young kids, I want it to be fun. That’s the number one KPI. As soon as it starts becoming like a job, that starts that clock for this isn’t fun. Even for me, with our junior high age groups, there may be sprint training or other things I want to implement, and then I look around and they’re not paying attention and they’re not really into it—this might be what I think they need, but in a group of 40 or 50 10-year-olds, that’s where I’ve had to change what I do because first everything we do has to be fun. Then, I’m going to try to work the actual stuff I want to do into it.

Working with young kids, I want it to be fun. That’s the number one KPI, says @joeybergles. Share on X

With the kids I’m working with now, I’ve changed up the program like six times in six weeks. Every week it was going through a massive surgery. In my head, I thought it was going to work a lot better, but then you get out there with forty 9-year-olds and it’s like, oh man I thought they were going to enjoy that more…but they did not, they did not find that fun at all.

So, okay, cross that out.

From a long-term development standpoint, I look at stuff and think let’s make it fun, let’s make it engaging, let’s make them want to keep coming to our strength and conditioning activities. Then, as we get to 11 or 12 years old, we can start to sprinkle in more, and then when we get to junior high, we’re going to have to start doing more.

And as we get to high school…. Well, if I started with you when you were 10, and now you’re in high school, I’ve had you for five years. I may not know exactly where that individual is going to be at, but I can tell you right now they’ll be able to do a lot of things really, really well, and now I have another four years of actual technical physical development that we can do.

We went from kids should never lift weights and that mantra to hey, this is my 7-year-old deadlifting 190 pounds and post it and go viral on social media. Meanwhile, that 190-pound deadlift, that’s a rounded back, things are shifting. If you’re praising phenomenal technique and they may only be doing 50 pounds, that’s fine. But if I have a 7-year-old doing rounded-back deadlifts with a hip shift, okay, you’re putting some specific “inputs” into that system. There’s probably going to be a price to pay at some point down the line. It may be in two, five, or 30 years. And then you don’t need a specific mobility drill to fix it, you need to, like, go back to that previous point in time and not do that.

One of the things I tell people is that I like to develop strength, but slowly. Yeah, I’d like to have bigger jumps in numbers, but slowly is reasonable, and I know my technique will probably stay consistent. If I just say “we want to get strong” with 13-year-olds, I have a good idea what those squats, deadlifts, everything’s going to look like. But if we can just hit a 5-pound jump every month, I know the technique will stay good, and by the time they’re a freshman in high school, they’ll have solid strength. Now we can really start pushing because they have a skill and know what they’re doing.

LTAD
Image 3. Female athletes performing in Coach Bergles’ LTAD-based system.

That’s 100% a skill, and that just takes time. That’s not something you’re just going to be able to do in three months. So, when we look at that long-term model, it’s one of the skills we want to build along the way. Now, when we get two years down the line, and we want to do heavy clusters at 95%… if you’re not very good at the actual squatting technique, how effective do you think those clusters will be?

We’re developing those skills in a long-term model to get to those more advanced loading schemes. All of it’s a work in progress—this is the first time I’ve worked with 8-year-olds. And for like a month, I’d be driving home in my car thinking… that wasn’t bad, but it wasn’t quite up to the level I hold myself to.

Nine times out of 10, the kids’ favorite activity is timed sprints on the Freelap. There was a time when I thought we’d do the timed sprints only if we could get to it, but after a couple weeks where I was like this doesn’t work, this doesn’t work, this doesn’t work…the Freelap? That always works. So, you know what? That’s always in the session.

Freelap USA: Turning specifically to training varsity high school football players, choose one phase of the year—pre-season, in-season, off-season, whenever—and talk about a couple of new principles or exercises or pieces of equipment that you’ve added to your program in the past couple years that have made a notable impact, and how did you learn about those?

Joey Bergles: Going back to the Freelap system, we’ve had it for a little over a year now. We started with eight chips and have 20 now. It’s been a huge upgrade, being able to time sprints—the intent just goes through the roof. You’ll always have those self-motivated individuals who will be like even though I don’t know what my time is, I’m going to run extremely hard on this 10-yard sprint. But that’s not 100% of them.

The Freelap gives us the ability to time, and we track different stuff. I like short accelerations, so we’ll do a 2-yard build into a 10-yard sprint. We do different flys and max velocity with a 20-yard build, 30-yard build, different stuff like that—I like the versatility of it, different stuff like curved sprints that I have protocols for, measuring what different speeds are on curves, and the Freelap allows us to do that with the chips.

Incorporating the Freelap this past cycle, we did a potentiation cycle on our last day of the week with our deadlifts and that same sprint of 2 plus 10. In our weight room, we have a little bit of empty space, and then we have a garage door that opens up so we can sprint in the empty space and then carry it out through the garage door. There are different ways we time, whether it’s potentiation or our actual training session.

And I use it for everything, so it’s not just football—women’s basketball uses it, volleyball uses it, our junior high kids use it. We do it with our third through fifth graders. Everyone uses it, and everyone really enjoys it. It’s competitive, and kids are competitive with each other.

We also use the contact grid, and I really like how I can use that to see trends that I can then apply to a larger setting. We can’t run 100 kids through on a contact grid—that would take way too long—but I can look at trends that show how I might do different rep brackets based on what I see. It could be that I’m seeing pretty good data on reps 8 and 9, so why would I set my program for only five reps? That’s when I can apply data I’ve seen to a larger setting.

Just Jump
Image 4. Athletes have the opportunity to get performance data from the Just Jump mat, Freelap timing system, and MuscleLab contact grid.

Freelap USA: In your personal career development as a coach, how do you approach continuing education and the ways you continue to grow as a coach? How do you view your responsibility to be a mentor and develop that wider coaching tree beneath you?

Joey Bergles: I was lucky with how I came up in the profession, because I was around mentors who took continuing education very seriously. With that, I saw firsthand that there was a lot of personal financial investment in continuing education.

I’ve seen firsthand the benefit of honing your craft, whether it’s speed stuff or mobility stuff, and I’ve had to pay for that information. That’s a reality, says @joeybergles. Share on X

I know it’s kind of common for people to say, this is my continuing education budget, and if it’s outside of that, I’m not going to do it. But I’ve seen firsthand the benefit of honing your craft, whether it’s speed stuff or mobility stuff, and I’ve had to pay for that information. That’s a reality.

I’ve gone to New York City, I’ve gone to Toronto, I’ve gone to Southern California twice, and those were all just to learn more about mobility—and some of those were covered, and some I completely paid out of pocket. Not just the course, but also paying for a hotel, paying for flights, those have been investments I’ve made in the skill set I have. As a result, I’m able to do things.

Education
Image 5. Investing in his own certifications and continuing education has been a key to Coach Bergles’ success.

When people ask, “how do you know how to do this?” or “how do you do that?” the answer is, well, I spent a lot of money on this. I can’t just give you a five-minute talk on how to do it…. If you could learn it in five minutes, then I’ve wasted a lot of money because I’ve made a substantial investment in myself. That’s the cold, hard truth.

That’s something I try to do every year. I just took Brett Bartholomew’s Art of Coaching and that wasn’t covered by my employer. I went to Austin, and that probably cost close to $1,500 between the course and the travel, and that’s an investment. Those are the things where, if I know it’s not going to be worthwhile, then I won’t invest my own personal finances in it. But I did research and going to that course was a good investment; it’s something that will help me for the next 30 or 40 years of my life. I’ve heard other people say it, if you’re not willing to invest in yourself, why would anyone else invest in you?

I also make a point of reading a lot, and I take a great deal of pride in the notes that I take. I don’t want to be the person who says, okay, I read 60 books this year, but I just sped through them and didn’t actually learn anything. Great, you read 60 books, but did you take anything from them?

So, I try to have a process where it’s pretty consistent. I want to read 15 pages during my workday, whether it’s coming in early or some time during the day, and then I want to read 15-20 pages at night. Then, I want to read around 30-40 pages on the weekends. The reality is, sometimes I’m not able to do that, 100% that happens. But 75% of the time I do, I spend those 45 minutes to an hour to get that reading done.

Over the course of the year, I structure that in. I listen to a podcast every morning when I come in to work, but when I go home from work I don’t—at the end of the day, I don’t want to listen to any information. At that point it’s music, because if I put on a podcast and it’s valuable information that I’m not ready to retain, then I’m going to miss it. So, I try to put the high-value material that I think will be critical to retain at the start of my day.

The same with my reading; my book in the morning will be more scientific-based and require more critical thinking, and my book at night will be more leadership, biography…the type of stuff that you don’t have to do a lot of in-depth thinking about. I like to read two books simultaneously: I have my at-work book and then the book I read at night.

I also spend some time on social media, and I’ll be honest, there are track accounts on Instagram where I’ll tell my other coaches, I found this track account in Estonia and they were doing this interesting plyometric drill with their high jumpers, and that’s the kind of thing that gets us thinking. That’s how I use social media now, finding these random, far-off accounts where I can learn about stuff I never would have known about otherwise.

That’s how I use social media now, finding these random, far-off accounts where I can learn about stuff I never would’ve known about otherwise, says @joeybergles. Share on X

From a mentorship standpoint, when I was coming up, a lot of my early stages were self-taught. There are pluses and minuses to that—I had to figure out a lot on my own. That’s good and bad. I didn’t have someone helping me in certain areas, and that probably could have made me better both in the short term and the long term. But I also developed a skill set of I don’t need you to tell me what to do, I’m going to figure this out.

I got three racks, I got a hallway, and I’ve got 30 soccer girls? Okay, I’m gonna figure this out. Instead of having someone to bounce ideas off of, it was just okay, we’re gonna do this, and we’re gonna do this, and okay, that didn’t work, so now we’re gonna try this, and okay that worked really well so we’re going to stay with it.

With that, I have a lot of respect for individuals who are self-motivated, the ones who are like hey, you didn’t tell me to do this, but I did this, this, and this. That’s the person I want to teach what I know. If you’re expecting someone to hand you something, I’m probably not going to do that.

Both in terms of the financials and what I’ve spent to acquire the knowledge that I have, plus all the hours I spent doing things like being on YouTube way past midnight when I was 22 just trying to learn what I needed to know. If you’re a younger coach or an intern with a mindset that you just kinda want to do this but haven’t really made a whole lot of investment, then I am not going to give you everything I have until you make that investment on your own end.

It’s just like that idea of engagement with the athletes, that coach who’s invested and that light bulb goes off—they are the ones who, 20 years down the line, will have taken everything and run with it. But if it doesn’t matter that much to you, it’s not going to have that long-lasting effect.

Since you’re here…
…we have a small favor to ask. More people are reading SimpliFaster than ever, and each week we bring you compelling content from coaches, sport scientists, and physiotherapists who are devoted to building better athletes. Please take a moment to share the articles on social media, engage the authors with questions and comments below, and link to articles when appropriate if you have a blog or participate on forums of related topics. — SF


MBSC

Facility Finders: Mike Boyle Strength and Conditioning (MA)

Blog| ByJohn Delf-Montgomery

MBSC

This episode of Facility Finders visits a Mount Rushmore of strength coaching—located just outside of Boston, Massachusetts, Mike Boyle Strength and Conditioning is owned and operated by Coach Mike Boyle. His gym now has two locations, one in Woburn and the other in Middleton.

For this installment, Coach Boyle takes us on a tour of his Woburn location. His gym is in the private sector of strength and conditioning, and he works with hundreds of athletes spanning beginner-level youth to Olympic gold-medal athletes.

Design

Coach Boyle moved to this 22,000-plus square foot facility because he had a vision of his system in this facility. Anytime you build/remodel a space, you have to think about your system of training. For Coach Boyle, his specific training flow has to accommodate the masses, including starting different sessions every 30 minutes or so to allow them to train a high number of clients in one day.

MBSC Flow
Image 1. The facility’s setup and design help maximize flow in the training area.

The facility is sectioned off into the main weight area with sprinting strip, the functional training turf space, and the conditioning room. Each has its own space, which is unique compared to what we often see nowadays with monster wide-open facilities—but Coach Boyle has his system set up in a way that can overcome the split of the spaces. Considerations all the way down to where to situate the bathroom and hallway offer value, according to Coach Boyle.

“It’s pretty simple,” he says. “One large open room with offices and locker rooms/bathrooms off a long hallway. The hallway was deliberately ended at a point so people could not enter the gym from the center.”

Michael Boyle

This is important to him because they have athletes sprinting in his facility—that closure allows athletes to not have to worry about trucking another client walking in to start their session. Coach Boyle also mentioned that he has designed three collegiate weight rooms before, so that experience was helpful in deciding what he wanted and what he didn’t.

Presentation
Image 3. Coach Boyle hosts a conference workshop at MBSC.

Purchasing

This is something that I think a lot of coaches miss out on: purchasing equipment from companies that, even if you are only spending $20,000 because that’s a huge renovation for you, treat you in a similar way to those purchasing in the multimillion-dollar range.

“Number one was the relationship,” Coach Boyle says, talking about his connection with Perform Better. “When you build a facility, people you don’t know come out of the woodwork. I went with Perform Better because they had always treated me like I was important, even when I didn’t have a big budget and wasn’t spending a lot of money. Number two was cost. In the private sector, it’s your money.”

For private sector gyms, make sure the facility you are in is fully maximized before investing in a new space. A move won’t necessarily save a struggling business—but it can surely sink it. Share on X

This 22,000-square-foot space is something that most coaches only dream about, but the success of Boyle’s practice over time shows in the space he now trains in. For private sector gyms, make sure the facility you are in is fully maximized before investing in a new space. A move won’t necessarily save a struggling business—but it can surely sink it.

Specialty Equipment

At Mike Boyle Strength and Conditioning, the main focus is obviously on helping clients get stronger and faster, so over the years, specialty equipment has come and gone. Mainly because of the issue of flow, Coach Boyle has focused on not “cluttering” the gym with those specific use types of equipment. When I asked him about these issues, he mentioned hex bars, Arena Sports timing gates, and Keiser air-pressured “cable machines,” and then the plethora of conditioning equipment they have at MBSC.

Specialty Equipment
Image 4. Slideboards, stationary bikes, and treadmills in their own separate room.

“The big thing with Keiser is velocity capability—with no weight stack, you can move weight concentrically,” he said, explaining why they don’t use cable stacks and why they decided on the conditioning equipment they bought. “Keiser doesn’t have the ‘pull back’ that normal cable stacks do.”

“We bought the three types of equipment for this room—treadmills so we can train ‘running muscles’ and get conditioned, bikes are used for the athletes with groin/hamstring issues, and slide boards to help stress the muscles not used as much in the sagittal plane.”

Training Clients
Image 5. Clients train in the large, turf functional training space at MBSC.

Takeaways from Coach Boyle

This gym tour is something different because a lot of facilities are built for as wide a number of uses as possible, whereas this gym was designed to fit the exact training method followed by Coach Boyle.

Design Sketch
Image 6. Sketch of the design and flow.

“Facility design is all about traffic flow,” Coach Boyle said, when explaining the thought process behind his setup. “The big key is to have open space and multi-use equipment. Too many coaches buy machines that they can use for one exercise. We never do. We bought racks, benches, pulley systems, and lots of dumbbells. You need to think about the gym as a factory. The assembly line needs to be smooth!”

Too many coaches buy machines that they can use for one exercise. We never do. You need to think of the gym as a factory. The assembly line needs to be smooth, says @mboyle1959. Share on X

Coach Boyle trains hundreds of athletes a day, so that assembly-line setup is something many small colleges and high schools could think about within their facility. Most schools can afford one weight room for all of their athletes, but without the assembly-line setup, it becomes clustered and dangerous.

Since you’re here…
…we have a small favor to ask. More people are reading SimpliFaster than ever, and each week we bring you compelling content from coaches, sport scientists, and physiotherapists who are devoted to building better athletes. Please take a moment to share the articles on social media, engage the authors with questions and comments below, and link to articles when appropriate if you have a blog or participate on forums of related topics. — SF


Max Out Drop

Why We Dropped ‘Max Out’ Days!

Blog| ByJoey Guarascio

Max Out Drop

Break out the smelling salts, crank up the Lil Boosie, tighten up the lifting belt—time to smash a big squat. The team surrounds the athlete, chanting encouragement as the spotters set up. The athlete takes the bar out, and there is a feeling of excitement and almost panic as to whether they will be able to accomplish this Herculean feat of strength.

The athlete descends—with the spotter tight to their body—and then drives back up with all their force. Veins pop out of their forehead with everyone screaming that famous coaching cue, “UPPPPP.” The athlete stands up and walks the bar back into the rack while the room erupts: players dancing, coaches blowing whistles, bedlam. Congratulations are exchanged like a national championship has been won. The athlete has hit a personal record 60 pounds above their previous squat. The strength coach stands there reveling in the accomplishment, like their purpose has been fulfilled.

But amid all this commotion, the purpose of a 1RM test is forgotten—to gain an appropriate number to train from in the next block of training.


Video 1. Teammates fire up an athlete maxing out in a clean.

Testing for a 1RM

One rep max testing is common practice in a majority of weight rooms around the country, including one in which I have been personally employed, but what purpose does it serve? From my own undoing in the “numbers chasing game,” I can tell you that it is easy to lose sight of the purpose of testing and fall into the trap of ego lifting your athletes. I bring up most of the issues and scenarios in this article because I have made the same mistake in my career. Let’s look at the history of strength and conditioning to give us insight into this traditional practice.

I can tell you that it is easy to lose sight of the purpose of testing and fall into the trap of ego lifting your athletes, says @CoachJoeyG. Share on X

As strength and conditioning continues to mature as a field, coaches continue to find ways to validate themselves through the traditional “Max Out Day.” I don’t fault coaches for wanting to prove that their program is working, and a lot of times, external pressure dictates that coaches have a certain quota of numbers at the end of every semester. Before some of the newer technologies were created, coaches in the early days of the profession had to show worth to sport coaches to validate the necessity of their jobs, and they did this by showing increases in strength through one rep maxes.

Johnny Parker
Image 1. Coach Johnny Parker training an athlete outside on a bench press machine. Coach Parker is a pioneer in the field and an invaluable mentor.

We must remember that, in the early stages of the field, strength and conditioning coaches were fighting the stigma that they weren’t necessary. Research in the U.S. was centered around aerobic conditioning, and a lot of the more advanced training methods were hidden behind the Soviet’s Iron Curtain. It wasn’t until the pioneering work of coaches like Johnny Parker, Al Vermeil, Al Miller, and many others that the strength and conditioning community in America start to use the more researched and proven training methods and best practices from the Eastern Bloc.

Russian Lifts
Figure 1. Pictured above is a breakdown of the average intensity trained at for Soviet Olympic lifters throughout their years of dominance in the Olympics. It is very interesting how infrequently they eclipsed the 90% threshold, and how most of the lifting above 90% came from competition attempts. (Credit Breakingmuscle.com)

Though the knowledge that strength is one piece of the puzzle for increased athletic performance is now a shared philosophy for most practitioners, the allure of having bragging rights at conferences has fueled the practice of max out day to extreme ends. As the profession evolves, so should our practice of safer, accurate, and purposeful prescriptions of load—which is the end goal of one rep testing.

What Is the Specific Reason for One Rep Testing?

Mladen Jovanovic defines a one rep max as: “the maximal weight one can lift without a technical failure.” This definition coincides with what the purpose of testing should be. We should seek to create testing protocols that are repeatable and uniform in terms of standards and effectiveness.

In a sports setting, the only reason to test a 1RM is to have an accurate training number to train off in a percentage-based program. The accuracy and prescription of load is essential to a successful strength program. How can we apply overload if we don’t know the amount of load necessary to elicit stress on the athlete and promote the adaptation that drives strength and growth? Trying to program and plan training without some idea of training maximums for athletes is like playing pin the tail on the donkey in the dark.

All training is a form of guesswork and experimentation. Scientific principles clear up a lot of the guessing, provide structure, and guide safe and effective strategies for training. Coaches can’t utilize these strategies if they can’t properly prescribe the appropriate loads during the training process. “Hope” is not a strategy—planning structured overload is essential to a safe and effective training program.

General Adaptation Syndrom
Figure 2. Pictured above is Hans Selye’s General Adaptation Syndrome. To get a supercompensation or increased general preparedness level, a stress must trigger an alarm phase in the body. If we don’t have an ability to apply a load that triggers this alarm phase, we will not drive strength adaptions.

It is unsafe and irresponsible to guess at load prescription. Athletes get hurt when inappropriate loads are on the bar. Speed of movement and technique become compromised when loads are prescribed without sound reasoning. I am not advocating for no heavy lifting, but I am advocating for having a strategy to safely lift heavy in a progressive manner.

One rep testing, if done, should satisfy a specific training objective, not validate or be a metaphorical pat on the back to the S&C coach, says @CoachJoeyG. Share on X

One rep testing, if done, should satisfy a specific training objective, not validate or be a metaphorical pat on the back to the strength and conditioning coach. A strength and conditioning coach shouldn’t need to feed their ego with 1RM numbers. These bragging rights violate one of my main philosophical rules: you are in your position to serve the athletes, not the other way around.

Coaches should never expose an athlete to potential danger for their own benefit.

Let’s also look at when we, as strength and conditioning coaches, actually test athletes for one rep maxes. Typically, the one rep testing happens right before a transitional period in the training year, such as the end of the semester or the conclusion of summer workouts. This is an ass-backward way, as the reason to update a one rep max is to adjust it for future training blocks. Therefore, it doesn’t make sense if we wait to test until training is completed, with rest or a competitive period following.

Why would a coach risk injury or employ maximal fatigue on an athlete leading into a competitive period? Aren’t we trying to deliver the athletes to the sports coaching staff ready to compete in their sport? Athletes don’t come to college to be professional strength athletes; they come to compete in their respective sports. Putting these athletes at risk of injury just prior to a competitive period is careless and irresponsible and should not be common practice.

Risk Reward That Comes with Max Out Day

The accuracy of testing and safety are major concerns in testing one rep maxes. The minute a coach in any capacity helps the athlete accomplish the lift, the test is invalid. Spots can increase load anywhere from 10% to 40%. Bench press should be performed with two hands, not four. If a coach is so nervous about an athlete’s safety with a given load that they must physically grab the bar, then that load should not be on the bar in the first place.

If a coach is so nervous about an athlete’s safety with a given load that they must physically grab the bar, then that load should not be on the bar in the first place, says @CoachJoeyG. Share on X

This goes back to what is the purpose in testing one rep max? If coaches take these inflated numbers and program off them, athletes could be potentially training with supramaximal loads. It is a strength and conditioning coach’s job to do no harm—so why expose athletes to unnecessary danger, when proper testing protocols would allow accurate numbers with safe attempts?

Adding a spot in any capacity immediately creates a super-maximal attempt that the tissue may not be able to handle. I have seen pecs, backs, quads, and even a meniscus destroyed during a max out day. When an injury has occurred, I’ve always had to answer not only to myself, but even more so to the injured athlete and their coaches. When the smoke clears, there is the realization that the extra 5 pounds on the squat that you, as an S&C coach, were chasing was not worth the cost of the athlete’s health. Our job is to do no harm and mitigate any potential dangers of training. Excessive spotting and supramaximal loading are dancing with the devil and serve the strength and conditioning coach more than the athlete.

Technical Standards and Reliability of One Rep Testing

The technical side of max out days is something of great importance. If an athlete can’t complete a movement with the same technical proficiency that they do in training, coaches shouldn’t use that number to train off. Board benches, partial squats, and starfish power cleans are not acceptable numbers to train off if the mode of exercise in training requires full range of motion or cleaner technical efficiency.

If an athlete can’t complete a movement with the same technical proficiency that they do in training, coaches shouldn’t use that number to train off, says @CoachJoeyG. Share on X

If the point of a one rep max is to create a number to train off, coaches should aim for the movement pattern to replicate the technique the coaches demand in training. Cut-offs should be put in place during traditional max out days based on how the movement looks versus chasing a number. Bottom line: the lifts should look the same from the warm-up through the max attempt.

Technique Failure
Image 2. Technical integrity is paramount when testing one rep maxes. If an athlete must alter the movement in a way that lands outside of that exercise’s technical movement bandwidth, the number collected should not be used to prescribe loads off in future training sessions.
Adapted Figure
Figure 3. Adapted from the study “Using Load-Velocity Relationships to Quantify Training-Induced Fatigue,” where the researchers (Liam J. Hughes, Harry G. Banyard, Alasdair R. Dempsey, Jeremiah J. Peiffer, and Brendan R. Scott) observed that the measured 1RM of participants declined by 9% at 24 hours after the fatiguing exercise session and was still 4% lower than baseline at 48 hours. A 9% decrease on a 400-pound squat would mean in that moment the athlete’s daily max would be 365. We can see why this could be an issue, as the athlete’s strength fluctuation could compromise training affects.

Fluctuation of One Rep Max

It’s May 1, and you, the S&C coach, just concluded a successful max out day in which you observed strength gains up to 40 pounds in some athletes. You add these new numbers into their Excel workbook in the master table. The coach programs the summer workouts that start June 1 off this new number.

An athlete comes back off intersession break ready to get right, and when the first workout day approaches, you prescribe 75% of the newly tested 1RM for a set of four. The athlete takes the bar out and struggles with the first rep, grinds to get the second, and gets buried in the hole on the third. The coach is shocked and angered by the “lack of effort” of an athlete coming off a month break with an overexaggerated one rep max to train off. This is another situation that can be avoided by taking the appropriate steps in applying a training max.

1Rm Figure
Figure 4. This diagram was taken from “Strength Training Manual” by Mladen Jovanovic, where he discusses how strength and conditioning coaches should undershoot one rep maxes and remind themselves that one rep maxes are a tool in prescribing appropriate overload for the athletes.

Mladen Jovanovic proposed a viewpoint that really challenged my personal perspective on load prescription based on one rep maxes. Jovanovic stated that athletes have different levels of one rep maxes:

  • The highest level is a competition max, which is the highest level of performance under major arousal. This could be directly correlated to the typically hyped-up max out days.
  • The next level is a training max. This performance still requires a higher arousal state and can’t be repeated weekly.
  • The last level is the everyday max. This number is a weight that you could walk in, load on the bar, and hit after a warm-up.

The reasoning behind Jovanovic’s viewpoint of these classifications is simple: there are huge fluctuations in absolute strength depending on various factors like fatigue state, environment, and arousal. To keep the athlete safe, it makes much more sense to undershoot a one rep max than overshoot the max and expose the athlete to the injury risk associated with faulty loading schemes. How would it make sense to use what Jovanovic defines as a competitive max as a number to train off, knowing the arousal state and environment that was necessary to produce that performance?

To keep the athlete safe, it makes much more sense to undershoot a one rep max than overshoot it and expose the athlete to the injury risk associated with faulty loading schemes, says @CoachJoeyG. Share on X

Testing Is Training, Training Is Testing

The sheer planning and aftermath of a max out day takes away from the purpose of a one rep max—to train with more accuracy. A one rep max is a tool, not a training goal. Strength and conditioning coaches don’t win national championships for having a certain number of 500-pound squatters (as much as we would like to believe otherwise).

The sheer planning and aftermath of a max out day takes away from the purpose of a one rep max, which is to train with more accuracy, says @CoachJoeyG. Share on X

There are several methods that are safe and effective for achieving and adjusting one rep maxes. Load-velocity profiles have become extremely popular since the emergence of affordable bar velocity sensors hit the market. Reps in reserve (RIR) and rate of perceived exertion (RPE) also fit the bill if you have limited resources. Here at FAU, we rely on velocity cutoffs when trying to achieve an athlete’s one rep max that is currently unknown.

Lift sets
Figure 5. Pictured above is the velocity cut-off we utilize at FAU if the athlete has an unknown one rep max and needs to establish a load to prescribe future training off of.

We don’t want to disrupt the training cycle, so we gather our one rep testing data on deload weeks every fourth week, which is when we drop our training volume down significantly while maintaining high intensity. This loading prescription scheme allows us to hit anywhere from 85%–90% every fourth week for a single. Like I stated, we love training heavy but in a way that doesn’t disrupt training from before that week or cause residual fatigue that lasts into the next training block. When the athletes hit the single, we record the average velocity of the movement and provide a sliding scale based on velocity for how much the athlete’s one rep max should go up or down.


Video 2. Velocity-based bar speed measurements.

Over the course of a summer, we have seen athletes progress to hitting their previous one rep max in a workout as their new 90%, faster than their previous 90% test. Because we use this method in training, the number is a valid measurement and an effective number to train off, as the arousal state, technique, and environment are that of a normal training session. It also allows strength and conditioning coaches to provide feedback to the athlete on their training status without the tapering and stress of a max out day.

VBT Scale
Figure 6. Pictured above is the sliding scale that we use here at FAU to adjust one rep max based off the velocity expressed using 90% of the previous one rep max. This scale has allowed us to provide progressive overload and adjust the training prescription without the risk.

Many other methods have been discussed previously on SimpliFaster. Some of these methods include RIR, RPE, load velocity profiling, and rep maxes.

Keep the Main Thing the Main Thing

Don’t get caught up in ego lifting, as it only hurts the athletes you train. Coaches must do no harm. It is a strength and conditioning coach’s duty to provide responsible training that supplements the main emphasis in training for sport, which is better sport performance.

Having X amount of 500-pound squatters and X amount of 400-pound benchers won’t guarantee a championship, even though it will make the strength and conditioning coach feel good. Training must serve a bigger purpose. Technology has provided strength and conditioning coaches with safe and effective ways to prescribe load—we need to advance with the times.

Since you’re here…
…we have a small favor to ask. More people are reading SimpliFaster than ever, and each week we bring you compelling content from coaches, sport scientists, and physiotherapists who are devoted to building better athletes. Please take a moment to share the articles on social media, engage the authors with questions and comments below, and link to articles when appropriate if you have a blog or participate on forums of related topics. — SF


Vmaxpro Exxentric

How to Apply the Vmaxpro and Exxentric Flywheel Integration in Training

Blog| ByAdam Wingate

Vmaxpro Exxentric

I use Exxentric’s flywheel devices, and I use Vmaxpro on my barbells—that the two companies would join forces to integrate their products sounds too good to be true, like a watch that can accurately measure blood lactate levels or a vertical jump program that will add 20 inches. But it is real, and I’ve collected all the details you’ll need to get started.

That Exxentric and Vmaxpro integrated their products sounds too good to be true, like a watch that can accurately measure blood lactate levels or a vertical jump program that will add 20 inches. Share on X

Just before I get into all the steps, let me show you what you’re missing.


Video 1. This is Jay Gurusamy demonstrating the Vmaxpro app integration with Exxentric’s kPulley Go at Smash Gym in Sunnyvale, CA.

If you already have a Vmaxpro, then you just need to drop a small fortune on an Exxentric product.

Are they worth it? Yes.

Are they high-end equipment? Yes.

Are they critical to develop an athlete? No, but your athletes will like using them.

If you own a kBox or kPulley, then the financial investment is much less to pick up a Vmaxpro. And remember that it has many other uses besides what I will describe here.

If you have neither product, I strongly recommend both companies and have found customer service for each to be stellar. They are friendly, helpful, and competent, and they set a high standard. Now, after saying all that, if you are against performance metrics and dislike precisely engineered machines that provide a novel training stimulus, then reading about the unity of both might mean you like to suffer. In that case, a competitive flywheel environment is just right for you.

There’s one more thing: in order to attach the Vmaxpro to your Exxentric product, you’ll need to purchase the interface bracket for a price that you won’t like. The tiny, plastic clip runs about $60, and if you order from the Exxentric website, they will ship it from Sweden for a high cost. To avoid this, order directly from SimpliFaster if you are in the U.S.

Integration
I use flywheel training on a weekly basis with my athletes. It’s fun, and compared to barbells, it’s a radical change. A serious limitation has been quantifying progress and intent since there is little intuitive grasp of the meaning behind switching from a flywheel with an inertia constant of 0.005 kg∙m2 to one of 0.025 kg∙m2. Owners of a kBox have the option to add a kMeter, and I have used this solution successfully, but I have also damaged one and had to replace it. It’s a finely tuned instrument that works, but I have been hesitant to redeploy it.

Setup (App and Firmware Update)

You cannot use Vmaxpro with the legacy version of the application (last updated to 4.2.1). The reason is that a firmware update is needed for the device itself (6.3.x or later) and that is only available in the newer Vmaxpro app (currently version 1.1.2). Rather than parse all those numbers, all you have to do is click on the app with the black V-swoosh logo rather than the white one.

Legacy

The next order of business is to update the firmware of the actual Vmaxpro device.

Settings

Under the Training menu, you’ll have the option to connect. Once that is done, if a firmware update is available, you will see a small, orange icon prompting you to download it. As of this time, the current version is 6.4.5, and once that update is complete, you will see the version information reflected in the device status.

Device

Create a Flywheel Exercise

The app is stocked with nearly 50 standard exercises, including varieties of barbell, dumbbell, bodyweight, and kettlebell movements. As of today, there are no entries under the Flywheel menu, so we will first have to add one. I fumbled my way through this process, so you won’t have to.

There are two pathways to reach the menu option to create a new exercise.

  1. Management -> Exercises -> Create Exercise (white circle with a plus sign in the upper right corner)

Management

  1. Training -> Start a workout -> Add first exercise -> Add first exercise (again) -> Create Exercise (white circle with a plus sign in the upper right corner)

Start Workout

Select Workout

Add Exercise

Exercises

Flywheel Menu
Now that you can access the option to create an exercise, here is the screenshot.

Create Select

It is necessary to select an existing exercise as the template for a new one, which is confusing since there are no existing Flywheel exercises. My solution was to use a barbell row, but if you try to save the exercise at this point, it will be rejected as a duplicate. To resolve this, just modify the Equipment menu and switch from Barbell to Flywheel. Use the Alias option to assign a new name to the movement. Click Save.

Barbell Row

Regardless of which pathway you used to create the exercise, to select it you will need to start a workout. To begin, click Start a workout, and through that menu sequence you will use the pathway described earlier:

    Training -> Start a workout -> Add first exercise -> Add first exercise (again) -> Select the Flywheel exercise you created.

Entering Workout

Once you are finished, you will see a screen like this. It is not necessary to specify a goal. Click Done. If you have created athlete profiles, you will be prompted to choose one.

kPulley Row

Please note that if you have not connected your Vmaxpro yet, it’s time to do so. (You can see below that no sensor is connected.) Now we are ready to go. Click on the exercise to enter the main measurement display and start working.

kPulley Training

Performance Monitoring

You can configure this screen to show anything you are interested in monitoring. Click Add chart on the right to choose among numerous metrics. Start cranking out reps, and the information you have selected for display is automatically shown in real time—perfect. Be sure to set the inertia constant of your disc. Unfortunately, Vmaxpro and Exxentric use different units, so I’ve taken care to provide the necessary conversion for you in the table below.

kPulley Vmaxpro
Flywheel Size

Once your set is done, this is an example of what you’ll see. Naturally, if you added different charts than I did, you will see that information.

Peak Power

A few quick tips. The speaker icon at the bottom indicates which metric is audibly reported. It seems to default to Rep order regardless of what you may have set during the previous workout. I don’t know how many of you have trouble counting reps, but I expect most people will want to change this setting.

The icon to the left (showing four quadrants) allows you to configure the presentation screen during your set; this is almost certainly something you will want to edit. Finally, the icon to the right showing a ruler allows you to filter reps based on distance. All of this is very well thought out and fun to use.

Video 2. Vmaxpro Flywheel introduction guide.

This article is not a complete tutorial on all that the Vmaxpro app has to offer. But if you are just getting started, I hope this will greatly simplify the process for you.

Integrating the Vmaxpro with Exxentric’s kPulley Go makes it possible to track and monitor performance the way you would with a 40-yard dash, vertical jump, RSI, or back squat. Share on X

The first day I introduced the Vmaxpro on the kPulley Go, a gym-wide competition to find the most powerful athlete immediately ensued. Real-time feedback changes everything. Athletes increase their intent, and it is possible to track and monitor performance the way you would with a 40-yard dash, vertical jump, RSI, or back squat. Even if you are not interested in tracking the performance over time of anything within the software, you still benefit from the real-time biofeedback.

Since you’re here…
…we have a small favor to ask. More people are reading SimpliFaster than ever, and each week we bring you compelling content from coaches, sport scientists, and physiotherapists who are devoted to building better athletes. Please take a moment to share the articles on social media, engage the authors with questions and comments below, and link to articles when appropriate if you have a blog or participate on forums of related topics. — SF

  • « Go to Previous Page
  • Page 1
  • Interim pages omitted …
  • Page 40
  • Page 41
  • Page 42
  • Page 43
  • Page 44
  • Interim pages omitted …
  • Page 164
  • Go to Next Page »

Primary Sidebar

FEATURED

  • Using Speed and Power Data to Bucket and Train Faster Athletes
  • Plyometric Training Systems: Developmental vs. Progressive
  • 9 (Fun!) Games to Develop Movement Skills and Athleticism

Latest Posts

  • Rapid Fire—Episode #15 Featuring Kyle Brown: What is Universal Speed Rating (USR)?
  • Why We Don’t Perform Hang Cleans
  • 1080 Sprint: Four Essential Tips You Won’t Find in the Manual

Topics

  • Adult training
  • App features
  • Artificial Intelligence
  • Athlete
  • Athlete performance
  • Baseball
  • Buyer's Guide
  • Career
  • Certifications
  • Changing with the Game
  • Coach
  • Coaching
  • Coaching workflows
  • Coching
  • College athlete
  • Course Reviews
  • Dasher
  • Data management
  • EMG
  • Force plates
  • Future innovations
  • Game On Series
  • Getting Started
  • Injury prevention
  • Misconceptions Series
  • Motion tracking
  • Out of My Lane Series
  • Performance technology
  • Physical education
  • Plyometric training
  • Pneumatic resistance
  • Power
  • Power development
  • Practice
  • Rapid Fire
  • Reflectorless timing system
  • Running
  • Speed
  • Sports
  • Sports technology
  • Sprinters
  • Strength and conditioning
  • Strength training
  • Summer School with Dan Mullins
  • The Croc Show
  • Track and field
  • Training
  • Training efficiency
  • Wave loading
  • What I've Added/What I've Dropped Series
  • Youth athletics
  • Youth coaching

Categories

  • Blog
  • Buyer's Guide
  • Freelap Friday Five
  • Podcasts

COMPANY

  • Contact Us
  • Write for SimpliFaster
  • Affiliate Program
  • Terms of Use
  • SimpliFaster Privacy Policy
  • DMCA Policy
  • Return and Refund Policy
  • Disclaimer

Coaches Resources

  • Shop Online
  • SimpliFaster Blog
  • Buyer’s Guide
  • Freelap Friday Five
  • Coaches Job Listing

CONTACT INFORMATION

13100 Tech City Circle Suite 200

Alachua, FL 32615

(925) 461-5990 (office)

(925) 461-5991 (fax)

(800) 634-5990 (toll free in US)

Logo of BuyBoard Purchasing Cooperative. The word Buy is yellow and shaped like a shopping cart, while Board and Purchasing Cooperative are in blue text.
  • Facebook
  • Instagram
  • Twitter
  • YouTube

SIGNUP FOR NEWSLETTER

Loading

Copyright © 2025 SimpliFaster. All Rights Reserved.