• Skip to content
  • Skip to primary sidebar
SimpliFaster

SimpliFaster

cart

Top Header Element

  • Facebook
  • Instagram
  • Twitter
  • YouTube
  • Login
  • cartCart
  • (925) 461-5990
  • Shop
  • Request a Quote
  • Blog
  • Buyer’s Guide
  • Freelap Friday Five
  • Podcast
  • Job Board
    • Candidate
    • Employer
    • Facebook
    • Instagram
    • Twitter
    • YouTube
You are here: Home / Blog

Blog

A man holding gym equipment is featured on a podcast cover with the text: Student-Athlete Preparation Podcast, Episode 9, Kyle Rogers, Strength & Pitching Coordinator/Owner, Rogers Performance. The bottom shows the SimpliFaster logo.

Episode 9: Kyle Rogers – Practice Skill, Train Output

Podcast| ByCody Hughes

A man holding gym equipment is featured on a podcast cover with the text: Student-Athlete Preparation Podcast, Episode 9, Kyle Rogers, Strength & Pitching Coordinator/Owner, Rogers Performance. The bottom shows the SimpliFaster logo.

https://simplifaster.com/wp-content/uploads/2021/08/Episode-9-kyle-rogers.mp3

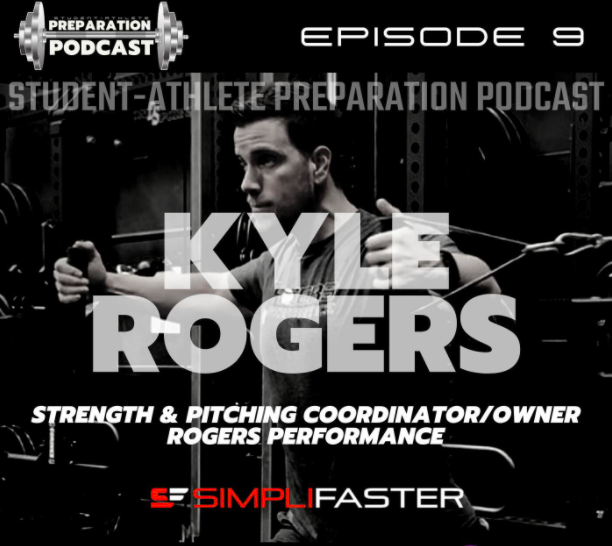
Cody sits down with good friend and private sector coach, Kyle Rogers from Seattle, Washington. Kyle own his own facility where he specializes in training baseball players from the youth level all the way up to the big leagues.

Kyle and Cody discuss how college strength and conditioning can improve with integration, how to approach programming through a skill acquisition lens, and how to allocate energy to get the most out of your training with athletes.

Connect with Kyle and Cody:

Kyle’s Media
Twitter: @KyleRogers18
Instagram: @klrogers28

Cody’s Media:
Twitter/Instagram: @clh_strength

Female Deadlift

Training Athletes of All Abilities with Anna Woods of sheSTRENGTH

Freelap Friday Five| ByAnna Woods, ByNathan Huffstutter

Female Deadlift

Anna Woods is a wife and mom to three children in central Kansas. She earned her degree in Exercise Science with a minor in marketing in 2005. Her credentials include: ACE-CPT, Biomechanical Exercise Specialist, CF-L1, DNS Running/Weight Training/Exercise 1, Functional Aging Specialist, PFP-Personal Trainer of the Year Finalist (2017), Metabolic Flexibility Certified.

She has been in the fitness industry for over 16 years and currently is the CEO and Founder of sheSTRENGTH, an online and in-person fitness and training program. She trains women and youth of all abilities in her barn gym behind their home in rural Kansas. Additionally, she is the strength and conditioning coach for the Hutchinson Community College Blue Dragon NJCAA softball team and she works with many softball players in the area. Anna is also the author of the soon-to-be released book and CEU course “Adaptive Fitness Exercise Specialist,” which trains coaches, teachers, and trainers on how to work with athletes with special needs/accommodations.

Freelap USA: Breaking technical movements into constituent parts is a common process in skills training for team sports—how do you use this same concept to “reverse-engineer” Olympic lifts and teach youth athletes how to begin getting into foundational positions that will support the full movement? 

Anna Woods: As an athlete myself, I have had the huge honor to train under the mentorship of multiple high-level Olympic lifting coaches over the years and I’ve taken various cues they’ve given me and tried to apply them in practical ways for my athletes to understand. The late Glenn Pendlay always taught the clean from the top down, and I applied this same concept to my teaching methods.

I like using medicine balls to break down the clean positions for many reasons:

  1. Because we have a smaller gym with limited access to barbells.
  2. A medicine ball is less intimidating, which allows the athlete to relax and not overthink all the steps to completing a clean.
  3. More athletes can go at one time, which is great for large-group or team settings.

One of my favorite top-to-bottom clean position drills is “beat the ball to the floor.” Athletes stand arms-width apart from each other, both hands on a medicine ball, with arms extended out straight at hip-height. The athlete going first stretches up on her toes and extends her hips fully toward the ball. Both athletes then count to three, and on three, one athlete drops down under the ball into a squat catching the ball in a front-rack position with their feet flat on the floor.


Video 1. Playing “Beat the Ball to the Floor” game to teach basic positions of the clean.

The second pull of the clean is the hardest to teach, so again, trying to keep the drills less technical and intimidating, we use medicine balls for this as well. This is the most impactful portion of the lift in its carryover to power and hip drive in other sports—yet it is the part of the clean that is bypassed by most athletes.

For the next drill, both partners stand apart from each other: one partner will be on the floor, kneeling back on their heels and holding the medicine ball out front of their body (and I like to have my athletes elevated on a mat with their feet hanging off the back for this position, because many lack the ankle dorsiflexion to kneel all the way back). The partner on the floor violently extends their hips up and forward to drive the medicine ball up and out toward their partner, who is standing a few feet away and waiting to catch the ball.

The only cues I provide are that the arms should stay long and loose and cannot extend away from the body before the hips are fully extended. Sometimes, we will even place bands under the athlete’s armpits and I tell them the bands can’t fall out until the ball is released out of their hands. This forces the ball to be tossed up in the air using only hip drive, not arms or traps.


Video 2. Partner medicine ball exercise to teach the feel of the second pull of the clean.

From here, we will transfer these same drills to a PVC pipe or lighter barbell and continue with drills like the “rocking chair” as I like to call it. For this, I have my athletes stand in front of a tall box. Again, focusing on the second pull of the clean, I have them start with their back toward the box in a hang clean position, with their chest over the bar and knees slightly bent.

I cue the athlete to pull their chest behind the bar to slide the bar up their thighs, and as they pull their chest behind the barbell, they sit back on a high box to feel the load of the bar in the mid-foot and heel. After the chest has passed behind the barbell, the athlete then violently stands up, driving their feet into the floor as they extend their hips upward and out to maneuver the bar up to the shoulders in a front position.


Video 3. “Rocking Chair” clean drill with a box.

We will practice one or two of these positions as foundations to learning the clean the first month, then we progress to using barbells or dumbbells mostly, and only use these drills as part of our warm-up prep for lifting that day.

Freelap USA: Softball is a rare sport in that playing the game doesn’t necessarily improve the main physical qualities that most impact the game. How do you approach performance training to improve physical KPIs for softball, particularly with year-round players who have demanding game and practice loads?

Anna Woods: My approach to the performance training side of softball is very intuitive and based on a weekly assessment of workloads for the athletes I work with. For the college team, I have 3 different templates I will work from each workout session, depending on the week’s workload in terms of practices and games. The three templates vary in intensity, volume, and recovery—depending on that, we will choose one of the templates to work from.

My goal with these movements for corrective exercise is to stay on top of building and maintaining good patterns in throwing, hitting, and pitching, says @SheStrength. Share on X

A common denominator for all three templates includes long warm-ups and cooldowns, with a lot of soft tissue work, breathwork in various positions, t-spine mobility, pelvis control for hamstring length, and anti-rotation/rotation patterning. Our sessions typically last no longer than 45-60 minutes, 2-3 days a week. My goal with these movements for corrective exercise is to stay on top of building and maintaining good patterns in throwing, hitting, and pitching. Bad habits sneak into these technical movements so easily, so we do our best to create opportunities to slow down and reintegrate good movements—specifically with rotation—into our lifting sessions.

After re-patterning good movement back into the body, we will work to add load and intensity at various levels to build strength and power. We saw this carry over into the performance of our athletes last year in terms of avoiding injury—we had only one hamstring strain all year, and that was related to a fluke accident.

Softball Pitcher
Image 1. A pitcher throwing a pitch with low back extension that has developed through squatting and benching with low back extension. This affected her accuracy (left). Another way we re-pattern neutral spine and core stability into our warm-ups is patterning good movement prior to our workout (right).


Video 4. Before vs. After of addressing this pattern of low back extension and one way we correct it.

We also spend a lot of time working foot load and rotation in our pre-lifting skill work with the use of bands. And lastly, for strength, we focus on working antagonist muscles that are overused in their year-long seasons. This is where the use of TRX and light bands/dumbbell work comes into play. Again, everything we do is focused on creating efficient patterns of movement to avoid bad habits and injury.

For conditioning, we focus mostly on energy system development based on the position played. But in general, most days will include team competitions, EMOM’s, assault bike all-out efforts of 4-6 seconds, or sprints with acceleration and deceleration. It looks something like:

  • (5-8 Min) Soft Tissue Work: Foam rolling, lacrosse ball focus on shoulders, lats, bottom of the feet.
  • (8-10 Min) Corrective: Thread the needle, foot wringing, big toe mobility, hip flexor stretches, tripod rocking, adductor rocking, Dynamic Neuromuscular Stability Development positions (6-10 mos).
  • (5 Min) Postural: Deadbug, bird dog, Paloff presses in half-kneeling, lazy squat holds, single leg squat holds, deadlift holds with breathwork.
  • (30-35 Min) Lifting: Deadlift variations, split squats, pulling, rowing, landmine press, internal/external shoulder rotation.
  • (10-15 Min) Power/Skill/Conditioning: Agility ladders, Medicine ball drills, team relays, sprints, plyometrics, box jumps, banded runs.
  • (5 Min): Breathwork, mindset, soft tissue work, DNS re-patterning.
Landmine Lifts Softball
Image 2. Landmine lifts in softball training.

Freelap USA: Softball is also highly asymmetrical with stress on one throwing arm, one drive leg, and in most cases one swing pattern. Do you target those specific imbalances in performance training for softball, either to mitigate or to accentuate the effects of those repeated actions?

Anna Woods: I spend a lot more time working on this with my pitching athletes. Many go to pitching lessons and work on speed, spins, and power, but spend little time slowing the motions down and learning to activate the big-toe/glute with take off, how to “feel” the oblique’s load and stretch through the middle of the pitch, and how to drive through a strong front leg and foot load.

Most of my time is probably spent learning how to teach the athletes to truly rotate. I have had the pleasure of working under the guidance of Dr. Jared Shoemaker, DC at InMotion Spine Muscle Joint and he has helped me learn how to break down true rotation through the mid-back and obliques and teach it in small pieces to our athletes. Many athletes I assess will overcompensate true rotation by leaning to the side, overthrowing with anterior delt and bicep, extending through the low back, clenching through the neck and teeth, and overusing the hip flexor of the drag leg.

When the athlete is forced to slow down and work through these compensations, she will begin to feel the difference between rotation and overcompensation and retrain the tissues to work correctly, says @SheStrength. Share on X

When the athlete is forced to slow down and work through these compensations, she will begin to feel the difference between rotation and overcompensation and retrain the tissues to work correctly.

My favorite ways to train this are:

  • Banded single-arm rotation with ball.
  • Paloff anti-rotation in kneeling, half-kneeling, lazy squat (stick across back of shoulders).
  • Hanging stance with ball.
  • 3-Mos to low oblique sit.


Video 5. Here I am tactile-cueing an athlete to rotation through her mid-back using the stick as a guide.

Freelap USA: After being forced to utilize remote coaching methods during the pandemic, many coaches have realized this is a sustainable model for training a broader base of athletes. What do you think are a few of the keys to executing a viable and effective remote coaching program?

Anna Woods: The main way I have learned to execute an effective remote coaching program is to try to maintain as much of the culture of in-person training as you can via an online community. Some of the best ways I have figured out how to do that include:

  • Creating team competitions within the group.
  • Making social media challenges.
  • Sharing videos of my own workouts or sharing personal struggles.
  • Asking guests to drop a line or two in the group as motivation.
  • Delegating team captains or leaders in the group to lead conversations in the message boxes.

I require daily accountability and post check-ins on each day’s workouts as part of the points system we use in team competitions, which drives others to get their workouts completed. I keep workouts simple and repetitive for 4-5 weeks, and include videos to follow along with. I record workouts we do as a team at every session and load those videos to YouTube so I don’t have to spend a lot of extra time making videos for athletes to follow during remote coaching times.

The main way I have learned to execute an effective remote coaching program is to try to maintain as much of the culture of in-person training as you can via an online community, says @SheStrength. Share on X

Freelap USA: You also work with clients who have special needs or who have suffered a serious injury. For those athletes who may not have clearly defined fitness or performance goals, what are the first steps for creating motivation and buy-in, and how do you individualize your programming to meet their needs?

Anna Woods: I have worked with athletes with special needs for 14 years and I have to say every client I work with is motivated differently—so that is a hard question to answer, because each client has his or her own motivations and needs.

In general, my clients who use wheelchairs or are non-ambulatory have goals that include maintaining independence for as long as possible. This includes being able to transfer themselves out of the wheelchair, having strength to drive a car, maintaining arm strength to manually wheel across terrain or up and down ramps in public places. Many also want to keep their weight down and continue to fit in their wheelchairs. Most people in wheelchairs only receive a new wheelchair every 5 years, so maintaining weight and strength is important to keep good posture in a chair over a 5-year span.

In general, my clients who use wheelchairs or are non-ambulatory have goals that include maintaining independence for as long as possible, says @SheStrength. Share on X

More ambulatory clients, such as people with ASD, Down syndrome, or other diagnoses have motivations to look like certain celebrities, to fit in certain clothes, or to look good in front of others. Their goals are similar to any other clients. Those that compete in Special Olympics or other athletic sports also want to get faster, stronger, and more athletic for their events—and parents and caregivers want the athlete to avoid injury as much as possible, so strength training and conditioning are of great assistance. The buy-in usually must be created with the parent or caregiver of a person with special needs, because so much of the life of a person with special needs is avoiding injury, disease, or pain—so the idea of weight training can be scary for most.

Great first steps to create buy-in include having a sit-down meeting to go over goals, address concerns, and understand triggers/struggles, fears, or anxiety the parent or client may have. Secondly, the coach should be prepared to demonstrate a few exercises to ease the concern of all involved. Positive reinforcement through reward charts, non-food reward goal lists, and daily, weekly, and monthly challenges help the person with special needs stay motivated.

Most athletes with special needs are underestimated in their abilities and strength, when they have more grit and determination than the most talented athletes in the program. Many can do similar movements as the other athletes in the group, they just may need slower directions and a visual cue to follow along with. Those in wheelchairs may need to use PVC pipes instead of barbells or may need hand attachments for bands because of limited grip strength, but in general, the programming is the same. For conditioning, I will have my non-ambulatory clients be timers or rep counters for those conditioning if it’s a movement they cannot complete, so they are still engaged and a part of the group.


Video 6. Air Assault Bike adapted exercise.

Motivational Chart
Image 3. A sample motivational chart we use with some clients with developmental delays, to help increase participation and retention. All rewards are non-food related.

Communication is also different for people with special needs. For some diagnoses, like ASD or Down Syndrome—time is typically not a motivating factor to increased effort, so goals that are task-based seem to be more effective. Instead of saying do as many reps as you can in 30 seconds, tell the client they have to do 20 reps before they get to put the dumbbells down. Or for walking/running/rolling exercises, place manipulatives such as cones on the floor for each station or targeted distance instead of using time descriptions.

Since you’re here…
…we have a small favor to ask. More people are reading SimpliFaster than ever, and each week we bring you compelling content from coaches, sport scientists, and physiotherapists who are devoted to building better athletes. Please take a moment to share the articles on social media, engage the authors with questions and comments below, and link to articles when appropriate if you have a blog or participate on forums of related topics. — SF


PlayerMaker Sensors

Getting Started with the PlayerMaker Uno

Blog| ByAdam Wingate

PlayerMaker Sensors

Wearable electronic devices have inundated the consumer market for over a decade, with numerous products available for the sports performance enthusiast. Millions of FitBits have been purchased since 2014, conferring metrics for heart rate, movement, and sleep quality; meanwhile, the recovery monitor WHOOP is popular within the CrossFit community to guide training readiness via heart rate variability and sleep analysis.

I view these tools as conveying “metadata” about an athlete; by which I mean a measure of overall physical condition based upon heuristics tied to the activity of the heart (which Soviet sports scientists studied and implemented decades ago). Another category of wearables, either situated on the body or on the barbell, includes velocity sensors for which the present moment is a golden age of affordable options with excellent data fidelity. The purpose of this review, however, is to discuss a third type of sensor designed to provide highly specific metrics for a single sport: the PlayerMaker Uno, a wearable soccer tracker.

I provide private strength and conditioning services to youth athletes who compete in a variety of sports including wrestling, American football, soccer, and track. It’s a unique environment in that my current group has remained largely intact for the past three years, thus allowing me the chance to closely monitor and plan their training long term. I rely on equipment such as force plates and contact grids to collect data on the effectiveness of my methods, and while we already use sensors for sprinting, jumping, and lifting, I simply wasn’t aware of tools to measure performance on the pitch. Therefore, when the opportunity arose to try out the Uno, I immediately took it.

Unboxing

If you have purchased a new phone within the last 10 years, you will already be familiar with the packaging of the PlayerMaker. Sleek and compartmentalized, even without a quick start guide you would find yourself quickly getting started.

PlayerMaker Unboxing
Image 1. The packaging for the Uno is sleek and compact.

The two devices, one for each foot, are housed in a flip-top charging case in the same style as popular wireless earbuds today. Attach the supplied USB-C cable to the case to charge the sensors for a few hours (the case itself will not charge the sensors when removed from an electrical connection). Once the case lights are orange, the devices are ready for pairing via Bluetooth.

The App

The user interface is well designed, nice to look at, and easy to navigate. The only drawback is that Android devices are not supported at this time, but the company says that will change later this year. To ensure the connection is made to the appropriate sensors, the app will display the last four digits of the MAC address of each device, and those characters should match what is on the respective label of each: the blue sensor is for the left, and the red is for the right.

There is the option to select the left, right, or both. During the connection process, any available updates will be downloaded and installed.

The PlayerMaker Uno user interface is well designed, nice to look at, and easy to navigate. Share on X

I encountered one issue during connection that I can see being a common one for new users: once the sensors have been associated with an account, in order for a different account to use them, the sensors must first be deleted from the original account. The troubleshooting guide on the PlayerMaker website describes this exact scenario and the resolution, which I discovered in about 10 seconds of searching. That experience left me very impressed with the company’s troubleshooting guide.

An additional consideration is the data itself and who has access. PlayerMaker provides the option to automatically email activity reports to user-specified addresses. In addition, control over viewing and editing activities can be restricted to the player only or to the coaching staff. These features enable a variety of workflows whereby the player can have as much or as little involvement in the analysis of their stats as they would like.

Field Test

The workflow is simple and intuitive: each time the sensors are removed from the case, inserted into the straps, and attached to the cleats a new session will be recorded. Once they are returned to the case, the app will receive data about the most recent session. All historical data is automatically saved for you and available for viewing so long as your internet connection is active.

All historical data is automatically saved for you and available for viewing so long as your internet connection is active. Share on X

At this point it’s important to cover a couple of details that were not apparent when I began. First, I ran a quick 100m (well, not quick, but slow) to ensure that everything worked as intended. When I attempted to download the data, the app informed me that the minimum distance tracked is 300m. Ok, no problem, I ran 400m and repeated the download: this time I found out there’s a minimum time requirement for activity tracking of 10 minutes. This was a little annoying considering that the Activities menu could easily display the requirements for creating your first activity. On the other hand, it’s also entirely reasonable to expect that anyone practicing or playing soccer would meet the minimum requirements.

The elastic bands housing each device are of course suitable for a range of cleat sizes. During purchasing, you have the option to select:

  • Medium (3.5-8.5 Men’s US/3.5-9.0 Women’s US)
  • Large (9-13 Men’s US/9.5-12 Women’s US)

My testing included men’s sizes 9 to 13 without any issues. The sensors can be inserted before or after the strap is wrapped over the cleat, which makes removal and insertion of the sensor a separate step from adding or removing the strap. This is a smart and time-saving design feature because it is likely the strap would always stay on the cleat, and the sensor would be swapped in and out for practice and games. For those who use different cleats for training versus competition, it would be worthwhile to purchase additional straps.

Metrics

A variety of metrics are stored for your review. I won’t cover all of them here, but I want to highlight a few of the more salient. It’s also a good time to mention that PlayerMaker offers a team-based kit called Squad that gives greater control over monitoring and data collection than the Uno. With that in mind, if there is an option the Uno doesn’t support, it may be that Squad does.

PlayerMaker also offers a team-based kit called Squad that gives greater control over monitoring and data collection than the Uno. Share on X
PlayerMaker Metrics
Image 1. The user interface for the Uno is intuitive and informative, presenting many of the most useful measurements in one location.
  1. Distance Covered. To accurately assess the weekly physical demands from training and competition it would be valuable to know just how much running volume an athlete accumulates. We care about plyometric touches, strength training volume and intensity, the velocity of power movements, the volume and intensity of sprints, yet we assume the training load of a match is some mixture of walking, running, and sprinting for 90 minutes. What is accomplished within that time can vary considerably—perhaps not in the Premier League, where the action is relentless, but in your local club or high school I assume most players could not quantify their aerobic output in an absolute sense (e.g., 4km, 8km, 12km) or the proportion dedicated to sprinting.
  2. Sprint Distance. As a helpful companion to the distance metric, this tracks the portion of the Distance Covered metric that was run at a speed of 5.5 m/s or higher. The ratio of Sprint Distance to Distance Covered could be used to gauge the intensity of the match; the closer to 1, the greater the proportion of time spent moving at higher speeds.
  3. Work Rate. As it turns out, the application already tracks a metric called Work Rate, which is the ratio of the Distance Covered divided by the time of the activity. I give a lot of credit to the designers for providing exactly the information that athletes would most want; it’s very reassuring when the data I wish for is actually already there.
  4. Maximum Kicking Velocity. As with all ball-related measures, this information is available separately for the left and right foot. Unless you are Son Heung-Min, it is likely that you have a non-trivial difference between your dominant and non-dominant legs. The larger the discrepancy between the two, the greater the benefit of a training intervention to improve the weaker leg. The same rationale can be applied to touches and releases (passes), both of which are recorded for each side.
Unless you are Son Heung-Min, it is likely that you have a non-trivial difference between your dominant and non-dominant legs. Share on X

The sensors themselves are inertial measurement units (IMUs). To better understand what data they generate, I reached out to PlayerMaker and they responded helpfully. Because it can be distinguished when the foot is in the air or on the ground, the flight and ground contact times for each leg are known and therefore the stride length can be calculated. From here it is easy to begin speculating on novel applications beyond soccer.

Applying the Data

Keep in mind that all metrics would be expected to demonstrate improvement over time, especially if starting with younger ages. There is perhaps a decreased need for monitoring a more developed player, which is why I would begin using this sensor with players who are old enough to manage the application but also young enough to benefit from and be motivated by the results.

The information obtained from any sensor package is only as valuable as the efficacy of the decisions that are made with that information. Having more and more data does not necessarily increase the quality of decisions, but not having it can certainly harm them. For instance, there is an overwhelming amount of data published daily on the stock market, which is useless on its own and must be interpreted by an analyst or software algorithm that will decide what to do.

Having more and more data does not necessarily increase the quality of decisions, but not having it can certainly harm them. Share on X

Absent data, you can only make guesses or copy the actions you see other people taking; on the other hand, relevant data might make you a cryptocurrency millionaire or at least help your athletes perform better. Furthermore, information, in a technical sense, relates to those facts that are not already known. If the PlayerMaker reveals that a striker favors their dominant leg, this is unlikely to convey anything novel to the player or the coach. However, if it is shown that the kicking velocity of the non-dominant leg is increasing over time, that may justify whatever training has been assigned to accomplish that outcome.

Rapid-Fire Athlete Q&A

The following is a brief exchange with one of my athletes, Pavan Nawbatt of the Santa Clara Sporting ‘05 boys team, part of the Elite Clubs National League (ECNL). I asked him to try out the PlayerMaker and send me some feedback.

Pavan Soccer
Image 3. Athletes like Pavan Nawbatt may find the Uno to be useful for their athletic development.

Me: Is there an issue you think the PlayerMaker could help you with?

Pavan: The percentage of left-right usage is important. I favor my right, but the app showed the ratio was higher than I expected.

Me: Do you feel you have the ability to use the information on your own?

Pavan: Absolutely—the reports are straightforward and easy to understand.

Me: Did the app tell you anything you did not already know?

Pavan: Yes, the maximum velocity of my shots.

Me: Is there anything you wish the app could tell you that it doesn’t?

Pavan: Nothing I can think of.

Me: Do you think this device would be more useful for you today or when you were younger?

Pavan: Definitely now because I understand the data, the app, and what to do with the results.

Final Recommendations

Given that a high level of soccer performance is achievable without PlayerMaker, it is certainly the case that such a device is not required to improve performance. What is less clear is the degree to which a youth soccer program with far fewer resources than a professional organization might benefit from athlete monitoring. Moreover, empowering individual players to measure and monitor their own outcomes is appealing both from a technological and a self-determination standpoint. For $166.83 (shipping included), the distance and speed metrics alone are worth it.

Empowering individual players to measure and monitor their own outcomes is appealing both from a technological and a self-determination standpoint. Share on X

Wrist-based devices such as the Apple Watch, Fitbit, or WHOOP would almost certainly be disallowed by an attentive referee during a match; for the same reason, such devices pose a risk to teammates during training and should be avoided. With the PlayerMaker largely out of the way on the outside of the ankle, this is the best possible location for safety and to measure stride and striking data. Indeed, PlayerMaker informed me that their device has been accepted into the FIFA Innovation Program as the first instance of wearable technology.

Anything that reveals new dimensions to an otherwise routine activity has the potential to regenerate curiosity and commitment, especially for a player who may feel stuck. In a perfect world, every coach has the time and ability to develop every player under their care to the best version possible; in reality, however, we mostly do the best we can with the time and knowledge available to us. No one is more responsible for a player’s development than the player themselves, so I like the idea of putting tools into the hands of the person most interested in their own success.

No one is more responsible for a player’s development than the player themselves. Share on X

While I would not anticipate radical changes from the addition of any of the popular wearables available today, sports performance is about the accumulation of incremental improvements over time. To that end, one application of the distance tracking feature I envision is a more accurate calculation of caloric needs based upon the actual effort expended. I’m a firm believer that you can’t improve what you don’t measure, so it’s exciting to see a consumer-level device ready for those who want to take another step forward.

Since you’re here…
…we have a small favor to ask. More people are reading SimpliFaster than ever, and each week we bring you compelling content from coaches, sport scientists, and physiotherapists who are devoted to building better athletes. Please take a moment to share the articles on social media, engage the authors with questions and comments below, and link to articles when appropriate if you have a blog or participate on forums of related topics. — SF

Golf Club Head Slow Mo

The Science and Efficacy of Nondominant-Side Swings for Club Head Velocity

Blog| ByTyler Standifird

Golf Club Head Slow Mo

Within the last few years, golf club head and ball speed have gained large amounts of attention. Recently, Bryson Dechambeau attempted to drive a par 5 at the Bay Hill Invitational, achieving 194 mph ball speed; meanwhile, many other tour pros are pushing the envelope on driving distance.

Evidence suggests that distance is not only about viral social media videos, but also related to performance. Golfweek published data in 2018 and reported that for the 18 players who had a scoring average of less than 70, average driving distance was 302.57 yards—those with a scoring average above 70, however, averaged around 290 yards off the tee.1

Evidence suggests that distance is not only about viral social media videos, but also related to performance, says @StandifirdTyler. Share on X

Clearly distance is an advantage at the highest levels. But what about the amateur game? In their 2020 distance report, with over 26 million shots, Arccos notes that “data suggests there’s a strong correlation between distance and handicap. Better players hit it farther across all age brackets. The best players are typically around 60 yards longer than the highest handicap group, and while the rates of decline are similar, better players are most typically longer players.” 2

Handicap Drive
Table: Evidence suggests that the lower your handicap, the farther your average driving distance.

In the world of competitive golf, physical training is now a must for success. Many top players in the world are traveling with teams of experts to help them optimize their training, swing mechanics, and other aspects to perform at the highest level. A large part of this is training for greater driving distance.

View this post on Instagram

A post shared by TPI (@mytpi)


Video 1. Jon Rahm performs power training. (Video Credit: Spencer Tatum)

These players, however, have nearly unlimited funds and golf is their full-time job.

Where does that leave the amateur golfer who is already struggling to find time in a week to play a round or practice? How do they find the time to do advanced power and strength training in addition to the time commitment of golf? Many of these golfers only have a small amount of time each week to dedicate to their training, so what should they be doing with their limited options?

Overspeed for Golf

Due to the limitations mentioned above, training programs that are shorter in duration and easy to do at home are becoming commonplace in many strength training situations. Golf is no exception to this rule. With the connection between club speed, ball speed, and distance with regards to golf performance at every level, targeting a golfer’s ability to improve these components is essential. Consequently, overspeed training has become very popular in the last five years.

Training programs that are shorter in duration and easy to do at home are becoming commonplace in many strength training situations, says @StandifirdTyler. Share on X

Basically, overspeed training means making the body move faster during a known movement to reset the normal neuromuscular reaction speed of the body. This method is commonly used in track and field sports, baseball, and now golf. In golf, overspeed methods involve using specifically weighted clubs swung at various velocities during specified training regimens.

Ideally, golfers would be able to do a little bit of everything; when given the choice, however, the benefits of overspeed training are clear and can help golfers maximize the limited time they have while also getting incredible results.

Top coaches are stressing the importance of learning to swing fast both as an adult and as a junior based on these benefits. The Titleist Performance Institute (TPI), the world leader in the certification of golf fitness professionals, has been at the forefront of the speed movement in golf. Amongst many areas of golf fitness, TPI has demonstrated a high success rate in developing champion golfers and teaching the skills necessary for speed creation. Their teachings involve the concepts of overload vs. overspeed training, athletic windows of opportunity, muscular loading, and The Big Break Theory.

The Big Break Theory suggests that the longest hitters in the world seem to have a history of speed training in the opposite direction. These players would train the left side of the body if they were a right-handed golfer, and vice versa. It is important to note that this theory focuses on velocity training on the opposite side and not solely strength training on the opposite side. The theory is that an athlete will only accelerate to the point of which their body knows it can safely decelerate and stabilize. Therefore, the stronger and faster the decelerators are, the faster one can develop their ability to accelerate.

The Big Break Theory suggests that the longest hitters in the world seem to have a history of speed training in the opposite direction, says @StandifirdTyler. Share on X

While this theory can be qualitatively supported by looking at those individuals who utilize this type of training to their benefit, pinpointing the exact modality of improvement or injury prevention that may result is not as clear. The purpose of this article is to explore some of the research that may help bring clarity to the Big Break Theory of opposite side velocity and power training, while also sharing some initial findings in a lab measuring forces after a training protocol focusing on high velocity dominant and nondominant side training.

1. The Trunk

The trunk and core play a key role in the transfer of energy during a variety of rotational hitting and throwing sports. Training the trunk to provide stability as well as power throughout rotational movements appears to be a key component of any speed-type training program. Golf-specific training programs should utilize the core in a variety of movements and contraction types to achieve the stability and movement needed to transfer energy throughout a swing.

Stuart McGill and his colleagues provided an article in 2003 related to the need of muscle activations to assure stability in the lumbar spine.3 They suggest that:

The collection of works point to the notion that stability results from highly coordinated muscle activation patterns involving many muscles and that recruitment pattern must continually change depending on the task.

McGill did suggest that, most often, the rapid increase in joint stiffness suggests that large muscle forces are rarely required to ensure sufficient stability. Furthermore, the suggestion is that athletes must be able to maintain sufficient stability in all activities, with low but continuous muscle activation. This suggests that higher velocity training at low forces may be a wonderful way to improve the functionality of this core musculature. In fact, the authors suggest that:

Any exercise that grooves motor patterns that ensure a stable spine, through repetition, constitutes a stabilization exercise.

One may argue that the golf swing is not so much about stability as it is about the movement of various joints at the correct timing and magnitude. These authors mention that stability is a moving target and continually changes as a function of the torques needed to support postures, and the necessary stiffness required in anticipation of needing to move quickly. This statement is clearly one that supports the need for the intricate ability of the trunk during the golf swing.

One may argue that the golf swing is not so much about stability as it is about the movement of various joints at the correct timing and magnitude, says @StandifirdTyler. Share on X

The question then becomes: how does one train the trunk to enhance these traits if they are so imperative to the golf swing?

A lot of research has been done on this topic related to baseball, which can provide some insights to the world of golf training. Baseball, like golf, is filled with athletes who spend much of their time rotating to one side of the body. Not surprisingly, core and trunk musculature has been shown to become stronger on one side compared to the other in these athletes. Glen Fleisig has spent his lifetime studying baseball throwing and hitting as a way to understand performance and injury risk. When he discusses the role of the trunk, he is very specific about the need for opposite side training for these athletes.4

Even though trunk rotation is asymmetric in baseball players, core training programs for trunk strength and flexibility always address activities in both directions of movement, performing the same exercises in the counterclockwise and clockwise directions. The authors of this study support this practice to optimize the athlete’s core stability. Overdevelopment of musculature in one direction will have increased unopposed torsional stress on the spine.

Dr. Fleisig clearly suggests that nondominant training is important to these unidirectional athletes and that they need to spend time doing rotational movements to the opposite side for the trunk to not be overdeveloped in one region. While there are many ways to accomplish this in a gym setting under the direction of a trainer, one simple and effective means is for golfers to spend time swinging the golf club to the opposite side.

2. Nondominant Training for Performance Improvements

There is some research suggesting the way in which our body might transfer training effects from one side to the other. A few studies will be presented here.

The first study followed two groups of competitive soccer players: one that trained with the non-preferred leg and one that trained only the preferred leg. At the end of the testing, the group who experienced the nondominant training had improvements in all tests, while the control group did not improve.5

The authors present a few narratives as to why these results were so strong and consistent among the nondominant training group. One suggestion was that there was more attentional focus placed on the nondominant training, potentially resulting in more motor learning because of the dynamic systems theory. They further argue that the learner of the skill is better equipped to pick up more relevant information from their environment during the task when they can use both the dominant and nondominant limb.

The learner of the skill is better equipped to pick up more relevant information from their environment during the task when they can use both the dominant and nondominant limb, says @StandifirdTyler. Share on X

While it is difficult to pick out the exact mechanism of the improvement, the nondominant training leads to improvements in the dominant side. Thus, the nondominant swings may be a mechanism of the golfer learning the skill and feeling the proper movements and sequencing of the golf swing for successful shot making, similar to these soccer players. This is especially true when considering the learning of a higher velocity swing. Maximizing the motor learning component with nondominant swings, as seen in the soccer study, is an important piece of the speed training puzzle.

Another golf-specific example is a study performed in 2016, which compared a variety of training methods for golfers to increase driving distance. They reported that the group that trained both nondominant trunk and arm musculature improved more than the groups who did nothing, or who just trained the core.6 This shows another benefit for nondominant training to improve driving distance.

3. Is Asymmetry Important?

Some argue that those who need a stronger side for the performance of their specific sport skill would benefit from that side being stronger during performance; others, however, suggest that though this may be true, reaching high levels of asymmetry may increase risk for injury.

So, what is an appropriate level of asymmetry?

That is the golden question, and difficult to answer. Matt Jordan, the director for sports performance at the Canadian Sports Institute, suggests that we should be potentially worried when that asymmetry gets above a 10-5% value in athletes during various jumping/landing tasks. Others have also supported a similar number of asymmetry greater than 15% being a potential risk factor for injury.7

Research has shown conflicting results, but studies have shown an increase in injury risk with elevated levels of asymmetry. Edouard showed that handball players with imbalanced shoulder strength had an elevated risk of developing injuries.8 Another study in footballers showed that those who were injured scored much higher on tests of asymmetry (61) than their non-injured counterparts (30). 9

Studies have shown an increase in injury risk with elevated levels of asymmetry, says @StandifirdTyler. Share on X

At the trunk—an important piece of the golf swing discussed earlier—research has shown an increased risk of low back pain found in those with an obliquus internus asymmetry. There was an average risk increase of almost 20 (2.4–167.9) and a linear relationship between length of time of low back pain and the level of asymmetry (r=0.75). 10

Finally, a study on the ability of professional cricket players to accelerate and change directions (a common need in a golf swing), were inhibited by asymmetry. The cricket players could not accelerate and change directions as effectively when asymmetry existed.11 One could argue that asymmetry should not only be present in cricket athletes who throw and hit with one side of the body but should be encouraged for performance improvements. Instead, this asymmetry was a limiting factor of their speed and accelerations in movement. Golf would be much more like cricket in terms of the movement sequencing of hitting and throwing from one side—as such, speed and accelerations in golfers might also be influenced by asymmetry.

It is also worth re-visiting the work done by Dr. Fleisig, which suggested that when asymmetry is present in baseball swings and throws, torsional stress on the spine will increase in the presence of that asymmetry. Thus, golfers would benefit from a training program that included both directions of rotation for strength and velocity training.

Golfers would benefit from a training program that included both directions of rotation for strength and velocity training, says @StandifirdTyler. Share on X

4. Muscle Activation and Contraction Types

Most movements in sport require all different types of muscle contractions: concentric, isometric, and eccentric. When training athletes, many coaches will utilize the triphasic approach and incorporate all these contraction types during a training program. It is unlikely that expert strength and conditioning coaches would only target the muscles in the exact way used during the movement. Good training will utilize all different phases of muscle contractions, even going as far as focusing periodization on each of the different phases individually. Many have seen great benefit from this approach to training.

Thinking back to our recreational golfer already in a time crunch, how would they go about training this way?

There are many successful ways to train in these triphasic methods, but could it be possible that a nondominant swing or throw or backwards running might be a way an athlete with limited time could incorporate some triphasic training into their fitness routine? While not the only or best way, and not the methods typically used to create complete symmetry between sides, it can be a way to utilize different muscle contractions during their power and velocity training. Considering the recreational golfer, there might not be any other time to stress the neuromuscular system, and nondominant swings might help get some varied training into their routine.

One plausible explanation for some of these potential benefits from nondominant triphasic training might be the increases in EMG activity during concentric contractions compared to eccentric.12 Once again, as we think to our recreational golfer, if the goal of speed training is to really charge the neuromuscular system, incorporating concentric contractions would stand to increase the activity of the muscles utilized in the task. While there are several ways this could be done, utilizing a left-handed golf swing might be a simple way to generate increased muscle activity for a right-handed golfer.

Utilizing a left-handed golf swing might be a simple way to generate increased muscle activity for a right-handed golfer, says @StandifirdTyler. Share on X

5. The Feel of Swinging Fast

If you are at all familiar with the world of golf coaching, the idea of drills and swing aids to help a golfer “feel” a movement pattern is commonplace. Francesco Molinari at the 2019 Masters used what looked like a cross between a countermovement jump and a golf swing. Alex Noren and Justin Rose are two more examples of using an extreme swing rehearsal drill to achieve a position, helping to get in the correct position on the downswing and through impact.

The feel of the golf swing is a crucial part of improvements in mechanics, sequencing, transition of forces, hand position, etc. To this end, I stumbled upon something in a recent data collection in my lab that made me think of this in the sense of dominant and nondominant swing training.

The feel of the golf swing is a crucial part of improvements in mechanics, sequencing, transition of forces, hand position, etc., says @StandifirdTyler. Share on X

A new, yet athletic, golfer came into my lab. I included him in a study on the use of SuperSpeed training clubs. SuperSpeed training clubs are three different weighted clubs designed to help golfers increase swing velocity. Two of the clubs weigh less than an average golf driver and one is heavier. Subjects swing these clubs at max velocities through a series of drills and training protocols. In addition to golf, SuperSpeed also has weighted bats used similarly for baseball. I started by having the golfer hit some balls on 3D force plates before going through the SuperSpeed Level 1 protocol.

Club Speed graph
Figure 1. Vertical ground reaction force of the first driver swing prior to any training with SuperSpeed clubs (light blue=club vertical downswing, red=club parallel downswing, dark blue=impact).

For golfers, when looking at timing of vertical ground reaction, the peak force should occur prior to impact more in the range of club vertical or club parallel on the downswing. This ensures the golfer has transferred their force first through the ground and then up the kinetic chain through the rest of the body and to the club. Looking at his pre-training data, it was clear that the timing of his lead leg vertical force was maximized right around impact, which is too late according to much of the research that would look at the kinetic sequencing of the ground reaction forces.

SuperSpeed Swing
Figure 2. First swing with the SuperSpeed club (light blue=club vertical downswing, red=club parallel downswing, dark blue=impact).

After going through a warm-up, he took his first swings with the SuperSpeed clubs. On the first swing, his kinetic sequencing was improved drastically. The peak vertical ground reaction force occurred between club parallel and impact with the ball.

2nd SuperSpeed Swing
Figure 3. Second swing with the SuperSpeed club (light blue=club vertical downswing, red=club parallel downswing, dark blue=impact).

His second swing saw an even greater improvement as the peak vertical ground reaction force was almost directly in line with the club parallel on the downswing. Additionally, his maximum force had increased by nearly 25 percent. This resulted in a kinetic sequence that is much more indicative of speed and proper ball striking. This continued throughout all the swings with the SuperSpeed clubs.

SupersSpeed Protocol
Figure 4. Driver swing initially after the Level 1 protocol of 36 swings with the SuperSpeed clubs (light blue=club vertical downswing, red=club parallel downswing, dark blue=impact).

The final test was to see what kind of transfer would occur when the golfer went back to swinging his own driver. Figure 4 shows those results, and when compared to Figure 1, shows a peak vertical force that was 32% greater than the pre-training and a peak that is occurring at or around club parallel instead of later than impact; a drastic improvement in both magnitude and timing of force.

After 6 weeks of the Level 1 training (including both dominant and nondominant swings), we observed:

  • His kinetic sequencing was improved.
  • His maximum force had increased.
  • His driver swing speed had increased nearly 15 mph.

These outcomes can be attributed to neuromuscular training, but I also think it should be noted that this type of swinging can be a type of “feel” drill for a golfer: a simple, quick, and effective way to help golfers feel what it is to move that force forward to the lead leg.

There are numerous ways to do this, evidenced by various drills presented on golf forums and used by coaches. In this case, I did not provide any cues but instead just handed him the club and he was able to improve his kinetic sequencing in a matter of moments. The practice of swinging both dominant and nondominant with SuperSpeed is one way that a golfer can utilize a feel drill while swinging a club to improve vertical force production. This golfer did nothing more than make approximately 100 swings a week, at a time commitment of about 45 minutes for the entire week. This was 100 feel drills of getting that force forward onto the front leg—not 1000 drills, or 1000 swings at maximum velocity, just 100.

What Does All This Mean?

It is important to note that, first and foremost, club head speed and training for those increases does improve enjoyment and success of golfers of a variety of skill levels. With that as the main goal, it is essential to know what the most safe and effective methods of training club speed are. As mentioned previously, in an ideal world all golfers would utilize speed and power training as a part of all of their training. Unfortunately, that is not often an option for a vast majority of recreational golfers—they must choose how to spend their limited time, and when left with one choice, they need to choose swinging fast and safe.

Club head speed and training for those increases does improve enjoyment and success of golfers of a variety of skill levels, says @StandifirdTyler. Share on X

As such, simple plans of swinging clubs at high rates of velocity, when carried out correctly, provide a means to train club speed for those who do not have the time to devote to an entire power-building plan. The suggestions in this piece point out the importance of The Big Break Theory as outlined by Dr. Tom House and TPI. The research presented here offers some evidence as to why nondominant training should be incorporated as part of a power and velocity training protocol. This can look like single leg and arm exercise in the gym, plyometric-based training focused on single limbs, or it can be as simple as swinging a golf club on the nondominant side.

While training for club head velocity, remember that to swing fast you must swing fast. Also remember the importance of your Nondominant side as a potential means of reducing injury risk and seeing larger improvements in your club head speed.

Since you’re here…
…we have a small favor to ask. More people are reading SimpliFaster than ever, and each week we bring you compelling content from coaches, sport scientists, and physiotherapists who are devoted to building better athletes. Please take a moment to share the articles on social media, engage the authors with questions and comments below, and link to articles when appropriate if you have a blog or participate on forums of related topics. — SF


References

1. Dusek, D. “By the numbers: Distance off the tee really does pay dividends.” Golfweek. 2018.

2. 26 Million Golf Drives Analyzed: Has Driving Distance Increased? Arccos. 2020.

3. McGill, S. M., Grenier, S., Kavcic, N., and Cholewicki, J. “Coordination of muscle activity to assure stability of the lumbar spine.” Journal of Electromyography and Kinesiology. 2003;13(4):353-359.

4. Kavcic, N., Grenier, S., and McGill, S.M. “Quantifying tissue loads and spine stability while performing common stabilization exercises, submitted for publication.” Spine. 2004;29(20):2319-2329.

5. Fleisig, G. S., Hsu, W. K., Fortenbaugh, D., Cordover, A., and Press, J. M. “Trunk axial rotation in baseball pitching and batting.” Sports biomechanics. 2013;12(4):324-333.

6. Haaland, E., and Hoff, J. “Non‐dominant leg training improves the bilateral motor performance of soccer players.” Scandinavian Journal of Medicine and Science in Sports. 2003;13(3):179-184.

7. Sung, D. J., Park, S. J., Kim, S., Kwon, M. S., and Lim, Y. T. “Effects of core and Nondominant arm strength training on drive distance in elite golfers.” Journal of Sport and Health Science. 2016;5(2):219-225.

8. Impellizzeri, F. M., Rampinini, E., Maffiuletti, N., and Marcora, S. M. “A vertical jump force test for assessing bilateral strength asymmetry in athletes.” Medicine and Science in Sports and Exercise. 2007;39(11):2044-2050.

9. Edouard, P., Degache, F., Oullion, R., Plessis, J. Y., Gleizes-Cervera, S., and Calmels, P. “Shoulder strength imbalances as injury risk in handball.” International Journal of Sports Medicine. 2013;34(07):654-660.

10. Yeung, J., Cleves, A., Griffiths, H., and Nokes, L. “Mobility, proprioception, strength and FMS as predictors of injury in professional footballers.” BMJ Open Sport and Exercise Medicine. 2016;2(1):e000134.

11. Linek, P., Noormohammadpour, P., Mansournia, M. A., Wolny, T., and Sikora, D. “Morphological changes of the lateral abdominal muscles in adolescent soccer players with low back pain: A prospective cohort study. Journal of Sport and Health Science.” 2020;9(6):614-619.

12. Bishop, C., Read, P., Brazier, J., et al. Effects of inter-limb asymmetries on acceleration and change of direction speed: a between-sport comparison of professional soccer and cricket athletes. Journal of Strength and Conditioning Research. 2019.

13. Gabriel, D. A., Kamen, G., and Frost, G. “Neural adaptations to resistive exercise.” Sports Medicine. 2006;36(2):133-149.

Elite football training

Can You Help the Best Get Better?

Blog| ByChris Korfist

Elite football training

What happens when, out of the blue, a top NFL athlete shows up at your door?

At first, it’s thrilling—your mind instantly races to images of fame and grandeur. Your picture could be in a blog or on YouTube, showing how you trained this NFL player to even greater success. Shortly after indulging this grand illusion, however, you realize that it could also go the wrong way.

What if the player doesn’t see any progress from the training and word gets out that you, in a word, suck? Or, worse yet, your training could lead to a costly injury. Coupled with those concerns, you start to question if he actually can get better. After all, this guy is in the NFL—shouldn’t he be at the pinnacle of his athletic ability? When all of these emotional thoughts pass, you realize it is time to do what you always do: solve the problem.

This was my situation.

How it Started (or, Why Are You Here?)

I’ve been training athletes for 30 years and have trained and worked with all levels of athletes, but there has always been a context as to why someone shows up at my door. Those reasons tend to range from direct recommendations and referrals to athletes who read my articles online to others who heard me on a podcast. With any new client, my usual process is to go through a formal assessment, which includes a video analysis looking for gait compensations and power leaks, as well as some basic data from the 1080 Sprint (including velocities and power outputs). Then, we create a plan of attack to get the athlete to their goal.

This time, it was different.

Chicago Bears wideout Thomas Ives had been working with me since his sophomore year in high school—we navigated through an issue with scoliosis and developed good numbers to get him to college, where he had a successful career at Colgate. From there, we built to a point where he put up such impressive NCAA numbers he ended up on the Bears. Thomas told me he was going to bring by a couple players who wanted to train…and next thing you know, he and two other guys walk up to my door: David Montgomery and Deshaunte Jones. David was just finishing his rookie season as the Bears’ running back, and Deshaunte had recently graduated from Iowa State, posting impressive stats as a wide receiver and hoping to land a roster spot in the NFL during the worst year to do so, thanks to COVID-19.

Formal assessment? Nope, they wanted to train, that day. I was going to have to improvise. I tried to stay within my protocol by asking the same question I ask everyone who shows up: Why are you here?

That’s an important question on many levels:

  1. It starts our journey together, and I can explain how I can help on that journey.
  2. I know what is important to them, so they feel like we are always working on what they feel is necessary.
  3. With high school athletes, when I require a parent present, I quickly find out if it is a parent’s will for them to be there or if they truly want to be there. (And if it is the former, I know our relationship will be a short one.)

In this case, both David and Deshaunte came right out and said they needed to be faster. Both were looking to improve their 40 times—the year before, David had dropped in the draft with a poor 40, and it was a stigma that he wasn’t very fast.

Easy enough, I figured. So, we went out, and I filmed all three in a run on my iPad using Coach’s Eye. The cue is to run from driveway to driveway, which is about 20 meters full speed. I shoot from both the side and the front. I can then show what I think could be improved and also what a good repetition looks like. I know that sprint mechanics come in all different styles, but there are certain markers that I look for.

I know that sprint mechanics come in all different styles, but there are certain markers that I look for, says @korfist. Share on X
Montgomery Assessment
Image 1. Chicago Bears running back David Montgomery in a sprint assessment.

With David, here is what I saw: an excessive push from his left leg toe-off (which is the point where his foot is about to come off the ground). His push brings his knee behind his butt, and the knee completely extends. The impact of the hard push tilts his pelvis, so his knee lift is not as high—this impacts his ability to wind up, punch the ground, and get more force on the initial impact of the ground (which is called tangential force). According to Ken Clark’s research, this is the key factor to running speed.

Montgomery RTO
Image 2. David Montgomery’s right side toe-off in the same assessment.

In the image above, some of David’s angles are better. But what I see is a straight leg and a low carriage of the swing leg. If we can get the foot to do more work than the knee, he will become more efficient by having more horizontal push. You can also see his torso slightly winding, which could be a compensation from a foot that doesn’t find its way through the whole process.

If we can get the foot to do more work than the knee, (the athlete) will become more efficient by having more horizontal push, says @korfist. Share on X

After our session, I watched David’s Combine 40 on YouTube—his hip tilt was more prevalent on his runs, which can really slow an athlete’s last 15 yards.

Training on the Fly

I like to use my ankle-rocker jump and data from the 1080, which gives me a good idea of how athletes deal with slack in their system. Do they jump and snap up in the air, or is there a bunch of movement to get to a point to jump? Do they throw their body into the air with their back, or do they drive with their legs? David was pretty good at the ankle-rocker jump, so we eliminated it from the menagerie of exercises.

Most importantly, the 1080 gives me a time for the 20-meter distance we are running (and I use 20 meters because my driveway goes up a hill after that mark). I also get average and max velocity, average and max power, and average and max force. With this digital data, I can track improvements. Additionally, I can also see if one leg is doing more than the other.

David’s first run at 1 kilogram of tension in the band (so the line doesn’t have so much slack) was:

  • 3.33 for 20 meters.
  • Peak velocity of 8.05 m/s and average speed of 6 m/s.
  • Peak power of 339 watts and an average of 192 watts.

Some of the traditional training methods like squats and power development were obsolete with David. As a high school athlete in Ohio, he was All-State in the shot, discus, and 4×100, so I knew he had power. I used my GymAware to measure bar speed metrics, and he was off the chart: In a single leg squat, he moved 300 pounds as fast as he moved 135.

In fact, I thought that if I made him stronger, it might slow him down. With his lower body power pushing as hard as it did, he may not have had the pelvic control to control his push. Sometimes, when the push is stronger than the ability to control the pelvis, this causes the pelvis to tilt—which would then push his leg farther back, and he would not have the time to bring his swing leg through and create an early contact. These factors led me to get rid of any weight room work in my plan.

On the other side of the spectrum, however, what if we made the unweighted limbs move faster? What would happen if I pulled him at supra-max speed with the 1080 Sprint? This would force him to turn over at a faster rate, and he wouldn’t have time to have a big push out back to destabilize his pelvis. And he would have to become more reactive in bringing the swing leg forward.

To accelerate this process, I started out using 1080 assistance to pull him over mini hurdles. Now, if he tried to push back he would hit a hurdle—this gave him a target, and no one likes to hit a hurdle. As I lengthened the distance, I increased the speed so the frequency would remain the same. To make it more difficult, I put thin mats in between hurdles to challenge his pattern and eventually added water bags.

He also worked out with Exogen sleeves on his calves. I do it a little different by just loading one leg: at supra-max velocity, if one leg is loaded and the other is free, it forces the unweighted limb to cycle faster. This design works really well (research on the concept will be published soon). When David’s pattern started to change, we went out to the street, and he would get towed for longer distances with the 1080.

I do it a little different by just loading one leg: at supra-max velocity, if one leg is loaded and the other is free, it forces the unweighted limb to cycle faster, says @korfist. Share on X

The drills I programmed along with his speed workouts were bent-knee prime times and the Frans Bosch single-leg runs. I use the bent-knee prime times to push the toe-off split. I use the single-leg runs to work on the leg that is in the air. To challenge the timing of the drills, we added overspeed and water bags as well.

Since we train twice a week, the other workout day was an acceleration day. This was our most competitive day because we tracked data via the 1080 for time, velocity, and power. As I said before, David has incredible power—the staff at 1080 couldn’t believe his numbers at the end of the summer.

His unweighted numbers, on the other hand, weren’t that great. The question became how can we transfer his force against weight to unresisted power? It was fun to go through different settings and see improvement, especially when we would go back down to the lowest setting on the 1080 and feel really fast. I liked making slight adjustments from a heavier to a lighter weight to see if he could keep the power that he had at the higher weight.

Just as important was assessing David’s power output in different situations. Power production in football isn’t as simple as an orange wire hanging off a comfy Spudz belt coming straight behind your hips. With some workouts, we connected the 1080 to his shoulders or his thighs to challenge his body to continue to move forward after contact was made. We also did diagonal runs, where he kept his shoulders and hips square as he ran diagonally in almost like a bounce after contact.

With some workouts, we connected the 1080 to (the athlete’s) shoulders or thighs to challenge his body to continue to move forward after contact was made, says @korfist. Share on X

Adding Variety

As a change-up to the direct force, I needed to have something like a water bag-type exercise to teach his body to self-organize. Since a start with a water bag doesn’t have quite the same impact as sprinting, I borrowed from Dan Fichter/Frans Bosch and created an unstable environment by connecting two jump stretch bands to a dowel with some eye hooks. The athlete holds the bar in front of their face and the coach hangs on from behind.

When the athlete accelerates, all of their foot imperfections will push in different directions, and their torso will have to compensate. Eventually, the body learns to use its feet better, regardless of the environment. We have had some of our biggest gains after implementing this in our workouts, and athletes will either bound or single-leg bound in this fashion.


Video 1. David Montgomery performing unstable push exercise with jump stretch bands and manual resistance.

Another change-up was doing an acceleration/resisted run from a vertical position. This requires a lot from the hamstrings. Additionally, sometimes a ball carrier gets stood up after contact and will need to learn how to accelerate from that vertical position.

David, Deshaunte, and Thomas all felt that the sensation of pulling mirrored how fatigue felt in a game, so as we got closer to the season, they really increased their volume. In some cases, we executed as many as 20 heavy pulls, since David wanted to be ready for a normal game load of 20 carries.

On our last night before they left for camp, we had a marathon workout. It was a beautiful July night, with minimal traffic on my street. They wanted to see the results of 2 1/2 months of training. Quickly, the trash talking started, and everyone wanted to end the summer as King of the Street. Deshaunte took five pulls to warm up and his numbers came on strong. By the end of the night, here are the numbers David produced:

  • His 20-meter time was 3.05, a decrease in time of .28.
  • Max velocity was 9.1 m/s with an average of 6.57 m/s. This was an improvement of 1.1 m/s in peak velocity and .57 m/s average.
  • Power output was peak 446 watts and an average of 220 watts. This was an improvement of 107 watts and 28 watts, respectively. That last number is very difficult to change.

For our year anniversary, we did a video to see the difference. I have the entire frame-by-frame analysis on trackfootballconsortium.com.

LTO Split
Image 3. One-year anniversary, before/after. The knee height is the biggest difference here, which again allows for a bigger T Force. David also has more of a shin angle change by using more of his forefoot and toe rocker.
RTO Split
Image 4. On this one, the knee height looks about the same but focus on his shin angle change. He is getting more horizontal propulsion, and his foot also seems to be loading more, like a spring.
Left Contact
Image 5. Here is the before/after of David’s left leg contact point. There is a huge difference between the two.

In image 5 above, on the left, David lands on the outside of his foot—which can work, but he won’t be able to produce force in the first portion of the contact (as Ken Clark often discusses). His contact will be longer, and he will need to produce force in the back half of his contact.

But I am concerned with the swing leg. It is what I call “late in the gait.” His swing leg is behind his stance leg. This creates a timing issue. His swing leg will never have the time to get the knee high enough to not land early. And, the increased knee height and limb speed will allow the leg to create greater tangential force.

Sprint Form
Image 6. In this last photo comparison, we can see the result of all of the factors that David and I worked to improve.

He has a slightly greater split, which will allow for greater T Force—but you can see his center of mass is much higher than before. This increased vertical force will allow for more to happen in the air, including faster limb speed.


Video 2. “Before”—David Montgomery sprinting in May 2020.


Video 3. “After”—David Montgomery sprinting in May 2021.

Since you’re here…
…we have a small favor to ask. More people are reading SimpliFaster than ever, and each week we bring you compelling content from coaches, sport scientists, and physiotherapists who are devoted to building better athletes. Please take a moment to share the articles on social media, engage the authors with questions and comments below, and link to articles when appropriate if you have a blog or participate on forums of related topics. — SF

Podcast promotional graphic featuring two speakers: Mark Hoover, Director of S&C at York HS, and Rich Burnett, Head S&C/Plyomat Creator at Greater Atlanta Christian. Text highlights a bonus episode recap of the 2021 NHS-SCA NatCon.

Bonus: Mark Hoover & Rich Burnett- NHSCCA Natcon Recap & Plyomat

Podcast| ByCody Hughes

Podcast promotional graphic featuring two speakers: Mark Hoover, Director of S&C at York HS, and Rich Burnett, Head S&C/Plyomat Creator at Greater Atlanta Christian. Text highlights a bonus episode recap of the 2021 NHS-SCA NatCon.


https://simplifaster.com/wp-content/uploads/2021/07/bonus-mark-hoover-rich-burnett-nhssca-2021-natcon-recap-the-plyomat.mp3

Cody sits down with Mark Hoover and recaps the experience they had at the 2021 NHSSCA National Conference in Minneapolis, Minnesota. This was the first time to get back in person for the organization and it was an awesome experience.

Key Points for the Conference Include:
– Multiple friendships
– Concentrated lecture and hands-on periods
– Partner Mini-Sessions where vendors display their products to everyone
– ALL THE FOOD
– Multi-Thousand dollar raffle give-away
– Prestigious Award Ceremony

Also, Cody sits down with Rich Burnett LIVE at the Simplifaster booth at the conference to discuss his new unbelievable product, the Plyomat.

Time Stamps
Mark Hoover: 0:00–48:14
Rich Burnett: 48:15-End

Connect with Cody, Mark, and Rich:

Cody’s Media:
Twitter/Instagram: @clh_strength

Mark’s Media:
Twitter: @YorkStrength17

Rich’s Media:
Instagram: @coachb89
Twitter: @CoachRichB
Website: www.plyomat.net

Flat Dumbbell Press

Using BTS Technology to Improve Exercise Prescription for Strength and Hypertrophy

Blog| ByMike Croskery

Flat Dumbbell Press

Anyone who has worked with athletes has observed how rare it is for them to get identical results from the exact same routine. Although trends may be similar within a group, there are inevitably some athletes who produce better results while others are stagnant or regress. Using the latest technological advancements in sport and exercise science gives us some insight into the variation from individual to individual in order to either capitalize on their strengths or try and improve areas that are holding them back.

Metabolic testing, such as expired gas analysis and blood lactate levels, helps to determine whole body energy demands—particularly for aerobic and anaerobic lactate events. Appropriately matched external performance measures, such as power, force, and speed assessments, are excellent for monitoring individual response from a training routine, validating a successful training phase, or monitoring recovery. Neuromuscular assessment by surface EMG (electromyography) helps to connect the dots between the neural response and the performance outcome during a training environment or competition.

This—EMG—is a key factor that I considered one of the missing links for finding appropriate individual exercise prescription.

(Bipolar surface) EMG is a key factor that I considered one of the missing links for finding appropriate individual exercise prescription. Share on X

With this goal in mind, finding the most appropriate system for my needs was no easy task. In the end, I invested in a wireless 8 EMG sensor system and inertial sensor (G-Sensor 2) from BTS Bioengineering. I chose BTS Bioengineering because:

  • They have been in the business of motion analysis for more than 25 years.
  • Their sensors have been validated and used in peer-reviewed scientific research.
  • The products have been used in a variety of medical, sport, and aerospace applications.

Although EMG has been very well researched over the decades (a quick Google Scholar search returns 27,600 articles for 2020 alone), and the technology and interpretation continue to be developed, I have found it is not as commonly applied as an assessment tool in a sport and fitness setting.

To keep it simple for the purpose of this article, I am referring to bipolar surface EMG and not fine wire or multiple-array EMG. Measuring and monitoring the EMG signal tells you several different characteristics of how the muscle is responding, including when the muscle is active (on or off), how much the muscle is active, and how the muscle’s activity is responding to movement and applied force. From these findings, you can extrapolate additional information, such as how that muscle behaves in relation to other muscles and whether or not the muscle is fatiguing.

My interest has always been in the field of muscle strength and hypertrophy, so the ability to finally “see” how a specific muscle responded to a stimulus was exciting.

Muscle Activation: Differences Between Individuals for the Same Exercise

The EMG signal is a measurement of the combined action potentials of the motor units immediately underneath the electrodes and to a certain depth within the muscle. This signal is a combination of the number of motor units, the size of the motor units, the firing rate (or rate coding), motor unit cycling in conditions such as fatigue, and to a certain extent the synchrony to which these motor units fire together.

The last factor is generally believed to not necessarily have a large impact on the signal in most submaximal contractions at moderate speeds. As the Henneman size principle on motor unit recruitment states that motor units recruit from smallest to largest, in the very simplest sense a larger EMG signal is believed to generally be caused by increased motor unit recruitment of progressively larger motor units up to around 80% to 85% of MVC in most muscles. However, all muscles do not behave exactly the same, and a motor unit that is further away from the electrode will give a smaller signal than the actual signal produced, along with changes in firing rate and synchrony that all can ultimately affect the measured signal.

FREEEMG Sensor BTS
Image 1. FREEEMG and G-Sensor.

To put it to the test, I examined a former bodybuilder, a current competitive powerlifter, and a recreational lifter on the flat dumbbell press. The latter I had worked with in the past—he had always struggled with chest development and pressing strength.

When comparing three different subjects with three different training histories, one might expect unique recruitment patterns throughout the exercise. The question is, could measuring these unique recruitment patterns bring to light areas where their technique could improve to maximize the effect of the exercise? The hypothesis is that by examining our recreational lifter’s muscle activation pattern against athletes who have had successful results in both strength and hypertrophy, we might gain more insight to help explain his consistent lack of results in this area. Although having athletes to compare results to is definitely a benefit, it is not always required. If the goal is to improve chest development, it would be desirable to see a pattern of higher activation throughout the full range of movement in the pectoralis major.

The setup for this investigation was as follows:

  • Four FREEEMG sensors on each side for the pectorals major (sternal portion), anterior deltoid, biceps brachii, and triceps brachii (long head).
  • Electrode locations were by established guidelines (SENIAM and Cram’s Introduction to Surface Anatomy, 2nd Ed.)
  • The G-Sensor was attached to one of the dumbbells on the dominant side.

Data was collected using EMGAnalyzer software and analyzed with a custom developed protocol with SEMGAnalyzer software, both of which were included with the system. To be able to compare and examine the activation patterns, the EMG signal of the first five repetitions was normalized to the dynamic peak EMG signal (converted into a ratio where the EMG signal is divided by the highest EMG signal during the set of five repetitions) during the exercise. Although, it may have been desirable to compare to an MVC, the issue with collecting several valid MVC for all muscles is that it requires a fair amount of setup and was not possible due to time constraints.

Flat DB Press 3-Lifters
Figure 1. The graphs illustrate the left and right mean muscle activation patterns of the five repetitions with the first section of the cycle representing the eccentric portion and the other half representing the concentric portion of the repetition. Notice the different left and right activation patterns despite similar mirrored electrode locations.

On first glance, the graphs in figure 1 potentially reveal a few insights as to how the nervous system activates the muscles during the movement. Since the graphs are normalized as a percentage of the mean peak activation during the movement, you can see the distinct differences in activation pattern between the three different lifters. In the recreational lifter, mean peak chest activation of approximately 75% occurs on the right side at the end of the movement on lockout versus earlier in the concentric portion with mean peak values closer to 90% for the more experienced lifters.

Although the left side chest activation patterns are closer in similarity between the three, mean peak activation still lags in the fitness enthusiast. Deltoid activity looks similar between the three lifters, but triceps activation has a lower activation level for the bodybuilder compared to both the powerlifter and the enthusiast at the start and mid-point of the concentric portion.

Acceleration and velocity kinematics were collected by the G-Sensor attached to one of the dumbbells on the dominant side. This was necessary in order to determine the lowering phase (eccentric contractions) and the lifting phase (concentric contractions) of the dumbbell during the lift. The ability to collect three-dimensional acceleration, along with orientation angles, can also provide information on the forces applied to the dumbbell.

Remember Newton’s second law of motion that Force = Mass x Acceleration? Since our dumbbell weight doesn’t change for the individual, we can get an idea of the forces acting on the dumbbell caused by the muscles through the acceleration data. We can see the powerlifter moved the dumbbell faster and with a nice, smooth acceleration (and therefore force) curve, versus the wavy graph produced by the others.

So, what does all this mean?

Initially, it appears that the recreational lifter could have less optimal chest activation compared to the others, the bodybuilder potentially has the greatest activation of the chest muscles, and the powerlifter is hitting the “Goldilocks zone” of similar peak activation across all three muscles. Remember, the graphs are the mean values normalized to the peak EMG value obtained during first five repetitions. Values close to 100% in the cycle would suggest consistent activation close to the dynamic peak.

The reverse of this is also true, with a lower percentage representing a consistently lower activation compared to the dynamic peak. Although the biceps brachii does cross the shoulder joint, in this case it is believed to act more like a stabilizer than a strong contributor to the movement. Calculating the mean of both the concentric and eccentric phases is another way to quantify this difference; however, as you can see, during a dynamic contraction the activation changes throughout the movement and a mean value may not tell the whole story.

As in most test situations, more questions are inspired and therefore more testing!

3 Lifts Same Lifter
Figure 2. A comparison of three chest exercises at an intensity of a 20-repetition maximum in our fitness enthusiast to see if we can find one that would result in better activation.

These graphs represent a comparison of three different exercises performed by our fitness subject (flat flys, flat dumbbell press, bench press). In this case, since we are comparing the same muscles in the same individual on the same day without removing the electrodes, with a minimum of five minutes’ rest between submaximal exercises, there is no need to normalize. The readings are the actual voltages in mV read by the FREEEMG sensors.

Interestingly, the same activation in the right pec muscle persists, although left and right activation levels were similar for both flat dumbbell press and flat flys, with the bench press showing a very different pattern between left and right. Another interesting observation is the high activation of the biceps muscle during the fly movement. Although calculating individual forces on muscles within a movement is challenging, to say the least, could we make an argument that the fly exercise could also be considered a bicep exercise due to its biarticular function here?

While the common perception that shifting to dumbbell work results in a more equal left-to-right-side balance, in this case the activation pattern of a U-shaped curve on the right and A-shaped curve on the left persists through both exercises. Could this be a learned neural strategy? A past injury? A technique issue? Could there be an anatomical difference in structure? All are possibly valid theories that would require working with the client to establish a solution to help get them the results they want.

Also, it is important to remember that a greater amplitude does not necessarily mean a stronger muscle. Initially, this may seem counterintuitive, as we are used to seeing increasing graphs resulting in increased strength. In very general terms, an increasing EMG amplitude will often be related to an increase in force in that same muscle. This relationship is not necessarily linear and can be more of a curvilinear relationship in different muscles.

It is important to remember that a greater amplitude does not necessarily mean a stronger muscle. I find it better to think of the EMG amplitude as how hard the muscle is working. Share on X

Instead, I find it better to think of the EMG amplitude as how hard the muscle is working. For example, assuming electrode application is correct and the conditions for signal strength are similar, if the left biceps curls a submaximal weight of 20 pounds and results in an amplitude of 1 mV and the right biceps lifts the same weight but results in a reading of 1.3 mV, you might automatically think the right biceps is stronger. However, if both biceps have a maximum activation level of 1.5 mV during a maximal voluntary contraction, the right biceps is working at 86% activation whereas the left biceps is working at only 67%. In this case, the left is more likely stronger (can produce more force with less activation) than the right and illustrates the importance of normalization of the signals to an associated effort.

Future technique strategies to help our recreational lifter could focus on engaging the right pectoralis muscles at the initiation of the concentric movement by altering arm angle while trying to deactivate synergist muscles such as the anterior deltoid in combination with drawing a stronger mental connection to the muscle’s contribution to the movement. Although the biceps brachii is not particularly active in either press movement, it is significantly higher in the fly movement—most likely as a result of the muscle being placed in a stronger position with the arm extended at the elbow.

If our fitness enthusiast wants to prioritize chest development, bench press may not be the best choice in the short term based on this assessment. This last statement can be a controversial one, as increased EMG activation has not been proven to result in greater hypertrophy. However, at times you have to make a decision based on the best information you have, and I feel that EMG analysis can be a valuable tool to help make those decisions.

The one caveat I am consistently reminded of that is generally true for all assessments, but especially for EMG data collection, is to make sure you have good “clean” data. Skin preparation, electrode choice, exact placement on the targeted muscle, muscle cross talk on small muscles, and the amount of fat tissue between the skin and the muscle can all affect the quality of the signal. It may take more time to do it properly, but you will be confident in your data and subsequently your analysis.

Data-Based Exercise Prescription

Assessing muscle activation by EMG and inertial monitoring provides additional information as to how the muscle works under different exercise and training conditions. With this type of evaluation, we can check to make sure the muscle is responding as desired throughout the range of motion. This removes common assumptions and generalizations we may rely on to guide our exercise prescription.

Assessing muscle activation by EMG and inertial monitoring helps remove common assumptions and generalizations we may rely on to guide our exercise prescription. Share on X

Although peer-reviewed scientific articles provide excellent information on muscle activation for a wide variety of commonly used training techniques, as we have just seen, there is also an individual response that should be considered, especially when results have not achieved the desired level. Presenting this information in a graphical form is a powerful way to communicate this to both the athlete and the coach to help change established mindsets as to what exercise is “best” and to consider other approaches to the problem.

As you could see from the graphs, our fitness enthusiast would most likely benefit initially from a closer look at his technique to help increase activation and symmetry in the pectoralis muscle, as even different exercises continued to show a similar recruitment pattern. Although investigating additional chest exercises may result in the discovery of a more ideal activation pattern, the fact remains he would most likely benefit from changing his biomechanics to more favorably load the chest muscle among the three tested exercises.

Technique modifications such as a greater range of motion, changes in acceleration, a greater upper arm abduction angle in relation to the torso, and a change in pronation of the hand, combined with a stronger mental connection to the targeted muscle, could all have an effect on the activation pattern of the agonist and synergist muscle groups and presumably his results. The lifter should be retested (combined with video analysis) in the same initial conditions along with detailed notes taken as to what technique changes occurred. The addition of video during a test has been particularly helpful to me in understanding the context of the notes after the fact.

If the goal is more performance oriented, combining EMG data with kinematic data obtained from an inertial monitor during the performance of an actual skill can help ensure specificity of training by matching the prescribed exercises to the actual movement activation patterns. Does the chosen exercise during training actually mimic the activation patterns needed to perform the skill? As we have seen, the results can sometimes be both surprising and enlightening. Effective muscle hypertrophy, strength, or rehabilitation training can be more efficiently matched to the correct exercise for that individual’s muscle activation patterns, thereby narrowing the varied training response.

In my own application of these techniques, changes in acceleration cause noticeable changes in activation level combined with relatively small changes in body position. Trying to establish a stronger mental connection to increase activation seems to be more effective in those who have less training experience than experienced athletes. However, the mental connection becomes more useful in this latter group in helping them deactivate or relax certain muscles involved in the movement to help improve movement efficiency or to emphasize other muscle groups.

As someone who has worked with a wide variety of clients for more than 25 years, it can be difficult to assess all angles and movement patterns at once without possibly overlooking something. Having the data laid out for me in an easy-to-read format makes it easier to address what could be improved and can help unlock unseen issues I may have never even considered that may give an athlete an edge against their competition.

Having the data laid out for me in an easy-to-read format makes it easier to address what could be improved and can help unlock unseen issues I may have never even considered. Share on X

This last point I have encountered many times. There is something very gratifying and humbling when what you thought was occurring wasn’t actually occurring—and, in fact, something else was going on that never even crossed your mind. You really don’t know what you don’t know…until you know you don’t know it. EMG, when done properly and judiciously, can provide that next level of information for clients to help make well-informed decisions for individual exercise prescription.

Since you’re here…
…we have a small favor to ask. More people are reading SimpliFaster than ever, and each week we bring you compelling content from coaches, sport scientists, and physiotherapists who are devoted to building better athletes. Please take a moment to share the articles on social media, engage the authors with questions and comments below, and link to articles when appropriate if you have a blog or participate on forums of related topics. — SF


Adaptive Exercises

Adaptive Power for Injured Athletes

Blog| ByDanny Foley

Adaptive Exercises

Training around pain and injuries can be vexing, irrespective of the mode or the nature of the injury. The better part of my work over the last five years has explicitly revolved around this premise: How do I get this athlete to achieve tangible progress when X/Y/Z aren’t feasible options? Apart from some combination of reverse-engineering and problem-solving, finding the answer also requires a robust understanding of who the athlete is as a person and what their present limitations consist of.

Another root of this problem is the connotations we’ve created within strength training over the years. For instance, if we want to improve muscular strength, we automatically associate this with bench/squat/deadlift. If we want to improve conditioning, we immediately default to long runs, cycling, or bodyweight circuits. When it comes to power, most of us are under the impression that we must do cleans/jerks/snatches and heavy plyometrics in order to achieve our goals.

What I generally do is see how far from the ‘optimal’ I have to go for an athlete and then assess the return on investment, says @danmode_vhp. Share on X

All of these assumptions are short-sighted and patently false. In perfect conditions, of course, we understand what’s optimal, but we have to thoroughly understand the relativity to training. In my opinion, we are too quick to fall into the trappings of conventional biases. A common example of this is improving power for someone if they can’t do cleans or intensive plyos. What I generally do is see how far from the “optimal” I have to go for an athlete and then assess the return on investment. For instance, using a jammer snatch variation for an athlete who’s coming off rotator cuff surgery and isn’t quite ready for a barbell.

Start with the Spectrum

At its fundamental root, power is the summation of force applied during a movement and the velocity at which it moves (P= F*v). The first step in the process is—injury notwithstanding—identifying where the athlete is deficient on the force-velocity curve: Are they slow because they’re weak, or are they weak because they’re slow?

Velocity-Power
Figure 1. This image is a very simple spectrum I use to determine where to focus my training parameters. While there is a lot of carryover with exercise selection between strength and power, there is an important difference in the parameters for each.

So, for athletes who can’t move a lot of weight but move relatively high loads at high velocities (low force/high speed), I program mostly strength-based applications. I take the opposite approach for athletes who are high force/low speed. And for athletes who are either low or high in both, they’re the easiest—they get a certain dose of each training mode.

Identify the Constraints

Once we observe the athlete for where they are deficient in terms of strength versus speed qualities, we need to thoroughly understand the hard limitations the athlete has, or what can be referred to as individual constraints. Movement constraints can be broadly classified in three ways:

  • Physical
  • Internal
  • External

The physical constraints are the easiest to identify, as these are simply the objective measure of how the injury affects them. In most cases, we can identify these based on the time point of where the athlete is post-injury and what their eligibility is for things like intensity/load/range of motion. The internal constraints are much more difficult to identify, and this really relies more on our ability to communicate and understand our athletes as opposed to the objective analysis of injury.

Constraints
Figure 2. Individual constraints can be broadly classified as physical, internal, or external.

The internal constraints have much greater variability between athletes, as everyone experiences pain and injury in a very individual manner. However, a caveat to be mindful of here is that internal constraints will not be linear (across time), nor will they be consistent between movements. In other words, the athlete’s perception of pain and ability are multivariant, and throughout the training process a number of things will influence it. The athlete will also have varying levels of confidence based on the tasks at hand, so where confidence may be present in certain areas, it can’t be assumed for others.

Finally, we have external constraints, which are essentially the athlete’s tolerance levels for intensity, ranges of motion, or volume based on their response to training. We can also include environmental items here, such as the type of resistance being used, the surface or position they are working from, or the instruction being delivered by the coach. Where the internal constraints are largely driven by the athlete’s perception, the external constraints are more governed by the coach and represent the factors that we mostly have control or influence over.

Navigating Barriers

In addition to physical and mechanical constraints (i.e., compromised hip extension, inability to load over body weight on single leg squat), we must also recognize the global decrements that have manifested. For barriers, I look at these as either being functional or operational. Put simply, functional barriers speak to getting impaired movement back to a proficient state. Operational barriers, on the other hand, include more secondary aspects such as the rate of movement, load tolerance/capacity, and integrated tasks such as change of direction.

When athletes have difficulty with functional barriers, the solutions are largely predicated on isolating the area in question and working to get back to a balanced state—for example, closing the margin on left/right leg in a Y Balance Test. Navigating functional barriers is not difficult in most cases; it really just requires time and patience. Operational barriers are a bit more involved and tend to require a little more nuance. But broadly speaking, what we’re concentrated on with operational barriers is getting the athlete to demonstrate full kinetic integration without the injured area showing any lag. From there, we want to emphasize the capability of the area and work toward what will be demanded of them in sport/duty.

Functional Operational
Figure 3. Recognizing functional versus operational barriers.
Virtually any barrier can be overcome—it really just comes down to how much accommodation is needed and how much return the athlete would receive by doing so, says @danmode_vhp. Share on X

Virtually any barrier can be overcome—it really just comes down to how much accommodation is needed and how much return the athlete would receive by doing so. Engineering extremely complicated and cumbersome strategies for minimal returns is an imprudent and foolish way to go about this. What we’re focused on is efficiency, in which the strategies and applications we present are logical and simple to replicate, and (most importantly) provide a sufficient stimulus for the athlete. This is going to require thorough explanation and objectives from the coach, as the athlete must understand why they are performing certain variations and, more importantly, what these incremental steps are building toward.

Adaptive Power Options

Over the years, I’ve identified a handful of applications or specific pieces of equipment that I commonly rely on for adaptive power options. Bear in mind that there isn’t anything inherently right or wrong with equipment/movement selection, it’s simply a matter of what you can coach proficiently and what the athlete is confident/capable of using or doing. This is a short list of some of the adaptive variations with which I’ve found success. Note that, for some, these were just temporary alternatives to work back to conventional selections; for others, though, these provided long-term or even permanent substitutes. Also, these are introduced in a progressive manner, meaning I would progress an athlete 1-4 chronologically.

1. Band Unloaded

Band unloaded variations can be utilized in a myriad of ways; in this context, however, I’ll use this as an entry-level means for reacclimating the athlete to move under velocity conditions. What this setup does is reduce the athlete’s body mass as they move through a given range of motion (increased band tension = decreased mass).

In turn, this gives the athlete a better opportunity to execute movement with greater speed—and, in most cases, improved confidence. Again, generally speaking, this would be the first installment and would be followed by doing the movements at true body weight, progressing to light loading with speed emphasis and finally to a reflexive/ballistic fashion. I’ve found this to be a highly effective strategy and have used it for an array of movements, but below are what I believe are the best to get familiar with:

Foley Table 1
Table 1. Band unloaded exercises. Video examples of each exercise can be found on the playlist here.


Video 1. Band-assisted pogo hops.

2. Jammer/Cable (*guided path of motion)

The primary reason for using a cable and/or jammer setup is to provide the athlete with a guided path of motion. If nothing else, I believe this takes away a variable by not having to focus on stabilizing the path of motion, which then results in the athlete being able to concentrate their efforts more purely on “just move fast.”

The primary reason for using a cable and/or jammer setup is to provide the athlete with a guided path of motion, says @danmode_vhp. Share on X

The cable and jammer, for the most part, can be viewed as interchangeable, although I know jammer arms aren’t exactly commonplace for most. Just be aware the cable setup will have slightly more demand for the athlete to organize the path of motion, so if you do have access to jammer arms, I would suggest introducing those first, as the athlete can really concentrate on the rate of motion.

Foley Table 2
Table 2. Jammer/cable exercises. Video examples of each exercise can be found on the playlist here.

3. Landmine Variations

We all know my love for the landmine by now, but I believe it really demonstrates its value with the injured population. With the landmine setup, first and foremost, we give the athlete a better platform to work from, as the unfixed base allows them to utilize the most effective path and ranges of motion given their individual constraints.

The multiplanar nature of the landmine also promotes a high degree of biofeedback, which can help the athlete ‘feel’ their way into optimal movement patterns, says @danmode_vhp. Share on X

The multiplanar nature of the landmine also promotes a high degree of biofeedback, which can help the athlete “feel” their way into optimal movement patterns. For adaptive power using the landmine, I’ve particularly found success with the following variations:

Foley Table 3
Table 3. Landmine-based exercises. Video examples of each exercise can be found on the playlist here.


Video 2. Landmine switch clean.

4. Med ball variations

Med ball variations are a more common accessory option for training power qualities; however, I think some coaches and trainers overlook how beneficial med ball work can be, specifically for the injured population. When I incorporate med ball drills with injured athletes, I mostly do so to promote organic and optimal movement for the athlete. In other words, when performing med ball drills, the athlete will naturally and intuitively find the path of motion that best accommodates them.

When performing med ball drills, the athlete will naturally and intuitively find the path of motion that best accommodates them, says @danmode_vhp. Share on X

Having fewer technical restrictions often bodes well for the athlete. Moreover, med ball work usually gives the athlete an immediate and overwhelming sense of how their body is moving in space. Med ball drills are also typically perceived by the athlete as low-threat movements, which will help them feel more confident executing things under velocity conditions. There are really endless variations I could include here, but for the sake of brevity, here are just a few of the ones I commonly program:

Foley Table 4
Table 4. Med ball variations. Exercises can be found on the playlist here.

Rate of Progression

I should be clear that everything provided in this article is intended for athletes who have already completed conventional rehab and physical therapy and have been cleared by their physician. The rate at which you move your athletes is predicated on their present ability and long-term goals. I know that sounds open-ended, but it’s really difficult to generalize and say there is some empirical timeline.

That said, I’ll leave you with a few points to consider:

  • For some athletes, these are just short-term options until fully healthy; for others, they can be more permanent or long-term solutions. I also utilize everything found in the charts in my accessory blocks.
  • Personally, I establish deceleration proficiency before going max effort on acceleration.
  • Orthopedic injuries require more strength emphasis.
  • Soft tissue injuries (normally) require more speed emphasis.
  • However, it’s critically important to load soft tissues heavy and slow before light and fast. Tendons need to be loaded heavy and under eccentric conditions before I move into any true speed work.
  • Pay attention to modalities your athletes appear to have the most success with. An example would be seeing greater return on a landmine press than a barbell push press. If something works, stick with it.

Irrespective of injury or sport, be sure to have your athletes demonstrate proficiency in multiple planes of motion under a variety of tempos

Since you’re here…
…we have a small favor to ask. More people are reading SimpliFaster than ever, and each week we bring you compelling content from coaches, sport scientists, and physiotherapists who are devoted to building better athletes. Please take a moment to share the articles on social media, engage the authors with questions and comments below, and link to articles when appropriate if you have a blog or participate on forums of related topics. — SF

Female Lacrosse Player

A Practical Guide to Utilizing Wellness Questionnaires in Collegiate Team Sports

Blog| ByTorin Shanahan

Female Lacrosse Player

Most coaches can agree there is value in monitoring your athletes to gain insight into their wellbeing. Whether this is for mitigating injury risk or for performance enhancement, load management via monitoring systems provides useful information for the performance staff. One problem is the cost of many of these systems. There is, however, one method that is cheap and relatively easy to implement: the wellness questionnaire.

The scientific community has established that increases in workload heighten the risk of injury and can decrease performance (Esmaeili et al. 2018)—essentially, the two things we performance coaches are trying to prevent. A study by Fields and colleagues recently provided further evidence that the wellness questionnaire’s measure of readiness at the beginning of the day was directly related to the external workload. The study showed that morning readiness is predicted by the previous day and predictive of that day’s external load measures (Fields et al. 2021).

The scientific community has established that increases in workload heighten the risk of injury and can decrease performance, says @Torinshanahan42. Share on X

This opens up opportunities for implementing subjective readiness measures to provide the same monitoring benefit as much more expensive tools. Many coaches are now left pondering the key question: “How do I implement this with my team?” Lucky for you, I am here to provide you with the lessons I have learned from using questionnaires with a D1 conference championship-winning team.

Questionnaires are designed to be conversation guides, not decision-makers. The insight gained is just one piece of a larger, more complicated puzzle. Now, this one piece is a key cornerstone, but still just one piece. Conversations must be had among the strength staff, medical staff, and coaching staff both about and with the athletes. The athletes must be involved and talked to when warning signs pop up. The ultimate goal of these questionnaires is to provide guidance on who needs to be talked with, and what about. Effective implementation is feasible when three simple components are established:

  1. Using it with the right team.
  2. Simple delivery.
  3. Insightful analysis.

The Right Team

The right team? What does that even mean?

Questionnaires are not practical for every team. The right group is paramount to the method’s success. A team of 15 and up to 40 athletes is the ideal size. Much smaller and you are better served simply talking to each athlete; and any larger and questionnaire compliance with that many individuals can be very tricky.

The right group is paramount to the method’s success. A team of 15 and up to 40 athletes is the ideal size, says @Torinshanahan42. Share on X

Why not just talk to all your athletes anyway? Why do you need the questionnaires?

Depending on staff size, it can be difficult to have a meaningful conversation in groups of greater than 15 athletes (hence why the questionnaires can help guide you). As an example, when I was working with women’s lacrosse, I would look at the data every morning as it came in live before morning training sessions. I set up Excel’s conditional formatting to highlight any athletes whose responses were outside of the norm. We used a traffic light classification system: between one and two standard deviations below the mean was orange, and beyond two standard deviations created a red light. I would approach the highlighted athletes during the warm-up to talk through the concerns I had. Most ended with “Sounds good, let’s have a great day,” but some of these conversations led to modifications for the training session.

The second part of picking the right team is the culture of that group. The group needs to have a sense of pride in the details and be a group with strong leadership and a desire to improve no matter what it takes. At the end of the day, you are relying on them to take their time to fill out the questionnaire truthfully. Without that, it is pointless—so picking a team that possesses the culture to comply with honesty is key.

Typical-Questionnaire
Figure 1. The wellness questionnaire that we have utilized, displaying a typical format.

Simplicity

The second key piece to address is designing and delivering a questionnaire in an efficient manner that gives you impactful information. Begin with the design of the questionnaire—for those not familiar, one of the more common questionnaire frameworks is multiple questions that are typically on a 1 to 5 scale (Figure 1). These ask about the athlete’s fatigue, sleep quality, soreness, stress, and mood (Fields et al. 2021). Additionally, hours of sleep and RPE have been added along with other more team-specific questions. Two problems can arise with this particular format, detailed below.

The second key piece to address is designing and delivering a questionnaire in an efficient manner that gives you impactful information, says @Torinshanahan42. Share on X

Design Problem 1: Redundant Questions

If multiple questions are very similar, they can be simplified to streamline the information while reducing the time required to fill out the questionnaire to increase compliance. Without any analysis, any coach can agree that fatigue and soreness as well as mood and stress are related. In fact, Fields et al. backed this up by stating that fatigue and soreness were the two most predictive readiness variables for external load measures (2021).

According to the Merriam-Webster Dictionary, fatigue is defined as “the sensation of tiredness,” while soreness is “the sensation of pain or discomfort from exertion.” In the athlete’s mind, what is the difference? We as coaches can specify what we mean it to be, but from an athlete’s point of view, what is one without the other? They are extremely similar and often present simultaneously. Our data provides evidence to support this idea: fatigue and soreness correlated together at 0.59 and had the same scores 55.7% of the time (Table 1).

Pearson Correlations
Table 1. Pearson correlations for our questions on readiness.

The same argument can be applied to mood and stress. The difference is much clearer here, but the physiological effect remains similar. Stress and mood correlated at 0.54 and had the same score more often, at 55.9% of the time (Table 1). Our athletes’ changes in mood relative to their averages were more predictive of winning versus losing games compared to change in stress level on gameday. Wellman found evidence of an effect of stress on external load measures, while Fields did not (Wellman et al. 2019) (Fields et al. 2021).

Our athletes’ changes in mood relative to their averages were more predictive of winning versus losing games compared to change in stress level on gameday, says @Torinshanahan42. Share on X

In conclusion, mood and stress could be used interchangeably in questionnaires, but the overall evidence points to only needing one measurement. Additionally, fatigue correlated moderately with stress and mood; 0.37, and 0.49 respectfully. Mood had a moderate correlation to other factors like soreness at 0.38 (Table 1). Considering the complexity of the human body and our athletes’ lives, these are solid relationships that can be used to provide information about the other measures of readiness.

Design Problem 2: Vague Scales

The second problem is the degree of vagueness in a 1-5 scale, and that lack of definition creates unnecessary discrepancies. This is the same argument that most make with utilizing RPE. You can learn what the extremes feel like: you know what it is like to feel so sore you cannot walk, or what it feels like to wake up feeling so great you could outrun Usain Bolt. Knowing what a 1 or a 5 is on a scale of 1-5 is pretty easy.

What, however, does a 3 feel like?

The degree of vagueness creates “noise” in your question (defined as “irrelevant or meaningless data or output occurring along with desired information” by Merriam-Webster). Creating concrete structure for your question will reduce this unwanted signal of an athlete not truly understanding what one response choice means versus another.

The degree of vagueness creates *noise* in your question, says @Torinshanahan42. Share on X

Additionally, on a 1 to 5 scale, the middle 3 should be your average to allow room for degrees of positive and negative change. On all the readiness questions, our data averaged out to be a 3.76 out of 5, with a median of 4 across all the questions. Questions about mood and sleep quality actually averaged over 4. This limits our ability as practitioners to understand the positive change in our athlete’s state of being due to the inherent noise created by 4 being the average. Questions should be written so that the average is in the middle, to allow the full range of possible change to be captured by the question’s design.

Wellness Decision Flow
Figure 2. Mental model for the designing of wellness questionnaires.

Optimal Questionnaire Design

What I learned from my experience is that the design needs to be simplified and specifically tuned to amplify the signal of what is impactful, while drowning out the noise of what is not. This can be done with fewer questions than traditional formats (Figure 3). Fewer total questions on the entire questionnaire will decrease the time needed to fill it out, which will increase the focus on the questions that are present.

Fewer total questions on the entire questionnaire will decrease the time needed to fill it out, which will increase the focus on the questions that are present, says @Torinshanahan42. Share on X

A sleeker design incorporates one question each about fatigue, mood, sleep quality, and the number of hours slept (Figure 3). The questions below were picked based on the statistical analysis mentioned above to decide which questions provide the most information. A very simple response system was employed, with three total responses for the questions on fatigue, mood, and sleep quality. The responses would be below-average, average, and above-average to increase the specificity of the information received by cutting out the vagueness (Figure 3).

Simply, this means that the average will always be the average. I designed this to give room for minor day-to-day differences without creating unnecessary noise when the athletes must define the difference between a 3 and 4. It also plays into the earlier argument that has been brought against RPE—by only giving the choices of average or an extreme, the athlete can easily pick if they are at an extreme or not. This creates clarity.

Questionnaires need to be built to have set “plans of action.” If this happens, then this happens. This can be specific to the team, athlete, or question. For any responses out of the norm, there is a set plan of action to address that issue. I refer to these as “points of discussion.” Again, the concept behind questionnaires is to guide the conversation of how to best manage your athletes. When certain data is received it should initiate a conversation as to why that trend is occurring and guide you toward a solution.

For any responses out of the norm, there is a set plan of action to address that issue, says @Torinshanahan42. Share on X

This is very context-based and individualized for each team and its members. Points of discussion could be if anybody has a response of significantly below-average score, then they are talked to during warm-up to ascertain more information about what is wrong. This is where the art of coaching is guided by the science of coaching. Some of these circumstances could turn points of discussion into points of decision, meaning that actions were directly taken because of data responses (example plan of action in Figure 4).

Optimal Wellness
Figure 3. Potential questionnaire template based on lessons learned.

Simple Delivery

Once you have designed a practical questionnaire, delivering it is by far the easiest part. These questions can be sent through Google Forms, your athlete management system (AMS), or any other form system. Data can be downloaded into Google Sheets or Excel very easily. Google Forms can be bookmarked, added to the home screen, or saved in many other ways for easy access. Some AMSs can resend the link for the questionnaire at pre-scheduled times to assist with access and compliance.

Once you have designed a practical questionnaire, delivering it is by far the easiest part, says @Torinshanahan42. Share on X

I implemented a Google Form and Excel workflow. Google Forms were sent to the athletes to be bookmarked on their devices. Google Sheets allowed having instant access to a live data feed. I connect the Google Sheet to my Excel workbook for more advanced calculations, analysis, and reporting.

Insightful Analysis

A complete breakdown of how to analyze the data is beyond the scope of this article. Analysis needs to be simple and quick. To be efficient, it should be automated as far as daily analysis goes. Excel and Google Sheets provide starting points to crunch the numbers, set up dashboards, and create great visuals. Excel and Google Sheet wizards like Adam Virgile and Dave McDowell are great resources when it comes to making a workbook. Using a question and response system like the one proposed above will make analysis extremely easy due to the lack of quantifiable responses. This can be challenging for the math nerd in some of us but it makes our lives as coaches easier. We are here to help athletes, not to play around in Excel.

Plan of Action Flow
Figure 4. Flow chart for an example plan of action (here specifically for fatigue question).

Summary

1. The Right Team

  • 15-40 athletes
  • A culture that focuses on the details and doing the right thing

2. Streamlined Delivery

  • Less than 5 Questions Total
      • Fatigue
      • Mood
      • Sleep Quality
      • Hours of Sleep
  • Simple and extremely clear response choices
  • Create a plan of action.

3. Analysis

  • A million ways to do this.

4. Visualization

  • Simple
  • Context
  • Meaningful and Impactful Information Only

5. Day to Day Operations

  • Check responses as data comes in before sessions.
  • Engage athletes and staff at points of discussion according to your preset plan of action.

Since you’re here…
…we have a small favor to ask. More people are reading SimpliFaster than ever, and each week we bring you compelling content from coaches, sport scientists, and physiotherapists who are devoted to building better athletes. Please take a moment to share the articles on social media, engage the authors with questions and comments below, and link to articles when appropriate if you have a blog or participate on forums of related topics. — SF


References

Esmaeili, A., Hopkins, W. G., Stewart, A. M., Elias, G. P., Lazarus, B. H., and Aughey, R. J. “The Individual and Combined Effects of Multiple Factors on the Risk of Soft Tissue Non-Contact Injuries in Elite Team Sport Athletes.” Frontiers in Physiology. 2018;9:1280.

Fields, J. B., et al. “Relationship Between External Load and Self-Reported Wellness Measures Across a Men’s Collegiate Soccer Preseason.” Journal of Strength and Conditioning Research. 2021;35(5):1182–1186.

Wellman, A. D., Coad, S. C., Flynn, P. J., Siam, T. K., and McLellan, C. P. “Perceived Wellness Associated with Practice and Competition in National Collegiate Athletic Association Division I Football Players.” Journal of Strength and Conditioning Research. 2019;33(1):112–124.

Halson, S. L. “Monitoring Training Load to Understand Fatigue in Athletes.” Sports Medicine. 2014;44(S2):139–147.

Saw, A. E., Main, L. C., and Gastin, P. B. “Monitoring the athlete training response: subjective self-reported measures trump commonly used objective measures: a systematic review.” British Journal of Sports Medicine. 2015;50(5):281–291.

Taylor, K.-L., Chapman, D. W., Cronin, J., and Gill, N. D. “Fatigue Monitoring in High Performance Sport: A Survey of Current Trends. Journal of Australian Strength and Conditioning.” Journal of Australian Strength and Conditioning. 2012;20(1):12–23.

Thornton, H. R., Delaney, J. A., Duthie, G. M., and Dascombe, B. J. “Developing Athlete Monitoring Systems in Team Sports: Data Analysis and Visualization.” International Journal of Sports Physiology and Performance. 2019;14(6):698–705.

Wing, C. “Monitoring Athlete Load: Data Collection Methods and Practical Recommendations.” Strength and Conditioning Journal. 2018;40(4):26–39.

Game Chase

Putting the “Fun” in Fundamentals: How, When & Why to Gamify Sprint Training

Blog| ByKyle Davey, ByMatt Tometz

Game Chase

Speed is a critical factor in sport performance. Research shows that—wait, this is SimpliFaster, right? Great, then lets skip the small talk about why speed is important. If you’re here, reading this site, you are fully aware of the make-or-break nature of speed in sport success.

Of course, you are also likely aware that developing speed is a somewhat elusive skill. There’s a reason many strength and conditioning coaches are infinitely more comfortable in the weight room than on the field, let alone the track. Perhaps it’s the same reason for the outdated sayings “speed is born” and “speed can’t be trained.”

It seems as though the tide is turning, however, and more and more coaches recognize the importance of directing training toward speed development as opposed to prepping team sports athletes for mock power and Olympic lifting events. Without discrediting the significance and necessity of strength training, speed development should arguably be the cornerstone of training for most positions in most team sports (to preemptively ward off the haters—strength training plays a significant role in speed development, undoubtedly).

Those of us who train youth athletes also juggle the responsibility of long-term athletic development (LTAD). To our understanding, there is no consensus that directs youth training from a broad, multi-year perspective. There are trains of thought that coaches can use to guide programming and program philosophy, but not a clear roadmap. (Side note: that’s part of the fun of coaching, isn’t it?)

What we do know with certainty is this: Kids who don’t show up don’t get better. The #1 factor in the success of any program is adherence. Underlying adherence is attendance.

Here’s the bottom line: If your training is boring, kids won’t show up. Period.

Gamification is a great way to make training sessions something athletes look forward to, encouraging great attendance and program adherence.

Gamification is a great way to make training sessions something athletes look forward to, encouraging great attendance and program adherence, says @CoachBigToe & @KD_KyleDavey. Share on X

Fun = Attendance. Attendance = Adherence.

What’s going to lead to better sprint development? An 80% effective program with 100% attendance done for six months or a 100% effective program with 80% attendance done for two months? This might oversimplify training the youth athlete but training the youth athlete is a push and pull. If you push with too much technical work (fundamentals) and too little fun trying to make the “perfect” program, they aren’t going to pull. If you take opportunities to work on fundamentals and then meet them in the middle for the real reason they’re there (to have fun), they’ll definitely pull.

This is not to say that good technique is not important. “Putting the fun in fundamentals” requires actually working on the fundamentals…that’s kind of how the saying works. But, believe it or not, the attention spans of youth athletes won’t always be where you want them to be and entire weeks or months of training could go out the window with a big growth spurt.

Additionally, you can’t get to the fundamentals without having the athletes buy in. Giving the athletes some of what they want (fun) will open up the door to everything else (fundamentals) by increasing attendance and engagement.

What Is “Fun”?

Now that we’re on the same page about how putting the fun in fundamentals will increase attendance, we have to know what is in fact fun. Think back to your childhood a long time ago (longer for some than others). Who were your favorite coaches? What made you eager for the next practice as soon as the current one ended? What do you wish you did more of? What types of practices made you fall in love with training? Out of love with training? Which coaches did you wish there were more of? You know more about making training fun than you think…

And here’s a crazy concept: You have your own athletes, and you want to make training fun for them…so ask them what they find fun! Or try multiple drills and ask them which were their favorites. You have an extremely specific focus group (because it is your intended audience), so take advantage of it. And, especially youth athletes, as they won’t mind doing new stuff anyway (they’ll actually enjoy it).

Hidden Benefits of Gamifying Training

In addition to increased adherence—and the instrumental impact that alone has on long-term development—gamification brings other benefits as well.

1. Improved Effort

Improved effort is one such benefit of gamification. Anecdotally, Kyle has had kids who were holding back when it wasn’t time to hold back. He once told an athlete that if she hit a PR for the day on resisted sprint power (measured with the 1080 Sprint), he’d participate in her next Tik Tok video. She didn’t just hit an in-session PR, she hit an all-time PR. Her sprint power was ~20% higher on that rep than her others that day.

Not only did Kyle learn a Tik Tok dance that day, but he got from that athlete the most she had ever given.

Although this was arguably more of a challenge than a game, the outcome is the same: exciting the athlete and providing motivation to increase performance above the day’s baseline psychological readiness.

2. Engage the Kid Who Doesn’t Want to Be There

If you’ve trained youth athletes long enough, you’re bound to have come across kids who just don’t want to be there. Some will even outwardly admit the only reason they come to training is because their parents make them.

As you can imagine, this group is very difficult to train. It’s draining mentally and emotionally, and the outcomes aren’t great because the kids’ efforts and desires to improve aren’t great.

We’ve found games to be particularly helpful in engaging this crowd. If you can turn training into fun, all of a sudden exertion and attitude both move in the right direction. And if you find a game the athlete really enjoys, you’ve just struck gold. Manipulating the rules/constraints of the game to make it more challenging is your golden ticket to achieving the desired training stimulus. For instance, if part of the training session includes 20-meter sprints, change the game so the athlete only has a shot at winning if they give 100% effort over 20 meters. Bingo.

If you can turn training into fun, all of a sudden exertion and attitude both move in the right direction. And if you find a game the athlete really enjoys, you’ve just struck gold. Share on X

If you get enough smiles over the course of enough sessions, maybe—just maybe—that kid will even start wanting to be there.

3. Generate Referrals

You tell me which is more likely to entice your client’s buddies to want to come to your facility:

Training is cool. I got faster. Yea.

Or…

Training is awesome. My coach’s name is Big Toe, can you believe that? It’s even on his license plate. He’s like, some kind of sport science nerd, or something. Half the time we do games, like races and obstacle courses. I’m getting faster, too. It’s fun there.

Kids aren’t going to talk about your facility because their flying 10 time dropped a tenth of second. They don’t know what a flying 10 is, and the metrics don’t mean anything to them.

The same goes for parents. Unless they are “in the biz” and can recognize good training from poor training, they won’t care about the metrics we care about.

You know what kids will tell their friends about? How much fun they have. Same goes for parents—if they feel that you’re responsible, you’re a good influence, AND their kids have fun, that’s the kind of thing they’ll gladly share with other parents.

Long story short: The use of games can impact your bottom line.

Creating  Games

Here are two lessons we’ve learned from coaching sprint training for youth athletes:

  1. Everyone runs a little faster when they’re being chased.
  2. No one likes losing.

The facilities we work at have much different layouts from each other. TCBoost, where Matt works, has a ton of open space. The RE_Building, where Kyle works, has a 60-meter, two-lane track. Matt’s facility is square-like, Kyle’s is a narrow rectangle.

You can probably relate to one of us. We bet you either work in a small, narrow space, like Kyle, or a wide open one, like Matt.

Either way, we’ve got you covered. Below are some of our favorite games to excite athletes, elicit competition, and provoke performance.

*P.S. Notice the athlete’s body language and facial expressions before, during, and after these activities.

Resisted Sprint Races


Video 1. Resisted sprint races.

This is a simple, yet fun one. One athlete does a resisted sprint on the first “go” call. When they reach a distance of your choice, you give a second “go” call. It’s a race to the finish line. At Kyle’s facility, he typically sets up 15-meter sprints and gives the second “go” call around the 7-meter line, but you’ll want to tailor the timing to make it a competitive race.

If you want athletes to PR in sprint power, give this game a go. Between not wanting to lose a race and hearing those footsteps coming behind them, this game tends to improve resisted sprint performance.

Chase Games

Everyone runs just a little faster when being chased. Knowing there’s something behind you coming for you that you can’t see is quite the motivator.

Everyone runs just a little faster when being chased. Knowing there’s something behind you coming for you that you can’t see is quite the motivator, says @CoachBigToe & @KD_KyleDavey. Share on X

Plus, chasing each other is a great way to get a quiet kid to come out of their shell. We’ve had athletes go from seemingly introverted to trash talking within minutes of competing in this game!

There are a variety of ways to create advantages or disadvantages for offense or defense by manipulating spacing, starting position, or initiation to develop the intended skill for that session.


Video 2. Chase games.

Athletes face each other and begin about 1 meter apart. There is a cone 10 or 15 meters down the track. The game begins when the athlete nearest the cone moves. Their goal is to get to the cone before being tagged. If that happens, they win the race. If the athlete gets tagged, that’s a loss.

In this next version, both athletes start lying down, with defense (in front) having their toes on the line and offense (in back) with their eyes on the line. After the coach says ready, offense can get up whenever they want and race to the finish line. Defense must react to the offense and try to beat them. (Yes, this was outside. Thanks, COVID-19.)


Video 3. Fox and hound.

Another option for chase games is to add implements like pool noodles. In the video below, the athletes were working on curve running by chasing each other through a figure 8. The coach determines how far ahead the offense starts and where the finish line is, then says “go.” Let the show begin! In this variation, instead of tagging each other with their hand, they have to whack tag each other with the noodle, instead.


Insert Video 4. Noodle chase.

COD vs. Linear Sprint

You got a better name for it? We’re all ears.

As with the other games, you’ll probably have to play with the spacing to fit your athletes and make the race competitive.


Video 5. COD vs. Linear Sprint.

This is basically a modified 5-0-5 versus a 15- or 20-meter sprint. One athlete runs forward toward a line, turns 180 degrees, and runs back to where they started. The other athlete sprints straight ahead. It’s a race to the finish line.

Kyle typically starts by having the athlete who is changing directions start at the finish line, run 5 meters forward, then turn and run back through the finish line. The other athlete is 15 meters away and gets to run straight.

Cone Stacking

Kyle stole this drill from Lee Taft (or, at the very least, Lee inspired it).


Video 6. Cone Stacking

Put cones 5, 10, and 15 meters away from the start line. Athletes grab the first cone, bring it back to the start line, then grab the second, stack it on top of the first, and repeat for the final cone.

Cone Tic-Tac-Toe

Kyle definitely stole this from another coach. Probably Lee Taft, again, though maybe not. Someone else could deserve to get credit for this.


Video 7. Cone Tic-Tac-Toe

I made a makeshift tic-tac-toe board out of bands. Put cones as far away as you like. Each athlete gets four cones of the same color, then add one cone of a third color. Once an athlete uses all four of their color, it’s first come, first served for the final cone. Alternatively, you can just put five cones for each athlete and let it play out.

Noodle Tag

Okay, this isn’t exactly a raw speed developer, but it is a fun and appropriate game for developing overall athleticism in youth athletes. The variations are endless, but the premise is simple: offense, defense, offense tags with the noodle, defense tries not to get tagged. One-on-one tag works really well in smaller groups, and creating teams works well with bigger groups.


Video 8. Wall Tag.

For smaller groups, video 8 shows what Matt calls “wall tag” (creative, right?). Again, probably credited to Lee Taft. Offense has to get their foot across the line at either one of the openings between the cones on the left or right side. Defense can reach over the wall to tag but not cross it—but they can run around the wall.

For larger groups, video 9 shows what Matt calls “team tag” (creativity is his strong suit). Offense starts in the middle box and goes one at a time, trying to tag one defender and run back. Defense must stay inside the boundaries but leave the boundaries once they are tagged. The clock starts on the “go” command and stops when the last offensive athlete returns to the middle box after tagging a defender. Communication, teamwork, agility, fun.


Video 9. Team Tag.
Cone Pick-Up Races

One of the benefits of racing is that it’s very objective: You either crossed the finish line first or you did not. One of the challenges of change-of-direction training is a 180-degree cut actually being 180 degrees going full speed or doing it precisely while going fast enough to provide an effective stimulus. Cone pick-up races combat this challenge and play into the objectivity of racing.

Determine the skill you want to work on, set up the cones/constraints accordingly, and explain the very simple rules. In this example, the skill was curve running combined with bilateral cutting. Here were the instructions: Start behind the line, stay on the outside of the cones, run and grab the cone in the middle, run back, and don’t lose.


Video 10. Cone Pick Up.

However, it doesn’t have to just be cones. The point is that it’s objective if the athlete picked up the item or not. In video 11, we were working on our pro shuttles (5-10-5) and using tennis balls, which took away the guesswork if the athlete touched the line or not. It reinforced the technique of what we were specifically training for and prevented the cheating of not touching the line to try to be faster. Matt also threw in a reactive start to create an advantage/disadvantage for “offense” and “defense,” respectively.


Insert Video 11. Tennis Ball Pick-Up.

Curve running, 90-degree cuts, 180-degree cuts, pivots cuts, accelerating from any position—you can emphasize anything depending on how you design the drill. Although some technique may worsen slightly with the intensity of the race, we believe it’s incredibly valuable to give the athletes simple constraints and have them figure it out full speed. If they go into a cut too fast and lose balance, they’ll lose; if they round the cut and make a wide turn, they’ll lose; if they try to be too fancy picking up the cone and drop it, they’ll lose.

Although some technique may worsen slightly with the intensity of the race, we believe it’s incredibly valuable to give the athletes simple constraints and have them figure it out full speed. Share on X

Additionally, the purpose of change-of-direction training is to improve game-speed agility during sport, and cone pick-up races do an awesome job bridging that gap.

Relay Races

Relay races are an awesome option for larger groups with endless variations. You’re competing against the other teams but also competing for your teammates. Although this video is not inside TC Boost (thanks again COVID-19), below is a video of short accelerations into a curve run followed by a sprint finish.


Video 12. Relay Race.

The athletes were cheering on their teammates, running as fast as possible, not thinking specifically about their footwork, and having fun. Checking off a lot of boxes right there.

A final relay for you…no, literally—a relay for you. Your athletes versus you, to be specific.

Twenty meters down, touch the line, 20 meters back. When the athlete returns to the start line, they tag their teammate, who promptly takes off with a smile that says, “I want to beat you, Coach.” Meanwhile, you have to touch the line and turn around again. You run one lap for every athlete you have.

Our advice…bust this one out in small groups, and only with young athletes!


Insert Video 13. Relay vs. Coach.

Speed Gate Golf

Kyle learned this game from Sam Portland—he talks about it in episode 141 of Joel Smith’s Just Fly Performance Podcast.

The idea here is to give an athlete a specific submaximal time to hit over a flying 10. You can play with what percentage of the PR you want them to hit. Not very many athletes get excited about intentionally running slow, but this is one way to challenge and engage them to do so.

We don’t have research to cite here, but it seems like if an athlete has conscious control and understanding of what 85%, 90%, and 95% of top speed feels like, and can execute those speeds on demand, that gives the athlete greater command over their speed and likely pushes the max velocity ceiling up.

At the very least, it can build mental comfort with running fast, as opposed to grinding and muscling your way to speed.

Variations: Changing the Start Command

To break the monotony of saying “go” to start each rep, an option is to engage athletes with different types of games. For instance, give simple math problems—if the answer is odd, they go. Or call out words and when the word ends in a vowel, that’s when the race starts.

To break the monotony of saying ‘go’ to start each rep, engage athletes with different types of games. For instance, give simple math problems—if the answer is odd, they go. Share on X

You’ll sometimes see brains melt.


Insert Video 14. Word games.

Get creative—maybe you have a deck of cards, and the race starts when you flip a face card, or an odd number, or an even number. Or a heart, a spade, an odd heart…the possibilities are endless.

Rock-paper-scissors is also a fan favorite around. Play until one athlete wins, and that’s when the race starts. Or have them face each other and pre-designate, “If you win, it’s a race to the cone on the left, but if you win, it’s a race to the cone on the right.”


Insert Video 15. Rock-Paper-Scissor Race.

If you find yourself, or your athletes, getting bored with traditional starts, mix it up with some of these games or create your own.

What About the Actual Fundamentals?

Technique is important, but it’s not the be-all and end-all. It should be addressed, but it doesn’t have to be perfect. Well, it depends. Every coach’s favorite saying. Please hold your eye roll for after this section.

We all know the fundamentals of good sprinting technique: good posture, hit your A-position, strike the ground with the ball of the foot, etc. And we all know what contributes to good sprinting technique: having enough strength and power to put appropriate force in the ground, the coordination to move the limbs in the right positions, the strength to hold/maintain those positions, and a nervous system effective enough to do all of that very fast.

With youth athletes, most of their “gainz” will come from improved coordination and nervous system capabilities. They don’t have the prerequisite physiology (yet) to achieve meaningful morphological changes. So, in the meantime, while waiting for Mother Nature to do her thing, exposing your athletes to the correct sprinting positions so they know what they are and what they feel like, sprinting with max intent, and having a ton of fun sounds like a good alternative.

On the flip side, your athletes will not have perfect technique in games. They will have every other variable under the sun distracting them from thinking “knee up, toe up” every step. The intensity of the game, trying to navigate defenders, strategizing what to do on offense, locating the ball, etc. will all take priority.

Gamifying sprint training is an opportunity to bridge the gap between technique work and game-speed performance, says @CoachBigToe & @KD_KyleDavey. Share on X

In training, an effective formula for helping “form” stick is pairing technique work with gamified drills. Also, we can’t forget the added bonus of additionally receiving coaching and feedback during these drills. This formula, over time, will lead to the transfer of technique in training to technique on the field.

Gamifying sprint training is an opportunity to bridge the gap between technique work and game-speed performance. Perfect technique isn’t useful if it can’t be applied with any sort of “winning” on the line (sport) and adding speed to awful technique will not contribute to LTAD (both performance and staying healthy). Athletes need the fundamentals, but they also need fun to put everything together.

To Gamify or Not to Gamify?

Let’s face it: Puberty is the greatest performance enhancer a kid will ever have. Youth athletes are going to get bigger, faster, and stronger all on their own, thanks to Mother Nature. So, don’t get in their way!

In our opinion, the biggest goal of training the youth athlete is instilling the most important training habit of all: consistency. Make training fun so your kids want to come to training sessions.

The biggest goal of training the youth athlete is instilling the most important training habit of all: consistency, says @CoachBigToe & @KD_KyleDavey. Share on X

The results you deliver, your pocketbook, and the athlete’s long-term development will all benefit from this approach.

Since you’re here…
…we have a small favor to ask. More people are reading SimpliFaster than ever, and each week we bring you compelling content from coaches, sport scientists, and physiotherapists who are devoted to building better athletes. Please take a moment to share the articles on social media, engage the authors with questions and comments below, and link to articles when appropriate if you have a blog or participate on forums of related topics. — SF


Matt TometzMatt Tometz is a sports performance specialist/sport science coordinator at TCBoost Sports Performance in Northbrook, Illinois. With a speed development background and a fascination for data, it’s his daily challenge to combine the art of coaching with the science of data for his athletes of all ages and sports. Outside the facility, Matt creates educational content for coaches and professionals. Find him on Instagram and Twitter @CoachBigToe, his website www.MattTometz.com, his YouTube channel and LinkedIn “Matt Tometz,” and his email: [email protected].

Dichotomies

The Dichotomies of Strength and Conditioning

Blog| ByTate Tobiason

Dichotomies

Read this; watch that; have you listened to Coach X?

Sound familiar?

Coaches today have an unimaginable amount of information at their fingertips compared to the coaches of 20 years ago. But is this a good thing? Trick question: of course it’s a good thing! The only downside is that within all this information, many coaches are trying to separate themselves from the pack and are drifting into dogmatic, almost militaristic styles of thinking on how to approach sports performance.

I’m not here to call these coaches out—plenty of others have—but rather I am here to say let us learn from them and their approaches. Behind most approaches (except burpees, which are stupid, and I will die on this hill fighting against them), there is a bit of truth.

There is a dichotomy between how professionals in strength and conditioning think the field must be handled.

A dichotomy is simply a division or contrast between two things that are (or are represented as being) divided into two entirely different, opposed, or contradictory groups (Dictionary.com). To put it in weight room terms: bilateral vs unilateral, aerobic vs anaerobic. Navigating dichotomies is recognizing the benefits of both yin and yang while refusing to make camp in one or the other. If you go too far one way or another, you might find success, but whatever success you do find will be short lived.

Navigating dichotomies is recognizing the benefits of both yin and yang while refusing to make camp in one or the other, says @Tate_Tobiason. Share on X

By learning to identify the dichotomies present in our field, we as coaches can better navigate not only our athletes’ development, but the forward direction of our chosen field.

The Dichotomy of Science

Science has been one of the most abused and misused words in the past decade. Coaches and companies everywhere claim to be driven by the science, and while that is good and all, the science can only go so far. There is a dichotomy between scientific theory and practice, which coaches must navigate.

Staying up to date on the latest research and understanding the implications is important, but I believe it is even more important to understand what the research is not stating. What’s the size and scope of the study? What are the rest times? (I’m looking at you P.A.P.) Can they fit into the flow of our training session? What population was studied?

Remember, the scientific method can only address one specific issue at a time, while sports are crazy complex. The science is only good if we can use it to win more games, not just to brag about our scientific approach on social media. Treat the science as a compass which guides us in the right direction while adapting the findings to our current situation. Do not treat the science as a rigid map and overhaul the facilities after each new study.

Remember, the scientific method can only address one specific issue at a time, while sports are crazy complex, says @Tate_Tobiason. Share on X

And remember, your athletes are not data points to be manipulated—they are individuals and should be treated as such. Do not turn into a callous lab coat in your quest to be backed by the science. The perfect program only exists between citations.

The Dichotomy of Technology

Technology has undoubtedly improved sport performance. From instantaneous feedback to player profiling, it helps guide a coach beyond what they can see with their own two eyes. However, if we aren’t careful, technology can take up our entire line of vision. The dichotomy between technology and old school observation occurs when a coach spends more time watching the numbers on a screen than they do the athlete.

A poor velocity reading might occur due to an imbalance in foot pressure or bar path, but one won’t know that if their eyes are glued to a screen. Focus on the athlete first and foremost before examining the data. Be a coach! There is such a thing as a recall function. Over time, your coach’s eye will start to align with the readings to help you become a more efficient coach. But be careful not to reject technology all together and essentially fly blind. Sorry, but no one has strength sonar.

Blue Green Contrast

The Dichotomy of Mobility

What is a sport coach’s favorite saying after losing a game? You guessed it: we need to stretch more. I’m going to blame us strength coaches for allowing this phrase to even still exist. Stretching is not a cure-all, and sometimes rigid movement on the field is because of overthinking.

We need to do a better job educating sport coaches on what mobility and flexibility are, and the dichotomy between training them. On the one hand, rigidity is necessary for maximal force production; on the other hand, however, force production must be expressed throughout a range of motion in sport. Careful how far you swing to one side or another. Mobilize for the sporting needs and no more.

Mobilize for the sporting needs and no more, says @Tate_Tobiason. Share on X

The Dichotomy of Strength

Do not get me wrong—strength matters. Strength, however, is not the end-all-be-all in sport performance. Strength lays the foundation for what can be, providing the athlete with potential to succeed.

The dichotomy between strength training and sport training appears when an athlete—in order to continue to increase strength levels—must reallocate training time towards raising said strength levels. At some point, the strength must be manifested through power outputs, RFD, and of course, on field/court performance. Where on the flip side, an athlete that does no strength training opens themselves towards higher injury rates and decreased performance as Father Time ticks away.

The Dichotomy of the Coach–Athlete Relationship

This is a unique dichotomy. On the one hand we want to develop meaningful relationships with our athletes where they feel comfortable enough to be honest with us; on the other hand however, we must maintain a respectable role as mentor/coach.

A coach does not need to know every athlete’s back story, they simply need to acknowledge that the athlete is a unique individual. Learn the art of short conversations. Mingle with the group before sessions and identify relatable characteristics between you and the athletes. Careful about how far your discussions dive with an athlete. These can be meaningful and warranted, but have potential to drift into legally gray issues. Do your job, be their coach—they already have friends.

Do your job, be their coach—your athletes already have friends, says @Tate_Tobiason. Share on X

The Dichotomy of the Strength Coach–Sport Coach Relationship

Every coach believes their way is the correct way. Sport coaches want to tell strength coaches how to lift, and strength coaches want to tell sport coaches how to practice. As strength coaches, we must develop healthy relationships with our sport coaches. We must avoid getting pushed around and overrun by the sport coaches wishes, while also being willing to compromise on training views at times. How many coaches have been fired or left on bad terms due to their dictatorial stances on programming? Then how many coaches have been fired because they didn’t speak up and the team fell apart?

By learning to walk this dichotomy, the field of strength and conditioning was created. Boyd Epley was no sport scientist. Rather, he was a man who knew how to sell his program to the coaching staff(s) while working with what they provided him. And he made the most of it, giving the likes of the author and the reader a chance to make a living.

It takes a village to find success in sport. Do not ostracize yourself from that village.

It takes a village to find success in sport. Do not ostracize yourself from that village, says @Tate_Tobiason. Share on X

Yes, There Are More

Strength and conditioning is a unique field where research and technology meet the human condition, opening up a world of nuance along with an ocean of dichotomies to navigate. I have only touched on a few of the many—take some time this week to examine your own coaching/practice and identify the possible dichotomies present. Feel free to share your reflections with me. I’d love to hear what you come up with.

Since you’re here…
…we have a small favor to ask. More people are reading SimpliFaster than ever, and each week we bring you compelling content from coaches, sport scientists, and physiotherapists who are devoted to building better athletes. Please take a moment to share the articles on social media, engage the authors with questions and comments below, and link to articles when appropriate if you have a blog or participate on forums of related topics. — SF

Softball Pitcher

Tips for the Young Strength Coach with Victoria Saucedo

Freelap Friday Five| ByVictoria Saucedo, ByCody Hughes

Softball Pitcher

Victoria Saucedo was born and raised in Southern California. She attended Utah State University, where she played softball and earned a bachelor’s degree in human movement science. She is a former GA at Northern Arizona University and earned a master’s degree there in educational psychology. Victoria currently serves as an assistant sports performance coach at Saint Louis University, overseeing the training for volleyball, softball, swimming and diving, track and field, and field hockey. She also assists with both men’s and women’s basketball.

Freelap USA: You have climbed the ladder quickly as a young coach. The S&C field is quite saturated. What do you believe has separated you from other candidates in the field during your journey?

Victoria Saucedo: I was fortunate to have met, in my opinion, some of the greatest individuals in our field during my softball career at Utah State. For the athletes at USU, the weight room was our favorite place to be. It did not matter to us if training sessions were held at 5:30 a.m. I saw firsthand as an athlete how a room should be managed and how an atmosphere gets created. And most importantly, I saw results.

I not only saw results for myself, but in our entire team, and those results translated to our performance on the field. I give so much credit to the staff at Utah State for my path and success. I have the perspective of both sides of the room, being both a coach and a washed-up athlete. I believe this gives me an edge on understanding what the athletes and teams are feeling and thinking. I can relate, empathize, help, and motivate since I have walked a similar path.

I don’t intentionally go out of my way to separate myself. I do everything I can to be the best version of myself. I know the type of coach I am, and if I act as anything outside of that, the athletes and coaches will sniff it out in a second. I live every day trying to grow from the day before, whether that is reading and educating myself on strength and conditioning, life, medicine, the stock market, news, etc.

I work with athletes from diverse backgrounds who are real human beings with family, friends, and real problems. I want to be educated on multiple aspects of life, because squatting 225 pounds for 10 won’t really provide help with real life issues. I always look to connect and grow relationships with the athletes. Something as simple as a conversation about subjects that they care enough to bring up and talk about goes a long way, even if it is about J. Cole’s new album.

I ask my athletes what their end goal is, and 99% of the time, it is to win a conference championship or beat their personal best. So, when the going gets tough, and they are dragging their feet in conditioning or training early in the morning, I make sure to let the athletes know what’s on the line that day. I remind them what they told me their goals are.

I like to make the atmosphere engaging and fun, but also competitive. We compete often, and sometimes I’ll even hop in if there is an odd number or the athletes challenge me and egg me on. Many coaches can talk the talk, but walking the walk goes a long way, too. This helps keep me in check.

Freelap USA: Strength and conditioning coaches are built from the quality of the mentorship they receive. Who are your biggest mentors in the field and how have they impacted your career path so far?

Victoria Saucedo: Many coaches on staff at Utah State from 2014-2017 had a huge impact on me, including Dave Scholz (Texas Tech Football), Alan Bishop (Houston Basketball), Chase Sanders (Cal Poly Pomona), Joe Powell (Utah State), Bri Brown (Racing Louisville FC), and Joey Bergles (JJ Pearce HS). All of them have had a direct impact on me.

Dave Scholz sat me down and told me what to expect in the field and how to prepare for it. Alan Bishop tells me the truth on how things are going to be, has been a great example, and helps me through any unfamiliar territory. Chase Sanders gave me my first internship opportunity: We had 16 sports with eight racks and experiencing how that program was executed and getting the chance to help was the best internship opportunity I could have asked for.

Joey Bergles was my strength coach for my last two years at USU. The way he implemented his program, including his detail-oriented coaching, was something I greatly enjoyed and can now implement with my teams. Joe Powell and Bri Brown are individuals who have been huge supporters of me. They gave me different insights on their routes in the field. When I struggle with certain aspects, they are there to listen and give me the response I need.

Lastly, Robb Hornett (Assistant AD for Sports Performance, St. Louis University) has broadened my perspective on different aspects of strength and conditioning. He has been a great mentor and boss. He challenges me on my programming and questions my thought processes, and when I assist him, he includes me and often asks me for improvements and how we can get better.

Freelap USA: It is often stated around the industry that being a great player does not automatically qualify you to be a good coach. What advantages, and disadvantages, do you believe you have from your playing career? What about these has molded you as a person and a strength coach?

Victoria Saucedo: When I finished with my eligibility, I had one semester remaining to complete my undergraduate degree. I became a volunteer coach for the softball team. I struggled because the athletes I coached were my teammates/roommates less than a year before, so the line between coach and friend was very blurry.

Being young can be an advantage, but also a disadvantage. There cannot be a lack of structure and boundaries in the athlete-coach relationship. At the same time, being younger in the field and closer to the athlete’s age, it is easier to relate and stay in touch with whatever is popular or trending, even though I may have zero clue to what is going on.

A disadvantage of being a successful athlete is always going back to the “glory days.” Former successful players who get into coaching easily fall into a mindset of “When I played, we did it like this, so that’s what we will do.” To be frank, no one cares. We must do what is right for the situation and population we are given. We must be able to critically think about what is best for our athletes. It is valuable to be able to gauge what the athletes are feeling based on previous athletic experience, but context is dynamic and complex, so it can’t be that cut and dry.

Lastly, being an athlete has made me a very competitive human. I think this will be my greatest advantage as a former athlete. I enjoy winning, and most of all, I enjoy the process of winning. I often tell my athletes that it is hard being great. Games are not necessarily dictated from the weight room or conditioning, but the consistency of creating greatness and hard work translates to the athlete’s nature. Skill obviously plays a big part, but the mindset of greatness is what separates good from great when skill and talent are close.

Athlete skill obviously plays a big part, but the mindset of greatness is what separates good from great when skill and talent are close, says @saucyy_vic. Share on X

I want to outwork, outperform, and outcoach, every single day. I try to find ways to get better every day so that I can make everyone I work with and surround myself with better.

Freelap USA: Knowing the X’s and O’s of strength and conditioning is important but learning how to coach is vital to execution. What are some key components to coaching versus just understanding concepts?

Victoria Saucedo: I think it is crucial to understand concepts and X’s and O’s. That’s a big part of our field. But at the end of the day, our job is to create robust and injury-resistant athletes and help the teams win. If we can’t master and understand the X’s and O’s, we may be out of a job.

A great program rarely lacks in relaying the why’s and the how’s at a high level. It comes down to a mastery of both people and skill. Coaching and concepts should be intertwined. I don’t see them as separate pieces. I am sure people can work on one concept a bit more than the other but having a well-thought-out program with both people skills and emotional IQ is a great formula for success.

There are teams I work with that love to know the “why.” After I go over the lifting/running session, they will ask all sorts of questions about how it translates to their sport and how it puts them in a position to succeed. On the other hand, I have teams that do not care why. As long as they know it will help them, they will crush whatever I have planned. This goes back to getting to know the athletes and teams and investing in people by taking time to go to their practices, talking between warm-ups, and getting insights from the coaching staff.

At Saint Louis University, I have five teams, which is about 120 student-athletes. I want to get to know them all. As I create dialogue with the athletes, this gives me more opportunity to educate them on important topics such as sleeping patterns, hydration, eating habits, breath work, extra training, and movement patterns.

Without the relationship connection, athletes will often tune you out when those topics come up. These conversations are crucial due to the influx of crappy information that is so readily accessible. At the end of the day, we must understand the concepts, relay the concepts at a high level, and create dialogue to better prepare the athletes.

Freelap USA: Being a female in the strength and conditioning industry is a challenge, and there are so many great female strength coaches in our field. What would you say to an aspiring female strength coach questioning their career path?

Victoria Saucedo: Being a female coach isn’t what makes it a challenge. It’s just like being a female in many other industries. Unfortunately, my abilities are often judged the moment I’m seen as female, in many aspects of life, from squatting at the gym, going to a supply store to buy wood for a dresser I am building, or applying for a job. I believe our field is getting better and creating more equal opportunities for all genders, but sometimes it’s not genuine and it is just to “check a box.”

The best candidate for the job should get the job, no matter the gender or race. I have been fortunate to work with and have mentors who have supported me and placed a lot of faith and trust in me because of my abilities. I just happen to be a female. I never saw myself as different from my male counterparts because of how I was coached and mentored. They treated me no differently—same responsibilities, same workload, and same care.

Any female coach questioning her career path should ask herself why. If it is because many strength coaches are males, and you’re unsure about being in that atmosphere, do it. Stand out, says @saucyy_vic. Share on X

Any female coach questioning their career path should ask herself why she is questioning it. If it is because many strength coaches are males, and you’re unsure about being in that atmosphere, then do it. Stand out. Be different. You are qualified and capable and happen to be a very strong woman.

Be smart and avoid toxic situations. If you’re in an environment that isn’t healthy for your well-being, get out. Being nervous about a career choice can be good. It is important to be able to get out of your comfort zone and grow.

Since you’re here…
…we have a small favor to ask. More people are reading SimpliFaster than ever, and each week we bring you compelling content from coaches, sport scientists, and physiotherapists who are devoted to building better athletes. Please take a moment to share the articles on social media, engage the authors with questions and comments below, and link to articles when appropriate if you have a blog or participate on forums of related topics. — SF


  • « Go to Previous Page
  • Page 1
  • Interim pages omitted …
  • Page 57
  • Page 58
  • Page 59
  • Page 60
  • Page 61
  • Interim pages omitted …
  • Page 164
  • Go to Next Page »

Primary Sidebar

FEATURED

  • Using Speed and Power Data to Bucket and Train Faster Athletes
  • Plyometric Training Systems: Developmental vs. Progressive
  • 9 (Fun!) Games to Develop Movement Skills and Athleticism

Latest Posts

  • Rapid Fire—Episode #16 Featuring George Green: Holistic Athlete Management
  • Rapid Fire—Episode #15 Featuring Kyle Brown: What is Universal Speed Rating (USR)?
  • Why We Don’t Perform Hang Cleans

Topics

  • Adult training
  • App features
  • Artificial Intelligence
  • Athlete
  • Athlete performance
  • Baseball
  • Buyer's Guide
  • Career
  • Certifications
  • Changing with the Game
  • Coach
  • Coaching
  • Coaching workflows
  • Coching
  • College athlete
  • Course Reviews
  • Dasher
  • Data management
  • EMG
  • Force plates
  • Future innovations
  • Game On Series
  • Getting Started
  • Injury prevention
  • Misconceptions Series
  • Motion tracking
  • Out of My Lane Series
  • Performance technology
  • Physical education
  • Plyometric training
  • Pneumatic resistance
  • Power
  • Power development
  • Practice
  • Rapid Fire
  • Reflectorless timing system
  • Running
  • Speed
  • Sports
  • Sports technology
  • Sprinters
  • Strength and conditioning
  • Strength training
  • Summer School with Dan Mullins
  • The Croc Show
  • Track and field
  • Training
  • Training efficiency
  • Wave loading
  • What I've Added/What I've Dropped Series
  • Youth athletics
  • Youth coaching

Categories

  • Blog
  • Buyer's Guide
  • Freelap Friday Five
  • Podcasts

COMPANY

  • Contact Us
  • Write for SimpliFaster
  • Affiliate Program
  • Terms of Use
  • SimpliFaster Privacy Policy
  • DMCA Policy
  • Return and Refund Policy
  • Disclaimer

Coaches Resources

  • Shop Online
  • SimpliFaster Blog
  • Buyer’s Guide
  • Freelap Friday Five
  • Coaches Job Listing

CONTACT INFORMATION

13100 Tech City Circle Suite 200

Alachua, FL 32615

(925) 461-5990 (office)

(925) 461-5991 (fax)

(800) 634-5990 (toll free in US)

Logo of BuyBoard Purchasing Cooperative. The word Buy is yellow and shaped like a shopping cart, while Board and Purchasing Cooperative are in blue text.
  • Facebook
  • Instagram
  • Twitter
  • YouTube

SIGNUP FOR NEWSLETTER

Loading

Copyright © 2025 SimpliFaster. All Rights Reserved.