[mashshare]
As coaches, we love to be in control. We work hard to minimize variables and create scenarios for our athletes that we can rehearse and repeat. After all, “we are what we repeatedly do so excellence is a habit.”
This mindset is definitely seen in most off-season training programs, as coaches use closed chain movement patterns and traditional lifting patterns to improve performance. While many of these movements are great tools to build an athletic foundation, we need to assess if they are the best use of our time for improving performance. Time is our biggest limiting factor in improving performance, so we want to make sure our exercise selection and programming give us the greatest amount of transfer to our sport.
Time is our biggest limiting factor in improving performance, so we want to make sure our exercise selection and programming give us the greatest amount of transfer to our sport. Share on XIt is this thought process that has led our staff to look at using asymmetrical training methods in our off-season training. Sports, particularly team sports, demand that athletes create force in a variety of planes with asymmetrical forces. Athletes need to be equipped to create these forces in a variety of scenarios, including:
- Running on a curve that requires athletes to use different forces on the inside/outside leg.
- Transferring weight and changing directions.
- Working through contact forces found in sports like football, lacrosse, soccer, and basketball.
Traditional training methods that lean heavily on bilateral lifts and linear plane movements often don’t meet these demands. As coaches, we had to make a choice: prepare our athletes to win at our off-season exercises or prepare our athletes to win on the field. To us, the choice was simple. The question was how to best implement this in our training.
While there are countless ways you can incorporate asymmetrical training into your program, we settled on these five easy-to-implement methods for ours.
- Use curved runs in our speed development.
- Add partner forces to apply pressure in different planes.
- Use bands in our speed/agility work to create asymmetric loads.
- Choose more unilateral movements.
- Use unstable loads.
For this article, we will focus on methods 1-3.
Curved Runs for Complete Speed
We have incorporated curved runs in a variety of ways to help our athletes. We love how they make us navigate different forces and also compel us to learn how to change postures in our running mechanics. With that in mind, we looked to progress our athletes from:
- Curve to upright (e.g., curved approach flying sprint).
- Curve to change direction (e.g., three-point run to coach signal, tennis ball drop).
- Upright approach to curve (e.g., straight fly to full speed curve).
- Upright to curve to upright (e.g., approach to three-point run to finish).
- Reactive based on partner (e.g., three-point chase, curved fly to chase, etc.).
We look to make our speed work as reactive as possible, so all runs are based on a key movement or partner movement.
Key coaching points for the curve:
- Lean into curve.
- Head leads the body.
Video 1. Running a few sprints tracing the three-point line on a basketball court is a great way to feel asymmetrical centripetal forces to the body. If you want to add athleticism to the drill, include variations like tag or chasing.
Partner Forces for Immediate Feedback
As a football coach, I love utilizing partner force runs because they definitely replicate the contact we encounter on the field. However, as we’ve worked with our other team sports, we’ve found great ways to create drills that simulate the uneven contact basketball or soccer athletes encounter as well. Contact on the upper platform changes how the body needs to navigate movement. From face-to-face contact at the line of scrimmage in football to an offensive player looking to disengage a defender trying to cut them off on a sprint to the hoop or goal in basketball/soccer, upper body contact is a common occurrence, and we want to train our athletes to navigate movement through the contact.
As with the curve runs, we looked to create a progression that increased the variables and difficulty for our athletes.
- Linear sprint against partner in front/offset.
- Linear sprint with partner on side.
- Curved run with partner in front/offset.
- Curved run with partner on side.
- Partner-resisted sprint to reactive finish.
With all of these methods, we look to use a few coaching points.
Cue 1: Drive Out
This was something I learned after talking with Chris Korfist a few years ago. We were discussing the start of the sprint and how too many athletes often focus on keeping their shoulders down (trying to “stay low”). It hurts their stride length because they are applying force in different directions. Chris shared that he cues his athletes to “drive out.” He explained that the key to the start was for the athlete to project their hips out as quickly as possible. This is true of a push-resisted sprint as well, as the forces needed for both skills are horizontal.
Cue 2: Pop the Ground
Sprinting against forces is no easy task. As with traditional acceleration mechanics, ground contact times can be long, particularly for athletes with a weaker foot/ankle complex. This is even truer with resisted sprinting. As a result, we want our players focusing on strong, quick contacts. We use verbal cues, calling of the hands, etc. to reinforce. We also use elevated surfaces (e.g., a thin rubber mat, piece of track, etc.) placed through the run to force them to contact quicker if it is still an issue.
Cue 3 (for Side Forces): Lean into the Force
When our athletes work against side forces, we want them to treat it like a curved run. We want them to lean into the force and drive the off arm and leg as hard as they can. We feel this gives two benefits for one cue: It helps them continue to accelerate into the force, and it also provides a reduced contact area for an opponent to push them.
Resisted Sprints for Learning
We have found bands to be an incredible tool for biofeedback and body positioning. We also like that we can localize the resistance point. This is especially useful to help our athletes feel/focus on the key coaching points rather than just hearing a verbal cue from us.
Video 2. It doesn’t matter if you are pushed or pulled, adding asymmetrical force to conventional sprints or acceleration works very well for athletes in team sports. A small amount of chaos is great for preseason conditioning when practice time is unavailable, but you still need to be ready to play sooner than later.
There are a variety of ways to use bands within speed and agility work, but the framework we begin with is proximal to distal. We want to begin with the resistance closer to the athlete’s center of mass so they can control the movement and have strong patterns. As they improve, we work further out, usually with the band strapped around the opposite shoulder. Here are a few examples of the ways we incorporate bands.
- Band-resisted sprints with the band on hip and behind.
- Band-resisted sprint start with the band around hip and to the side.
- Band-resisted sprints with the band across the opposite shoulder and behind.
- Band-resisted sprint start with the band around the shoulder and to the side.
We use similar strategies with bands for change of direction mechanics, but that’s for another article.
Unilateral Movements – Bridging Maximal Strength for Transfer
Asymmetric training isn’t just for the field, gym, or track. We love to use asymmetrical movements in the weight room as well. While we still utilize bilateral movements such as the deadlift and squat variations to improve acceleration, we believe in supplementing our training with asymmetrical methods to aid in COD, top-end speed, and nonlinear movements on the field/court.
Video 3. A combination movement like the rocker is more than just a single leg squat, it’s also a mobility exercise and an activation drill. You can put the rocker into a lifting program, a warm-up, and even a recovery day.
When using asymmetrical methods in the weight room, we begin with simple unilateral movements and loading. From traditional movements like lunge variations and single leg deadlifts to single arm presses/rows, we’ve found that using asymmetrical training helps us improve performance. One thing to note when programming is that we look to progress the athlete to unilateral movements with single limb or variable loading due to the challenge in stability and execution. As you design your program, just know there are myriad options to solve the puzzles your athletes present, and you’re only limited by your creativity.
Here are a few of our favorite asymmetric weight room movements to start with.
Single Limb Lifts
Single leg RDL
PNF raises
Kneeling step-up
ISO RDL to step-up
ISO RDL to one-arm row
Single Leg Plyos
Rocker jumps
Kneeling jump
Video 4. The band-supported (or assisted) rockers are great for ankle range of motion and learning the motion. Assisted rockers are not explosive or strength exercises.
Variable (Unstable) Loads
Asymmetric training in the weight room is not just limited to your movement selection. In addition to the movements I talked about, we also love the use of variable loading in our movements. We feel using uneven loading or variable loading compels our athletes to problem-solve to execute fundamental movements. They learn body control by handling different forces throughout the duration of the movement.
Asymmetric training in the weight room is not just limited to movement selection. We also love the use of variable loading in our movements, says @LUCoachTreske. Share on XWe believe that using variable loads more closely mimics the situations our athletes encounter on the field and court. Contact and force change as the game is played, and we want our athletes to be prepared for that. One thing to note: This is a more challenging method and one we progress to over time. I will also say the training age of our college athletes allows us to progress a little faster than if we were at the high school level.
Loaded Movements – Details That Matter
As I mentioned previously, only your creativity and equipment limit you in developing unstable loads to solve your athletes’ problems. We have used a wide variety of movements with variable loading, but here are a few of our favorites.
Phantom/Uneven Weights
This method was first introduced to me by Eric Donoval, the Associate Director of Sports Performance for Football at the University of Wyoming. We utilized a “phantom step-up” by performing a traditional barbell step-up using uneven loading on the bar. By loading the side opposite the step leg, we forced more glute med engagement and lateral hip/core stability. You can utilize this method with a wide variety of movements to help the athlete learn to stabilize and control a load. We progress the movement by increasing the load disparity.
Video 5. The use of a phantom step-up adds variety with a purpose to any training program. The asymmetrical loading pattern is very mild and just enough to keep athletes honest.
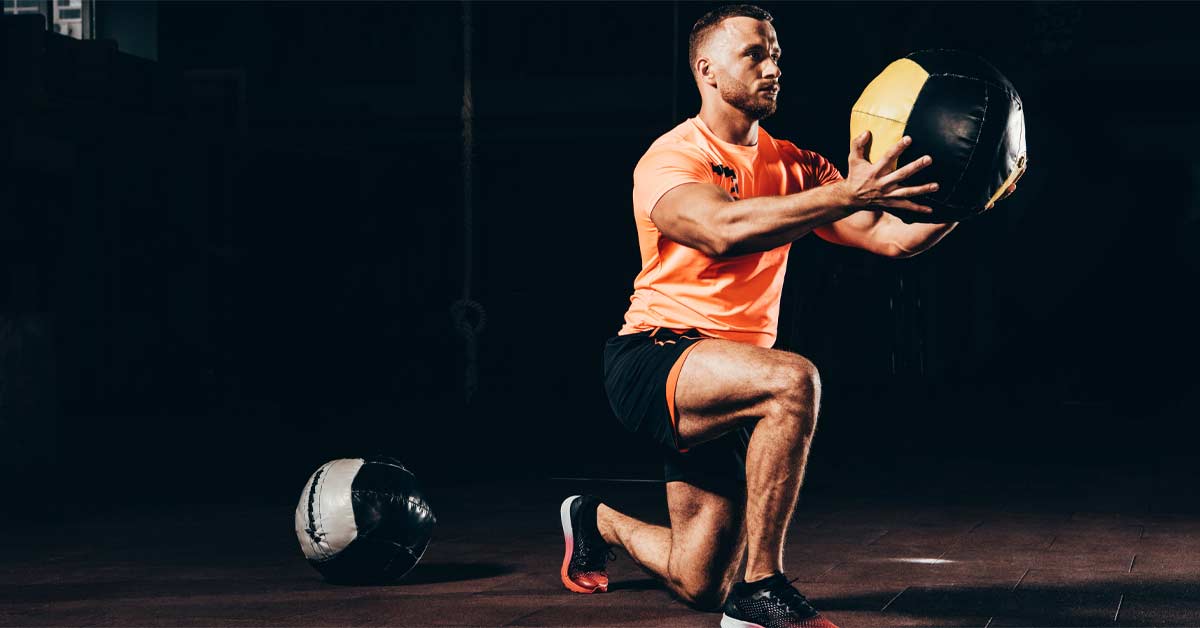
Medball Catch to Redirect
This method is great because it’s easy to teach and implement, especially in large group settings. We begin by placing the athlete in a critical position (start, toe off, COD position, jump landing, etc.). The athlete then receives a medball toss from a partner and has to display the sequential movement.
There are a variety of different movements you can do following the catch, but we typically progress it as follows: catch to throw, catch to jump, catch to sprint. To progress the loading, we change the plane, location, and velocity of the initial catch. This has been a great method to target upper body rotation, particularly with our change of direction work.
Video 6. Many coaches get bored with using the same routines so spicing things up without getting silly is the name of the game. Add important movement patterns by learning to load and release with asymmetrical patterns.
Aqua Bags (Banded PVCs with Weights)
Frans Bosch and Chris Korfist have popularized this method. Aqua Bags are phenomenal tools for providing variable loading, and I learned firsthand how challenging they can be to control when shadowing one of Chris’ track workouts. If you aren’t able to purchase Aqua Bags, there are alternatives.
If you are handy, one option is to purchase a thick PVC pipe, fill it with water, and seal it. Another option is the method we utilize with our athletes, and that is to wrap bands with light weights looped in around each end of a PVC pipe. The slack in the band allows for the weights to move as the athlete moves. It is an effective method that we love to use with any movement that requires hip stability, though admittedly the Aqua Bags are the easier option to use for athletes.
Mastering Banded Movements with Athletes
Bands are a tremendous way to add variable loading in the weight room. This method is by no means new, as the Westside Barbell and powerlifting community has utilized it with great success for quite some time; however, the method is often overlooked as a way to address asymmetrical needs and individual weaknesses. There are a ton of great resources on incorporating bands in the weight room, but there are a few things that have worked for us in progressing the movements and loads.
The incorporation of bands in the weight room is often overlooked as a way to address asymmetrical needs and individual weaknesses, says @LUCoachTreske. Share on XMovements: We progress the banded weight room movements from bilateral to unilateral, both for movement difficulty and for the challenge in implementation.
Example of Bilateral Movement: Band-Resisted to Band-Assisted Broad Jump
We are big fans of using bands with our broad jumps, especially from a pause start, as it forces the athlete to generate power from a start position with no countermovement. From this position, we execute both a resisted jump (to emphasize the initial push phase) and an assisted jump (to emphasize hip extension). We add hops or small depth drops to the approach as well.
Example of Unilateral Movement: Band-Aided Pistol Squats to Assisted Single Leg Jumps
The band has been a great tool to help teach single leg motor control and ankle mobility. Once we can get the athlete to demonstrate strong positions (shin/torso angle parallel), we implement jumps and transitions from the position. We start with holding the band during an eccentric on the descent to releasing it on a jump. We then progress to bodyweight movements and later to band-assisted jumps where athletes have to learn to control greater forces from a single leg stance.
Loads: We progress the bands from the angles we attach first (proximal to distal) to higher resistance bands. We love this because we can do the same movements with a different effect and intent.
Example of Proximal to Distal Load: Band-Aided Pistol Squats/Assisted Single Leg Jumps
Utilizing the same movement we described before, we can use the band location to force the athlete to handle the load differently. When we want to emphasize the ankle and foot’s ability to handle the load, we place the band further in front of the athlete. When we want to target lateral hip stability, we begin to work the band further to either side of the athlete. As we mentioned before, we progress to bodyweight transitions and assisted jumps. We also alter the planes we begin with and the type of approaches we use as the athlete progresses.
A Few Recommendations
The demands of sport don’t require preparation in one plane; nor do they require balanced loading and transfer of force. Asymmetric training is one way we can prepare our athletes—particularly those who encounter contact—to excel in their given sport. In addition to the exercises discussed in this article, we aim to use the weight room to address asymmetric needs as well.
Our staff feels we are only scratching the surface for ways to incorporate this method, and even a quick glance at Twitter shows others are as well. I look forward to sharing more of what we do and learning from great minds in the coaching world.
Since you’re here…
…we have a small favor to ask. More people are reading SimpliFaster than ever, and each week we bring you compelling content from coaches, sport scientists, and physiotherapists who are devoted to building better athletes. Please take a moment to share the articles on social media, engage the authors with questions and comments below, and link to articles when appropriate if you have a blog or participate on forums of related topics. — SF
[mashshare]


