• Skip to content
  • Skip to primary sidebar
SimpliFaster

SimpliFaster

cart

Top Header Element

  • Facebook
  • Instagram
  • Twitter
  • YouTube
  • Login
  • cartCart
  • (925) 461-5990
  • Shop
  • Request a Quote
  • Blog
  • Buyer’s Guide
  • Freelap Friday Five
  • Podcast
  • Job Board
    • Candidate
    • Employer
    • Facebook
    • Instagram
    • Twitter
    • YouTube
You are here: Home / Blog

Blog

Large Group Training

Training Large Group Sessions in the Private Sector

Blog| ByJuwan Griffith

Large Group Training

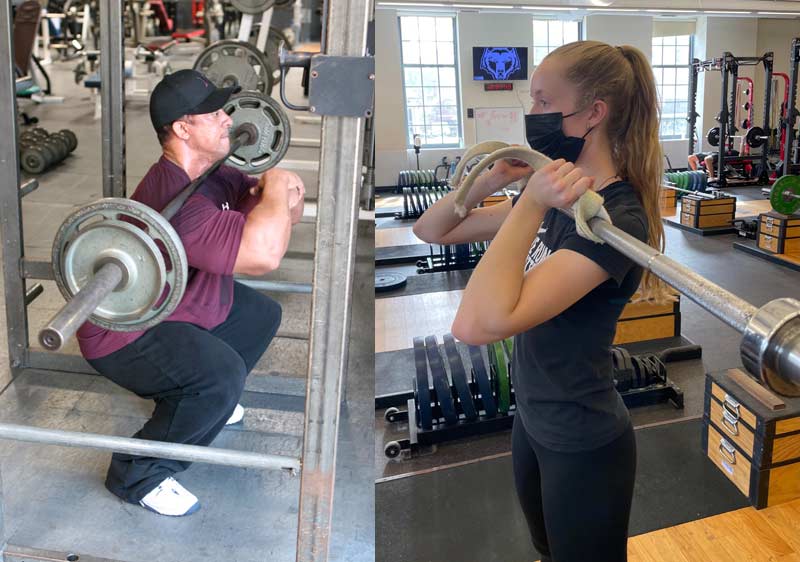
In the strength and conditioning industry, coaches can train athletes at various levels, such as junior high school, high school, college, and professional. In college and professional settings, there are many resources to utilize as a strength and conditioning coach to ensure that the athletes get the best adaptations possible for optimal performance. Many facilities have more than 10 power racks, multiple specialty bars, velocity-based training technology, and more equipment for use.

In the private sector, coaches may not have those same resources due to constraints within the business, such as time, money, staff management, and facility constraints. However, athletes are still the focus, and the ability to streamline and train your athletes at a high level while inducing stress for adaptation is still the number one goal as a strength and conditioning coach.

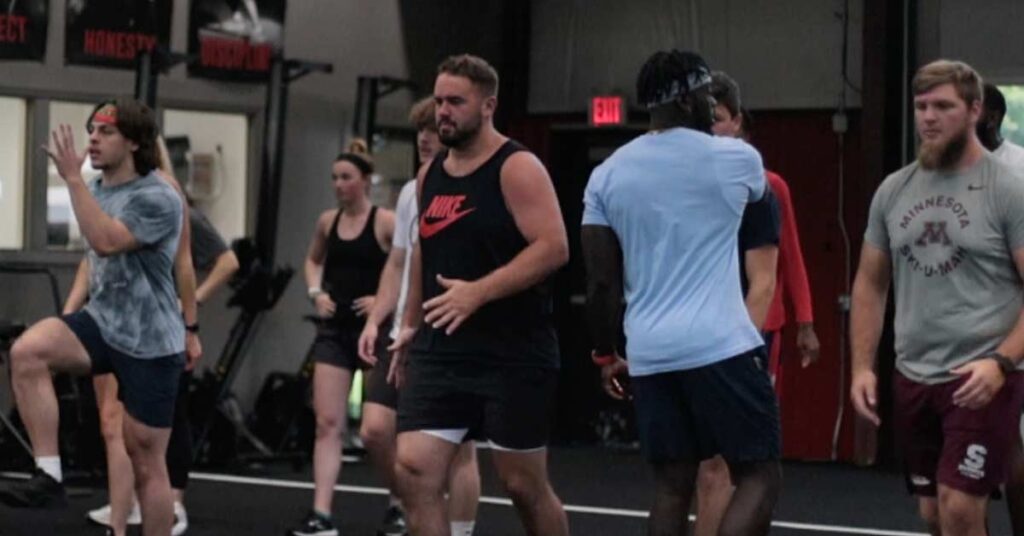
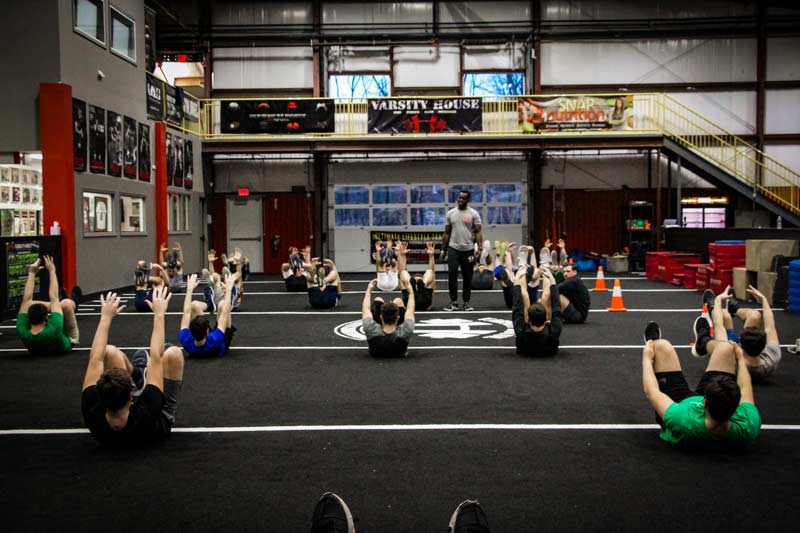
Coaches in the private sector look to provide the best training possible for their athletes. Some facilities allow for 6–10 athletes and some facilities allow for coaches to train 15–20+ athletes at one time. This begs the question: How do you facilitate and run a large group training session in the private sector?

The principles for running a large group session require an assessment of space and facility... As stupid as it may sound, many coaches overlook the space component when planning a training session. Share on X

There are many different avenues you can take to run a large group session, depending on the facility’s resources and capacity. The principles for running a large group session require an assessment of space and facility, time constraints, resources, and command and control.

Facility Considerations

First, as a coach you must assess your space. As stupid as this might sound, many coaches overlook the space component when running a training session. Before programming even begins, you must ask yourself:

  1. How many athletes will be in the session?
  2. How many coaches do I have to run that session?
  3. What athletes will I have in the session (male, female, sport, etc.)?
  4. What do the athletes generally need in terms of training?
  5. Based on their needs, what space do I have to work with in the training session?

At Varsity House Gym, we train different teams with more than 30 athletes in a session. Most high school athletes generally need more strength training under heavier loads with proper technique. The focus is to improve movement quality and instill the idea that technique is more important than load, and then progress from that perspective.

As coaches, when we know how many athletes we will have and what the athletes generally need, we can determine what to program based on the space available in the facility. An example of making a training adjustment is removing Olympic lifting from the program and replacing the movement with ballistic medicine ball exercises. While I am a big advocate of Olympic lifting in high school athletes, I also understand the learning curve that is required to ensure the athletes are meeting loads that elicit the proper adaptations. That being said, it is beneficial to have a training philosophy and understand how to regress and progress the movement rather than the exercise itself.

Know the Plan

Second, programming large group sessions requires coaches to be swift, effective, and to the point in a short period of time. For the most part, most coaches do not have more than 60 minutes to get a training session in with their athletes. Attention and focus from the athletes and the coach must be high, and they must be as well organized and prepared as possible.

For the most part, most coaches don’t have more than 60 minutes to get a training session in with their athletes. One way to stay organized is by running station-based training, says @debadjuju. Share on X

One way to stay organized is by running station-based training for athletes. When coaches program stations, it allows them to control the time in which the athletes must work at each station, forces the athletes to move quicker through their workout and have a sense of urgency, and meets the athletes’ training needs when programmed correctly. The group size will be indicative of the number of stations and how long the stations will run. For a football team of 40 athletes, we will have four stations with three exercises running for eight minutes at each station.

  • Station 1
    • DB bench
    • Inverted row
    • Reverse lunges
  • Station 2
    • Front foot elevated split squats
    • Single-leg RDLs
    • Push-ups
  • Station 3
    • Single-arm farmer carry
    • Lateral bounders
    • Box jumps
  • Station 4
    • Reverse sled drag
    • TRX rows
    • Band pull-apart

The goal for lifts like these is to attack each component of athletic development (push, pull, hinge, carry, plyometric) in some way in a short amount of time. Coaches must run a cost-benefit analysis on what they want their athletes to do and how they want their athletes to do it.

If, for example, the goal is to produce more force, then we must be creative with accomplishing that goal in a timely manner. We can meet different goals of athletic development by changing and manipulating the sets, reps, and intensities via the tempo of lifts. This is not to say that coaches can’t use accommodating resistance such as chains and bands to meet those goals, but if athletes don’t have the capacity to handle those modalities, or coaches do not have the manpower to effectively coach, then we must be innovative in the way we program.

Group Training
Image 1. Successfully running training sessions for large groups requires planning and a knowledge of the space you have to train in.

Use the Assets Available

The third component to coaching a large group session is asking what resources you have and commanding and controlling the climate you are in. Resources are the blaring elephant in the room when it comes to programming ability and bandwidth. There are coaches who will blindly program exercises and movements that require technical proficiency and fine-tuning but not have the staff to effectively facilitate the session.

Resources are the blaring elephant in the room when it comes to programming ability and bandwidth, says @debadjuju. Share on X

In a perfect world, coaches would want a 1:9 coach-to-athlete ratio in three racks. Three athletes per rack allows for the athletes to set up and break down equipment faster, learn from each other, and manage the flow of the session for the coach. If your facility has the means where there is a 1:6 coach-to-athlete ratio, then coaches can get a little more detailed with their programming. A training session with our athletes at Varsity House goes as follows:

Varsity House Session
Figure 1. Available resources will also determine your programming. This is what a training session with our athletes at Varsity House looks like.

This is a simple program that requires attention to detail both on the part of the athlete and the coaches involved. Your why behind training will always come before your how; however, you will not be able to execute higher modalities of training if you do not have the right resources or people in place.

Your WHY behind training will always come before your HOW; however, you can’t execute higher training modalities if you don’t have the right resources or people in place, says @debadjuju. Share on X

What happens when you have athletes with different skill sets and training ages?

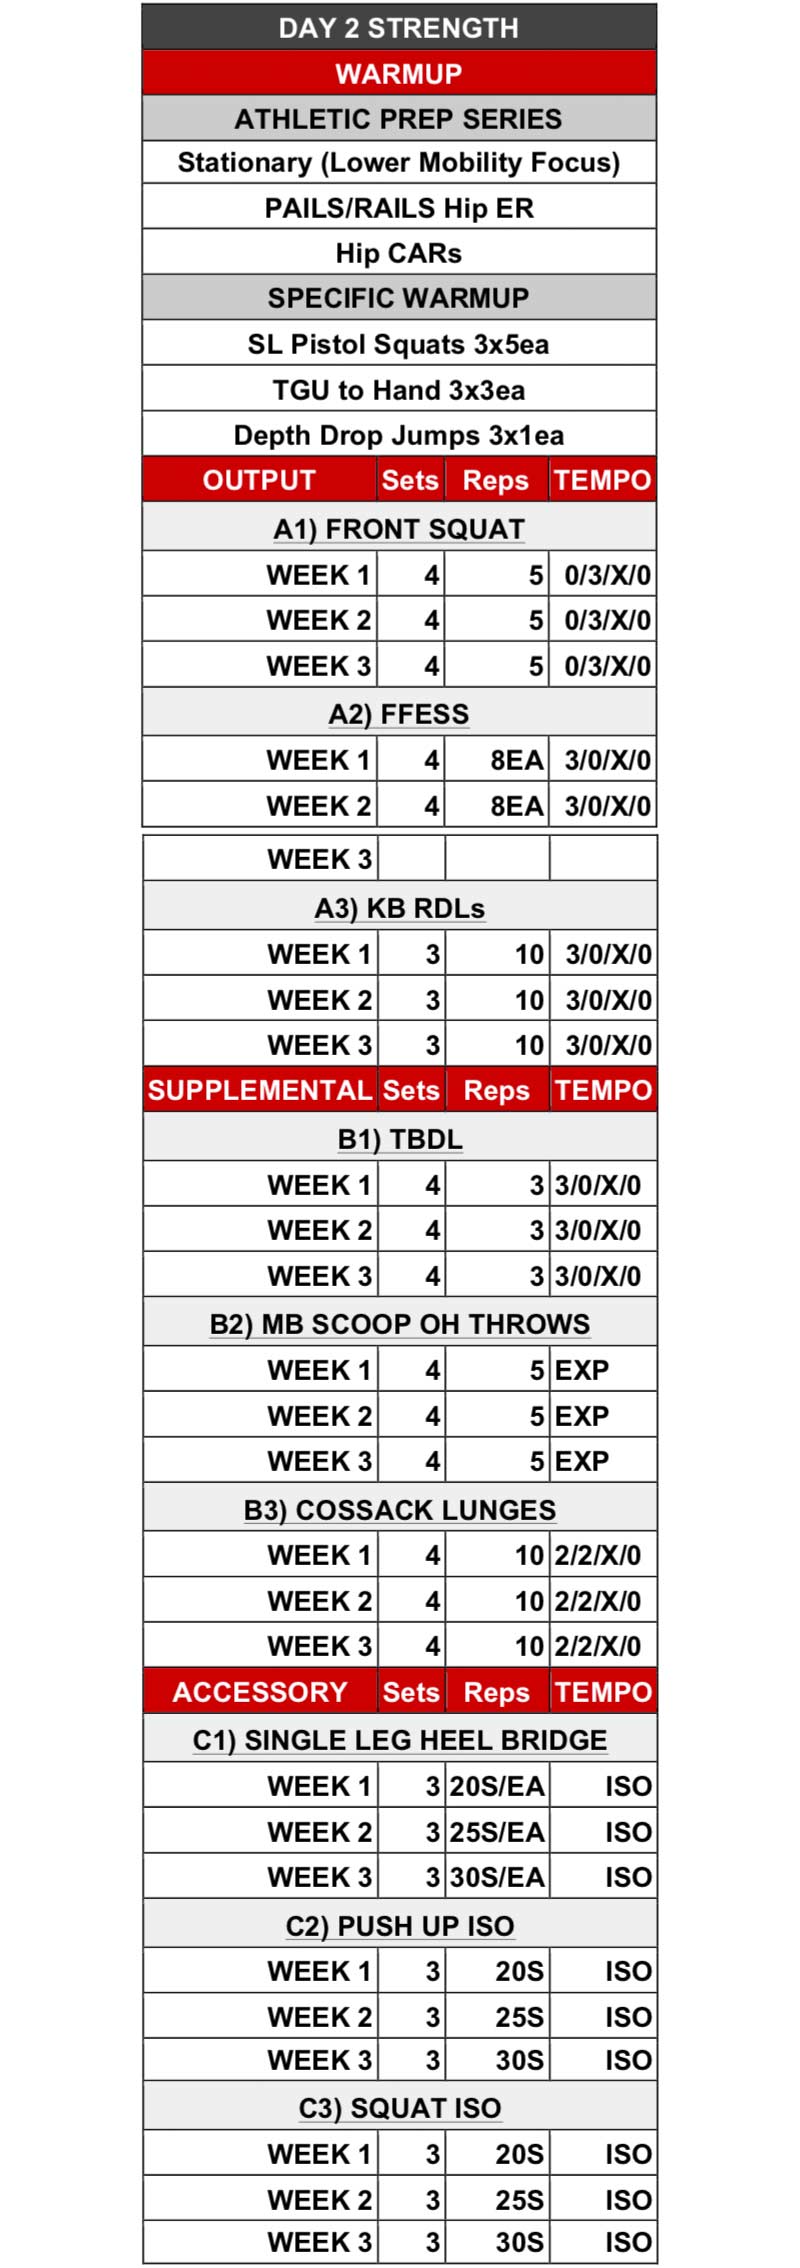
Given the capacity to do so, run separate concurrent programs or base the program on the lowest common denominator. Running concurrent programs looks like if a coach had a football team of 40 players—all of whom are different biological ages and training ages—that coach would want to have a beginner, intermediate, and advanced level program for the players. Coaches must understand proper progressions and regressions of movements to meet the athletes’ needs from a sports performance view. Kris Robertson, who is the Head Strength and Conditioning Coach for Simon Fraser University, wrote a standard criterion for youth development.

KRT Figure
Figure 2. A framework for youth development, including appropriate regressions and progressions, written by Kris Robertson, the Head Strength and Conditioning Coach for Simon Fraser University.

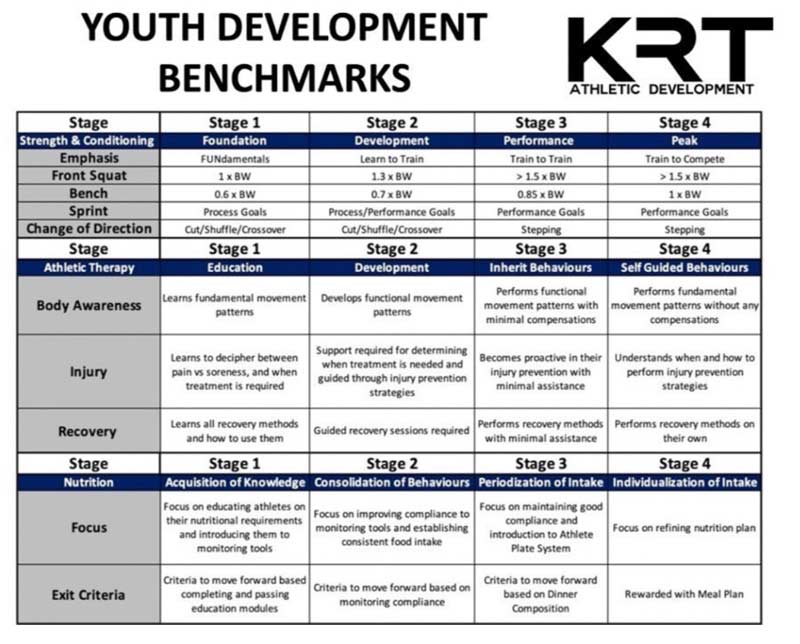
These benchmarks are a framework to scope your training methodology for your athletes, but the principle of meeting certain criteria before moving to the next stage holds. To run multiple programs during one session, you must understand and know what the end state is and reverse-engineer how to achieve that end goal.

Quality Coaching

Lastly, coaches need to command and always control the room and the session. There are certain intangibles that a coach needs to efficiently run a session. I’m not saying that you must be the rah-rah stereotypical strength coach who is loud and highly caffeinated, but you need to be able to capture the attention and focus of a room.

A coach must understand the general environment they are working in and the personalities they are working with to best facilitate success. For example, the stereotypical strength coach may be beneficial and needed for a football team’s culture, whereas a more reserved approach may be favorable for a men’s basketball team. The control portion relies on the second point, in which your programming is efficient and flows. A coach can command and control a room if they are well-spoken and communicative, and the flow of their session runs smoothly.

A great piece of advice when running a session is to do a mock session and set up all the equipment needed. Run through the session and identify any potential bottlenecks, says @debadjuju. Share on X

A great piece of advice when running a session is to do a mock session and set up all the equipment needed. Run through the session itself and identify any potential bottlenecks in the design to ensure that the session will continue to flow. An efficient session requires a focus on the why and how of preparation and attention to detail.

Final Takeaways

Running a large group session in a college weight room does not necessarily translate to running that same session in the private sector. Depending on the private facility, a coach may be constrained by factors such as space, time, staffing, and resources.

Even when those issues are present, a coach can effectively overcome them with the proper mindset and tools. Applying the ones I’ve mentioned, I have been able to coach sessions seamlessly by understanding what my end goal is and working backward to develop a robust plan to meet that goal. My primary aim as a strength and conditioning coach is to build healthy athletes while minimizing injury risk. The principles of running a large group training session and knowing my athletes’ needs have allowed me to be successful in increasing strength and speed during training blocks.

Since you’re here…
…we have a small favor to ask. More people are reading SimpliFaster than ever, and each week we bring you compelling content from coaches, sport scientists, and physiotherapists who are devoted to building better athletes. Please take a moment to share the articles on social media, engage the authors with questions and comments below, and link to articles when appropriate if you have a blog or participate on forums of related topics. — SF


Dumbbell Grip

Managing Stress Through Autoregulated Training

Blog| ByDrew Hill

Dumbbell Grip

Picture this. You’ve created the perfect program down to every rep. For the next few weeks, you know exactly what your athletes will do to succeed. There are even some colorful graphs that show the max recoverable volume for each week—something you’re extremely proud of. You gaze over the spreadsheet as if it were your firstborn child. Nothing can bring you down from the high of this moment—except for 32 kids dragging themselves into your weight room after a punishment conditioning session for penalties the week before.

Cue glass shattering sounds. One by one, your athletes fail this “perfect” program.

This is a real scenario I remember going through as a young coach in college. My program bit the dust, and we adjusted on the fly to squeeze out a worthless training session. I wish I could say this only happened once, but that would make me a liar.

I know that I’m not the only strength coach who has experienced this exact scenario. Maybe it wasn’t conditioning that got athletes; perhaps it was a lack of sleep, not eating enough, a heavy class load, extracurriculars, a crazy fad diet, their significant other dumped them, their dog died, etc. Whatever it is, you don’t always get 100% from your athletes—shoot, sometimes you barely get 50%.

Tired Kids
Image 1. The reality of working with athletes is that sometimes they are EXHAUSTED.

This poses a very important question: In a setting with dozens of kids, how can we create a program to maximize each athlete’s session no matter the circumstance? There are many ways to do this, but a strategy that I have been using for years is autoregulation.

What Is Autoregulation?

Autoregulation is a training method that adjusts each session based on the ability of each individual that day or moment. This is affected by both their perceived capability and their actual ability. The problem with this strategy is that it is harder to periodize since each session’s “success” is left to the whim of the user.

Autoregulation is a training method that adjusts each session based on each individual’s ability that day or moment. This is affected by both their PERCEIVED capability and their ACTUAL ability. Share on X

Without control over volume or intensity, most coaches might feel like a captain without a sail. We all know that athletes vary in the way they want to push themselves. I was someone who would take it to an 11/10 each workout and just deal with the consequences: If my program sheet said I had a 365-pound clean, I was going to get it at all costs.

Conversely, I’ve worked with athletes who, when given the choice, elect to do NOTHING. We used to play a game with these types of athletes in college called SNIPER. A random coach would count all their reps and mark it down when they skipped any. Then at the end of the workout, BAM! we would punish them for every rep missed.

This is why it is important to know your audience and then build a program around them.

Autoregulate Your Weight Room

I’ve compiled a list of some of the different forms of autoregulation I use as well as the type of athlete I most use them on. I’ve also categorized these based on the simplest to implement to the most complex/expensive.

Ready Score (Age 14+, for ALL Sport Athletes)

If I had a dollar each time an athlete told me that they were “tired,” I’d be competing with Bezos and Musk for richest person alive. For years, I would just say “me too” and laugh it off. It wasn’t until we created a simple score chart that we were able to quantify each person’s readiness and actually determine who was too tired versus who just wanted to complain.

There are many ways to do this, but our chart has three tangible and two intangible scores. This allows for true as well as interpersonal metrics to be considered. When a score is low enough, we adjust that individual’s workout to be less intense. We still get in a quality session, they feel like their feelings are heard, and we save a lot of frustration.

It wasn’t until we created a simple score chart that we were able to quantify each athlete’s readiness and actually determine who was too tired vs. who just wanted to complain, says @endunamoo_sc. Share on X

The reason we say this is for kids 14 and up is that prepubescent athletes seem to have a hard time with introspective thought, and they recover much faster than their older peers. I’ve seen kids play six games over a weekend and be ready to go by Monday.

Readiness Chart
Image 2. Self-reported readiness chart.

Max Reps (Age 12+, Basic Level of Weightlifting Knowledge)

This is one of the easiest ways to get in a lot of work in a short time. It’s also a great way to build competition into any program. The principles are simple:

  • Perform a baseline set of reps (we do one to two sets of five, three, or one).
  • Perform a max reps set following three rules: No repetitive bad form, no failure, and leave one rep for next time.

This can be as simple as allowing kids with younger training ages to get more volume or as complex as affecting each athlete’s progression based on the reps completed.

For example, in our program we have a “class leader,” which is the person who completes the most reps in one set during an exercise—it stimulates competition and gets more reps out of otherwise less-involved members. For progression, we use the rule if you can do more than the minimum but less than double, next week’s percentage increases 2.5%, and if you can do more than double you go up by 5%. So, for example, if we do a set of five at 70%, and they complete 12 reps on their max reps set, next week they will do 75%.

Rapid/Chaos Training (Age 16+, at Least 1 Year of Weight Room)

Whenever I talk with other coaches, I find this modality to be one of the least used in autoregulation. In the past few years, tempo eccentrics has become the golden calf of weight room training: it is worshipped. Strength coaches on Twitter drool over dozens of athletes squatting with synchronized uniformity. That being said, a growing amount of research supports the concept of rapid eccentric training in the weight room. (Here’s just one example.)

A rapid or chaos lift requires athletes to quickly lower and then ascend a movement to complete the set as fast as possible. Anyone can perform a rapid concentric, but it is astounding how few can perform a rapid eccentric with a little bit of weight. The autoregulation of this comes in the form of a stopwatch.

Anyone can perform a rapid concentric, but it is astounding how few can perform a rapid eccentric with a little bit of weight, says @endunamoo_sc. Share on X

Squats, for example, are a great way to challenge the rapid eccentric, since there is a turnover moment at the bottom. If I prescribe three sets of five at 50% 1RM, I will record their first set and challenge them to beat it. If they are able to move the weight even faster on the second set, I add 5% and challenge them again. The next week, we will start at a higher percentage and do it again.

Because emphasis is placed on speed over load, a tired athlete will simply move the load slower, while a prepared athlete will maximize speed gains. The greatest drawback of this autoregulation is that it requires a good coach’s eye. Athletes are notorious for compromising form for speed. Likewise, no increase in load should occur if there is obvious struggle or deceleration—a set of five rapid squats should not take 15 seconds.


Video 1. Rapid chaos lifting.

Velocity-Based Training (Age 16+, Requires Technology, 1- to 2-Year Minimum Experience)

One of the fastest growing trends in the weight room has to be velocity-based training (VBT). It is by far the sexiest of the autoregulation methods I have brought before you today. To use this method, you must intertwine technology and the barbell to create the ultimate feedback system. I’ve even used VBT to conduct a study on fatiguability in weightlifters. There are many ways to autoregulate this, but first you have to determine what your goal is and then work to a weight and speed combination that achieves that goal.

To keep it simple, I will talk about the primary three zones of speed we work on and how to progress through them using a block strategy system. This is a force-to-velocity-based system, but there are many ways to do this:

  • Block One: Weeks 1-3 (accelerative strength)
    Starting at about 65%, your athlete will perform 1-5 reps for 3-5 sets. Our goal is to lift a weight between 0.5 and 0.75 meters per second (m/s). If they can move the weight faster than 0.75 m/s, you will instruct them to add 5% to the bar. The ceiling for most athletes will be 85% at 0.5 m/s for only one or two reps.
  • Block Two: Weeks 4-6 (strength-speed)
    Starting at about 45% of their 1RM, your athlete will perform 1-3 reps for 3-5 sets. Ideally, the weight will move 0.75-1.0 m/s. If the weight is moved faster than 1 m/s, they will add 5% to the bar; however, if it moves under 0.75, drop the weight by 5%. Starting in this block, speed will matter much more than weight as you prepare for the final block. At most, you can expect them to achieve 60% of their 1RM.
  • Block Three: Week 7-9 (speed-strength)
    Most athletes dislike this block due to the lack of weight, but a great VBT system can reinforce competition and effort by giving speed feedback. I like to make it a competition, having our guys compete for speed over absolute weight achieved. Start this block at 25% of their 1RM and perform sets of 1-3 for 3-5 total rounds. The weight needs to move between 1.0 m/s and 1.3 m/s and only increase by 5% each set that they achieve faster than 1.3 m/s. Your top performers will achieve around 45% of their 1RM.
VBT Profile
Image 3. Three-block VBT system.

Other than the cost of technology, this method does have drawbacks. For one, it greatly slows down the flow of your training. It can also be demotivating for certain populations of athlete to lift so little. I like to use this strategy during the season and with my older population (20+ year-olds) because it maximizes the day-to-day output of the nervous system without adding too much volume to already overworked athletes.

RIR/RPE (18+, More Motivated and Experienced Lifters, at Least 1 Year in Weight Room)

Reps in reserve (RIR) and rate of perceived exertion (RPE) are great ways to decide what weight can be lifted on any given day. I’ve used this with more success with barbell sport athletes than others, but it is still an option to explore.

The idea is that you provide a rep range and then prescribe an intensity based on feel. For example, let’s say that your athlete is working up to a heavy single at RPE 8 or RIR 2. Rather than leave them to their own devices, you will give them a percent range to work through.

For this, we will prescribe 80%-95%, allowing them to start with a very manageable percentage and then build up to a weight that achieves our RPE/RIR goal. The downside to this is that ego can really affect what an athlete thinks an 8 actually is. I’ve seen college kids grind out an obvious 10/10 only to turn around and cheerfully chime: “That was a 7.5. I’m going to add 5 pounds.”

No, you’re not, kid.

RPE RIR system
Image 4. An example of one of our RPE/RIR sets for a low-intensity day.

What to Choose

Some coaches may never fully embrace the nuance of autoregulation within their training; however, they don’t have a choice. When prescribing a percentage of weight, a sprint, or a plyometric for an athlete, their fatigue and readiness will affect the outcome of that exercise. When your athletes are tired and they fail their weights for the day, they’ve performed a max effort set and attempted an RPE 10 (even if it would have normally been an 8).

In contrast, you might find that you have a standout athlete who needs more weight to be at the appropriate velocity for your current block goals. Even when you have them sprint or jump, the variability within the day to day affects the output and, therefore, the desired adaptation of that session. This is why I am a big believer in manipulating the autoregulation that typically goes “unseen” by planning for it ahead of time. You may not have the resources or technology to capture every athlete’s daily performance, but you can build in self assessments that allow them to determine their max volume or intensity for that day.

When it comes to strength and conditioning, remember everything works a little, some things work a lot, but nothing works if athletes can’t even do it, says @endunamoo_sc. Share on X

But now it is up to you to find out what you can autoregulate and whether your population can handle it. When it comes to strength and conditioning, remember everything works a little, some things work a lot, but nothing works if athletes can’t even do it.

Since you’re here…
…we have a small favor to ask. More people are reading SimpliFaster than ever, and each week we bring you compelling content from coaches, sport scientists, and physiotherapists who are devoted to building better athletes. Please take a moment to share the articles on social media, engage the authors with questions and comments below, and link to articles when appropriate if you have a blog or participate on forums of related topics. — SF


Stromotion Video Analysis

15 Keys for Taking Video Analysis to the Next Level

Blog| ByKyle Davey

Stromotion Video Analysis

While video review is ubiquitous in team sports, with nearly every high level team reviewing game and practice film, performance analysis is less common. The difference between the two is more than just semantics. Most sport coaches watch film with their team for dual purposes:

  1. To share insight on opponent tactics.
  2. To review player decisions during games and practices, again typically revolving around tactics (e.g., did the linebacker make the correct read and fill the right gap).

Performance analysis is a different animal.

Tactical elements can certainly be incorporated, but at its core, performance analysis seeks to answer this fundamental question: how does the athlete produce performance, and what interventions are required to improve it?

When investigating these questions, kinetic and kinematic data are prime suspects, and accurately capturing and reporting the right KPIs do indeed inform training decisions and athlete potential.

Accurately capturing and reporting the right KPIs do indeed inform training decisions and athlete potential, says @KD_KyleDavey. Share on X

Video analysis thus seeks to provide actionable insight on how to make athletes better.

The process involves a deep dive into the relevant and modifiable (emphasis on modifiable) performance variables, including but not limited to joint angles, athlete psychology, and decision making. Beyond performance enhancement, video analysis can serve the following purposes:

  • Screening for risk of injury.
  • Aiding in the return to play decisions (especially if an analysis was completed prior to the injury).
  • Ranking members of a team to appropriately match interventions with athlete subsets (i.e., “putting athletes in buckets”).
  • Allowing athlete and coach to see things from the same perspective.
  • Providing developmental athletes with performance milestones.
  • Granting objective feedback on the training process, essentially quantifying athlete development to improve over the course of a season or lifetime.
  • Comparing practice efforts to PR performances.

Rightfully so, performance analysis is only going to become more common. This article details 15 strategies to improve your performance analysis, based on my own trial and error as well as wisdom I’ve gleaned from others.

1. Don’t use an iPhone

An iPhone or iPad is a great place to start with video analysis—you can quickly capture 120 or 240fps slow motion video, upload it to a computer or an app, and begin analysis. Additionally, there is value in taking video and streaming it to a TV via AirPlay for immediate feedback and a quick and dirty, on-the-spot analysis with athletes.

But for the professional offering video analysis as a service, Apple products don’t cut it for two main reasons:

  • Professionalism (specifically, the lack thereof).
  • Image quality.

If you are hired to provide performance analysis, what statement does it make if you pull out your phone? How are you differentiated from the coach…or the athletes themselves, for that matter? First impressions matter, and if you want to be taken seriously and earn repeat business, you must appear as the professional you truly are.

First impressions matter, and if you want to be taken seriously and earn repeat business, you must appear as the professional you truly are, says @KD_KyleDavey. Share on X

Beyond that, iPhones currently offer 1080p video quality when shooting in slow motion. That’s fine for close shots, but kinematic and sport analysis often involves shooting from a distance and zooming in to avoid parallax issues when measuring angles and distances (more on this later). Image quality quickly deteriorates when zooming in on 1080p footage. 4K video quality allows you to zoom in on the picture while maintaining clarity.

Phone vs Camera
Image 1. The above shows the same sprint filmed in 1080p from an iPhone and in 4k from a camera. The iPhone is workable, but the 4K shot is clearly superior and allows for more granular and subjective analysis of facial expressions, tension, muscularity, etc.

Higher image quality provides a better product for the consumer—it’s worth noting that the athlete was about 12 meters from the camera in the above shots. Zooming in on still shots taken from greater distances will produce even lower quality images, particularly from 1080p quality footage. For more on camera specs and recommendations, read this.

I use a GoPro HERO10 and love it. The camera is compact, durable, and shoots 120fps slow motion video in 4K quality, giving you the picture clarity to impress while allowing for slow-motion, kinematic analysis.

Pro tip: Whatever camera you choose, be sure it supports 4K quality or above while shooting in slo-mo, is durable, waterproof, and easy to transport and set up.

2. Utilize a Tripod

There are several advantages to using a tripod, not the least of which is that you don’t have to stand behind the camera to film, allowing you to coach and observe from other angles. Additionally, you appear (and are) present for the training session, as opposed to playing the role of videographer and not watching what’s happening in real time because you are stuck behind the lens.

Further, a good tripod ensures steady footage. You don’t want your film to look like the Blair Witch Project—you need non-shaky, steady film for clean and easy analysis. A sturdy tripod that can withstand wind is desirable.

You need non-shaky, steady film for clean and easy analysis, says @KD_KyleDavey. Share on X
Tripod
Image 2. A tripod adds a level of professionalism that says, “I’ve been here before, I have a system, this isn’t my first rodeo.”

Pro tip: Use a mini bubble level (Google or Amazon that term) to ensure your camera is level, both side-to-side and front-to-back. If filming sprints from the side, set the camera roughly 10cm above the athlete’s waistline.

3. Use a remote

You’re going to notice a theme here. Using a remote introduces yet another level of professionalism. The preparedness again repeats: “I’ve been here, not my first rodeo…”

There is also a very real workflow and ease of use advantage to having a remote. As mentioned before, being present and able to observe and coach while filming is invaluable. A remote makes filming seamless, while also saving you time (and data on your data card). You can start and stop the video exactly when you want, as opposed to hitting “record,” running to your observation point, watching, running back, and hitting “stop.”

Remote
Image 3. The GoPro remote fits in your hand, charges with the same cord the camera does (never need to change the battery), and can even power on the camera.

GoPro offers a remote as well as an app that connects to the camera, but again, you don’t want to be the guy or gal looking at your phone during a training session. Further, the remote has stronger connectivity and a greater range than the phone does, making it a superior choice.

Pro tip: ensure your remote doesn’t use Wi-Fi to connect the camera, otherwise it is useless in settings where you don’t have Wi-Fi access.

4. Film from a distance

Parallax, which refers to images becoming distorted as a function of cameras transforming a 3D world into a 2D image, can cause errors in calculations such as angles and distances. Parallax is a normal phenomenon and isn’t indicative of problems or shortcomings with your camera—it just happens when taking pictures and video.

Parallax
Image 4. Still shots taken from the edge of the frame (left) and the center of the frame (right).

To avoid parallax—and therefore ensure accurate angle and distance measurements—you need to shoot from a distance, such that the athletes you analyze are in the middle of the shot. Additionally, take care to aim your camera straight. If the camera is angled slightly to the left or right, it will again create parallax and distort perception of angles.

Parallax is a normal phenomenon and isn’t indicative of problems or shortcomings with your camera, says @KD_KyleDavey. Share on X
camera setup
Image 5. Setting up your camera correctly reduces parallax and the ensuing measurement errors. Consistent, accurate setup allows for valid analysis. Original photo taken by Andrew Studer (andrewstuder.com) used here with his permission.

Pro tip: only analyze kinematics from the middle third of your footage. The edges of the frame produce parallax that distort perception of angles and distances, yielding inaccurate data.

5. Consider two (or three) cameras

To be sure, multiple cameras are not required to execute video analysis. You can capture quality film and complete comprehensive analyses with one nice camera.

But there is certainly merit and utility in capturing multiple angles—like side and front or back—of the same trial.

Specific to sprint analysis, two cameras come in handy when analyzing both acceleration and maximum velocity. Capturing a close up of the first step as well as the first 7-10 steps can be done at once, for instance. Additionally, cameras can be placed to capture the first 7-10 steps as well as a maximum velocity split, say 30-40m down the track. Thus, acceleration and max speed can be captured in one trial, saving time.

At least one coach I know has a custom mount by which he fixes a camera to a hurdle, allowing a unique perspective toward oncoming hurdlers while also capturing the traditional side shot.

Using two cameras opens doors to saving time, improving workflow, and capturing unique angles you may otherwise opt out of.

Pro-tip: to make analysis easier and improve workflow while filming, consider cameras that sync together via a remote and thus start and stop filming at the same time.

6. Never run out of memory or battery

Imagine being in the middle of a recording session and your battery dies. In some cases, like practice, there might be another rep to capture. In others, like a race, you may never get a chance to swing again.

Likewise, imagine readying yourself to break film down, only to realize your memory card became full halfway through the session and you don’t have everything you need.

4K video takes about 45gb of space per hour of film. Do yourself a favor and don’t skimp on the memory card. Go with a 32gb card at minimum, 64gb to be safer and give yourself more wiggle room.

Do yourself a favor and don’t skimp on the memory card, says @KD_KyleDavey. Share on X

Likewise, carry at least three batteries at all times—preferably extended life batteries.

Pro-tip: Many cameras can charge the battery internally, but an external charger that can be plugged into the wall allows you to charge multiple batteries at once.

7. Safely store video

This may not seem like an important step…but trust me, you will regret not keeping video long-term. Whether an athlete you once filmed gets hurt and you want to review old film to see if there were kinematic “clues” that could have been involved with the injury, or whether you simply want to juxtapose progress between last year’s film and today’s, a time will come when you’ll want to look back on old footage.

Cloud storage is an option, as is an external hard drive. Hard drives are nice because you know you’ll always have a hard copy.

Store your film for future reference. Just do it.

Pro tip: Permanently save at least one rep per athlete from each film session.

8. Understand the KPIs

Capturing film is great—but unless you are able to critique the movement and provide feedback on how to improve, you cannot call it performance analysis.

If you aren’t at the point where you know what you’re looking for, you’re probably not ready for video work. Your energy should instead be focused on honing your craft.

The Science of Speed, by legends Carl Lewis and Tom Tellez, and The Mechanics of Sprinting and Hurdling, by another legend, Ralph Mann, are both insightful for understanding sprint kinematics.

Speed Books
Image 6. The Mann book in particular is helpful, because it provides hard kinematic data. “The Science of Speed” is equally valuable, but perhaps geared more towards teaching how to coach speed as opposed to providing a summary of what angles the best in the world tend to hit.

Pro-tip: whatever you choose to analyze, watch an inordinate amount of film of that movement, from multiple athletes. Your coach’s eye is more valuable than your ability to measure angles and distances.

Your coach’s eye is more valuable than your ability to measure angles and distances, @KD_KyleDavey. Share on X

9. Create performance reports

Performance reports serve two purposes: they provide a snapshot in time of performance (like annual bloodwork), as well as highlight strengths and areas for improvement. Sleek, clean, and insightful reports bring tremendous value, as they inform training. Further, they may be used post-injury as a rehabilitative tool—particularly if a report was compiled before the injury occurred, serving as a pre-injury data point and providing minimum kinematic goals for the athlete to reach.

Basic considerations include acceleration and maximum velocity reports. One may also venture into block clearance, change of direction movements, or other sport-specific tasks, such as hurdling, field events, throwing a football, or pitching and hitting a baseball.

Wherever there is sport, there is possibility for performance analysis.

Pro-tip: Spend time making your report pretty. Appearance matters.

10. Use two reports: one for parents and athletes, another for strength coaches/technical coaches/sports science/medical personnel

It goes without saying that parents and (most) athletes speak a different language than those “in the biz.” If the only information the parent can understand from the performance analysis is the athlete’s name and the test date, the report misses the mark.

Instead, documents given to parents and athletes should be written and presented in such a way that they are understood. Don’t use technical jargon. Speak in plain English. Rather than comparing hip flexion angles at toe off between limbs and noting a 19-degree differential, simply state “Little Johnny’s right thigh doesn’t swing as high as his left one. If we fix that, his left heel probably won’t be the first part of his foot to hit the ground anymore, and he’s likely to become faster and decrease the chances he’ll get hurt. Training should focus on that moving forward.”

Parent Feedback
Image 7. A snippet of a report I give to parents, with the athlete name changed for anonymity. Note the language is colloquial and casual. Easy for a parent to understand, and communicates A) my expertise, intended to build trust, and B) that I have plan for how to better their child.

Save the heavy science for the strength and conditioning coaches, technical coaches, and sports science/medical staff. They can understand, and therefore value, that information.

Pro-tip: As Einstein said, “you don’t really understand something unless you can explain it to your grandmother.” If your grandma doesn’t understand your report for parents, redo it.  

11. Leverage video analysis software

I will not belabor this point, as it has been written about extensively elsewhere.

Some sort of video analysis software is required, as the common video players don’t provide the necessary tools to report joint angles, movement times (such as time to take off, ground contact and flight time, etc.), and distance covered (step length, for example).

Without the key metrics, you cannot analyze performance.

When considering video analysis software, priorities include workflow—as a poor process can easily double or triple the required time to complete an analysis—software capability, and cost.

Dartfish is a phenomenal tool, commonly used by TV commentators like NFL analysts, and includes next-level features such as stromotion. Kinovea is a limited but viable tool to get started, and you can’t beat the cost (it’s free). Other players certainly exist in the market as well.

When considering video analysis software, priorities include workflow, software capability, and cost, says @KD_KyleDavey. Share on X
Stromotion
Image 8. An example of stromotion, one of the advanced features that Dartfish offers.

Pro-tip: Kinovea is free. Dartfish offers free trials, and many other software options likely do as well. Test the waters and understand that you get what you pay for.

12. Be prepared to calculate distances

Distance metrics, like step and stride length, are of value because you may find asymmetries between left and right step length. Beyond basic sprint analysis, lengths in events like the high hurdles and triple jump are must-have metrics.

In order to calculate distance via video, you must have a known reference the same distance from the camera as that which you wish to measure. Sounds complicated, but it makes sense intuitively: If you’ve set cones on the ground one meter from each other, you can use that known distance to calculate other metrics, so long as the athlete isn’t too far in front of or behind the cones.

Pro-tip: tennis balls cut in half make for small, vibrant distance markers.

Bonus tip: Recall that velocity = step length multiplied by step frequency. If you know average step length and 10m split time, you can extrapolate step frequency.

13. Prioritize workflow

Time is valuable—perhaps the only thing we lose and can never get back. If you refine your process, whether by upgrading your video analysis software or becoming a bit more handy within Excel, you may reduce the time it takes to generate a report by five or ten minutes. Those minutes add up, especially if you’re analyzing a team of athletes and want to turn around the reports in a timely manner.

Excel is handy for creating a template and being able to plug and play. If you possess even a remedial understanding of formulas, you can program Excel to automatically calculate values for you, saving precious time. Further, if you have the wherewithal to Google custom formatting options, you can even program Excel to automatically add the desired text to what you input to a cell, such that when you type 4.67 and hit “enter”, it automatically turns into “4.67 steps per second.” Not to mention the many charts you can create in Excel, from bar graphs to scatter plots and line charts.

You can program Excel to automatically calculate values for you, saving precious time, says @KD_KyleDavey. Share on X
GCT Chart
Image 9. With just a little Excel savvy, ground contact and flight times can easily be converted into simple and easy to read charts, such as this one.

On the flip side, Excel is relatively limited in visual design options. Amazing design tools exist (like Canva), but I’ve yet to find one that matches the convenience and automation factors that Excel brings.

Lastly, write out the appropriate workflow to streamline your analysis process. The first few analyses I completed, I found myself going back and forth between still shots to measure angles. Then I got smart and wrote down a step-by-step process, ensuring I captured all measurements needed from one photo before moving on to the next. Total time to completion was cut almost in half.

Pro-tip: Make the down payment in time up front to save yourself time on the back end. Depositing a few hours to build your template and map out an efficient workflow will compound over time.

Bonus pro-tip: Program Excel such that when you input the time stamps at ground contact and toe off, contact and flight times are automatically extrapolated. 

14. Invest in technology…once you’re there

The bare minimum technological requirements are a camera, video analysis software, and a program to create a document, like Excel.

Beyond that, consider the variables you analyze, what metrics coaches and athletes find valuable, and how you may automate the data collection process via technology to improve data fidelity and streamline processes. Remember, the purpose of technology is to collect insightful data and save time in analysis.

Remember, the purpose of technology is to collect insightful data and save time in analysis, says @KD_KyleDavey. Share on X

If you report ground contact and flight times, a MuscleLab contact grid will make your life easier, at a fraction of the cost of competing technologies. It isn’t difficult to manually calculate the metrics via film analysis…but it’s time consuming. Imagine having those numbers at your fingertips, ready to plug and play. Further considerations from those analyzing sprint performance include timing devices to capture speed metrics like rate of acceleration and maximum velocity, and IMUs to automate kinematic data collection. While many tech companies exist, the allure of Ergotest is that the technology they produce conveniently syncs together, displaying all data on one screen.

Contact Grid
Image 10. Data collected from a developmental athlete using a contact grid. Ground contact and flight times are denoted by tc(ms) and tf(ms), respectively. Deploying the contact grids alongside the Ergotest Laser would yield step length and asymmetry values, among many other spatiotemporal metrics such as velocity, time to peak velocity, etc.

Those analyzing Olympic lifts may enjoy VBT sensors that capture bar speed as well as bar path, creating a nice visual that can be dropped into a report. A metabolic cart certainly provides value, particularly for endurance activities.

But before committing funds to technology, I recommend completing several reports, understanding the ROI, and becoming comfortable with the basics. Master a basic hip hinge before moving on to a power snatch.

Pro-tip: If you’re going to invest in technology, your first stop should be a quality video analysis software, like Dartfish.

15. Develop your business model

The value in performance reporting is there for athletes and coaches alike. This should be a standalone service you charge for, thus making this venture profitable as well as interesting and useful.

The value in performance reporting is there for athletes and coaches alike, says @KD_KyleDavey. Share on X

You can and should make a business out of this.

What do you charge? Who is willing to pay for your services? How do you get your foot in the door to build momentum? How do you craft your sales pitch?

These are questions you must answer for yourself. Resources exist: take advantage of them.

Pro-tip: pro bono analyses can be a good way to attract clientele and repeat customers, but free services are often perceived as low value services. Walk the line carefully.

Take the Plunge

As one of my old coaches used to say, “the eye in the sky doesn’t lie.” Performance analysis—and specifically video analysis—isn’t going anywhere. It will continue to evolve, and advanced skillsets in analysis and presentation will separate coaches from the pack by providing actionable insight that illuminates areas for improved athletic performance.

Like all things, there’s a learning curve and lots of trial and error involved in becoming proficient. If you’re on the fence, here’s my advice: just take the plunge. You will grow as a practitioner, and your athletes will benefit along the way.

Since you’re here…
…we have a small favor to ask. More people are reading SimpliFaster than ever, and each week we bring you compelling content from coaches, sport scientists, and physiotherapists who are devoted to building better athletes. Please take a moment to share the articles on social media, engage the authors with questions and comments below, and link to articles when appropriate if you have a blog or participate on forums of related topics. — SF

Sabatini FFF

Coaching, Competing, and Recovering with Phil Sabatini

Freelap Friday Five| ByPhil Sabatini, ByNicole Foley

Sabatini FFF

Phil Sabatini is the President and Associate Head Coach of East Coast Gold Weightlifting, one of the largest and most successful programs in U.S. weightlifting history. He is also a senior faculty member at Old Dominion University, teaching anatomical kinesiology and strength and conditioning in ODU’s undergraduate exercise science program.

As a competitor, Phil has been a staple in the national weightlifting scene, having placed in the top 3 in 14 national events and earning more than 40 national medals over a very successful 16-year career. He has been a three-time member of Team USA and currently coaches more than 20 national-level athletes. They are part of the 100+ athletes he and his staff oversee.

Freelap USA: As an Olympic weightlifting coach and a former strength coach at VMI, where do you land on the age-old debate: Should non-weightlifting athletes train the Olympic lifts? Why or why not? And if so, what is the minimum effective dose they should be programmed?

Phil Sabatini: Absolutely. I believe there are many benefits to the Olympic lifts and their variations for an extremely wide range of athlete. Philosophically, I believe in ALL styles/emphases of training. There is justification to use just about anything out there if there is buy-in from the athlete and the coach can progress it consistently. That said, I believe it to be any strength and conditioning professional’s job to have as many “tools in the toolbox” as possible. More importantly, it is their job to know how to use them. “You can dig a hole with a hammer,” but there are certainly better tools for the job!

I believe it to be any S&C professional’s job to have as many *tools in the toolbox* as possible. More importantly, it’s their job to know how to use them. Share on X

What I believe you get with the Olympic lifts is that ALL of those tools become more efficient at their job. The carryover in posture, body position, awareness, timing, muscle synchronization, bracing, mobility, force development, force application, changing levels, and load acceptance, among many others, all lead to a more efficient athlete. In turn, athleticism improves, and sport-specific play is accelerated and of a higher potential because of the proficiency in basic and complex movement.

In terms of dosage, that is a difficult question to answer. Because Olympic lifts are so versatile in adaptation, such a wide variety of loading and variation could be useful for many different reasons at many different times. Specifics such as peak velocity, peak power, strength development, metabolic demand, sport season, etc. would dictate load management.

Freelap USA: As a national-level coach and competitor, how have you managed to balance both roles during the training year and even more so during long weekend meets where you lift on the last day?

Phil Sabatini: I will admit that it does take its toll on me as a competitor. Training does not seem to suffer much, as I find it motivating to be in the grind with our athletes. But if I could pinpoint anything specifically outside of competition, it would be recovery.

I am a very high-energy coach, so teaching in the morning, training in the afternoon, then coaching all night is not ideal for the next day’s squats! However, that can be extremely motivating in itself—to prove that if you are sincerely interested in doing something, you will find a way to get it done. I have been so driven to continue to be successful in the sport for so long; it is non-negotiable and has never really been a thought in my mind that anything of that regard would be a detriment.

When coaching long weekends at competitions, especially national competitions where the stress is high, fighting through emotional exhaustion is essential. There are so many ups and downs throughout the events, and as any experienced coach will tell you, it’s MUCH easier to lift in the meet than to coach. As invested coaches, we are constantly lifting WITH the athletes. I get just as nervous watching them as I do lifting the weights myself!

What is important in managing these stressors is to compartmentalize the different roles you take on throughout the competition. When those roles are finished, give yourself time to be an athlete. Although exhausted after a long day of coaching, I still came here to do a job of my own, and the only way I will be successful is if I can lower my state of arousal and anxiety and visualize success. I have ALWAYS felt a sense of relief when it was my turn to lift. All the anxiety and lack of control that comes with coaching—finally, that weight is lifted, and I am in control of my own outcome. That alone has been the shot of adrenaline necessary to perform without fear and apprehension.

Freelap USA: You tore your rotator cuff in 2018 and came back to have podium finishes in 2020 and 2021. How did that process affect your training? And how has it changed your programming for your athletes?

Phil Sabatini: In 2017–2018, at 35 years old, I can say I was at my physical peak. I was the strongest I had ever been, and having been in the sport for 11 years at that point, I was mentally as dialed-in as I had ever been in anything I had ever done.

There were some negative physical changes from the injury: my external rotation has never been the same, which has affected my front rack and overhead positions. I started to develop compensation patterns as a result of that. The following year, my positions weren’t quite caught up to my strength levels, and I hyperextended my elbow in competition, forcing me to withdraw.

The elbow injury was a far worse rehabilitation. During that process, I was very frustrated and was able to accept the fact that something happening one time can be called a “fluke”—but once it happens again, it’s the start of a “pattern.” I had to decide whether or not lifting at a high level was still important to me, and if it was, I needed to do things differently.

Let’s face it, I wasn’t getting any younger; but I was still moving some weight and finding myself right in the mix with the best in the U.S. So, I utilized my resources. I took note of how our coaching staff developed athletes. I asked myself, “If I was one of our athletes, how would we approach this?”

Through a collective effort and a massive, humbling change in perspective, we started the rebuild. Of all the negative things COVID-19 has brought us, the postponing of competitions that year was not one of them. We were able to diligently work on some physical limitations I had for more than a full year without taking our foot off the gas, which allowed me to prolong my career by years.

It’s easy to be motivated to push heavy weights around, especially with the exposure of social media. But well-thought-out warm-ups & auxiliary movements must be done with diligence & investment. Share on X

Brenden McDaniel, one of our coaches and one of my best friends, best defined a great lesson through all of this: “Your house is only as clean as the broom closet.” It’s easy to be motivated to push heavy weights around, especially with the exposure of social media. But well-thought-out warm-ups and auxiliary movements must be completed with diligence and investment. And that quickly became point of emphasis among all our lifters in the gym, including me.

Freelap USA: How has your programming style adapted to allow you to sustain such a long and successful weightlifting career?

In any sport, longevity is gained through a wide variety of experiences and modifications. From the time I was four years old, I was “training,” whether or not I thought of it as that. My only goal in life was to play for the Pittsburgh Penguins. Then when I turned 10, it became the Pittsburgh Pirates.

I played every sport my parents would allow me to and could never stand to lose or be mediocre at ANYTHING. So, a deep combination of various experiences, vast physical development, and natural intrinsic motivation is certainly the foundation to the success I have for as long as I have had it.

Over time, as my needs as an athlete became more specific and ever-changing, some of the biggest mistakes I have made as an athlete came with a hard-headed disposition that often found me trying to fit a square peg in a round hole. Some of the greatest training years came in the greatest adversities I have ever faced as an athlete.

The first of those circumstances came as a result of my career. I was the Head Football Strength/Conditioning Coach at VMI, and not only was I working a ton of hours, but I was also traveling with the team. From August to November, training conditions were not ideal. But I was determined to continue progressing as I was still young in my weightlifting career and wanted to be successful.

So, Coach Leo Totten and I communicated about training frequency and volume, and despite training only 3–4 times a week, I was still able to earn victories and podium spots in December at the American Open, one of two Senior National events that were also qualifiers for Team USA. This really opened my eyes to the importance of quality over quantity. I was finally able to translate some of the best advice my father ever gave me: “It’s not what you do, it’s HOW you do it.”

The next meaningful training hurdle came during the birth of my first daughter, who was born at 27 weeks, weighing 1 pound 14 ounces. She came two months before the 2012 National Championships/Olympic Trials. I was ranked in the top 8 at the time, preparing for a battle between a handful of others for a spot on the final qualifying team for the Olympic Games, which would compete at the Pan-Am Championships for team points.

My wife stayed in the Ronald McDonald House in Charlottesville, Virginia, for three months while our daughter was in the NICU at UVA. I commuted back and forth from Lexington, still working full-time. I was emotionally exhausted on a daily basis, watching our little girl suffering and trying to breathe on her own, unsuccessful feedings, transfusions, etc. The only thing that felt good to me was training.

Rightfully so, it was NOT going well. So, Coach Totten reprimanded me for expecting it to, and we had some great discussions about developing perspective in training, competition, and life that would allow me to get what I needed out of training and keep even just a small amount of focus on the sport. We talked about how it was okay to not live, sleep, and breathe weightlifting—but just enjoy it as a breach of reality for an hour or two and be thankful that you have the opportunity to do so.

Two months later, I had the greatest showing of my career, going 6/6 with personal bests, at the time, of a 155-kilogram snatch and 189-kilogram clean and jerk: enough to make the final Olympic qualifying team in 2012 for the Pan-Am Championships. (Although I lost the gold medal on the last lift of the competition to a young Ian Wilson with a 192 clean and jerk.)

Later in my career, my modifications came as a result of injury and age. Two substantial injuries back to back really made me evaluate my training mindset. As I recovered from those, I noticed my body was not moving like it used to and I was not recovering as easily as I used to. Still, in my mind, for me to continue to compete with the best, I HAD to train 5–6 times a week at close to maximal capacity—because that is what brought me success over the past decade.

My training suffered, and for the first time I really felt like my performance was declining after almost 15 years in the sport.

Coming off of injuries, I refused to finish my career in such a disappointing fashion. So, our coaches and I collaborated and introduced not only new movements, but once again, a new perspective to training that allowed me to continue competing at a very high level. Since then, I finished third, second, and first in the past three national events, making 16/17 total lifts on the platform—the first place finish came three weeks before I turned 39 years old.

Freelap USA: As an exercise science professor, what do you believe is missing in academia to help aspiring strength and conditioning coaches become better prepared for the field?

Phil Sabatini: There is definitely one glaring omission that is essential to the field in general—the ability to teach! Because the programs are so heavily based around the science, there is rarely an opportunity for application. Even with opportunities to apply the science, so many professionals are ill-equipped.

There is definitely one glaring omission that is essential to the field in general—the ability to teach.… I believe that exercise science programs should cross over with physical education. Share on X

Personally, my undergraduate degree is in physical education, so to graduate, I had to do almost two years of hands-on teaching in the schools. While I enjoyed certain aspects of it, I knew it was not what I would do for the rest of my life. However, it absolutely IS something I am doing and will be doing for the rest of my life! Coaching is teaching.

So many attributes that make up an effective coach also make an effective teacher, such as presenting to a large audience, the words you choose and when you say them, being concise with your ideas and delivering them in a way that the highest number of people can understand and engage with them, the power of enthusiasm, time management, organizing groups, and the list goes on! I am so thankful I stuck with the degree and got my teaching license even though I knew I was going to pursue strength and conditioning.

I believe that exercise science programs should cross over with physical education. The students should be required to take at least two semesters of methodology/pedagogy and should be evaluated by the physical education department. This is all essential to the professions within the field and should have just as much weight as the scientific foundations they will graduate with.

Since you’re here…
…we have a small favor to ask. More people are reading SimpliFaster than ever, and each week we bring you compelling content from coaches, sport scientists, and physiotherapists who are devoted to building better athletes. Please take a moment to share the articles on social media, engage the authors with questions and comments below, and link to articles when appropriate if you have a blog or participate on forums of related topics. — SF


Baseball Pitcher

Mechanisms of Adaptation to High Velocity Throwing

Blog| ByTyler Anzmann

Baseball Pitcher

Throwing velocity has become a gatekeeper to the higher levels of baseball. Improving this quality is a complex endeavor, and one that I’m intimately familiar with as both a player and coach.

When I graduated college I wasn’t ready to give up on my dream of playing professional baseball, but with my velocity being what it was (up to 88mph), I didn’t have any opportunities. I knew I needed to throw harder, but I wasn’t sure exactly how to go about doing that. So, I buckled down and began researching, talking to coaches who had a track record of success with improving throwing velocity, and then experimenting on myself. Out of this process, I learned what did and did not work on my way to improving my own velocity to 94mph. Fast forward a few years, and I’ve helped many high school, college, and professional pitchers improve their velocities as well.

Throwing velocity has become a gatekeeper to the higher levels of baseball, says @tyler_anzmann. Share on X

This article will be about not only what works, but about why it works and how to apply it.

Program Design and Adaptations

Well-designed programs for velocity enhancement should involve some amount of high intensity throwing. This makes sense, as most people are intuitively familiar with the SAID principle (specific adaptations to imposed demands)—in other words, you need to train the thing you’re trying to get better at.

If you want to throw harder, you need to throw hard somewhat frequently. But beyond this obvious point, what’s going on as far as adaptations to this stimulus and how does it help increase throwing velocity? There are two basic types of adaptations that are important to understand when dissecting training methodology:

  • Neurological adaptations
  • Physiological adaptations

Both of these play a role in determining the output capability of a human being. If we use the analogy of a racecar driver, neurological adaptations would be akin to becoming a better driver, whereas physiological adaptations would be ways to increase the horsepower of the car. In order to throw at our highest possible velocity, both of these types of adaptations are important.

Neurological Adaptations

Neurological adaptations involve changes to the body’s software. If the software is too slow or out of date, even the best hardware will perform poorly.

1. Coordination

The first neurological adaptation that’s important to understand is coordination. Basically, this means that muscle force is applied at the right time, in the right direction, in the right sequence, etc. In research on specific adaptations to weight lifting, one of the key determinants of velocity-specific adaptations (how good did the participants get at lifting light weights fast vs. heavy loads slowly?) was coordination.

The groups that lifted lighter weights got better at lifting weights fast, while the other group got better at lifting heavier weights and not quite as good at lifting light weights fast (Almasbakk and Hoff, 1985). This points to the coordination gained from specific types of training being important for the specific adaptations. This same process occurs with high velocity throwing and is one of the reasons pitchers who focus only on throwing strikes at low intensity don’t continue to gain velocity after puberty (when physical maturation alone can account for improvements in velocity).

2. Motor Unit Recruitment

The second neurological adaptation is motor unit recruitment. A motor unit is composed of the motor neuron (a nerve cell which passes impulses from the brain or spinal cord to muscle fibers causing it to contract) and the muscle fibers it innervates. Motor units can be divided into low- and high-threshold varieties.

  • Low threshold motor units are recruited first due to the size principle. These are composed mainly of type 1 (or slow twitch) muscle fibers, which are resistant to fatigue but are not capable of very high outputs.
  • High threshold motor units are composed mainly of type 2 (or fast twitch) muscle fibers. These are only called upon when the central nervous system determines that their assistance is required. This could be when heavy loads are being lifted, when light loads are being lifted in close proximity to failure, or when maximal velocity is intended.

Repeated exposure to maximal effort activities can help make more high threshold motor units available. Therefore, throwing at maximal effort somewhat frequently can be a helpful stimulus for increasing the ability to recruit high threshold motor units (more on this later).

Repeated exposure to maximal effort activities can help make more high threshold motor units available, says @tyler_anzmann. Share on X

For example, an early off-season high intensity throwing session will typically include:

  • A warm-up involving a potentiating component
  • Specific constraints drills tailored to that athlete’s needs in low volume


Video 1. Figure 8 Drill, example of specific constraints.

  • Long toss, or catch play as needed to finish warming up
  • Maximal effort throws with additional momentum (run-up, shuffle, walk-up, etc.)
    • Over/underload balls may or may not be used depending on athlete development level, needs, etc.
    • Every throw is measured
    • A velocity drop-off is used (generally around 2%) to stop the session early if necessary
    • Complete rest between throws to keep fatigue low


Video 2.  Shuffle Throw.

3. Rate Coding

The third neurological adaptation is rate coding. Rate coding is the frequency at which motor units discharge action potentials to activate. Increasing the rate at which motor units are activated increases the potential for overall force output in shorter time frames.

High velocity movements have been shown to increase rate coding to a greater degree than heavy loading (Van Cutsem et al., 1998), which makes sense as this plays a larger role in high velocity force production than low velocity force production.

Heavy loading and high velocity movements both compete for significant recovery resources and therefore must both be carefully planned around and accounted for. This is just one reason why the assessment process is so critical. Depending on an athlete’s force velocity profile, training experience, and the time of year, more or less heavy loading may benefit that athlete. But, in a more advanced population, heavy loading plays a relatively small role in improving performance. This means a higher volume of sport-specific training (throwing in this case). More intensive ballistic and plyometric variations are used with contact times, velocities, and weights determined by the athlete’s profile.

4. Activation Level of Antagonist Muscles

The fourth neurological adaptation is related to the level of activation of antagonist muscles. Think of antagonists as the muscles that oppose the motion you’re trying to create (e.g., the triceps are the antagonist to the biceps as they extend the elbow while the biceps create elbow flexion).

Antagonist coactivation is important for joint stability, but if antagonist activation is too great it will limit the net torque produced by the opposite muscle. This coactivation has been shown to decrease as a result of high velocity training (Janusevicius et al., 2017).

Physiological Adaptations

Along with neurological adaptations, physiological adaptations to high velocity throwing are also critically important. Think about this as the hardware to the neurological software. Low quality hardware won’t be able to take advantage of all of the amazing features of even the best software.

1. Fascicle Length

The first physiological adaptation is a change in muscle fascicle length. Increased fascicle length is important as it is associated with faster contraction velocities. Longer fascicles mean a greater number of sarcomeres (the smallest functional unit of muscle tissue) in series and all of these sarcomeres shorten at the same time. If a greater number of sarcomeres in series shorten at the same velocity, a greater distance has been covered in the same amount of time. This equates to higher shortening velocity.

It has been shown that faster 100m sprinters have longer fascicles than their slower counterparts (Kumagai et al., 2000). This can be applied to throwers as well. The way sprinters train generally involves relatively frequent high effort sprinting, plyometrics, and gym sessions tailored to their specific needs. Throwers should be trained similarly. Throw at high intensity one or two times per week, use intensive and extensive ballistic and plyometric variations, and tailor gym sessions to the athlete’s needs.

2. Fiber Type Shifts

Muscle fiber types are something that everyone is familiar with. There are two broad categories: fast twitch and slow twitch. Beyond this basic level of familiarity, there is more that can be gleaned from understanding some important differences between the fiber types and subtypes.

Within the fast twitch (type 2) muscle fibers there are two important subcategories: type 2a and type 2x. Type 2x fibers have the fastest shortening velocities (~5-6 fiber lengths/second), while type 2a are still very fast (~3-4 fiber lengths/second) but are a bit slower than type 2x (Beardsley, 2021), and both types are significantly faster than type 1 fibers (0.5-1.0 fiber lengths/second) (Beardsley, 2021).

Depending on the type of training performed, fibers can shift their type from 2a to 2x, and vice versa. The more fatigue that is present in a training program, the more likely a shift is to occur from type 2x to type 2a. This may or may not be a problem depending on the force-velocity profile of the athlete, but as strength standards and basic body composition requirements are met, this is worth keeping in mind when programming. Type 2a can shift to 2x provided that the velocity is high enough and volume is relatively low.

Type 2a can shift to 2x provided that the velocity is high enough and volume is relatively low, says @tyler_anzmann. Share on X

This is just one reason why distance running and high volume, low to moderate intensity training programs tend to be incompatible with a goal of maximizing throwing velocity. If you want to maximize throwing velocity, high intent and low fatigue during training sessions are musts.

3. Stiffness and Connective Tissue Adaptations

Muscles and adaptations related to them are incredibly important when it comes to maximizing throwing velocity, but there are limitations to a purely muscle-focused approach. Concentric muscle actions are limited in that as the shortening velocity increases, force decreases—so at very high shortening velocities, very little force is produced. At the highest movement velocities, it may not even be possible for muscles to shorten fast enough to help in a meaningful way. This is why elastic energy storage and release is so important in high velocity movements, including throwing. Tendons play a large role here. They can be thought of as amplifiers to our muscle power. When tendons are stretched, they store elastic energy to be released later, producing output much greater than muscles alone are capable of.

In order to increase the amount of force that is transferred from a muscular contraction and increase the amount of elastic energy that can be stored and released, tendon stiffness often must be improved. Stiffer tendons require more force to be stretched, but they return more elastic energy. Compliant tendons, on the other hand, change length without requiring as much force to be exerted on them. Think about trying to pull a heavy stone using a very stretchy rubber band; this would be like a very compliant tendon in that force transfer (greatly inhibited). Next, think about pulling that same heavy stone with a chain; this would be like a stiffer tendon in that force transmission (better and more immediate).

Research has shown that elite 100m sprinters have stiffer Achilles tendons and stronger calves to go along with those stiffer tendons (Arampatzis et al., 2006). Stiffer tendons require stronger muscles in order to stretch them, so this makes sense. Similar adaptations occur at the shoulder and arm in overhead throwers. These adaptations occur as a result of high velocity training (sprinting) and also help to increase their sprinting proficiency. Throwing at high velocities has a similar training effect and these adaptations have similar performance implications for improving throwing velocity as well.

Research has shown that elite 100m sprinters have stiffer Achilles tendons and stronger calves, says @tyler_anzmann. Share on X

4. Muscle Pennation Angle

The final physiological adaptation involves the pennation angle of muscles. This is the angle of the muscle fibers relative to the longitudinal axis of the entire muscle. The greater the pennation angle, the fewer sarcomeres in series, but the greater the number in parallel. This means that a greater, or more obtuse, pennation angle means that the muscle is capable of generating higher forces, but lower velocities. Due to the shortening velocity being slower, more cross bridges can form, generating higher force. When higher velocity training is used, the pennation angle of a muscle tends to be reduced or more acute.

When it comes to throwing and other complex movement patterns involving proximal to distal sequencing, the more proximal muscles will generally have a greater pennation angle and the more distal muscles will have a reduced pennation angle. This makes sense, as the demands on those structures are different. Proximal muscles tend to be used more for force production and have more time to do so, while distal muscles tend to be exposed to much higher velocities and be involved in energy transfer.

Conclusion

In order to maximize an athlete’s opportunities to play at the highest level, throwing velocity must be maximized as it offers a powerful advantage on the field. However, maximum intensity throwing can provide benefits as a powerful means of training as well as an arrow in the quiver of a pitcher when used appropriately. The neurological and physiological adaptations that occur as a result of this stimulus help raise the ceiling for a thrower’s velocity potential. Once coaches understand the adaptations that can be created through a program involving high velocity throwing, a thoughtful program can be implemented based on their existing understanding of program design and periodization.

Since you’re here…
…we have a small favor to ask. More people are reading SimpliFaster than ever, and each week we bring you compelling content from coaches, sport scientists, and physiotherapists who are devoted to building better athletes. Please take a moment to share the articles on social media, engage the authors with questions and comments below, and link to articles when appropriate if you have a blog or participate on forums of related topics. — SF

Jump Test

Four Low-Cost Athlete Readiness Tools to Enhance Your Program

Blog| ByBrandon Holder

Jump Test

We may not realize it, but all good coaches subconsciously assess an athlete’s readiness in some capacity. This doesn’t necessarily involve the use of sophisticated technology—sometimes it’s simply talking with the athletes about how they’re feeling or how practice was and then making the appropriate adjustments to the training plan.

Coaches may not think that they have the ability to initiate an athlete readiness program on a larger scale due to a lack of resources, from knowledge to equipment to manpower. While having access to more resources can lead to better monitoring of our athletes, there are also several lower-cost and time-effective readiness protocols that can help coaches monitor their athletes’ readiness on a budget.

There are several lower-cost and time-effective readiness protocols that can help coaches monitor their athletes’ readiness on a budget. Share on X

This article will dive deeper into four affordable yet effective tools to monitor athlete readiness and help lay out real strategies to utilize them.

Athlete Readiness

Readiness monitoring is assessing an athlete’s physical and mental preparedness for that particular day. You can accomplish this through various methods, some easy to implement immediately and some requiring more work up front. The benefits of monitoring an athlete’s readiness are having the ability to keep your athletes from overtraining and making more appropriate adjustments to a training plan if necessary.

When monitoring athletes, you want to ensure that the information will provide value and help drive training decisions. Not every affordable measure will fit every environment and be appropriate—it is the coach’s responsibility to figure out if the juice is worth the squeeze when it comes to committing to a readiness tool.

Coach to Athlete Communication

The most affordable monitoring tool available to coaches is their own coach’s eye and their ability to care and communicate with the athletes—this is free, provides insight, and helps get athlete buy-in. Trust is a two-way street, and we should see this as working with the athlete and not being above them.

Stress does not discriminate, whether it’s from an intense training session, academics, or arguing with a boyfriend/girlfriend—knowing this information allows coaches to better monitor the athletes and their training program.

This assessment begins the second they walk through the door. Are they talking and laughing? How does their body language appear? How are their actions consistent with what they’ve shown in the past?

This assessment begins the second they walk through the door. Are they talking and laughing? How does their body language appear? How are their actions consistent with what they’ve shown in the past? Share on X

If any of these raise a red flag, communication can begin with a simple how are you? That can go a long way in a trusting relationship. More follow-up questions include:

  • What did you do last night?
  • When did you go to sleep?
  • How did you sleep?
  • Did you eat breakfast?

And so on, including any questions that may be specific to the athlete or team.

I worked with a collegiate team that went out late on Thursday nights for their team bonding night. I knew coming in early Friday morning what we were getting into, and it was never good. Asking the right questions on Friday gave me the tools to better prepare that training session. This was a better idea and more of a reality than thinking I could prevent a team of college students from going out with their friends and teammates the night before.

Being a successful communicator is a requirement for a coach, and it also comes into play when implementing a more strategic monitoring strategy. The following four strategies and assessment tools can help coaches cover their entire team and pursue a more organized and holistic program:

  1. Subjective questionnaires.
  2. Grip strength.
  3. Countermovement jump assessment.
  4. 10-yard sprint assessment.

1. Questionnaires

Subjective questionnaires work to provide similar data as wearables, but from the athlete’s perspective. Everyone perceives stress and what is good hydration and nutrition differently, so it is important to educate athletes the best you can and try to create standards. Know your audience here and use your best judgment to create questions that will benefit the program.

I have used questionnaires for some teams and found success—not necessarily because it showed a magical number, but rather because it helped open the door for a conversation. If I see that an athlete has put a low number on morale or overall readiness for multiple days in a row, then I will have the type of productive conversation with that individual that has helped drive more success than anything else.

Obtaining a questionnaire is relatively easy and affordable. Training software such as Bridge Athletic and TeamBuildr have their own questionnaires available that teams can easily do from their phones. Or, if you’re on a tighter budget, you can create one yourself using Google Office or several other survey apps.

Readiness Questionnaire
Figure 1. Example of a simple subjective readiness questionnaire.

2. Grip Strength

Using grip strength to help regulate and assess an athlete’s readiness is one of my favorite methods. It’s quick, only taking about 10 seconds to test each hand. It’s also affordable: a quick Amazon search shows a grip dynamometer costs $28.99. And it requires no skill to operate—just grab it and squeeze it as hard as possible to get an accurate read.

Using grip strength to help regulate and assess an athlete’s readiness is one of my favorite methods. Share on X


Video 1. I’ve used grip strength as a readiness assessment method when working with private clients or small teams of 10-15. I first used this method when preparing a few athletes for pro days at their colleges and began to implement the grip test before and after training sessions.

Though I started with limited expectations, I’ve found with my athletes that grip strength is reliable for monitoring their fatigue and stress. You can see from the short range of data below that many of the days with lower results were surrounded by stressful periods for this athlete. These include testing in one of his pro day events, such as the 40-yard dash or 225-pound bench press test, during stressful times in his personal life such as a breakup and moving apartments, and the gradual stress of training multiple times and days throughout the week. The higher days often corresponded with positive training days and hitting personal records.

Readiness Data
Figure 2. Pre- and post-test data for grip strength with relevant notes.

Getting a baseline or “max” was the first objective, and then monitoring anything larger than a 10% drop-off as a red flag that would potentially influence training. Every time there was a dip in grip strength, we didn’t automatically decrease training or assume the sky was falling. But consistently, each time there was a significant drop, it was around a time of chaotic stress or injury.

The only downside to this method is that there is high variability at first—it takes some time before you can create a reliable average and begin to see patterns. Since it is so accessible to test, though, the numbers will accumulate quickly.

For me, it’s just too easy of an option not to implement it, with low risk and a potentially high reward.

3. Countermovement Jump

Performing a countermovement jump is another assessment that can help monitor training readiness. It meets the same required criteria of being quick, semi-affordable, and relatively reliable for recognizing athlete fatigue.

Step one is to find a testing tool that you can use consistently. I personally like using a jump mat, as I find that it’s quicker and flows better in a group setting than jumping with a Vertec. Either is fine, and most facilities are equipped with one or the other (or at least can find room in the budget to purchase a reliable vertical jump testing tool).


Video 2. Performing a countermovement jump on a Just Jump mat as a readiness monitoring tool.

Next, it is important to test often and under the same testing standards—for example, I test my teams every session after warm-ups and before the first lifting block, every training day.

Keeping the testing procedures consistent is not only important for creating more data and making numbers more reliable, but it also helps with the flow of the training session. Share on X

Keeping the testing procedures consistent is not only important for creating more data and making the numbers more reliable, but it also helps with the flow of the training session. Eventually, the athletes just knew that we perform a countermovement jump to conclude our warm-up.

When examining the jumps, I stick to the rule of 10% drop-off being a red flag. If an athlete jumps under the 10%, I allow another rep to ensure it wasn’t just a poor rep; if the jump is similar or even worse, then we can look to adjust the training plan.

4. 10-Yard Sprint

The 10-yard sprint is another great tool to monitor an athlete’s readiness for training. When recording the numbers for the exercise, it is important to keep the testing procedures similar, much like with the countermovement jump. The timing of the 10 isn’t done to necessarily get an accurate 10-yard sprint, but rather to compare the numbers to themselves and decide where the athlete’s training ability is for that day.

A stopwatch can easily record an athlete’s sprint time to compare to over the course of time. As long as the testing procedures are similar, performed at the same time, with the same setup, and by the same individual, then you should feel confident with comparing and relying on the numbers.

When training large groups, I’ve given the responsibility of one line to interns, or even sport coaches who watch the team lift. Then I always keep them with that group throughout the testing.


Video 3. When performing the assessment, I run three sprints and use the best timed sprint as the number to compare to their best recorded time. Ensure that the athletes get full rest—one minute at the minimum; this should be easy to do if you are working with a large group.

Using a sprint drop-off chart (which you can find for free at xlathlete.com), you can determine if the sprint has a 2-5% drop-off change. I have always used 5% or higher as my marker, as I find 2% to be too low for the level of athletes I train. Five percent or more gives them more wiggle room for errors.

On the Right Path

All coaches want to know that they’re making the right decisions to drive their athletes in the correct direction. Much like the value of a map on a long road trip, readiness tools can offer coaches insight that they are on the correct path and doing what is right for the athletes.

Implementing these methods to determine athlete readiness is a low-risk/high-reward option coaches can do without altering their current training program or environment. Share on X

Monitoring athlete readiness does not have to be an expensive or complicated process. Implementing these methods is a low-risk/high-reward option coaches can do without altering their current training program or environment. The previously listed methods are all also cost- and time-effective, allowing coaches to make better training decisions.

Since you’re here…
…we have a small favor to ask. More people are reading SimpliFaster than ever, and each week we bring you compelling content from coaches, sport scientists, and physiotherapists who are devoted to building better athletes. Please take a moment to share the articles on social media, engage the authors with questions and comments below, and link to articles when appropriate if you have a blog or participate on forums of related topics. — SF


French Contrast

Supercharge Your Athlete’s Performance with the French Contrast Method

Blog| ByMike Over

French Contrast

By Mike Over and Alex Chrysovergis

If you’re training for strength, power, and overall athleticism—or even if you’re just a fan of reading fitness literature—chances are you’ve heard of post-activation potentiation (PAP). This is the phenomenon by which “the contractile history of a muscle influences the mechanical performance of subsequent muscle contractions.”1 In layman’s terms, this means that by exposing a muscle to heavy loads prior to an explosive movement, we can elicit greater fast-twitch fiber recruitment and a higher degree of nervous system stimulation.

Simply put, we harness more power.

There are a few training methods that take advantage of this principle, the most common being the complex and contrast methods. Complex training involves performing a few heavy repetitions in the strength range, immediately followed by some reps of a lighter load power exercise of the same movement pattern. For example, back squats and plyometric jumps. The contrast method, on the other hand, involves switching between strength and power exercises from set to set.

French Contrast is two ‘waves’ of potentiation-based training all rolled into one big complex set. Generally, you’ll take 20 seconds between exercises and 2-5 minutes between sets. Share on X

All of this sounds great, but can we possibly do even better? Yes, we can. Enter the French Contrast Method (FCT), an advanced training protocol that combines both complex and contrast training. Research and personal experience suggest that it produces amazing results. The concept was first and foremost grasped by French track & field coach Gilles Cometti, and then it was widely popularized by Cal Dietz, the Head Olympic Strength & Conditioning Coach for numerous sports at the University of Minnesota.

Here’s a general overview of how it works. Each set involves:

  1. A heavy compound lift: This is a big strength movement whose purpose is to recruit as many relevant motor units as possible.
  2. A force-oriented plyometric movement: This typically involves a relatively longer ground contact/stretch reflex time. At this point, you should just try to produce the maximum amount of force possible on each repetition.
  3. A speed-strength movement: Speed-strength is all about moving at high speed with the maximum load possible.
  4. A speed-oriented plyometric movement: An accelerated/overspeed exercise is performed here, usually by utilizing a band to provide that extra speed boost.

All four exercises belong in the same set and represent a similar movement pattern like pushing, pulling, squatting, hinging, and so on. They should be performed in this exact order, taking only a few seconds of rest between each one.

The totality of these movements is designed to involve the whole strength-speed/speed-strength spectrum.

Programming Parameters

Now let’s elaborate on specific programming parameters.

1. Load and Reps

  • For the compound lift, the load should fluctuate around 80% of your 1RM. Perform 2-3 reps. Resist the temptation to go too heavy. The purpose is to potentiate the muscles, not get gassed out. More on common mistakes later.
  • In the force-oriented plyometric, simply focus on producing as much power as possible on each rep. Do 3-5 reps.
  • For the speed-strength movement, use around 60% of your 1RM as a general rule, especially if you’re going to use Olympic lift variations. Keep in mind that this percentage can vary depending on the nature of the exercise. For example, other ballistic exercises like the barbell jump squat are best performed around the 30% point. The load you choose should feel heavy yet comfortable enough to be explosive. Again, do 3-5 reps.
  • In the speed-oriented plyometric, focus on minimizing contact time with the ground or switching between concentric (lifting the weight) and eccentric (lowering the weight) contractions as fast as possible. Perform 4-6 reps.

2. Sets and Timing

All four of the above exercises constitute one giant set. Once more, remember that your goal is to attack every rep with full intent and aggression, not under fatigue. Therefore, perform your French Contrast sets first thing after a good, dynamic warm-up while you’re still fresh. Do not exceed 3-4 sets of any given complex in the same training session. You can program two complexes for different body parts though, such as lower and upper body.

3. Rest and Frequency

Rest around 20-30 seconds between each exercise during the set but take 2-5 minutes off between sets. The French Contrast Method is notorious for draining the lifter’s nervous system resources and causing systemic fatigue.

The French Contrast Method is notorious for draining the lifter’s nervous system resources and causing systemic fatigue… Use it in your last periodization block to peak, for no more than 3 weeks. Share on X

For this reason, you should use it in your last periodization block (realization phase) to peak, two to three times per week, and for no more than three weeks. Make sure to follow with a deload period, especially if you’re competing.

Examples

Let’s look at some examples so that the method’s modus operandi becomes crystal clear. It goes without saying that what follows is a simple demonstration of the logic behind the method. The movements can be substituted with others, sport-specific or not, to suit your needs accordingly, as long as the above conditions and principles are satisfied.

Complex 1: Hinge/Lower Body Pull

Let’s first take a look at FCT as applied to lower body pulling. This series, in particular, can help athletes with building linear acceleration and aerobic work capacity/power. The exercises are:

1A. Trap bar deadlift or RDL – 3 reps @ 80%
1B. Broad jump (high-force speed) – 3 reps

1C. Elastic resisted row – 5 reps

1D. Assisted sprint – 15-20 meters


Insert Video 1. Hinge series.

Complex 2: Squat/Lower Body Push

Here’s an example of how to apply FCT to squatting. It will help athletes immensely with vertical jumping speed and power. Here are the lifts:

1A. Safety bar box squat – 3 reps @ 80%
1B. Hurdle hops – 3 reps

1C. Sled push resisted x 20m

1D. Assisted squat jumps – 5 reps


Insert Video 2. Squat series.

Complex 3: Upper Body Push

This is an example of FCT applied to upper body pushing. It will tremendously help athletes required to throw/push/punch in their sport. Here’s what it includes: 

1A. Close grip barbell bench press – 3 reps @ 80%
1B. Med ball chest pass – 5 reps

1C. Dumbbell push press – 5 reps @ 60%

1D. Band-assisted plyo push-up – 5 reps


Insert Video 3. Upper body push series.

Complex 4: Upper Body Pull

As far as functional movements are concerned, this list would not be complete without a pulling-focused complex. Athletes who drag/pull/grapple in their sport will find this extremely useful. The exercises are:

1A. Weighted pull-up – 3 reps @ 80%
1B. Plyo inverted row – 5 reps

1C. Ball slam – 5 reps

1C. Band-assisted pull-up – 5 reps


Video 4. Upper body pull series.

Common Mistakes

By now you should have a good idea of how to program FCT. Now let’s look at some common mistakes you’d best avoid.

1. Not Choosing the Correct Weight

A lot of times, people do French Contrast wrong because they see it as an opportunity to load up the weight and create high degrees of stress and tension and even go to near failure for 8+ reps.

This is counterproductive for an athlete trying to get stronger and faster. The context of their sport and the athlete’s goals help identify the loading schemes and range of motion. If you are a sprinter trying to boost acceleration, why in the world would you feel the need to squat ass to grass with 1-3 rep maxes? You want to maximize the potentiation effects of your big strength lift, so you don’t want aggressive fatigue coming from the main lift. The same applies for deadlifts from the floor or raised. You must use the correct scenario for each particular athlete and their goals.

Additionally, acceleration doesn’t happen with perpendicular shin angles, so take that note into account when doing your movements.

2. You Rest Like a CrossFit Lifter or a Bodybuilder

You are training for performance, but you are not trying to drive so much lactate to your muscles you can’t move the next day!

On the flip side, you will be out of breath. That’s normal. However, we’re here to get strong and fast, so sucking wind for 2-3 minutes between exercises would be a sign you need to go back to base one and touch up your conditioning work.

French Contrast is two “waves” of potentiation-based training all rolled into one big complex set. Generally, you’ll take 20 seconds between exercises and 2-5 minutes between sets.

3. Poor Exercise Selection

Most people will just turn to the standard box jump for the choice to contrast the main lift. While it can help, you need to think more outside the box (no pun intended) and utilize more exercises that relate to the athlete’s needs. Other options can include hurdles, bounds, even depth jumps and band-assisted/-resisted jumps.

Are they in a frontal plane sport? Have lateral-based movements. Additionally, the key is to not gas yourself on the big lift so your plyometric is not at a high work rate.

4. Trying It with a Low Training Age

While seeing this on YouTube and Instagram might be exciting for the young athlete, it can be a waste of time. Doing the French Contrast Method without developing basic levels of strength and power would be like trying to add a spoiler and turbo to your ’95 Toyota in the hope of kickstarting the engine’s speed.

Doing French Contrast without developing basic levels of strength and power would be like traying to add a spoiler and turbo to your ’95 Toyota in the hope of kickstarting the engine’s speed. Share on X

It’s just not ready for it.

Rate of force development (RFD) within a muscle requires various levels of motor unit contractions. They can be either isometric or ballistic contractions. However, the point of RFD is understanding that high initial motor unit release plays a critical role to reach a high rate of force development. This means that if an athlete cannot recruit the most motor units, their RFD will be impacted, making it a poor choice for low-skill newbies.

5. Using for 3+ Weeks

While this strategy is highly advantageous to use even closer to competition, it is not something you want to continue to do for extended periods of time. It is perfect for building to peak week.

The best way to use French Contrast training is as a form of periodized block training and cycle it in 3-4 weeks prior to your event or competition. The goal of FCT is not muscular growth, so if your goal is to add slabs of muscle, I wouldn’t count on this to get you there.

French Contrast Takeaways

For FCT, potentiation is the underlying physiological mechanism that theoretically makes this set structure effective. This is when a conditioning exercise—commonly a heavy loaded compound movement—serves to increase the performance of a subsequent exercise, commonly a lower-load, higher-velocity exercise. French Contrast is a great way to take potentiation and alternate between high force and high speed.

While this method tends to work much more efficiently with higher-skill lifters, it has been tested with lower-skill beginners, and there is some suggestion that if they are above novice, a slight drop in intensity (think RPE 6-7) and a slight increase in the reps performed can have some merit. This is ultimately up to the discretion of the coach. Beginners need to be focused on motor learning, recruitment, and proprioception before working such high training variations.

One big thing to remember that is often underappreciated is that in sports and training, many scenarios involve performing while fatigued. That is one area where the French Contrast can help and give a proper synergy to real-life situations.

Adding French Contrast training can fire up metabolic capacity and enhance the overall work capacity of your training session by getting more work done in less time. Share on X

Above all, FCT is a solid way to stay young and agile if you’re over 40. In particular, most men after this age begin losing motor units and growth hormone. Adding FCT can fire up metabolic capacity and enhance the overall work capacity of your training session by getting more work done in less time.

If you find yourself needing to show up your old high school buddies in a summer basketball league this year, give this method a try 3-4 weeks leading up to your season.

Since you’re here…
…we have a small favor to ask. More people are reading SimpliFaster than ever, and each week we bring you compelling content from coaches, sport scientists, and physiotherapists who are devoted to building better athletes. Please take a moment to share the articles on social media, engage the authors with questions and comments below, and link to articles when appropriate if you have a blog or participate on forums of related topics. — SF


References

1. Lorenz, D. “Postactivation Potentiation: An Introduction.” International Journal of Sports Physical Therapy. 2011;6(3):234–240.

Alex ChrysovergisAlex Chrysovergis is a self-defense instructor and strength and conditioning coach. He’s the owner of Streetwise Krav Maga, a leading reality-based self-defense and fitness school in Greece.

Pickering Juniors

What Makes a Good Junior Athlete Might Not Make a Good Senior Athlete

Blog| ByCraig Pickering

Pickering Juniors

In 1998, Michael Owen became the youngest England player ever to play at a World Cup when he was brought on as a substitute in England’s first group game, a 2-0 win against Tunisia. Owen was also a substitute in the next game, before starting the final group match, a 2-0 victory over Colombia. In the quarterfinals, the 18-year-old Owen was again chosen to start the match—this time against Argentina. In the 16th minute, with the score tied 1-1, Owen received the ball just inside the Argentina half, dribbled past two of their most experienced defenders, and coolly finished from just outside the penalty box.

It was an amazing goal, and one that led to him being voted the BBC Sports Personality of the Year.

The assumption was that, being this good at 18, Owen would go on to become a world-beater: the best player on the planet. Things didn’t quite work out as planned. Although he had a couple of successful seasons following his breakthrough, Owen eventually moved to Newcastle—where the team was relegated—and Manchester United (where he was largely a bit-part player), before ending his career, aged 33, at Stoke City.

At least Owen got to play on the biggest stage. At age 12, Sonny Pike had the world at his feet. The British player had a trial at Ajax, the Dutch club renowned for developing successful world class players; later, he had trials at Chelsea. At 14, he was part of a McDonald’s advertising campaign, and had his legs insured for £1 million. Much was made of Pike’s talent—he was compared to Pele and Maradona—but he retired from football in 2001, aged just 18, having never played a professional game.

Key Predictors for Success

The stories of Pike and Owen highlight the sporting world’s obsession with youngsters, with the implicit—and sometimes explicit—notion that being good at a young age transfers to senior success. We see this in track and field all the time: athletes who are successful at the under-18 and under-20 levels being promoted as those that will soon become world-beaters.

To an extent, I experienced this in my own career; having come 3rd at the World Under-18 Championships and 1st at the European Under-20 Championships over 100m, and with the London 2012 Olympics just seven years away, I was heralded as a potential gold medal winner at those Games.

That, of course, didn’t happen.

Despite these cautionary tales, many people believe that what makes a good junior athlete also makes a successful senior athlete, and point to factors such as conversion from World Under-20 to senior squads as evidence of effective (or ineffective) systems. However, a recent study published in Sports Medicine suggests that the predictors of junior and senior elite performance are in fact, in many cases, opposite.

Despite these cautionary tales, many people believe that what makes a good junior athlete also makes a successful senior athlete, says @craig100m. Share on X

To reach their conclusion, the study authors conducted an extensive literature search, finding 71 studies comprising 9,241 athletes (both male and female) from across the globe. Two-thirds of the athletes combined into the meta-analysis were from team sports, 24% from centimeter-gram-second (CGS) sports (such as athletics, rowing, and weightlifting), with the rest from combat, artistic, and other sports.

Athletes were designated junior status based on the definition of the international federation. For athletics, this would be under-20 athletes (defined as competing up to and including the year of their 19th birthday). Overall, 5,690 of the athletes comprising the meta-analysis were juniors, and 3,551 were seniors. Finally, the authors split the athletes into four groups:

  • World Class—athletes who placed in the top-10 at major international senior or junior world or continental championships (1,003 in total).
  • National Class—athletes who were part of a national squad, and/or achieved a top-10 finish at the national championships, and/or played in the highest national league (4,818 in total).
  • Regional Class—athletes competing at below national standard (2,541 in total).
  • Below—everyone else (879 in total).

When analyzing their data, the authors looked at some key predictor variables within the athletes, including the age at which they reached key performance milestones, the age at which they started taking part in their main sport, the amount of accumulated practice in their sport, the amount of accumulated play in their sport, and the amount of accumulated practice and play in other sports.

The results make for interesting reading.

For junior success, the predictor variables suggested that these athletes achieved key milestones earlier, started their main sport earlier, undertook more practice in their main sport, and took part in fewer other sports.

For senior success, the predictor variables suggested athletes achieved key milestones later, started the sport later, and took part in other sports to a greater extent. In senior athletes, the amount of main sport practice was less of a predictor of success than in the junior age groups (in part because at the senior level everyone has high levels of practice), and the amount of early main-sport practice was not related to senior success.

When comparing senior World Class with National Class athletes, the researchers also noted something interesting: senior world class athletes tended to start their main sport later, and accumulated significantly less main-sport practice, but significantly more practice in other sports.

Senior world class athletes tended to start their main sport later, says @craig100m. Share on X

What Does All This Mean?

Firstly, if you want to be a successful junior, you should start your sport as early as possible, accumulate as much practice as possible, and focus your efforts on your main sport. If you want to have senior success, you should be a bit more circumspect: practice multiple other sports during your youth, and then focus on a key sport in your late teens.

Secondly, this is another nail in the coffin of the much popularized “10,000 hours” rule; accumulating as much training time as possible in one sport (“deliberate practice”) early on is negatively associated with senior success. Interestingly, senior World Class athletes appeared to accumulate less overall practice time than senior National Class athletes, suggesting that “giftedness”—whatever we might think that consists of—may be a driving factor of senior success.

Furthermore, and highlighting difficulties in talent identification, senior National Class athletes tended to be better at the junior level than senior World Class athletes, but the World Class athletes had a rapid improvement over a short-time period during late adolescence and/or early adulthood which took them to the highest level.

The authors came up with an interesting potential explanation for at least some of these differences: depleted potential. They suggest that athletes may have a similar level of potential, but when they attempt to maximize this potential may be important. Future national class athletes appear to deplete their potential earlier, in part by undertaking more sport-specific practice during their mid-teen years.

Athletes may have a similar level of potential, but when they attempt to maximize this potential may be important, says @craig100m. Share on X

This clashes with other stressors—school, sleep, homework, socializing, etc.—all of which may blunt the scope for future positive adaptations, potentially through overuse injuries or burnout. Less sport-specific practice during this age bracket, however, decreases the risk of overuse injuries and burnout, and so maintains adaptive potential for later on, when the athlete is physiologically able to harness it.

Pulling It All Together

It’s clear to see that what makes a good junior athlete is different from what makes a senior athlete. This doesn’t mean that being a good junior athlete is negative; instead, the main telling factor is how the junior athlete became “good.” If it’s based on minimal training and a high level of sport sampling, then this is potentially a marker of talent; if it’s based off lots of training and potentially early maturation, then it’s potentially a marker of a lower chance of senior success.

What makes a good junior athlete is different from what makes a senior athlete, says @craig100m. Share on X

As such, focusing on enhancing junior performance through accumulating high levels of sport-specific training is potentially damaging to senior success, but positive for junior success. This means that we might, to some extent, be forced to choose—and that expecting successful junior athletes to become successful senior athletes may be a false prophecy.

Lead Photo by Kieran McManus/BPI/Icon Sportswire

Since you’re here…
…we have a small favor to ask. More people are reading SimpliFaster than ever, and each week we bring you compelling content from coaches, sport scientists, and physiotherapists who are devoted to building better athletes. Please take a moment to share the articles on social media, engage the authors with questions and comments below, and link to articles when appropriate if you have a blog or participate on forums of related topics. — SF


Female Athlete Pushups

The Building Blocks of Athlete Performance with Tim Kettenring

Freelap Friday Five| ByTim Kettenring, ByMissy Mitchell-McBeth

Female Athlete Pushups

Tim Kettenring is a husband, father, performance coach, and consultant. He’s the Head Strength and Conditioning Coach at Loyola University – New Orleans and owns two businesses: Valhalla Performance, a brick-and-mortar training facility, and Human Performance Solutions, a training consulting company.

Freelap USA: In addition to your position at Loyola, you actively work as a consultant in the high school sector creating training programs for schools that lack a strength and conditioning professional on staff. Can you talk us through the process of determining needs and progressions in a program you won’t have your eyes on all the time?

Tim Kettenring: I generally start with the skills that I would like an incoming freshman college athlete to have acquired when they get to me and work backward from there. My KPIs are movement competency in the major patterns—squat, hinge, lunge, push, pull, rotate—and motor control. I still FMS incoming freshmen to assess these KPIs, even though I generally don’t use correctives.

With the end goal established, I set a baseline exercise for each pattern starting with bodyweight exercises and build the program from there, ensuring that I teach sport coaches how to teach, cue, and assess each movement. A big priority early in my programming for high school athletes is to accumulate training volume and develop work capacity while also exposing them to novel exercises. I frequently implement multi-planar leg circuit progressions to accomplish these goals.

After the volume accumulation/work capacity phase, I like to get high school athletes comfortable using external loads while also continuing to teach sport coaches basic principles of movement standards: e.g., what a decent push-up looks like, hip crease below parallel in a squat, neutral posture in a hip hinge. I generally utilize a lot of tempo work in this phase to continue accumulating volume and enhance motor learning while improving the integrity of the soft tissue.

It’s popular to ignore aerobic capacity these days, but even a moderately trained aerobic system improves recovery in every facet; between sessions, between sets, etc., says @ValhallaPerform. Share on X

After the movement competency/motor learning phase, I progress into a “relative/maximal strength” phase, which sounds ridiculous, I know. For context, the schools I work with are non-football schools, so to try to progress these athletes to a 1.5x bodyweight squat or incorporate 1RM or 3RM percentage-based work is not practical, in my eyes. In this phase, all of our loading is based on percentage of body weight (i.e., relative), and the strength levels are the closest we can safely and practically get to maximal.

My simple assessment battery for schools that want on-site testing is:

  • 10-meter acceleration.
  • 30-meter sprint using the Freelap timing system.
  • A vertical jump using a Just Jump mat (purchased from SimpliFaster).
  • A 5-0-5 change of direction test also using Freelap.

I also recommend periodic conditioning assessments, usually for aerobic capacity.

From a needs analysis perspective, I look at movement competency and motor control, biomechanical efficiency, relative strength, “foundational” strength, and aerobic capacity.

Freelap USA: You recently wrote a piece for your blog on sleep and are an active proponent of the idea that “7-9 hours of sleep” isn’t a constructive message for most athletes. Talk us through the message you give to your athletes when it comes to sleep accumulation, efficiency, and quality, along with any other thoughts you have on the topic.

Tim Kettenring: My informal research on sleep stems from my own struggles with a sleep disorder called idiopathic hypersomnia that I was diagnosed with in 2012. Initially, I was prescribed a stimulant that acted on the GABA/Orexin receptors, but it was only effective for a few months before I became desensitized to it. After that experience, I dug into how to maximize “sleep performance.” I read sleep research, talked to neurologists specializing in sleep disorders, talked with dietitians about nutrient timing, and experimented on myself.

My primary takeaways from that research were as follows:

  1. Optimizing sleep environment (sleep hygiene).
    • Cold room.
    • As dark as possible.
    • Eye mask.
    • White noise machine.
  2. Sleep timing.
    • Consistent sleep time—go to bed within an hour of the same time every night.
    • Consistent wake time—wake up within an hour of the same time every morning.
    • Not going to sleep too late after the sun goes down to maximize melatonin release—for me this is between 8:30 and 9:30 p.m.
    • Not sleeping in too late after the sun comes up to maximize serotonin release.
  3. Basing nightly sleep time on cycles instead of hours.
    • We mostly sleep in 90-minute cycles where we go through the four stages of sleep (N-REM 1-3 and REM).
    • We can maximize daily energy levels by setting sleep/wake times based on the number of cycles.
    • We can minimize sleep inertia (grogginess upon waking) based on the same principles.
    • Six hours (~4 cycles) can leave us more energized than eight hours (5.33 cycles) because we wake up at the end of a cycle when our brains/bodies are more prepared for wakefulness.
    • The 7-9 hour/night recommendation comes from cumulative data.
  4. Sleep accumulation.
    • Sleep doctors I talked to recommend 70 hours of cumulative sleep time over the course of 10 days for the general population and closer to 90 hours for athletes.
    • This obviously sounds like “7-9 hours per night” but that’s an average, not a specific nightly recommendation.
    • The dietitians I spoke with recommended avoiding carbohydrates within 1-2 hours of sleep time.
    • Carbohydrates can have a sympathetic effect on the autonomic nervous system.
    • Protein has more of a parasympathetic effect.

I talk with my athletes about sleep more than any other aspect of their performance management process.

I talk with my athletes about sleep more than any other aspect of their performance management process, says @ValhallaPerform. Share on X

Freelap USA: Assessment protocols are all the rage these days. I know your volleyball program at Loyola is quite successful. Would you discuss what KPIs you use to guide your training and any other screening processes you find helpful?

Tim Kettenring: The number one reason volleyball has been successful is because we have great coaching staff and great players.

But from a training standpoint, the KPIs we use are:

  1. RSI – In my experience working with volleyball at the Division I level, a big emphasis is placed on maximal vertical jump height versus ground contact times on a multi-jump. We’ve started using the four-jump test on the Just Jump Mat as an inexact measure of RSI. By emphasizing this along with an enhanced focus on reactive strength, our athletes get off the ground quicker in matches as demonstrated by block and attack percentage increases.
  2. Linear Speed – We use 10-meter and 30-meter sprint times to assess acceleration and max velocity. We emphasize accelerative ability early in the off-season paired with our volume accumulation work in the weight room. Later in the off-season, the program progresses to more max velocity work combined with higher velocity weight room work. In-season we touch max velocity for 1-2 reps. I like the biomechanical efficiency that max velocity work develops and demands. Boo Schexnayder suggested several years ago that I micro-dose max velocity work with every group I train for these reasons.
  3. Change of Direction – We use a Modified T-Test where a 9-inch wicket is placed on each side of the “T,” so our girls have to sprint, shuffle, then jump and land twice in transition on each side. Since assessing agility is really difficult in our setting, we wanted to make a change of direction test that was at least semi-specific and seemed to address the movement patterns seen on court with every position.
  4. Aerobic Capacity – We use a 2x600m run test with three minutes of recovery between efforts and score total time, which ranges from 5:30 to 7:30. It’s really popular to ignore aerobic capacity these days, but even a moderately trained aerobic system improves recovery in every facet; between sessions, between rallies within a set, between sets, and between matches. We train it as such.
  5. Maximal Strength – We use a 3RM trap bar deadlift test for max strength. We feel that a 3RM gives us more accurate data than a 1RM since most of our girls aren’t anywhere near their ceiling from a maximal strength standpoint.

Freelap USA: Recently you posted a tweet about “military-style training” in team sports settings, the basic premise of which was that it’s insulting to individuals such as yourself who have actually served in the military. Can you expand on this thought as well as your thoughts on the safety and efficacy of these training “strategies”?

Tim Kettenring: There are many reasons why coaches should not use militaristic training or terminology with their athletes, but the fundamental reason is that military training is designed to desensitize soldiers to combat and to dehumanize enemy combatants. When you teach young people—usually boys playing high school sports whose frontal lobes are not fully developed—that they are “going to war” with another group of boys, it desensitizes them to violence and teaches them that it’s acceptable to dehumanize opposing players. The frontal lobes regulate decision-making and impulse control, and they are essentially rewired by this kind of messaging to make boys more prone to unnecessary violence and aggression.

This stunted development of executive function has nonlinear effects later in life, ranging from depression and anxiety to a propensity for domestic violence to a risk of substance abuse. I think the long-term effects were summarized well by Martellus Bennett when he posted a really sobering Twitter thread about emotional desensitization in football last year and the detrimental effects it had on his life.

From a veteran’s perspective, the use of military terminology dramatically minimizes what service members volunteer to do in the service of their country. To have coaches, many of whom would never be found within 100 miles of a recruiting office, insinuate that anything they or their athletes do is anything remotely close to combat is the insulting part. Many of my best friends risked their lives in combat so that these same coaches could safely coach their sports, and the perpetuation of this dynamic is a disservice to them.

Freelap USA: What is one thing you think you do differently from everyone else in your coaching?

Tim Kettenring: I’m not afraid to be wrong. I have experienced a series of personal and professional failures in my life that have left me with a humbling sense of my own fallibility. Many coaches are their own harshest critics, but many times this is an ego-driven desire to be right.

It’s become popular to preach ‘growth mindset’ ideals to athletes, but it’s rare that a coach is willing to embrace failure for risk of embarrassment, says @ValhallaPerform. Share on X

I tend to be on the opposite end of the continuum in that I’m critical of myself because I assume I’m wrong. It’s become popular to preach “growth mindset” ideals to athletes, but it’s rare that a coach is willing to embrace failure for risk of embarrassment. I’ve embarrassed myself more than most, so it really doesn’t faze me anymore. I had no one to blame but myself, and each of those failures provided an opportunity for me to learn more about myself.

Since you’re here…
…we have a small favor to ask. More people are reading SimpliFaster than ever, and each week we bring you compelling content from coaches, sport scientists, and physiotherapists who are devoted to building better athletes. Please take a moment to share the articles on social media, engage the authors with questions and comments below, and link to articles when appropriate if you have a blog or participate on forums of related topics. — SF


Front Squat Sprinter

Advantages of the Front Squat for Sprinters: A New Perspective on Strength for Speed

Blog| ByGabriel Mvumvure

Front Squat Sprinter

By Gabriel Mvumvure and Kim Goss

For more than a half-century, the back squat has been the go-to exercise for building bigger and stronger athletes. It’s become so popular, many strength coaches stand by the motto: “If you don’t have the back squat in your program, you don’t have a program!” However, many strength coaches have also ditched the back squat in favor of front squats in recent years. So, let’s take a deep dive into the benefits of this squat variation and particularly how it applies to sprinters.

Whereas there’s no question that discus throwers and shot putters have benefited from all forms of squats, some sprint coaches see little value in these exercises. These outliers believe that strength developed in the weight room will not transfer to the power needed to sprint faster and it will slow athletes down by adding bulky muscles. These opinions are based on misinformation. Just as strength coaches don’t prescribe 5-mile jogs for their athletes, sprint coaches shouldn’t have their athletes lift like Arnold Schwarzenegger!

(Lead photo by Viviana Podhaiski, LiftingLife.com.)

Olympic Lifters
Image 1. Throwers know the value of weightlifting training methods, which include squats. U.S. Olympians Carol Cady and Al Feuerbach are throwers who also won the Senior National Weightlifting Championships. Cady was an American record holder in the discus, and Feuerbach was a world record holder in the shot put. (Bruce Klemens photos)

Next question: “Why full squats for sprinters?” If the legs do not bend past 90 degrees in sprints, why perform any leg exercise through a full range of motion? Two reasons:

  • There are three ways to go in the squat: above parallel, parallel, and below parallel (i.e., quarter squats, parallel squats, and full squats). One problem with quarter squats is that athletes can use considerably more weight than with the other two squat depths, placing excessive stress on the spine. Such stress, and the subsequent lower back pain it produced, motivated Russian sports scientist Yuri Verkhoshansky to develop classical plyometric exercises such as depth jumps.
    Parallel squats use less weight than quarter squats but place the highest levels of shear forces on the knees (see reason #4 below). Consider that knee injuries are rare in weightlifting, and you would be hard-pressed to find examples of athletes tearing an ACL from a full squat. Additionally, limiting the range of motion of squats poses the risk of reducing flexibility and inhibiting the protective functions of the fascia (as discussed in our article on fast eccentric squats).
Consider that knee injuries are rare in weightlifting, and you would be hard-pressed to find examples of athletes tearing an ACL from a full squat.… Squatting enables sprinters to keep sprinting. Share on X
  • Squatting enables sprinters to keep sprinting and jumpers to keep jumping. To achieve the highest levels of performance, some high school track and field coaches believe it’s best for their athletes to compete in indoor track, outdoor track, and even joint summer sprint programs. Maybe that’s not such a good idea?
    A 2017 study on high school athletes found that those who focused on just one sport had an 85% higher incidence of lower-extremity injury. As it relates to track and field, a 1987 study tracked 17 high school track teams (174 males, 83 females) over 77 days. The authors concluded: “A total of 41 injuries was observed over this period of time. One injury occurred for every 5.8 males and every 7.5 females. On the average, an injury resulted in 8.1 days of missed practice, 8.7 days for males and 6.6 days for females. Sprinting events were responsible for 46% of all injuries.” Ouch!

Brown Sprinters
Image 2. To reach the high levels in track and field, staying healthy is critical. (Brown University graduate sprinter Kevin Boyce and senior jumper Lauren Stern. Photos courtesy David Silverman, Brown University Athletic Communications.)

Yes, we understand sprinters “feel the need…the need for speed,” but injuries are a red light to finish-line glory. Resistance training is a green light.

In a meta-analysis of 25 research studies involving 3,464 athletes, researchers found that strength training cut overuse injuries in half and all injuries by one-third! Further, approximately 70% of ankle and knee injuries are non-contact—the athletes were not touched! One explanation for the high rate of non-contact injuries is that sports-specific training may compromise the elastic qualities of connective tissues, making these tissues act like frayed rubber bands, ready to snap.

Now that we have your attention, let’s explore how sprinters can benefit from front squats.

Front Squats: A Question of Balance

In weightlifting, many coaches of Olympic champions and world record holders favor the front squat over the back squat. During their “high impact” weeks, elite weightlifters from Kazakhstan trained six days a week and performed eight training sessions a day (yes, eight sessions a day!). They squatted twice a day, with 10 of those workouts being front squats and two being back squats. Bulgarian weightlifting coach Ivan Abadjiev shared a similar mindset.

Abadjiev’s athletes won a dozen Olympic gold medals and shocked the world in 1972 when their team beat the mighty Russians. Abadjiev “changed the game” by focusing on only a few lifts, in contrast to the Russians, who performed a large variety of exercises.

In his early years as the national coach, Abadjiev often had his lifters squat twice a day for a total of 12 training sessions in a week; nine of those workouts were front squats and only three were back squats. Eventually, Abadjiev determined that the only supplemental leg exercise needed for his elite athletes was the front squat. But that’s weightlifting—what do elite strength coaches think of the front squat?

Bulgarian Lifters
Image 3. Bulgarian weightlifters would often squat 12 times a week. Three of those workouts were back squats, while nine were front squats. Shown is Blagoy Blagoev, a Bulgarian lifter who broke 18 world records and snatched 430 pounds at 198 pounds body weight. (Bruce Klemens photos)

According to legendary strength coach Charles Poliquin, European coaches were asked if their athletes could only perform three exercises, what would they choose? The consensus was the power snatch, the incline bench press, and the front squat. With that background, here are a dozen reasons why front squats hold an edge over back squats for all athletes, particularly sprinters:

Here are a dozen reasons why front squats hold an edge over back squats for all athletes, particularly sprinters. Share on X

1. Emphasizes the Lower Portion of the Hamstrings

Some strength coaches contend that low-bar, wide-stance powerlifting back squats work the hamstrings more effectively than conventional back squats. Yes and no…and it’s a big NO for sprinters, according to Canadian strength coach and posturologist Paul Gagné.

“The powerlifting back squat focuses on the proximal section of the hamstrings, closer to the glutes,” says Gagné. “I’ve seen many NFL players with big glutes and large upper thighs but little development in the muscles around the knee—they are basically built like horses. Such unbalanced development may be one reason the NFL has such a high risk of hamstring injuries.”

Lifting Trio
Image 4. Low-bar powerlifting squats with a wide stance emphasize the upper portion of the hamstrings. Back squats and front squats performed with a narrower stance through a full range of motion, as demonstrated by these two weightlifters, provide more complete leg development. (Bruce Klemens photos)

Gagné says balance during the front squat is influenced by the relationship between the center of gravity of the bar and the center of gravity of the body, a concept presented by Russian sports scientist Robert Roman in 1986. “With the back squat, the bar stays over the body’s center of gravity. With the front squat, the bar is forward of the body’s center of gravity. For an athlete to maintain their balance during the lift, the distal portion of the hamstrings, closer to the knee, will be more active than during the back squat. I believe that such development is one reason weightlifters seldom get hamstring injuries.”

Drawing Gravity
Image 5. Because the barbell is positioned ahead of the body’s center of gravity during a front squat, the hamstrings must work especially hard for an athlete to maintain their balance. With a back squat, the center of gravity of the bar (GCGB) is directly in line with the center of gravity of the body (GC Body). (Drawing courtesy Bud Charniga, Sportivny Press.com, adapted from R.A. Roman, 1986; photo by Viviana Podhaiski, LiftingLife.com)

2. Transfers Better to Sprint Starts

Explosive strength is the ability to overcome inertia, such as during the start of a 100-meter sprint. In our article about fast eccentric squats, we discussed how relatively weak hamstrings (in relation to the quadriceps) could affect explosive strength.

It can be argued that weightlifters perform back squats, but they also perform front squats, and the catch position and recovery from the clean resembles a front squat. Research on college football players found that weightlifters exceeded powerlifters in short sprint speed, suggesting that front squats more effectively train the start. One extreme example is the mock race between Mark Cameron and Renaldo Nehemiah.

Research on college football players found that weightlifters exceeded powerlifters in short sprint speed, suggesting that front squats more effectively train the start. Share on X

Cameron was the second American to clean and jerk 500 pounds, which he did at 240 pounds body weight in 1980. Renaldo Nehemiah ran the 100-meter hurdles in under 13 seconds, the first to do so, and played wide receiver for the San Francisco 49ers. In a mock race at the University of Maryland, Cameron was ahead of Nehemiah for the first 10 yards, at which point Nehemiah rocketed ahead.

Another point is that the start of a sprint is highly influenced by the strength of the calves. A 2007 study concluded that the gastrocnemius medialis “is one of the most important muscles generating the start and block acceleration.” In squats, a narrower foot placement and full range of motion increases the activity of these muscles. Athletes tend to front squat with a narrower stance than when they back squat, especially if they perform the wider-stance low-bar squats promoted by many prominent powerlifters and strength coaches. This calf-strengthening effect may help prevent hamstring injuries. In a study spanning 17 years, researchers found that one of the greatest risk factors for a hamstring injury was a previous ankle injury to that same leg.

3. More Specific to Upright Sprinting Mechanics

Sprinters don’t run on their heels. Because the barbell is forward of the body’s center of gravity during the front squat, the resistance is felt more on the forefoot. Also, the upright sprint position more resembles a front squat than a back squat.

Another characteristic of the front squat is that it requires more dorsiflexion than a back squat. One of the issues we’ve found with incoming sprinters is they often lack ankle mobility and the strength to maintain dorsiflexion when they sprint. As such, we have these athletes perform remedial strength exercises and special sprint drills to achieve and maintain optimal sprint mechanics during a race. 

Brooke Uri
Image 6. The upright, narrower stance of front squats and cleans require more dorsiflexion of the ankle, an essential quality in sprinting. Shown demonstrating the “knees in front of the toes” position she uses for cleans and front squats is sophomore Brown University hurdler Brooke Ury. This season, Ury posted the seventh-fastest 60m hurdle time in school history and has vertical jumped (no step) 31 inches. (Track photo courtesy David Silverman, Brown University Athletic Communications)

4. Superior to Back Squats for Improving Knee Stability

Although the word “quad” is in quadriceps, there are six quadriceps muscles. Research has shown the vastus medialis muscles, located on the medial (inside) portion of the knee, are more active with front squats than back squats. This is because the trunk is more upright, and the knees travel more forward than the back squat.

Gagné says that training the vastus medialis muscles is critical for maintaining optimal knee stability while sprinting, especially the lower portion called the vastus medialis oblique. As such, it’s important to emphasize exercises that strongly solicit the vastus medialis muscles, such as the front squat. And, according to Poliquin, the key to strengthening the vastus medialis muscles is performing full “knees in front of the toes” squats.

In his work with elite athletes, Poliquin found that getting athletes to perform full-range squats enabled them to reduce their risk of injury. For example, when he was hired to work with Canada’s national ski team, he said every athlete who had been with the team for the previous five years needed knee surgery. For the following five years under this legendary strength coach’s watch, no skiers went under the knife. Likewise, when he took over the training of the Canadian national women’s volleyball team, all but one athlete had jumper’s knee (a form of tendinitis). Within two months, only one athlete had knee issues.

As for the stress on the knees with both squat variations, there are two types of forces to be concerned about with squats: compressive and shear. Compressive forces act vertically on the knee, trying to compress the knee. Shear forces act horizontally on the knee, trying to pry the knee joint apart.

Front squats and back squats place equal amounts of shear force on the knee, but front squats place less compressive force….it makes sense that sprinters should focus more on the front squat. Share on X

According to Dr. Aaron Horschig, founder of Squat University, there is an inverse relationship between compressive force and shear force during squats. Thus, the deeper the athlete squats, the higher the compressive force and the lower the shear force. Front squats and back squats place equal amounts of shear force on the knee, but front squats place less compressive force. Sprinting is stressful enough on the knees (as suggested by the study previously mentioned), so it makes sense that sprinters should focus more on the front squat.

5. Works the Glutes More Effectively Than Wide-Stance Back Squats

If a sprinter’s glutes are relatively weak, their hamstrings must work harder, potentially increasing the risk of hamstring injuries. Some powerlifting coaches say that a low-bar, wide-stance back squat more effectively works the glutes, but there is a positive relationship between squat depth and the work of the largest glute muscle, the gluteus maximus. The range of motion is restricted with the modern powerlifting squat as the wider stance transfers much of the work to the adductors.

6. Accesses and Improves Flexibility

If you’re looking for a quick test to determine an athlete’s flexibility, the front squat is hard to beat, and not just for the lower body. For example, athletes who have tightness in their forearms and the muscles that externally rotate the shoulders will have difficulty supporting the bar on their clavicles. This doesn’t mean they will never be able to front squat.

Those athletes who cannot comfortably perform the front squat can attach lifting straps to the bar to reduce the stress on their wrists and forearms, and athletes can hold the bar on their fingertips with a thumbless grip. As athletes perform these variations, they should eventually be able to switch to the conventional front squat technique. Yes, there is a front squat variation where the arms are crossed in front, but this does little to improve flexibility, especially in the upper body.

Many YouTube videos show how to improve flexibility to perform front squats properly. Most of these ideas are effective, but one of the fastest ways to improve flexibility for the front squat is to perform front squats!

Lift Straps
Image 7. The front squat can also be performed with the arms crossed in front, but a better approach is to use lifting straps as shown. (Left photo by Bruce Klemens)

7. May Access Strength Imbalances

The hamstring/quad strength ratio has been extensively studied in athletes and the general population. Sports scientist Bud Charniga has some strong opinions about using seated exercise machines to test this ratio:

“All too often, athletes are tested and even trained seated on machines to measure, as well as to train hamstring to quadriceps strength, i.e., balance between thigh flexion to extension strength. This practice persists, utilizing in many cases expensive machinery; even though athletes in dynamic sport, with few exceptions; perform standing. Furthermore, it is unclear how training hamstring muscles lying face down or seated will have some prophylaxis effect for athletes running about on a field or court; where flexing and straightening of lower extremities entails far more complexity. After all, how often does one see an athlete sustain a hamstring injury lying face-down; or for that matter, seated?”

As an alternative, one interesting idea presented by Poliquin was that strength imbalances between the quadriceps and hamstrings could be determined by comparing the 1-repetition maxes of the front and back squat. According to Poliquin, if your front squat max does not equal 85% of your back squat, your hamstrings are relatively weak. Although this is just Coach Poliquin’s observations (and his formula may not be accurate), he does have a remarkable track record of reducing the risk of knee injuries in elite skiers and other athletes.

8. Improves Posture

According to Gagné, the front squat involves more body awareness than the back squat. “If you were to try squatting with a blindfold, it would be much more challenging to maintain your balance with a front squat rather than a back squat.”

Relating back to Roman’s drawing, Gagné believes that the reduced stability of the front squat may provide an advantage in sprinting. He says the base of support, the forefoot, is relatively small in sprinting. Because the foot strike is performed at high speeds, and the athlete has to deal with the disruptive forces of turns (and in the case of hurdles, jumps), the front squat may enable the athlete to more easily sprint with optimal technique and apply more force into the ground.

Gabriel Mvumvure
Image 8. Front squats improve body awareness, helping sprinters maintain optimal technique during high speeds. Shown demonstrating such technique is Brown Head Sprint Coach Gabriel Mvumvure when he competed for LSU. (Photo courtesy LSU Sports Information)

9. Strengthens the Upper Back Muscles Used in Sprinting

To keep the bar on the chest during the front squat, Gagné says many upper body muscles (and the abdominals) must be strongly engaged, especially the rhomboids and infraspinatus. The rhomboids help pull the shoulders back, which is important since sprinters with weakness in these muscles can develop a round-shouldered posture that affects sprinting mechanics. These muscles, which help athletes maintain optimal posture in the upright sprint position, are less active during a back squat.

The rhomboids, which help athletes maintain optimal posture in the upright sprint position, are less active during a back squat than during the front squat. Share on X

It’s been said that acceleration begins with the upper body, so upper body strength is important. Look at many of the best short sprinters, and you’ll find that they often have exceptional upper body development. Likewise with good running backs in football.

10. A Spotter May Not Be Required

For an athlete to safely back squat, they should lift in a power rack with the safety supports set at the appropriate height to catch the bar. Back and side spotters should also be recruited. Unfortunately, such guidelines are seldom followed in the real world. And if spotters are available, they are often inattentive or stand too far away from the athlete to save failed lifts.

With a front squat, experienced lifters can squat outside the rack. If the weight is too heavy or they get out of position, they can easily dump the bar forward. However, with this approach, bumper plates should be used (to protect the bar and the floor), and the lift should be performed on a platform (to avoid damaging the floor).


Video 1. The safest way to perform squats is inside a power rack. However, experienced lifters can perform front squats outside a rack, as the athlete can easily dump the bar forward. Shown is senior sprinter Maddie Frey, who in four months improved her vertical jump (no step) from 26.6 inches to 29.4, and freshman sprinter Andrew Li, who improved his vertical jump (no step) from 37.3 to 39.9 in one month. (Frey action photo by Leslie Whiting-Poitras; Li action photo courtesy David Silverman, Brown University Athletic Communications)

11. More Specific to the Start of the Clean

Because the trunk is more upright than in the back squat, the starting position of a front squat more closely approximates the start position of a clean or power clean. According to some Russian researchers, the back squat would be considered more specific to the snatch, as the wider grip forces the athlete to start with a back angle more parallel to the floor. Again, many elite weightlifting coaches believe the front squat is more important than the back squat for improving weightlifting ability.

12. Discourages Cheating

With back squats, athletes are more likely to cheat themselves by performing a partial lift. With front squats, according to Poliquin, athletes are more likely to squat lower. If athletes get out of position, such as by shooting their hips up or rounding their upper back, they will often drop the bar.

Big Benefits for Sprinters

Countless track and field athletes have benefited from performing back squats at the exclusion of front squats, and there is no question that back squats are valuable, especially when performed through a full range of motion. That said, we believe we’ve made a strong case as to why the front squat might be better than the back squat for sprinters, especially when compared to wide-stance powerlifting squats.

Is the back squat still “the king” of exercises? Absolutely, but for sprinters, the front squat should be a primary exercise in their weight training toolbox.

Since you’re here…
…we have a small favor to ask. More people are reading SimpliFaster than ever, and each week we bring you compelling content from coaches, sport scientists, and physiotherapists who are devoted to building better athletes. Please take a moment to share the articles on social media, engage the authors with questions and comments below, and link to articles when appropriate if you have a blog or participate on forums of related topics. — SF


Kim Goss
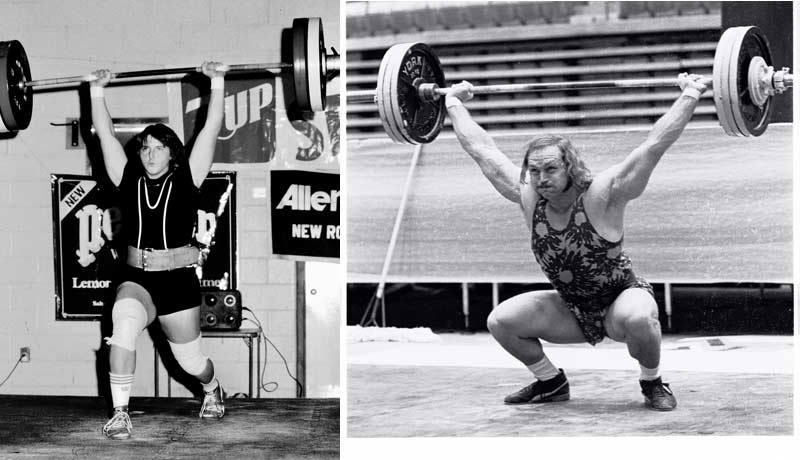
Kim Goss has a master’s degree in human movement and is a volunteer assistant track coach at Brown University. He is a former strength coach for the U.S. Air Force Academy and was an editor at Runner’s World Publications. Along with Paul Gagné, Goss is the co-author of Get Stronger, Not Bigger! This book examines the use of relative and elastic strength training methods to develop physical superiority for women. It is available through Amazon.com.

References

American Orthopaedic Society for Sports Medicine. “Sports specialization may lead to more lower extremity injuries.” ScienceDaily. 7/23/17.

Brenner, J.S. and the Council on Sports Medicine and Fitness. “Sports Specialization and Intensive Training in Young Athletes.” Pediatrics. 2016;138(3):e20162148.

Coh, M., Peharec, S., and Baãiç, P. “The sprint start: Biomechanical analysis of kinematic, dynamic and electromyographic parameters.” New Studies in Athletics. 2007;22(3):29–38.

Escamilla, R.F. “Knee biomechanics of the dynamic squat exercise.” Medicine & Science in Sports & Exercise. 2001;33(1):127–141.

Goss, K. Ivan Abadjiev personal communication. 5/23/11.

Goss, K. Naim Süleymanoğlu personal communication. 1988.

Gullett, J.C., Tillman, M.D., Gutierrez, G.M., and Chow, J.W. “A Biomechanical Comparison of Back and Front Squats in Healthy Trained Individuals.” The Journal of Strength and Conditioning Research. 2009;(23)1:284–292.

Hennessey, L. and Watson, A.W. “Flexibility and posture assessment in relation to hamstring injury.” British Journal of Sports Medicine. 1993;27(4):243–246.

Horschig, A., Sonthana, K., and Neff, T. The Squat Bible, pp. 97–100. Squat University LLC, 2017

Krychev, A. “The Bulgarian weightlifting program (according to Alex Krychev), uploaded December 2019, iduc.pub

Komi, P., ed. “Training for Weightlifting,” Strength and Power in Sports, pp. 365-366, Blackwell Scientific Publications, 1992.

Lauersen, J.B., Bertelsen, D.M., and Andersen, L.B. “The effectiveness of exercise interventions to prevent sports injuries: a systematic review and meta-analysis of randomised controlled trials.” British Journal of Sports Medicine. 2014;48(11):871–877.

Rojas, I. and Sisto, G.. Kazakhstan Weightlifting System for Elite Athletes. BookCrafters. 2015.

Roman, R.A. The Training of the Weightlifter, pp. 18, Sportivny Press, 1986

Watson, M.D. and DiMartino, P.P. “Incidence of injuries in high school track and field athletes and its relation to performance ability.” American Journal of Sports Medicine. 1987;15(3):251–254.

Yavuz H.U., Erdag, D., Amca, A.M., and Aritan, S. “Kinematic and EMG activities during front and back squat variations in maximum loads.” Journal of Sports Sciences. 2015;33(10):1058–1066.

Bench Press

Understanding and Applying Relative Strength Standards

Blog| ByPatrick Basil

Bench Press

Are we strong? It’s hard to determine progress if you don’t have anything to compare to. We must define what it means to be strong if we’re going to say whether we are or not.

Differentiating between larger and smaller bodies is also valuable. If a 160-pound male and a 200-pound male can both bench press 225 pounds, are they equally strong? Per relative strength, the 160-pounder is much stronger with a relative strength ratio of 1.4x BW compared to the 200-pounder, who is actually pretty weak for his size with a relative strength ratio of about 1.12x BW. Judging an athlete solely by the weight on the bar is not a fair or accurate measurement, because it doesn’t tell the full story.

Also, at a certain point we become strong enough. This means that solely increasing 1RM strength will not lead to any further on-field improvement (training transfer). Once this happens, the emphasis of training must shift toward methods that will directly transfer.

We need to define what ‘strong enough’ is and measure how close we are to achieving it. Using this information to drive programming decisions is really what matters, says @pbasilstrength. Share on X

Again, we need to define what “strong enough” is and measure how close we are to achieving it. Using this information to drive programming decisions is really what matters. Continuing to progress maxes for a team that doesn’t need them is a waste of time and a huge opportunity lost.

Strength Standards Defined

These standards are benchmarks I use to determine an athlete’s relative strength, which is the load they can handle well compared to their body weight, or how strong they are in certain movements or lifts. Usually, this is measured as their one rep max in the lift divided by their body weight. For example:

  • 300-pound bench press at 220-pound body weight
  • 300/220 = 1.36

This athlete can bench press 1.36x their body weight, which is really good for a male and insane for a female.

For other lifts, I’ll determine relative strength by a weight they can handle for a common amount of reps. I use this method for lifts we don’t test maxes for, such as:

  • Barbell RDLs
  • Lunges
  • Neck work

I usually program RDLs between five and 10 reps and most commonly from six to eight reps. So, our standard for barbell RDLs is the weight they use for eight reps with flawless form and technique. These I don’t compare to body weight; just the load itself is the benchmark.

For other lifts, I’ll just make a mental note of the weights used by most athletes in the group and do some quick math in my head. Reverse lunges are an example of this. If my average baseball player weighs 180 pounds and most of them use 185 pounds for reverse lunges for 6-8 reps, that’s pretty solid. This means most of the team can reverse lunge their body weight for at least 6-8 quality reps. If that same group is only using 95 pounds, we need to work on strength in that movement. That information drives programming decisions: In the second case, more focus on improving strength in the lunge is required.

The strength standards I use for common main lifts are:

Mens Strength Standards
Women's Strength Standards

How Did I Come Up with These?

Some of these are accepted standards supported by evidence, some are long-held norms in the field, some I found in random articles, some we figured out just by watching what our beginner, intermediate, and advanced athletes do, and others are extrapolated by math.

The back squat standards are pretty common across the field. The front squat is about 80%-85% of the back squat, so the front squat standards are 20% less than the back squat standards. Understand they are benchmarks and measurements, not hard and fast gospel rules. Your experience may be different from mine.

How Do I Test Them?

We test major lifts throughout the off-season, usually at the end of the semester after we’ve been training the team or group consistently for 16 weeks. With some teams, we do work up to a true 1RM; for different groups we also use reps in reserve and estimate a max, and for others we just make a mental note of how much weight they use. RDLs, lunges, and the neck machine are all examples of this.

For testing, we work up to a true 1RM, use reps in reserve and estimate a max, or just make a mental note of how much weight they use, depending on the group, says @pbasilstrength. Share on X

This is actually becoming my preferred method of evaluating strength over set maxing and testing weeks. Yes, we do share these standards with them—our athletes are very driven by measurements (and grades), so they want to be able to hit each one and see how they stack up.

Using Standards to Dictate Training

What does the athlete or group need from their training? Are they strong enough, or do they just need to continue what they’re doing and get stronger? The team average in each movement allows you to determine that.

I often find groups are strong enough in certain lifts, but not others—male athletes tend to hit the trap bar and squat standards faster than the bench press standards. In this case, the training for lower-body movements may be shifted more toward dynamic effort and power emphasis, where upper body strength will continue to follow basic progressive overload and more repetition assistance work. You can be strong enough in one lift/movement but not another.

If you only have one team to train, you could also break them into different subgroups based on what they need. Large rosters, like football or swimming, will not all be at the same level. If it’s logistically possible, you could use these measurements to tailor training for different ability levels (see beginners, intermediates, and advanced athletes).

Beginners, Intermediates, and Advanced Trainees

Training age refers to how many years an individual has been training in a supervised setting, not their actual age. Training level or ability refers to the:

  • Level of skill
  • Movement quality in major movement patterns like the squat, hinge, and lunge
  • Base level of strength demonstrated by athletes (usually compared to their body weight).

All athletes will fall into one of the three levels:

  1. Beginners (novices)
  2. Intermediates
  3. Advanced

Beginners

Beginners are exactly that. They have no real consistent experience training in a structured and supervised setting and do not possess any base level of strength, work capacity, or movement skill. Their training should reflect this.

Use the most basic variations of exercises that they can execute well with confidence. Apply minimal but consistent progressive overload and strive for continued quality movement. Strength, size, and power gains for this population will come simply by following that formula.

Beginners do not need advanced methods and likely will not be able to truly get the most out of more complex movements and methods anyway.

Intermediates

Intermediates are those with at least one to two years of direct and consistent training experience in a structured setting under a qualified coach. This population can execute basic variations of the major movement patterns well and can handle moderate training loads with consistent great technique and form, but they still have room to progress in gaining strength. They can hit the minimum strength standards but have not reached the point of diminishing returns for strength gains.

This population can begin to use heavier loads and more progressed exercise variations and learn more advanced methods. Training for this population should still be rooted in consistent movement quality, progressive overload, and simply continuing to get stronger and generally more explosive and powerful.

Advanced

Advanced groups are those athletes with at least three years of direct consistent experience under a qualified coach and who can move heavy training loads with flawless technique. This population can hit every strength standard goal and be considered “strong enough.” They have reached the point of diminishing returns to improving athletic performance solely by improving strength. Their training must be tailored toward increasing speed, power, and training transfer to the playing field for their sport. Individualization of the programming to improve weaknesses is also a great way to progress this population if it’s feasible with your logistics. I discuss training for advanced athletes like this further in my Advanced Training Manual.

Training for each level must be tailored accordingly (SAID principle). Beginners cannot execute to the same degree that advanced trainees do. Conversely, beginner training will not be a sufficient-enough stimulus for advanced populations. It’s your job as the coach to determine what level the group you are working with is currently at and tailor the training accordingly.

Beginners should be able to hit each movement’s ‘minimum.’ Intermediates should strive to hit each movement’s ‘goal.’ Once an athlete can hit the goal numbers, they’re considered to be strong enough. Share on X

Beginners should be able to hit the “minimum” in each movement. Intermediates should strive to hit the “goal” for each movement. Once an athlete can hit the “goal” numbers, they’re considered to be strong enough.

Long-term training can really be simplified to this: Teach and develop movement mastery and quality, then work to reach the strength standards through progressive overload.

That will encompass anywhere from 90%-99% of the athletes you’ll work with. Strength is the lowest-hanging fruit in terms of improving performance and reducing injury risk; it’s also very easy to train. Follow that formula, and I truly believe you’ll cover about 90%-95% of all transfer from the weight room to the field. Once an athlete is “strong enough,” training becomes an ongoing pursuit of that last 5%-10% of improvement.

At this point, bridging the gap between developing strength and translating it to sporting action becomes the emphasis of training. Shifting emphasis in training from strength dominant to power and explosive strength dominant is one way to reach that last 5%-10%.

Considerations for Larger Bodies

There will always be outliers with measurements like this. Do I expect every 300-pound player to squat 600 pounds to hit 2x BW? That’s a tough ask, but 450 pounds to make 1.5x BW is certainly reasonable. If they’re more than 300 pounds, they’d better be strong. If you have a 280-pound lineman who can’t squat 225 pounds, put two and two together.

Tall athletes are the real outliers. Think 6’4” and up. It’s much more difficult for the 6’5” forwards to squat to depth than the 5’9” running backs. For very tall athletes, I compare them to similar-sized bodies. Though they should still be able to hit the strength minimums, just understand it’s a little more impressive for them. I’ve found that very long-limbed athletes need a much longer emphasis on just developing strength and movement quality than their shorter peers. Progressing them to the next step in training will take longer and is less of a priority.

Will These Standards Work with High School or Youth Athletes?

I developed these standards based on our college athlete population, but that’s not to say they won’t work at the high school level. I wouldn’t worry about measuring relative strength for that population until they have a full year of supervised training in your program. They will get stronger and improve just by training properly and consistently. This is really the case with untrained college freshmen, too.

That said, if you have high school upperclassmen who have been in your program for 2-3 years, they should at least be able to hit the minimum numbers. You probably have a few athletes in mind who can definitely hit these standards.

For youth athletes not yet in high school, I wouldn’t worry about testing at all. Just continue to improve movement quality and confidence and give them a great experience. If they enjoy training and do it consistently, the rest falls into place. That’s really the case at every level.

Since you’re here…
…we have a small favor to ask. More people are reading SimpliFaster than ever, and each week we bring you compelling content from coaches, sport scientists, and physiotherapists who are devoted to building better athletes. Please take a moment to share the articles on social media, engage the authors with questions and comments below, and link to articles when appropriate if you have a blog or participate on forums of related topics. — SF


LVP-LPP

Where Is Max Power in Sprinting?

Blog| ByMatt Tometz

LVP-LPP

Data is pragmatic because it simply answers the question are we actually doing what we say we’re doing? Especially with the 1080 Sprint, we can directly answer are we specifically doing what we say we’re doing with our resisted sprint training? Now, that’s not to say it makes the decisions for you or takes the human coaching component out of it—you still must decide what it is you want to do, and then data comes in and supports that process of how do we make that happen?

Most sports aren’t dictated by how strong you can be—they are about how fast you can be strong. One of the biggest variables of sport is the time (or lack thereof) that constrains the movements and skills that need to be performed.

One of the biggest variables of sport is the time (or lack thereof) that constrains the movements and skills that need to be performed, says @CoachBigToe. Share on X

Using basic physics, power is force x distance all divided by time. In a post on his LinkedIn page, Matt Rhea—Director of Performance Science for University of Alabama football—shared an insight about training his football players that influenced my thought process: “Improvements in strength with a power-focused program were occurring simultaneous to power whereas power was not improving significantly with a strength-focused program.”

This makes total sense: training something not exactly as specific as power, like strength, won’t directly lead to power improvements. If we know power is relevant for sports and want to improve it, we must specifically train power. Although this referred to training power for lifting, the concept is still the same: if we say we’re training max power with our resisted sprints, are we actually doing that?

Lastly, training power must be actionable to help you do your job better as a coach. Assuming all things are equal, that your resisted sprint training is always at max effort with appropriate sets, reps, and distances, load will be the most modifiable variable and the biggest influence on speed and power. In the remainder of this article, I will answer:

  1. Why I compared load-velocity and load-power relationships, and what the difference between the two means for you as a coach.
  2. How I used the 1080 Sprint to answer, “are we actually training at max power with resisted sprints?”
  3. How the insights from this evaluation get turned into action for answering “how much load should we use to achieve max power?” 

Resisted Sprinting

What we currently know about resisted sprint training is that max power occurs around a 50% (48%–52%) velocity decrement (Vdec) or a load used that makes the athlete sprint at half of their max speed. This came from a study1 that had athletes perform resisted sprints with increasing loads until 50% Vdec was achieved and then evaluated the force-velocity and force-power relationships. Building on that, we also know general Vdec zones and their training emphases:

  • 0%–10% Vdec is the technical zone. This zone is light enough to maintain the natural rhythm and timing of sprinting while using slight resistance to draw out more effort.
  • 10%–40% Vdec is the speed-strength zone. This zone is a combination of resistance and speed to develop some sprinting-specific strength while still focusing on speed.
  • 40%–60% Vdec is the power zone.2 This is the optimal zone that’s heavy enough draw out maximal effort and develop sprinting-specific strength while being fast enough to still be powerful.
  • 50% Vdec is about where max power is.1 This specific Vdec has been found to be the sweet spot of load and speed to maximize power in sprinting.

Load-Power Profiling

Language is important, and we should be precise about the words we choose when describing our profiles and protocols. It IS important to differentiate that force-velocity and force-power relationships were evaluated in prior research, whereas I’m evaluating load-power and load-velocity relationships. Can both profiles end up at the same answer for choosing a load for max power? Yes. Are they the exact same thing? No.

If we want to know precisely what load gives the most power for each athlete when resisted sprinting, we need to evaluate the LOAD-power relationship, says @CoachBigToe. Share on X

If we want to know precisely what load gives the most power for each athlete when resisted sprinting, we need to evaluate the LOAD-power relationship. Using the protocols outlined in this article using the 1080 Sprint, my athletes completed a series of four sprints at 35 yards, 30 yards, 25 yards, and 20 yards, each with increasing load. The set of loads (kg) were either 1/5/10/15 (beginner), 2/8/14/20 (intermediate), or 3/10/17/24 (advanced). The 1080 Sprint calculated the highest 5-meter split of both velocity and power for every sprint, and we used this to compare load-velocity and load-power relationships.

We know load and velocity have a negatively linear relationship: as load increases, velocity decreases. We also know load and power have a parabolic relationship: as load increases, power increases up to a certain point before decreasing. This means there’s a sweet spot of load that’s not too heavy and not too light that yields max power. Linear relationships have an equation that follows y = m(x) + b and parabolic relationships have an equation that follows y = a(x)^2 + b(x) + c. In this case, y is velocity sprinted and x is load. M, a, b, and c are all numbers generated by a regression individual to each profile.

Coaches can directly turn this into action by calculating the regression (equation) of each athlete’s load-power profile and working backward to determine which load yields max power. This is important because you program resisted sprints based on load, not force or velocity. With that being said, the goal of your program can be either a certain Vdec or max power, but you still have to pick a load to achieve that. Although 50% Vdec is similar to max power, load-power profiles literally answer the question “are we actually doing what we say we’re doing [training max power]?”

LVP vs LPP Graph
Figure 1. An example of a load-velocity profile (blue) vs. a load-power profile (orange) on the same graph. Each profile has its regression equation and R-squared.

Protocols

At TCBoost Sports Performance, I collected resisted sprint profiles using the 1080 Sprint with 79 high school athletes, 8 college athletes, 8 post-college/professional athletes, and 1 middle school athlete. Sixty-three of these athletes were male and 33 were female. With protocols from the article I mentioned before, 82 profiles were completed on the “beginner” protocol, 4 on the “intermediate” protocol, and 10 on the “advanced” protocol. All loads, fastest 5-meter trimmed velocities, and highest 5-meter power outputs were charted on a dual-axis graph. The load-velocity data points were fitted to a linear regression and load-power data points were fitted to a second-order polynomial regression.

Forty-two percent of the profiles achieved greater than a 50% Vdec during the four sprints. It is important to note this, as 50% Vdec was achieved during all profiles in the previous study.1 Additionally, my athletes fall into a different demographic than those of the previous study (12 recreational-level mixed-sport athletes and 15 highly trained sprinters).

The resistance for 50% Vdec was calculated by solving for x with the equation 0.50b = m(x) + b. The resistance for max power from the load-power profiles was calculated by using load = -b/(2a) from the power regression equation y = a(x^2) + b(x) + c. Here’s an Excel tutorial on how to do all this.

Results: Comparing Load-Velocity to Load-Power Profiles

Using a paired-samples t-test, the loads needed for max power when compared to the loads needed for 50% Vdec were statistically different (p<0.001, ES = -0.417). This means a moderate difference existed between the two loads. There was a very high correlation (0.875, p<0.001) between the loads needed for max power and 50% Vdec. The correlation but statistical difference means the loads are similar but not close enough to be called the same.

The correlation but statistical difference between the loads needed for max power and those needed for 50% Vdec means they are similar but not close enough to be called the same, says @CoachBigToe. Share on X

The average “residual,” or difference between the load needed for max power and the load needed for 50% Vdec, was +0.9 ± 2.2kg. This means, on average, max power would be achieved with a load of 0.9 kg more than what would achieve 50% Vdec. With that being said, the residual had a huge standard deviation; meaning, there was a big range of overestimations and underestimations of the loads needed for max power when compared to the loads for 50% Vdec. The load for max power for 95% of profiles (two standard deviations) would fall between needing 5.3 kg more than 50% Vdec and needing 3.5 kg less than 50% Vdec. The maximum and minimum residual for max power was 9 kg more and 4 kg less than 50% Vdec, respectively, showing a lot of individual variation.

LVP Chart
Figure 2. The loads needed for max power and for 50% Vdec are similar, but not the same.

On average, 52.6% ± 6.1% Vdec was where max power was achieved, which is pretty similar to previous research. However, this came with a huge standard deviation. Ninety-five percent of the profiles (two standard deviations) had max power between 40.3% and 64.9% Vdec, with the minimum being 40.7% and the maximum being 81.2%. Again, showing a lot of individual variation.

For the sake of following protocols as illustrated in research, let’s look at just the profiles of the 40 athletes who achieved greater than a 50% Vdec during their four sprints. The average Vdec of max power was 54.2% ± 6.4% with the average load needed for max power being +1.3 kg ± 1.9 kg greater than that of 50% Vdec. Using an independent-samples t-test to compare the residuals of the profiles that achieved a 50% Vdec during their four sprints versus the profiles that did not, there was not a statistical difference (p<0.05, ES = 0.320). This means achieving 50% Vdec or not during profiling did not create a difference in the residual.

The average coefficient of determination (R2) for the 96 load-velocity profiles was 0.992 ± 0.007 and load-power profiles was 0.998 ± 0.002, showing reliable protocols. However, the correlation between the R2 of the load-velocity profiles and the R2 of the load-power profiles was low (0.372, p<0.001), meaning that a more reliable load-velocity profile didn’t necessarily mean a more reliable load-power profile.

Correlation
Figure 3. Scatter plot and correlation of load needed for 50% Vdec and max power. This has a very high statistically significant correlation (p<0.001) of 0.875.

If You Can, Create a Load-Power Profile

In summary, this data confirms, on average, the load needed for 50% Vdec is a good estimate of the load needed for max power. This has practical applications for coaches whose resisted sprint equipment doesn’t measure power, such as sleds and timing gates. However, with the 1080 Sprint and the ability to evaluate max power directly, the load needed for max power was achieved with as little as 41% Vdec and as much as 81% Vdec.

If you have the ability to measure power and want to truly individualize programming for your athletes, then create a load-power profile and calculate max power, says @CoachBigToe. Share on X

Each athlete is unique and will have their own strengths and weaknesses relative to not only their sprinting ability but also their resisted sprinting ability (hence, all the variability in the data above). Thus, if you have the ability to measure power and want to truly individualize programming for your athletes and answer are we actually training max power?, then you should create a load-power profile and calculate max power.

Since you’re here…
…we have a small favor to ask. More people are reading SimpliFaster than ever, and each week we bring you compelling content from coaches, sport scientists, and physiotherapists who are devoted to building better athletes. Please take a moment to share the articles on social media, engage the authors with questions and comments below, and link to articles when appropriate if you have a blog or participate on forums of related topics. — SF

References

1. Cross, MR, Brughelli M, Samozino P, Brown SR, and Morin JB. “Optimal loading for maximizing power during sled-resisted sprinting.” International Journal of Sports Physiology and Performance. 2017;12:1069-1077.

2. Cahill, Micheál. (2020, December). “A targeted approach to resisted sled training for speed development: Assess, prescribe and coach.” Track Football Consortium.

  • « Go to Previous Page
  • Page 1
  • Interim pages omitted …
  • Page 43
  • Page 44
  • Page 45
  • Page 46
  • Page 47
  • Interim pages omitted …
  • Page 164
  • Go to Next Page »

Primary Sidebar

FEATURED

  • Using Speed and Power Data to Bucket and Train Faster Athletes
  • Plyometric Training Systems: Developmental vs. Progressive
  • 9 (Fun!) Games to Develop Movement Skills and Athleticism

Latest Posts

  • Rapid Fire—Episode #15 Featuring Kyle Brown: What is Universal Speed Rating (USR)?
  • Why We Don’t Perform Hang Cleans
  • 1080 Sprint: Four Essential Tips You Won’t Find in the Manual

Topics

  • Adult training
  • App features
  • Artificial Intelligence
  • Athlete
  • Athlete performance
  • Baseball
  • Buyer's Guide
  • Career
  • Certifications
  • Changing with the Game
  • Coach
  • Coaching
  • Coaching workflows
  • Coching
  • College athlete
  • Course Reviews
  • Dasher
  • Data management
  • EMG
  • Force plates
  • Future innovations
  • Game On Series
  • Getting Started
  • Injury prevention
  • Misconceptions Series
  • Motion tracking
  • Out of My Lane Series
  • Performance technology
  • Physical education
  • Plyometric training
  • Pneumatic resistance
  • Power
  • Power development
  • Practice
  • Rapid Fire
  • Reflectorless timing system
  • Running
  • Speed
  • Sports
  • Sports technology
  • Sprinters
  • Strength and conditioning
  • Strength training
  • Summer School with Dan Mullins
  • The Croc Show
  • Track and field
  • Training
  • Training efficiency
  • Wave loading
  • What I've Added/What I've Dropped Series
  • Youth athletics
  • Youth coaching

Categories

  • Blog
  • Buyer's Guide
  • Freelap Friday Five
  • Podcasts

COMPANY

  • Contact Us
  • Write for SimpliFaster
  • Affiliate Program
  • Terms of Use
  • SimpliFaster Privacy Policy
  • DMCA Policy
  • Return and Refund Policy
  • Disclaimer

Coaches Resources

  • Shop Online
  • SimpliFaster Blog
  • Buyer’s Guide
  • Freelap Friday Five
  • Coaches Job Listing

CONTACT INFORMATION

13100 Tech City Circle Suite 200

Alachua, FL 32615

(925) 461-5990 (office)

(925) 461-5991 (fax)

(800) 634-5990 (toll free in US)

Logo of BuyBoard Purchasing Cooperative. The word Buy is yellow and shaped like a shopping cart, while Board and Purchasing Cooperative are in blue text.
  • Facebook
  • Instagram
  • Twitter
  • YouTube

SIGNUP FOR NEWSLETTER

Loading

Copyright © 2025 SimpliFaster. All Rights Reserved.