The feet can easily be labeled as the most important body part when considering human performance. In addition to being the literal base of support for the body, they play a major role and are typically the limiting factor when examining dynamic movements such as sprinting, jumping, and cutting.
Additionally, the feet are also responsible for contributing sensory information that provides biofeedback of the world around us. If the feet are suffering from any issues, it will eventually work its way up the chain and become present in other areas, such as the hips and knees.
If the feet are suffering from any issues, it will eventually work its way up the chain and become present in other areas, such as the hips and knees. Share on XI claim no specific expertise in this subject—people devote their entire body of work to the feet and podiatry—but I do have experience in taking the training and development of the feet a step further than the average strength and conditioning coach. In this article, I’ll cover some of the methods I use.
Barefoot Training
For simple, everyday foot care, it is optimal to be barefoot as much as possible. Shoes—especially fashionable high tops—imprison the ankles and foot, preventing many natural movements of development in the foot from occurring.
This is connected to the first step in proper foot strengthening and works to increase the mobility of the foot. While I do recommend barefoot training—or at minimum performing the warmup or certain exercises without the restrictions of shoes—too much of this can be dangerous.
Whenever a new athlete, especially those who are untrained, begin with the program they will typically go 2-4 weeks performing the warmup or exercises still in their shoes before exposing them to any barefoot movements. If this isn’t done gradually, it could create the perfect recipe for overuse injuries such as shin splints, or potentially cause structural damage to the feet!
Exposing the athletes to barefoot training, when appropriate, is a step in the right direction for training the feet.
Exposing the athletes to barefoot training, when appropriate, is a step in the right direction for training the feet. Share on XSelf Massage
Another area of focus is self-massage (though many rely on this too much). While it can be beneficial, just rolling your foot out on a lacrosse ball will not solve all of your problems. Performing self-massage exercises will, however, help initially increase range of motion for that day. This is important because, over time, increasing range of motion for the other exercises that day will help enhance the progression of the training.
The lacrosse ball is the most common self-massage tool for the feet; other tools such as foam rollers, massage sticks, and hard rubber medicine balls can be used on the other important muscles of the lower leg, the calves, shins, and perennials.
Video 1. Lacrosse ball foot rollout.
When beginning to roll out the feet, it is important to work the entire foot. Roll out the toes, the edges of the foot, and of course spend additional time on any tender areas. I will tell athletes rolling the foot out for the first time that there is no right or wrong when performing self-massage, that it is more just self-discovery and finding where they need the work.
There is no right or wrong when performing self-massage, it is more just self-discovery and finding where they need the work. Share on XVideo 2. Manual self-massage, lacrosse ball.
When massaging the lower leg, it’s important to hit it from all angles. Simply turning the foot in or out when rolling will adjust the musculature of the lower leg. This area is extremely tight so typically not much pressure is needed. Starting with a lacrosse ball or a massage stick and performing manual massage would be the least amount of pressure since you can better dictate the pressure being applied, then progress to a foam roller to roll out the areas before moving on to the medicine ball.
Video 3. Medicine ball rollout, lower leg.
The medicine ball works fantastic because it is basically a giant lacrosse ball and is easy to flow throughout the areas. Perform anywhere between 30 seconds to 2 minutes depending on the time available and what is necessary for the individual.
Mobilization
Following self-massage, mobilization of the foot and its surrounding structures of the big toe and ankle will be the necessary requisites to begin strengthening the feet.
Big Toe
If you have ever injured or even just stubbed your big toe, then you have firsthand experience in the importance of this seemingly small and insignificant body part. The big toe plays a major role in helping to maintain balance, arch support, and push off when sprinting, jumping, and even just walking.
If you have ever injured or even just stubbed your big toe, then you have firsthand experience in the importance of this seemingly small and insignificant body part. Share on XHere are a couple exercises to develop this forgotten part of the foot.
Video 4. Big toe mobilization stretch.
For this stretch it is best to perform it with a yoga block or plyometric box. Start by jamming your foot up against the object, crunching your toes back as if they were going to touch your shin. Continue driving the knee over the foot throughout the stretch as you open the toes up and stretch the fascia of the bottom of the foot. Hold for 30-60 seconds each side.
Big toe lift offs: Big toe lift offs seem silly when performing them for the first time, but you feel helpless once you realize it is easier said than done. For this exercise you’re going to lift the big toe off the ground while keeping the remaining four toes glued to the floor.
If you can easily do this, attempt to lift each toe up in its own individual manner.
Perform 10-20 reps. While not the best, this is something you can do with shoes…you could even do it right now while reading this article.
Ankle
Moving up the chain from the big toe, we reach the ankle. The ankle is important because if it’s immobile, then the foot will be limited in its ability to move and produce force (as well as potentially causing issues in the hips and knees in the future). An applicable example of this is that many athletes in the weight room suffer from poor squatting patterns due to poor ankle mobility, hindering them from getting into those proper patterns. This is an easy sell to your athletes who want to squat a house but slack on the smaller, less exciting exercises.
The ankle is important because if it’s immobile, then the foot will be limited in its ability to move and produce force. Share on XHere are some exercises that can help improve the ankle mobility.
Video 5. Seated ankle CARs.
Taken from Functional Range of Conditioning protocols, ankle CARs are a focused approach to the ankle circle. When many athletes perform ankle circles, there is unnecessary movement from the leg; performing them instead from a seated position and holding the shin in place will allow you to completely isolate the ankle and focus on each portion of the rotation.
Perform slowly for 3-5 circles each way.
Video 6. Supported ankle rolls.
This is an advanced movement and great for mobility of the ankle. Holding on for support, you will drop into a low squat position, then begin driving the knees forward as you roll onto your toes as far as possible. Once that range is met, slowly roll out of the position and repeat.
Perform slowly for 5-10 reps—keep this for athletes who it is appropriate for.
Video 7. Slant Board Exercises.
The slant board is such a diverse tool that can be used for stationary exercises and more dynamic movements to intensify an athlete’s landing. It’s a relatively new tool for my programming, but I have seen great improvements and confidence given to my athletes thus far. This is particularly true for athletes in sports like basketball and soccer, where ankle injuries are common and the foot gets contoured in odd positions. Performing some stabilization bounds with the slant board can better prepare them for when situations are less than ideal.
Foundational Foot Strength
Once the surrounding structures of the foot become more mobile, then more load can be placed through those ranges.
Stress the importance of training the feet to your athletes. Even in the weight room, having weak feet can lead to poor knee and foot position in compound movements like the squat and deadlift. Not correcting the issue just continuously reinforces these poor movement patterns and compensations throughout time, so not only are the athletes not getting as much benefit out of the movements, but you’re also putting them in a poor environment that could lead to issues later.
Here are some exercises to help create a solid foundation of foot strength. Many of these exercises will have an isometric counterpart, single leg counterpart, and can be progressed through the addition of load or by increasing the total work that is being completed. Before progressing, though, make sure each movement is performed with control throughout the entirety of the range.
When loading these exercises, I personally like using a belt squat machine or a safety squat bar set up with support, so balance is not an issue. They can also be performed with dumbbells or other means, but the more that balance gets challenged, the less the athlete can actually focus on perfecting the exercise at the foot.
The more that balance gets challenged, the less the athlete can actually focus on perfecting the exercise at the foot. Share on XHeel Toe Rocks: Heel toe rocks focus on transitioning between plantar and dorsiflexion. When performing, keep the knees extended and have full control at each end range. The most common flaw of this movement is the athlete pushing their butt back while raising the toes off of the ground, taking the emphasis off of the feet.
Perform these reps slowly, between 5-10 reps.
Video 8. Heel to Toe Walks
Taking it a step further from stationary heel toe rocks, performing the heel to toe walks will have you moving down the field. Focus on an exaggerated walk, initially striking with the heel before rolling the foot flat and finishing by pushing through the toes and getting as much lift off of the ground as possible.
Perform for 10-20 yards.
Video 9. Heel Walks & Toe Walks
These walks will isolate one specific movement, so either walking fully on the toes or on the heels. Either way, ensure that the knees stay extended and keep the feet straight when performing.
When walking on the toes, I cue athletes to imagine as if they were trying to spread their toes out like their fingers of their hands. For heel walks, I cue to take the toes and pull them up to their shins.
Perform these walks for 10-20 yards.
Video 10. Calf Marching
Marching on the toes is beneficial for building more endurance in the feet. Athletes should focus on avoiding their heels from collapsing down and touching the ground if possible.
You can also perform these movements in a single leg isometric march position, flexing the hip up and holding for time.
Perform for 5-10 reps per side or timed sets of varying amounts from 20-60 seconds.
Video 11. Sled Calf Push
This is one of my favorite exercises to get athletes to feel muscles of their feet that they didn’t even know existed. Pushing even an empty sled down the field while up on the toes will torch the toes and feet. Though normal sled pushing or pulling also effectively trains the feet, this variation is more direct because it places such a high emphasis and isolates the foot in the exercise.
Perform for 10-40 yards.
Video 12. Supported Calf Raises (DL, SL, Straight, Bent Leg)
Calf raises are the standard lower leg exercise—if you were only performing one of the exercises on this list today, it would probably be the calf raise.
Don’t get me wrong, I love the calf raise. It should be varied, though, and given more focus as far as modifying:
- The foot position;
- The time held; and
- Whether it is bent leg or straight leg.
This will ensure total development from this staple exercise.
When performing these calf raise variations, be strict about going slowly through each phase: the raising, the hold at top, the lowering, and the stretch at the bottom.
When performing these calf raise variations, be strict about going slowly through each phase. Share on XPerform for 10-20 reps, but this will vary depending on the variation selected.
Video 13. Ankle Spring Series (from Cal Dietz)
I first read about the ankle spring series from Cal Dietz on his YouTube page, so if you want more information on this exercise, you can go research it from the man who invented it.
After first performing the series myself and feeling the weakness in my feet, I began implementing it with our college athletes who were home over summer break.
What I liked about it initially is that the athletes feel the intensity and “burn” immediately. When prescribing most foot exercises, athletes aren’t as involved since it doesn’t feel as tough as cranking out 100 pushups.
When prescribing most foot exercises, athletes aren’t as involved since it doesn’t feel as tough as cranking out 100 pushups. Share on XNot the case for the ankle spring series.
The athletes dreaded doing it throughout the weeks, but got much stronger as the weeks progressed in the various positions. If I have limited resources when programming for a new athlete and can’t do many exercises, I always make sure that this series is a part of that program one way or another.
Start slow, only holding each position for 10 seconds and performing it with bodyweight only and begin progressing time from there.
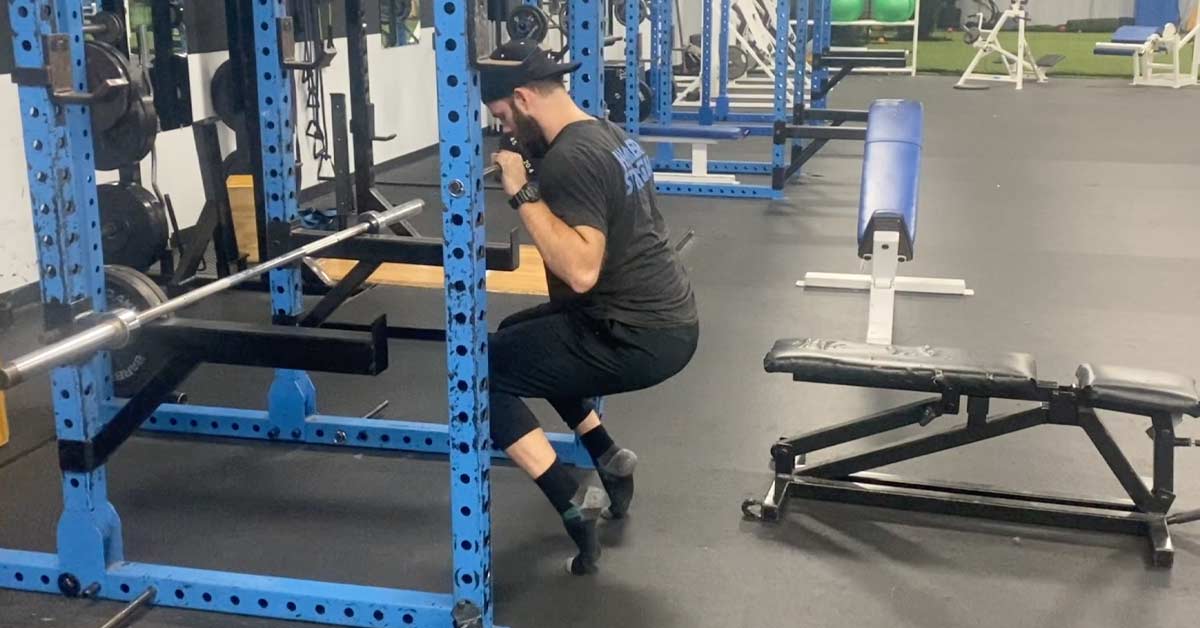
Video 14. Split Squat Iso with Heel Lift
Performing the split squat isometric hold with a heel lift can be done for reps or total time. When going through the exercise drive through the toes as if you were trying to crush the ground beneath you.
Perform for reps ranging from 5-20 and time held from 10-60 seconds. This is a broad range because if the athletes are just using their bodyweight, then the higher end of the range can be done; on the other hand, if they’re loading it heavy, then they will be working in the bottom range.
Video 15. Ankle Inversion / Eversion Hold
Wince we’re examining the actions of the foot, we also need to look at inversion and eversion (or the ability of the foot to withstand or restrict rolling in this case). Performing these holds off of a board is great to begin building the resiliency of the edges of the feet.
Start by placing the inside or outside edge of the foot on the board. You want to get as close to being off of the board without actually falling off. Once held for the desired time, switch sides.
Perform for 10-30 seconds each side.
Earlier I spoke about how if there was one exercise you were probably performing from this list then it would be the calf raises. If there is an exercise or muscle action that you probably aren’t performing is their opposite, dorsiflexion raises, or toe raises.
Similar to the idea of having a healthy ratio of pulling to pushing exercises in a program for shoulder health, you want to make sure to implement a dose of toe raises to focus on health of the shins and feet.
Many of my athletes—especially in track, basketball, and football—love performing these exercises because they feel it immediate burn through their lower shin. They also will typically claim they feel better after performing. Whether that has any merit or not, placebos are real and how they “think” they feel is also important to me.
Video 16. Wall Toe Raises
Performing toe raises off of the wall is a great starting point because there is no equipment needed and they can even do this exercise at home.
Start performing these for sets of higher reps, 15-25, and begin progressing by either taking the feet out farther from the wall or increasing the reps.
Video 17. Seated KB Dorsiflexion
The next progression will be adding some load; this can be done by placing a kettlebell around the foot to perform the exercise. Make sure that the athlete has most of their leg on the bench and they focus on just isolating the foot. The common mistakes are too much knee involvement, and shin rotation when raising up.
Perform for 10-15 reps, increase reps before attempting a heavier kettlebell.
For athletes who are new to this training, they will typically experience soreness in their calves and typically be surprised by the lack of controllable range they possess when performing some of the basic exercises like the heel to toe rocks or heel walks.
Dynamic Foot Strength
It is great to train the foot complex with these isometric holds, and slow, controlled exercises for strength. This is done to prepare them for more high-speed exercises that better resemble the demands of athletic actions.
It is great to train the foot complex with these isometric holds, and slow, controlled exercises for strength. Share on XOn the athletic field, everything is performed at full speed. The actions of change of direction, acceleration, and deceleration are performed maximally, and the feet must be conditioned to deal with these stressors. Exposing the feet to more aggressive and high-speed training must be a gradual process that is monitored closely.
Here are some exercises that can help raise the foot’s threshold and ability to handle high speeds.
Video 18. Pogo hop series.
Pogo jumps are submaximal jumps being performed through the ankle and knee. These are done to help build up that threshold in the feet to withstand force and should be built up gradually.
These jumps can be performed though various directions, stationary or moving, various body positions, and off of either double or single leg positions. Take it one step farther by performing them off an incline or step.
Video 19. Stair hop series.
With younger athletes, just getting them to jump rope is a great athletic building exercise which is often forgotten.
Video 20. Assisted pogo jumps
Once a base has been built through unassisted pogo jumps, adding some assistance to create an overspeed effect can be done through band assistance or by getting support on a racked barbell.
Perform jumps for timed sets between 5-10 seconds, or total reps 5-10. This can be raised of course as time goes on but initially less is more.
The feet are responsible for so much regarding athletic performance and overall health. Prioritizing them in our training programs is a must. Share on XFinal Thoughts
The feet are responsible for so much regarding athletic performance and overall health. Prioritizing them in our training programs is a must. It’s not a bad start to get out of our shoes and perform self-massage. Following that, begin to mobilize the surrounding structures. Then, once you begin focusing on strengthening them, move from a foundational base of isometrics and slow movements to more applicable high speed, dynamic actions.
These exercises can be easily placed in the beginning preparation of the workout or ending post exercises. Since there is so much that you can cover with training the feet, I would recommend sprinkling exercises of different focus throughout the training week and focus on building those specific exercises that you select.
Since you’re here…
…we have a small favor to ask. More people are reading SimpliFaster than ever, and each week we bring you compelling content from coaches, sport scientists, and physiotherapists who are devoted to building better athletes. Please take a moment to share the articles on social media, engage the authors with questions and comments below, and link to articles when appropriate if you have a blog or participate on forums of related topics. — SF

