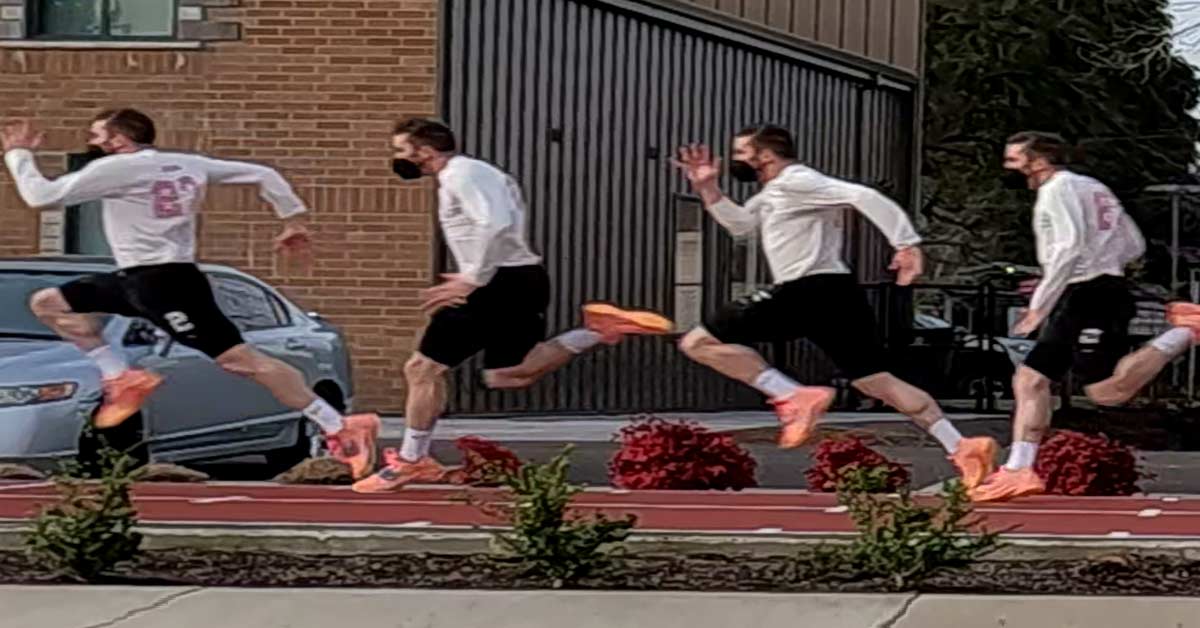
While video review is ubiquitous in team sports, with nearly every high level team reviewing game and practice film, performance analysis is less common. The difference between the two is more than just semantics. Most sport coaches watch film with their team for dual purposes:
- To share insight on opponent tactics.
- To review player decisions during games and practices, again typically revolving around tactics (e.g., did the linebacker make the correct read and fill the right gap).
Performance analysis is a different animal.
Tactical elements can certainly be incorporated, but at its core, performance analysis seeks to answer this fundamental question: how does the athlete produce performance, and what interventions are required to improve it?
When investigating these questions, kinetic and kinematic data are prime suspects, and accurately capturing and reporting the right KPIs do indeed inform training decisions and athlete potential.
Accurately capturing and reporting the right KPIs do indeed inform training decisions and athlete potential, says @KD_KyleDavey. Share on XVideo analysis thus seeks to provide actionable insight on how to make athletes better.
The process involves a deep dive into the relevant and modifiable (emphasis on modifiable) performance variables, including but not limited to joint angles, athlete psychology, and decision making. Beyond performance enhancement, video analysis can serve the following purposes:
- Screening for risk of injury.
- Aiding in the return to play decisions (especially if an analysis was completed prior to the injury).
- Ranking members of a team to appropriately match interventions with athlete subsets (i.e., “putting athletes in buckets”).
- Allowing athlete and coach to see things from the same perspective.
- Providing developmental athletes with performance milestones.
- Granting objective feedback on the training process, essentially quantifying athlete development to improve over the course of a season or lifetime.
- Comparing practice efforts to PR performances.
Rightfully so, performance analysis is only going to become more common. This article details 15 strategies to improve your performance analysis, based on my own trial and error as well as wisdom I’ve gleaned from others.
1. Don’t use an iPhone
An iPhone or iPad is a great place to start with video analysis—you can quickly capture 120 or 240fps slow motion video, upload it to a computer or an app, and begin analysis. Additionally, there is value in taking video and streaming it to a TV via AirPlay for immediate feedback and a quick and dirty, on-the-spot analysis with athletes.
But for the professional offering video analysis as a service, Apple products don’t cut it for two main reasons:
- Professionalism (specifically, the lack thereof).
- Image quality.
If you are hired to provide performance analysis, what statement does it make if you pull out your phone? How are you differentiated from the coach…or the athletes themselves, for that matter? First impressions matter, and if you want to be taken seriously and earn repeat business, you must appear as the professional you truly are.
First impressions matter, and if you want to be taken seriously and earn repeat business, you must appear as the professional you truly are, says @KD_KyleDavey. Share on XBeyond that, iPhones currently offer 1080p video quality when shooting in slow motion. That’s fine for close shots, but kinematic and sport analysis often involves shooting from a distance and zooming in to avoid parallax issues when measuring angles and distances (more on this later). Image quality quickly deteriorates when zooming in on 1080p footage. 4K video quality allows you to zoom in on the picture while maintaining clarity.
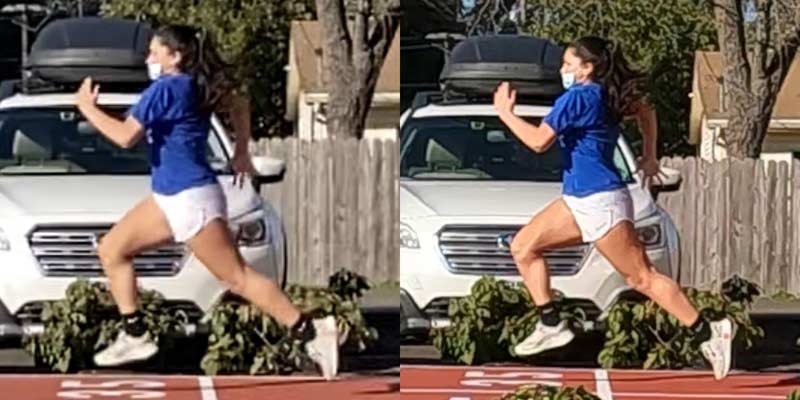
Higher image quality provides a better product for the consumer—it’s worth noting that the athlete was about 12 meters from the camera in the above shots. Zooming in on still shots taken from greater distances will produce even lower quality images, particularly from 1080p quality footage. For more on camera specs and recommendations, read this.
I use a GoPro HERO10 and love it. The camera is compact, durable, and shoots 120fps slow motion video in 4K quality, giving you the picture clarity to impress while allowing for slow-motion, kinematic analysis.
Pro tip: Whatever camera you choose, be sure it supports 4K quality or above while shooting in slo-mo, is durable, waterproof, and easy to transport and set up.
2. Utilize a Tripod
There are several advantages to using a tripod, not the least of which is that you don’t have to stand behind the camera to film, allowing you to coach and observe from other angles. Additionally, you appear (and are) present for the training session, as opposed to playing the role of videographer and not watching what’s happening in real time because you are stuck behind the lens.
Further, a good tripod ensures steady footage. You don’t want your film to look like the Blair Witch Project—you need non-shaky, steady film for clean and easy analysis. A sturdy tripod that can withstand wind is desirable.
You need non-shaky, steady film for clean and easy analysis, says @KD_KyleDavey. Share on X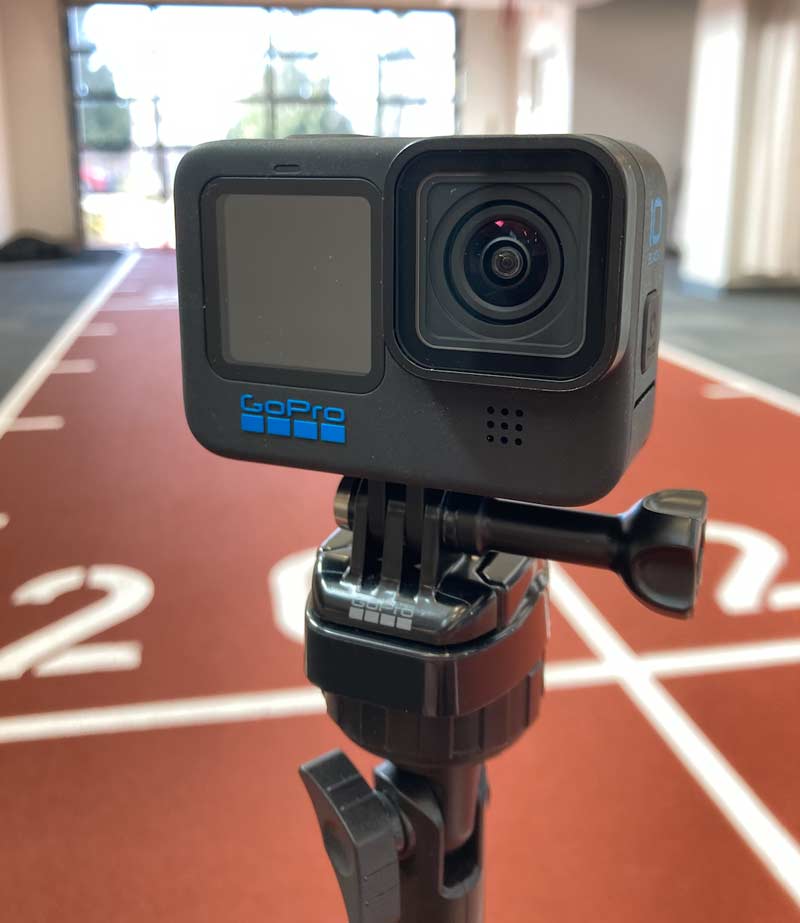
Pro tip: Use a mini bubble level (Google or Amazon that term) to ensure your camera is level, both side-to-side and front-to-back. If filming sprints from the side, set the camera roughly 10cm above the athlete’s waistline.
3. Use a remote
You’re going to notice a theme here. Using a remote introduces yet another level of professionalism. The preparedness again repeats: “I’ve been here, not my first rodeo…”
There is also a very real workflow and ease of use advantage to having a remote. As mentioned before, being present and able to observe and coach while filming is invaluable. A remote makes filming seamless, while also saving you time (and data on your data card). You can start and stop the video exactly when you want, as opposed to hitting “record,” running to your observation point, watching, running back, and hitting “stop.”
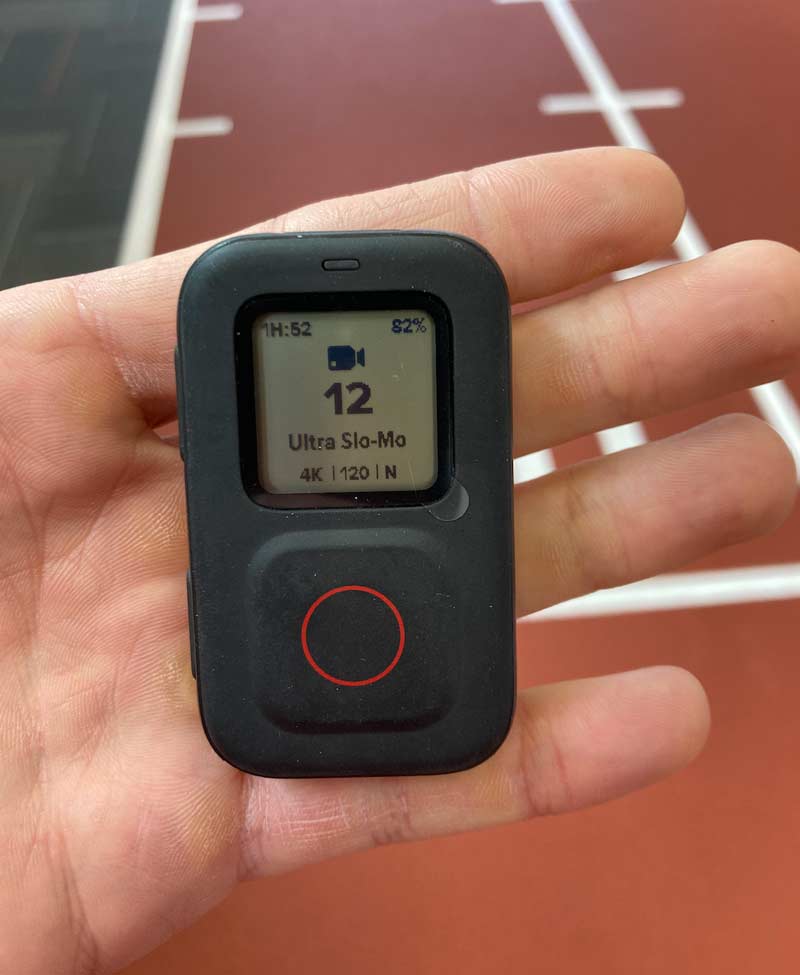
GoPro offers a remote as well as an app that connects to the camera, but again, you don’t want to be the guy or gal looking at your phone during a training session. Further, the remote has stronger connectivity and a greater range than the phone does, making it a superior choice.
Pro tip: ensure your remote doesn’t use Wi-Fi to connect the camera, otherwise it is useless in settings where you don’t have Wi-Fi access.
4. Film from a distance
Parallax, which refers to images becoming distorted as a function of cameras transforming a 3D world into a 2D image, can cause errors in calculations such as angles and distances. Parallax is a normal phenomenon and isn’t indicative of problems or shortcomings with your camera—it just happens when taking pictures and video.
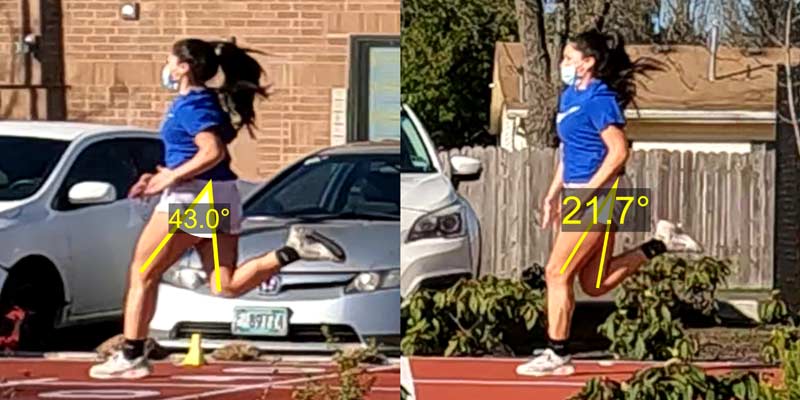
To avoid parallax—and therefore ensure accurate angle and distance measurements—you need to shoot from a distance, such that the athletes you analyze are in the middle of the shot. Additionally, take care to aim your camera straight. If the camera is angled slightly to the left or right, it will again create parallax and distort perception of angles.
Parallax is a normal phenomenon and isn’t indicative of problems or shortcomings with your camera, says @KD_KyleDavey. Share on X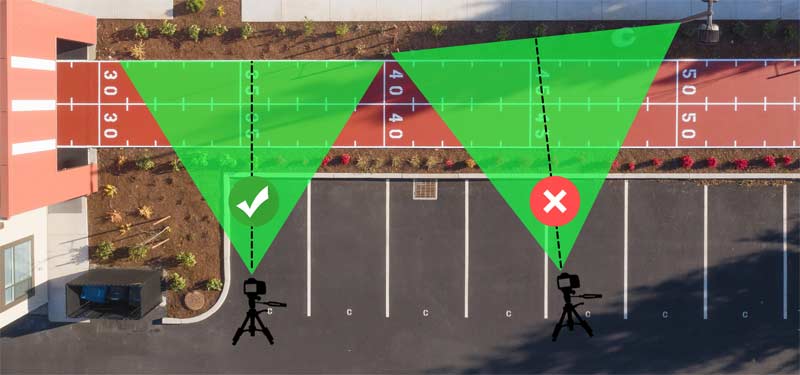
Pro tip: only analyze kinematics from the middle third of your footage. The edges of the frame produce parallax that distort perception of angles and distances, yielding inaccurate data.
5. Consider two (or three) cameras
To be sure, multiple cameras are not required to execute video analysis. You can capture quality film and complete comprehensive analyses with one nice camera.
But there is certainly merit and utility in capturing multiple angles—like side and front or back—of the same trial.
Specific to sprint analysis, two cameras come in handy when analyzing both acceleration and maximum velocity. Capturing a close up of the first step as well as the first 7-10 steps can be done at once, for instance. Additionally, cameras can be placed to capture the first 7-10 steps as well as a maximum velocity split, say 30-40m down the track. Thus, acceleration and max speed can be captured in one trial, saving time.
At least one coach I know has a custom mount by which he fixes a camera to a hurdle, allowing a unique perspective toward oncoming hurdlers while also capturing the traditional side shot.
Using two cameras opens doors to saving time, improving workflow, and capturing unique angles you may otherwise opt out of.
Pro-tip: to make analysis easier and improve workflow while filming, consider cameras that sync together via a remote and thus start and stop filming at the same time.
6. Never run out of memory or battery
Imagine being in the middle of a recording session and your battery dies. In some cases, like practice, there might be another rep to capture. In others, like a race, you may never get a chance to swing again.
Likewise, imagine readying yourself to break film down, only to realize your memory card became full halfway through the session and you don’t have everything you need.
4K video takes about 45gb of space per hour of film. Do yourself a favor and don’t skimp on the memory card. Go with a 32gb card at minimum, 64gb to be safer and give yourself more wiggle room.
Do yourself a favor and don’t skimp on the memory card, says @KD_KyleDavey. Share on XLikewise, carry at least three batteries at all times—preferably extended life batteries.
Pro-tip: Many cameras can charge the battery internally, but an external charger that can be plugged into the wall allows you to charge multiple batteries at once.
7. Safely store video
This may not seem like an important step…but trust me, you will regret not keeping video long-term. Whether an athlete you once filmed gets hurt and you want to review old film to see if there were kinematic “clues” that could have been involved with the injury, or whether you simply want to juxtapose progress between last year’s film and today’s, a time will come when you’ll want to look back on old footage.
Cloud storage is an option, as is an external hard drive. Hard drives are nice because you know you’ll always have a hard copy.
Store your film for future reference. Just do it.
Pro tip: Permanently save at least one rep per athlete from each film session.
8. Understand the KPIs
Capturing film is great—but unless you are able to critique the movement and provide feedback on how to improve, you cannot call it performance analysis.
If you aren’t at the point where you know what you’re looking for, you’re probably not ready for video work. Your energy should instead be focused on honing your craft.
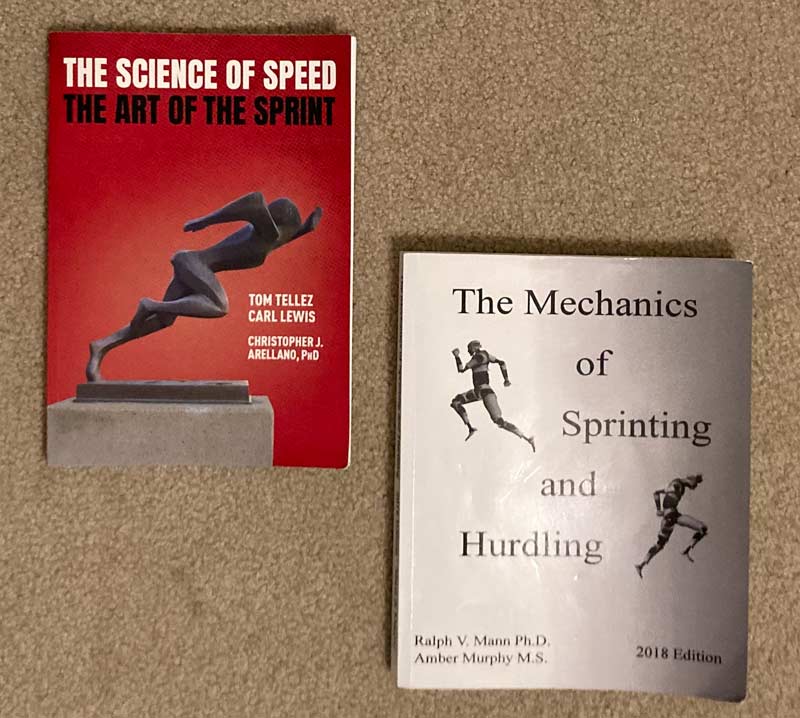
The Science of Speed, by legends Carl Lewis and Tom Tellez, and The Mechanics of Sprinting and Hurdling, by another legend, Ralph Mann, are both insightful for understanding sprint kinematics.
Pro-tip: whatever you choose to analyze, watch an inordinate amount of film of that movement, from multiple athletes. Your coach’s eye is more valuable than your ability to measure angles and distances.
Your coach’s eye is more valuable than your ability to measure angles and distances, @KD_KyleDavey. Share on X9. Create performance reports
Performance reports serve two purposes: they provide a snapshot in time of performance (like annual bloodwork), as well as highlight strengths and areas for improvement. Sleek, clean, and insightful reports bring tremendous value, as they inform training. Further, they may be used post-injury as a rehabilitative tool—particularly if a report was compiled before the injury occurred, serving as a pre-injury data point and providing minimum kinematic goals for the athlete to reach.
Basic considerations include acceleration and maximum velocity reports. One may also venture into block clearance, change of direction movements, or other sport-specific tasks, such as hurdling, field events, throwing a football, or pitching and hitting a baseball.
Wherever there is sport, there is possibility for performance analysis.
Pro-tip: Spend time making your report pretty. Appearance matters.
10. Use two reports: one for parents and athletes, another for strength coaches/technical coaches/sports science/medical personnel
It goes without saying that parents and (most) athletes speak a different language than those “in the biz.” If the only information the parent can understand from the performance analysis is the athlete’s name and the test date, the report misses the mark.
Instead, documents given to parents and athletes should be written and presented in such a way that they are understood. Don’t use technical jargon. Speak in plain English. Rather than comparing hip flexion angles at toe off between limbs and noting a 19-degree differential, simply state “Little Johnny’s right thigh doesn’t swing as high as his left one. If we fix that, his left heel probably won’t be the first part of his foot to hit the ground anymore, and he’s likely to become faster and decrease the chances he’ll get hurt. Training should focus on that moving forward.”
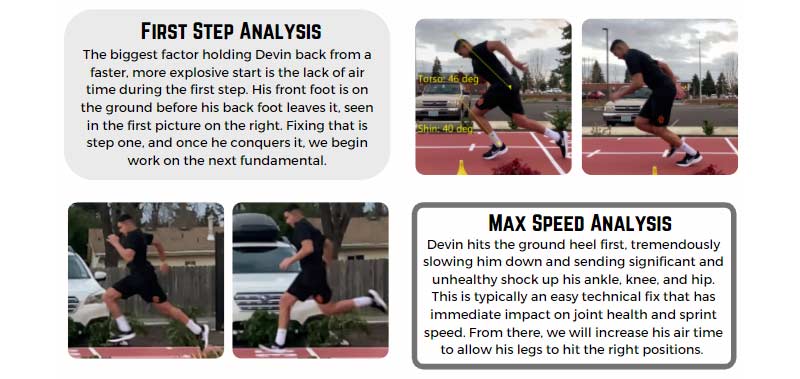
Save the heavy science for the strength and conditioning coaches, technical coaches, and sports science/medical staff. They can understand, and therefore value, that information.
Pro-tip: As Einstein said, “you don’t really understand something unless you can explain it to your grandmother.” If your grandma doesn’t understand your report for parents, redo it.
11. Leverage video analysis software
I will not belabor this point, as it has been written about extensively elsewhere.
Some sort of video analysis software is required, as the common video players don’t provide the necessary tools to report joint angles, movement times (such as time to take off, ground contact and flight time, etc.), and distance covered (step length, for example).
Without the key metrics, you cannot analyze performance.
When considering video analysis software, priorities include workflow—as a poor process can easily double or triple the required time to complete an analysis—software capability, and cost.
Dartfish is a phenomenal tool, commonly used by TV commentators like NFL analysts, and includes next-level features such as stromotion. Kinovea is a limited but viable tool to get started, and you can’t beat the cost (it’s free). Other players certainly exist in the market as well.
When considering video analysis software, priorities include workflow, software capability, and cost, says @KD_KyleDavey. Share on X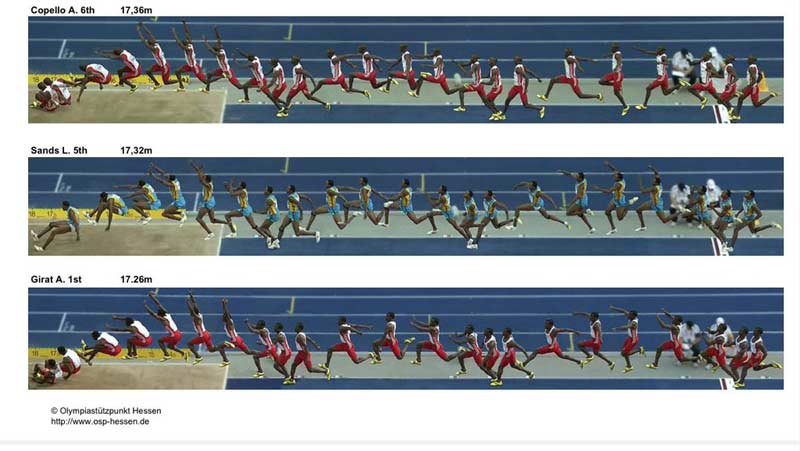
Pro-tip: Kinovea is free. Dartfish offers free trials, and many other software options likely do as well. Test the waters and understand that you get what you pay for.
12. Be prepared to calculate distances
Distance metrics, like step and stride length, are of value because you may find asymmetries between left and right step length. Beyond basic sprint analysis, lengths in events like the high hurdles and triple jump are must-have metrics.
In order to calculate distance via video, you must have a known reference the same distance from the camera as that which you wish to measure. Sounds complicated, but it makes sense intuitively: If you’ve set cones on the ground one meter from each other, you can use that known distance to calculate other metrics, so long as the athlete isn’t too far in front of or behind the cones.
Pro-tip: tennis balls cut in half make for small, vibrant distance markers.
Bonus tip: Recall that velocity = step length multiplied by step frequency. If you know average step length and 10m split time, you can extrapolate step frequency.
13. Prioritize workflow
Time is valuable—perhaps the only thing we lose and can never get back. If you refine your process, whether by upgrading your video analysis software or becoming a bit more handy within Excel, you may reduce the time it takes to generate a report by five or ten minutes. Those minutes add up, especially if you’re analyzing a team of athletes and want to turn around the reports in a timely manner.
Excel is handy for creating a template and being able to plug and play. If you possess even a remedial understanding of formulas, you can program Excel to automatically calculate values for you, saving precious time. Further, if you have the wherewithal to Google custom formatting options, you can even program Excel to automatically add the desired text to what you input to a cell, such that when you type 4.67 and hit “enter”, it automatically turns into “4.67 steps per second.” Not to mention the many charts you can create in Excel, from bar graphs to scatter plots and line charts.
You can program Excel to automatically calculate values for you, saving precious time, says @KD_KyleDavey. Share on X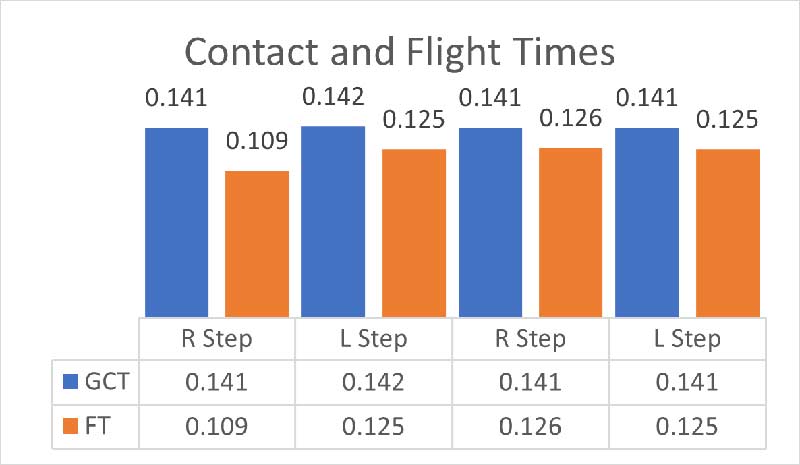
On the flip side, Excel is relatively limited in visual design options. Amazing design tools exist (like Canva), but I’ve yet to find one that matches the convenience and automation factors that Excel brings.
Lastly, write out the appropriate workflow to streamline your analysis process. The first few analyses I completed, I found myself going back and forth between still shots to measure angles. Then I got smart and wrote down a step-by-step process, ensuring I captured all measurements needed from one photo before moving on to the next. Total time to completion was cut almost in half.
Pro-tip: Make the down payment in time up front to save yourself time on the back end. Depositing a few hours to build your template and map out an efficient workflow will compound over time.
Bonus pro-tip: Program Excel such that when you input the time stamps at ground contact and toe off, contact and flight times are automatically extrapolated.
14. Invest in technology…once you’re there
The bare minimum technological requirements are a camera, video analysis software, and a program to create a document, like Excel.
Beyond that, consider the variables you analyze, what metrics coaches and athletes find valuable, and how you may automate the data collection process via technology to improve data fidelity and streamline processes. Remember, the purpose of technology is to collect insightful data and save time in analysis.
Remember, the purpose of technology is to collect insightful data and save time in analysis, says @KD_KyleDavey. Share on XIf you report ground contact and flight times, a MuscleLab contact grid will make your life easier, at a fraction of the cost of competing technologies. It isn’t difficult to manually calculate the metrics via film analysis…but it’s time consuming. Imagine having those numbers at your fingertips, ready to plug and play. Further considerations from those analyzing sprint performance include timing devices to capture speed metrics like rate of acceleration and maximum velocity, and IMUs to automate kinematic data collection. While many tech companies exist, the allure of Ergotest is that the technology they produce conveniently syncs together, displaying all data on one screen.

Those analyzing Olympic lifts may enjoy VBT sensors that capture bar speed as well as bar path, creating a nice visual that can be dropped into a report. A metabolic cart certainly provides value, particularly for endurance activities.
But before committing funds to technology, I recommend completing several reports, understanding the ROI, and becoming comfortable with the basics. Master a basic hip hinge before moving on to a power snatch.
Pro-tip: If you’re going to invest in technology, your first stop should be a quality video analysis software, like Dartfish.
15. Develop your business model
The value in performance reporting is there for athletes and coaches alike. This should be a standalone service you charge for, thus making this venture profitable as well as interesting and useful.
The value in performance reporting is there for athletes and coaches alike, says @KD_KyleDavey. Share on XYou can and should make a business out of this.
What do you charge? Who is willing to pay for your services? How do you get your foot in the door to build momentum? How do you craft your sales pitch?
These are questions you must answer for yourself. Resources exist: take advantage of them.
Pro-tip: pro bono analyses can be a good way to attract clientele and repeat customers, but free services are often perceived as low value services. Walk the line carefully.
Take the Plunge
As one of my old coaches used to say, “the eye in the sky doesn’t lie.” Performance analysis—and specifically video analysis—isn’t going anywhere. It will continue to evolve, and advanced skillsets in analysis and presentation will separate coaches from the pack by providing actionable insight that illuminates areas for improved athletic performance.
Like all things, there’s a learning curve and lots of trial and error involved in becoming proficient. If you’re on the fence, here’s my advice: just take the plunge. You will grow as a practitioner, and your athletes will benefit along the way.
Since you’re here…
…we have a small favor to ask. More people are reading SimpliFaster than ever, and each week we bring you compelling content from coaches, sport scientists, and physiotherapists who are devoted to building better athletes. Please take a moment to share the articles on social media, engage the authors with questions and comments below, and link to articles when appropriate if you have a blog or participate on forums of related topics. — SF

