• Skip to content
  • Skip to primary sidebar
SimpliFaster

SimpliFaster

cart

Top Header Element

  • Facebook
  • Instagram
  • Twitter
  • YouTube
  • Login
  • cartCart
  • (925) 461-5990
  • Shop
  • Request a Quote
  • Blog
  • Buyer’s Guide
  • Freelap Friday Five
  • Podcast
  • Job Board
    • Candidate
    • Employer
    • Facebook
    • Instagram
    • Twitter
    • YouTube
You are here: Home / Blog

Blog

Tightness

The Truth About Flexibility and How to Improve It

Blog| BySteve Haggerty

Tightness

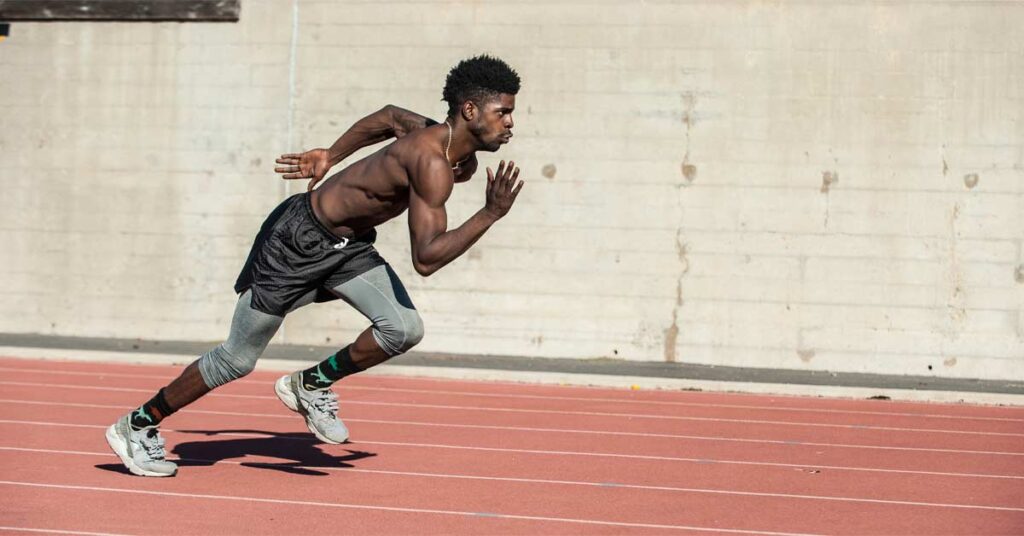
When you feel tight, what do you do? When your hamstrings or hips or lats feel tight and restricted, how do you make them feel better?

If you are a competitive athlete in your teens, you probably stretch or foam roll to fix these issues, and it makes them feel loose again…but did you really fix the issue? While stretching and foam rolling can provide temporary relief and improve flexibility, too often, we have to do it every day—which means we’re not actually fixing the issue.

What Causes Tightness?

Many different mechanisms in the body can cause muscle tightness. One important thing to really understand is the brain’s influence on a joint’s range of motion—your brain and the rest of your body are in constant communication (the brain and spinal cord tell the muscle to contract or relax, and the Golgi tendon organs and muscles spindles tell the brain where you are at in space, how stretched a muscle is, or how tense a muscle is), and one of the brain’s primary functions is to keep you safe and keep you alive. If the brain doesn’t feel that a joint or a muscle is safe and strong in a specific range of motion, it won’t let you into that range of motion.

“A tight muscle is a weak muscle.” – Greg Roskopf

When a muscle is tight, it is not magically shorter today than yesterday or too short for your body; instead, the brain is restricting that muscle from being stretched further. The brain is trying to keep that muscle safe.

When a muscle is tight, it isn’t magically shorter than yesterday; instead, the brain restricts that muscle from being stretched further. The brain is trying to keep that muscle safe. Share on X

For example, the most common muscle athletes tell me they feel tightness in is their hamstring. If a muscle around the hip is weak, injured, or overused, the brain will use the hamstrings (in this example) to guard against a person getting into a specific range of motion. It’s like walking on ice: when you walk on dry pavement, you might have a stride length of about 1 yard, but when walking on slippery ice and trying not to fall, your stride might shorten to 1 foot. Your brain doesn’t feel safe; it takes in the sensory input of seeing the ice as well as feeling how slick it is when trying to walk. If your brain doesn’t feel safe, it will restrict your range of motion. Go to the local roller-skating rink and watch: you will see seasoned professionals gliding around with long elegant strides and newbies moving inch by inch.

If your brain doesn’t feel safe in a range of motion, it won’t let you get there; if you let the brain know you are safe and can control a range, it will most likely allow you to get there. There can also be structural issues that limit flexibility, like a joint capsule, bony structures, and asymmetries/misalignments—I won’t touch on those, as that is a little out of my wheelhouse, but I will give two ways to best improve and solidify range of motion.

Stretching/Foam Rolling AND Strength Training

The most common way people improve their range of motion is by stretching. It works. I don’t know how long the effects last, but it will improve range of motion. Stretching pushes your body toward being more parasympathetic—relaxed. So, as you stay in a stretched position, your brain becomes more and more comfortable with the joint being in that position.

Like stretching, foam rolling works; it will improve your flexibility, at least in the short term. Some claim that using the roller will break up myofascial adhesions (knots or trigger points). A study by Chaudhry et al. found that to produce even a 1% change in tissue, there needs to be a force of 8359 Newton (852 kilograms/1,874 pounds) on the body. Foam rolling, obviously, does not produce that much force.

Then, how does it work?

Think of a weighted blanket and how it is calming; you may use it to reduce anxiety in yourself, a child, and even a dog. Think of the often relaxing feeling of a hug, the calm that comes from this sort of pressure on the body. Most likely, this is how a foam roller works. The pressure applied to the muscles isn’t enough to break up the knots but can influence the central nervous system to relax the muscle.

The issue with only stretching and foam rolling is that you don’t address the original cause of what limited the range of motion. Your brain didn’t want you there for a reason—most likely, there’s a muscle weakness around the joint.

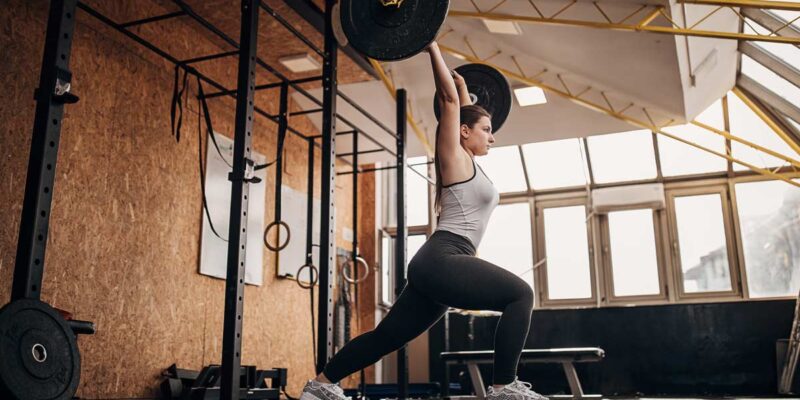
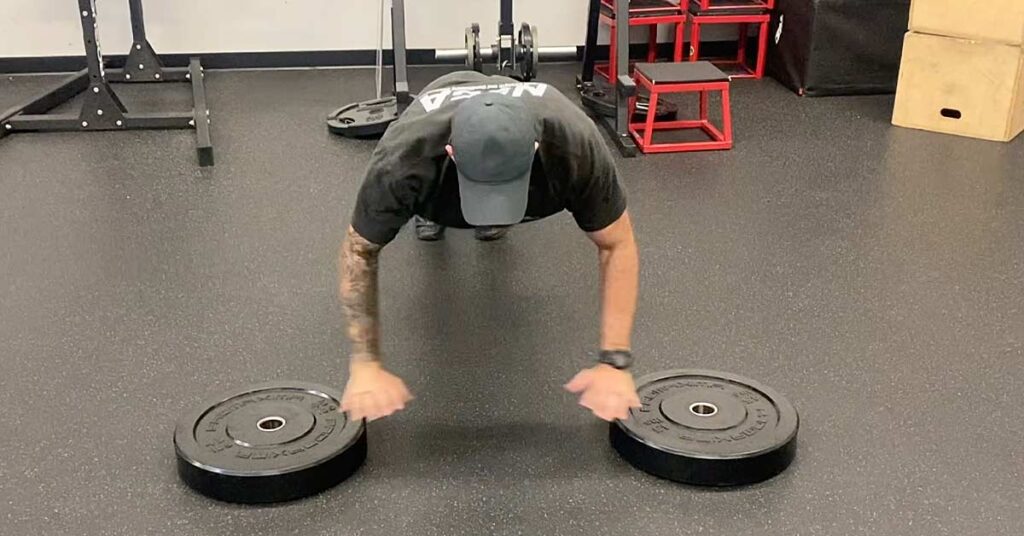
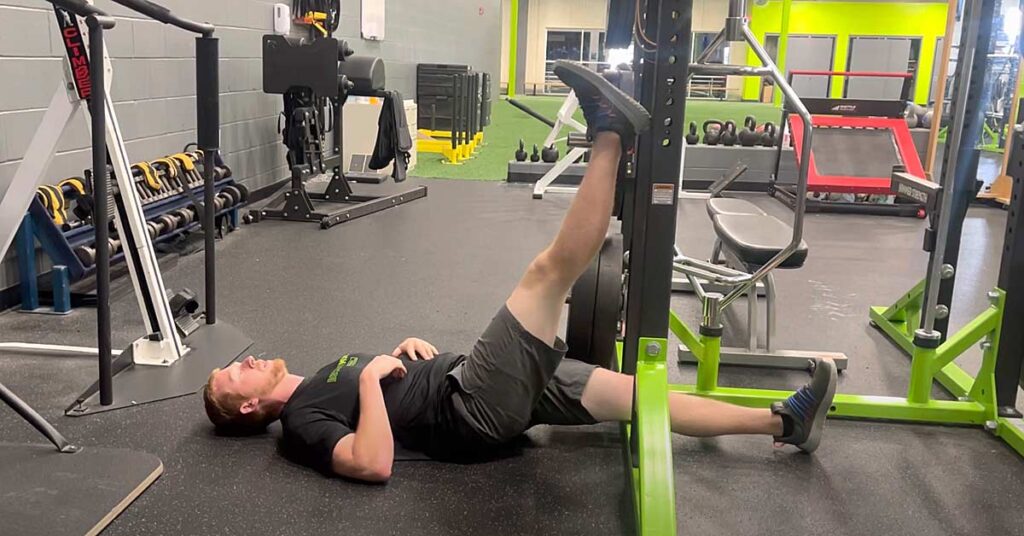
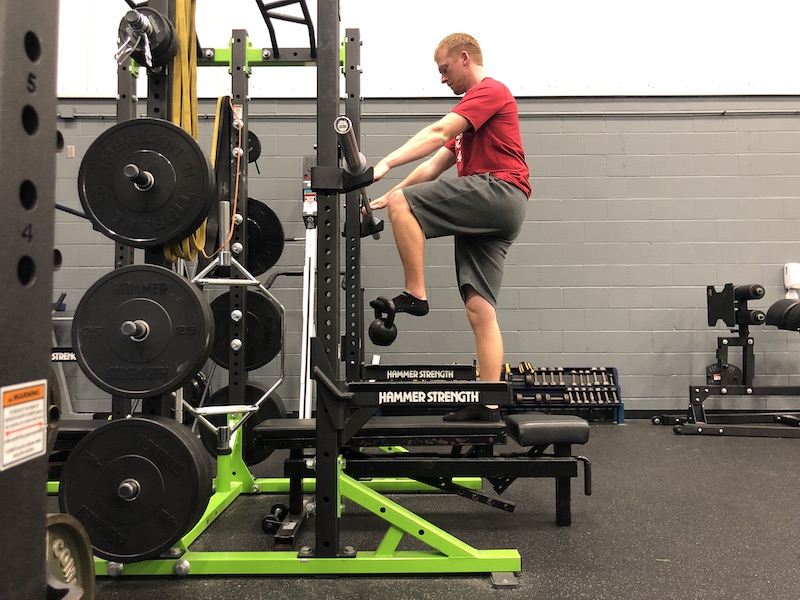
One way to increase the benefits of stretching and foam rolling is to strengthen the shortened and lengthened muscles in that position. More specifically, when dealing with tight hamstrings, I have athletes stretch or roll out to open up the range of motion needed. Then, I have them strengthen that range of motion with a single-leg Romanian deadlift for the hamstring in that new long position and the hip flexor in the short position with a kettlebell hip flexor raise. Not only have you increased your range of motion and flexibility, but you are also now stronger in that newly opened position.

Stretching doesn’t cause a tissue adaptation. In order to create a change—an adaptation—you need to stress the body. Getting strong in the new range of motion is an adequate way to stress the body in the new position.

To create a change—an adaptation—you must stress the body. Stretching doesn’t do that. Getting strong in the new range of motion is an adequate way to stress the body in a new position. Share on X
Single-Leg RDL
Image 1. Single-leg RDL: strengthening the muscle that is lengthened during a hamstring stretch.
KB Raise
Image 2. KB hip flexor raise: strengthening the muscle that gets shortened during the hamstring stretch.

Isometrics

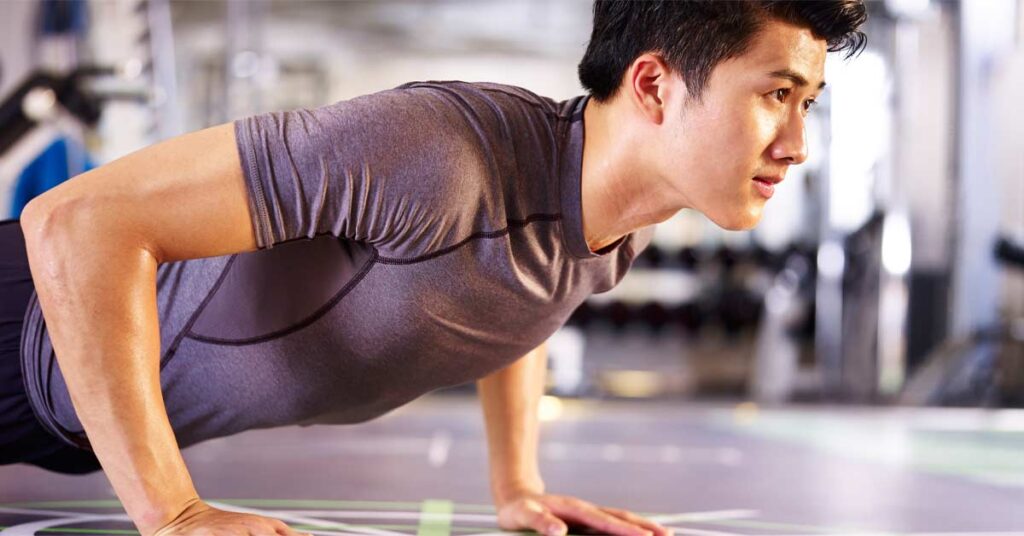
My favorite way to increase range of motion is through short-duration isometric contractions. Isometric muscle contractions are a great way to communicate with the brain that your joint is safe in a range of motion. Isometric, meaning not moving, are exercises where you actually don’t move but instead, you hold a position. Planks or wall sits are very common isometric exercises, but you can get very creative.

An isometric contraction in a stretched position is very similar to stretching but more effective. Methods such as muscle activation techniques (MAT), functional range conditioning (FRC), and proprioceptive neuromuscular facilitation (PNF) all utilize relatively short duration isometrics—under 15 seconds—and all are solid ways to improve range of motion. To briefly describe each (in an oversimplified way):

  • MAT focuses on the isometric contraction of the shortened muscle.
  • PNF contracts the lengthened muscle.
  • FRC techniques contract both the shortened and the lengthened at different times.

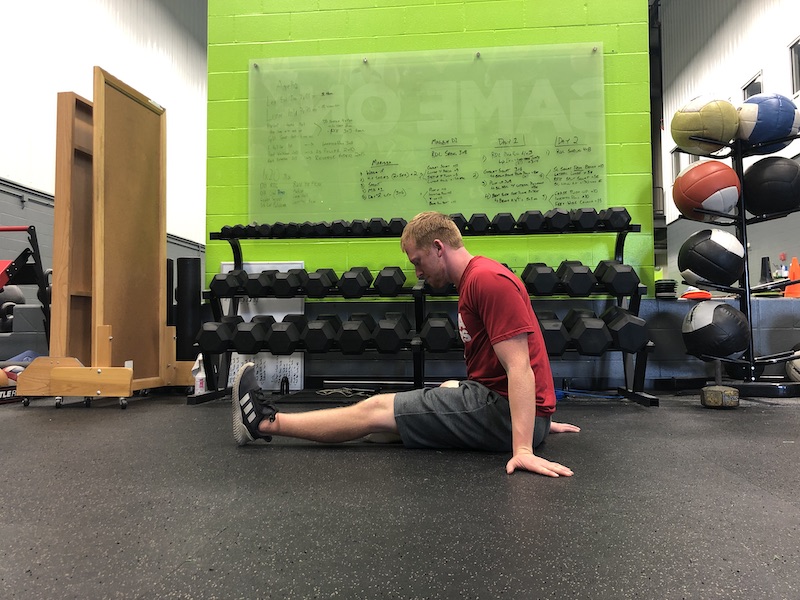
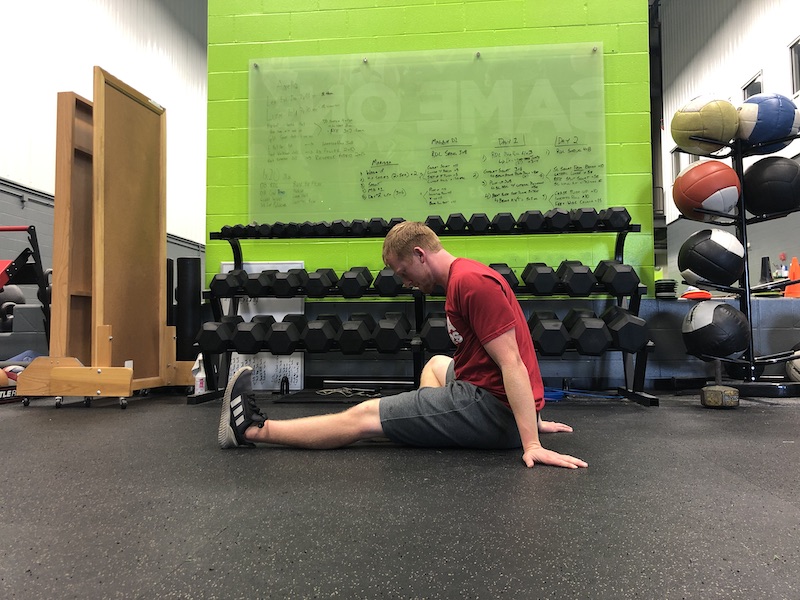
For example, if you were sitting on the ground in the modified hurdler stretch position, MAT would look to contract the hip flexors, PNF would try to contract the hamstrings and glute, and FRC would contact the hip flexors for a certain period and then the hamstrings for the same amount of time.

Hip Flexors
Image 3. Contracting the shortened muscles—hip flexors.
Ham Glute
Image 4. Contracting the lengthened muscles—hamstrings and glute.

Canadian chiropractor Dr. Ken Kinakin gave a presentation on increasing range of motion, and he referred to the technique he used as the “isometric agonist antagonist exercise.” This technique (similar to FRC ideas) involves getting the joint into the end range of motion in the specific area you want to increase and submaximally contracting the shortened muscle for five seconds by pushing into his hand, followed by submaximally contracting the lengthened muscle for five seconds by pushing the other direction into his hand. The patient or client performs a few repetitions in each direction, alternating between the shortened muscle (agonist) and the lengthened muscle (antagonist).


Video 1. Isometric agonist antagonist exercise for hamstrings and hip flexors, straight leg.

Video 2. Isometric agonist antagonist exercise for hamstrings and hip flexors, bent leg.

All of these methods, while distinctly different, utilize isometric contractions to improve range of motion. They all share the common theme of short-duration contractions, and most of these techniques prescribe low effort in these contractions: 20%–50% effort. These concepts all involve the idea of showing the brain that the joint is safe in this range of motion by proving that the muscles are strong here. The brain wants to keep the body safe and protected, so you just have to prove to your brain that the muscles can control and stabilize a range of motion.

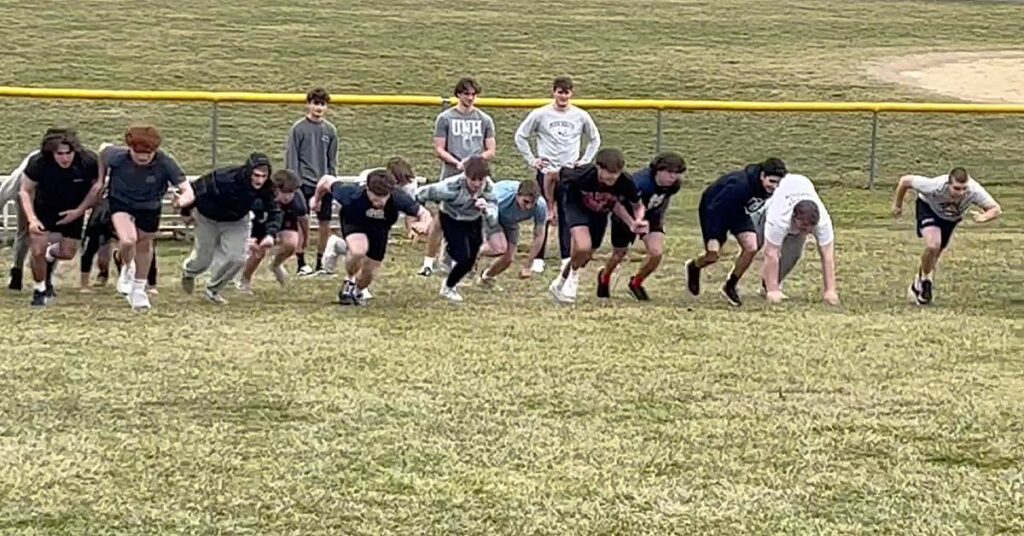
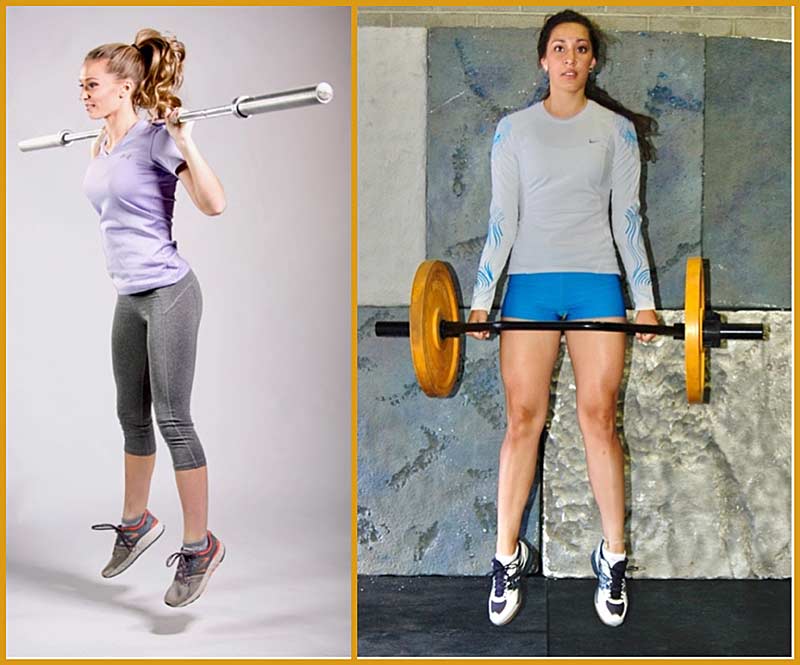
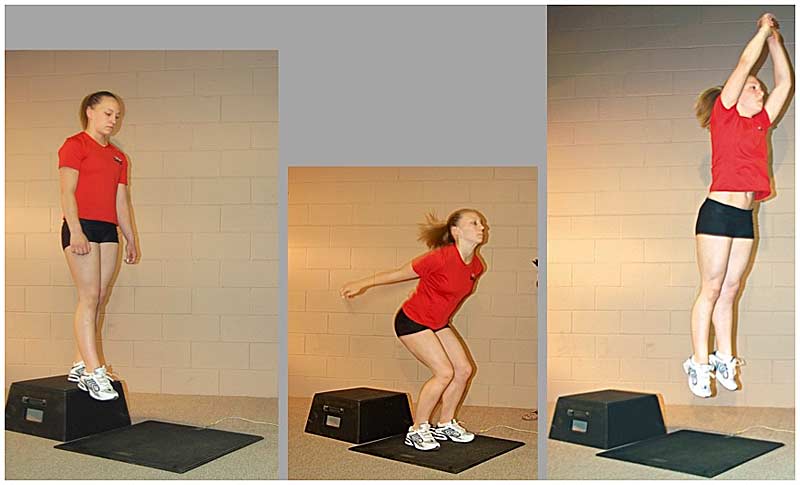
Think about a crazy lower-body workout you have completed in the past…one of those workouts where it hurt to go up a set of stairs for a couple days afterward. How was your flexibility on those days right after the workout? It was probably near impossible to touch your toes, and it hurt to even think about trying. Your muscles are clearly damaged and temporarily weakened, and your brain knows this.

By proving you are strong in specific positions, your brain will allow you to be more and more flexible, says @steve20haggerty. Share on X

To minimize the risk of further damage (and potential injury), your brain doesn’t allow you to be flexible and reach certain ranges of motion. Your hamstrings didn’t become shorter because of the workout and need to be lengthened through stretching; instead, this is your brain’s way of trying to keep the body safe. By proving you are strong in specific positions, your brain will allow you to be more and more flexible.

Safety First

The brain wants to keep you safe. If it doesn’t feel safe in a certain range of motion, it won’t let you get there. Isometrics and strength training are good ways to solidify a range of motion by demonstrating that you’re strong and safe in that particular range of motion. For isometrics, a five-second contraction of the shortened (agonist) muscle followed by a five-second contraction of the lengthened muscle (antagonist) repeated five times will open up and strengthen a new range of motion.

Since you’re here…
…we have a small favor to ask. More people are reading SimpliFaster than ever, and each week we bring you compelling content from coaches, sport scientists, and physiotherapists who are devoted to building better athletes. Please take a moment to share the articles on social media, engage the authors with questions and comments below, and link to articles when appropriate if you have a blog or participate on forums of related topics. — SF


References

The Future of Swis – The New Field of Weight-Training Sports Medicine 

Chaudhry H, Schleip R, Zhiming J, Bukiet B, Maney M, and Findley T. “Three-Dimensional Mathematical Model for Deformation of Human Fasciae in Manual Therapy.” Journal of American Osteopathic Association. 2008 Aug;108(8):379–390.

Inami T, Shimizu T, Baba R, and Nakagaki A. “Acute Changes in Autonomic Nerve Activity during Passive Static Stretching.” American Journal of Sports Science and Medicine. 2014 Jan;2(4):166–170.

www.researchgate.net/scientific-contributions/Takuya-Shimizu-2070675749

Gildersleeve CVASPS

CVASPS Seminar Q&A Series: Matt Gildersleeve

Blog| ByJay DeMayo

Gildersleeve CVASPS

The first time I “met” Matt Gildersleeve was during the Coaches vs. COVID-19 clinic put on by Hawkin Dynamics, and his talk was world-class. When it comes to building out progressive ways to improve movement outputs that not only translate to the game but are measurable and quantifiable in competition, I will challenge you to find a better practitioner. I’m elated to welcome Coach Sleeve to CVASPS, not just because I know his presentation will be fantastic, but because he’s one of the best people out there in our vocation. Enough from me, though; let’s meet 2023 presenter, Kansas Football’s Director of Sport Performance, Matt Gildersleeve.

Matt Gildersleeve: First off, I would just like to thank SimpliFaster. What a great platform that continues to educate coaches from all over the world. So, it’s a tremendous privilege to be on SimpliFaster and also to talk about what a great opportunity we have with Jay DeMayo.

CVASPS: What are a handful of mistakes you routinely see made by strength and conditioning coaches in the United States and around the world? And what specifically do you feel should be done differently to correct these mistakes?

Matt Gildersleeve: The biggest mistake I constantly see is judgment without context. I believe we get these small glimpses and snapshots of programs, what programs do—whether it be professional, private sector, collegiate, whatever level that may be—and we see these small snapshots of what a particular coach or program does. And we make judgments on whether that’s good or bad or indifferent or anywhere in between.

The biggest mistake I see S&C coaches making over and over and over again is judgment without context, says @CoachSleeve. Share on X

I see this over and over and over again. And I do believe we have one of the most judgmental professions there are. I think we’re first to judge and defend. And it’s a mistake I see all too often.

So, what I would challenge people to do, even if they get a day, is spend it inside a program. There’s so much that goes into programming methodology, between culture and the different factors that go into what you do and how you do it, that even to be with a program for an entire day, there are certainly things that we can take and see and assess. But to try to make a judgment based on snippets and sound bites from programs or coaches, whatever that may be, it’s a very ignorant thing to do. And I think it’s one of the biggest mistakes we make because, if we dug a little bit deeper, I think that’s where we could find there’s a lot of value and resources in a lot of different places.

CVASPS: What advice would you give a coach to improve their knowledge as a process of continuing education? By which I mean, can you point our readers in a few concrete directions to find scientific and practical information to improve the methods used to improve performance?

Matt Gildersleeve: My absolute first recommendation would be anything and everything ALTIS. I know this is becoming a lot more popular than it was maybe five years ago when I started getting into all of this, but man, what an incredible resource in so many different ways. Every resource they have, that they put out—online courses that they do, podcasts that they’ve done, and even articles and email lists.

And I haven’t personally been out to one of their on-site clinics and conferences, but I’ve heard nothing but amazing things. All this is a great resource. And I promise you; they’re not paying me to say that. Other than that, the obvious answer is to join us at PLAE HQ this summer for CVASPS. It’s going to be an awesome weekend that I’m excited to be part of.

CVASPS: How do you feel coaches can find a path to being in a lead role in a department?

Matt Gildersleeve: While there’s absolutely significant value in finding a niche in the world of athletics, I think it totally depends on which route and which destination you want to end up in. In my particular case, to be a head strength and conditioning coach, especially in a football program—and I’m sure it applies to a lot of different paths—you really have to be a generalist in many different areas. Your job is to oversee the big picture of everything from sports science to strength and performance to speed development to conditioning to culture to management.… It’s such a large and vast role that if you get too detailed or specific in one particular niche, you can lose the ability to see the big picture.

So, I would say speed training and speed development as a whole are probably the things that I’m most interested in, and I really enjoy the on-field training. But if I say it’s my niche, I think when you specify in my role, that can cloud some things up.

I like to make sure that I’m constantly sharpening my sword in all directions. And I’ve heard some directors say it’s best to be dangerous at everything. That’s pretty important. I think if you have a very specific lens when you have to manage the whole process of total development, you lose the ability to look at things through a generalist lens of how the entire big picture works together.

I’ve always questioned, or just been curious about, certain programs that have a speed guy and a GPS guy and a weight room guy, and they program all those things separately. Well, those things all work in unison. And so that idea of unification in a program is, to me, very, very important. Sometimes when we get so caught up in niches, it can really cloud and complicate that.

That idea of unification in a program is, to me, very, very important. Sometimes when we get so caught up in niches, it can really cloud and complicate that, says @CoachSleeve. Share on X

I prefer when our staff programs all program together. Now, we have a guy who specifies more in speed, but we don’t just say, “You go write this, and you go write that.” It’s a power. We sit down, and we develop those things together. I do think, sometimes, developing and finding a niche can help you move up in certain areas—and if that’s your role and you love a specific thing, then follow your heart and follow that. But I believe there’s a ton of value in having more of a general perspective and lens when your responsibility is to oversee the entire department as a whole, to really give and be able to provide you with the perspective of the big picture.

CVASPS: Can you provide a sneak peek at the topic you will be covering at The Seminar?

Matt Gildersleeve: As I said, I’m so excited about this conference, this clinic, The Seminar. I just couldn’t be more fired up to get out there and meet everybody and talk and, honestly, to learn. In my presentation specifically, I’ll be covering a wide variety of topics, but it will mainly be related to developing and analyzing game speed. There’s such a large gap right now in our evaluation process of:

  1. What we think speed is.
  2. How we evaluate it.

We measure miles per hour. We measure 10-yard sprints. There are a lot of different measurements we take. And sometimes, we quantify those as getting faster.

Well, my personal definition of speed—at least, how we use it here at Kansas—is how it applies to your speed and your sport. And is that increasing or not? Because just getting faster, if it doesn’t cross over to actual development of game speed, I think we’re really missing the boat. And so, we will talk about a lot of things.

Just getting faster, if it doesn’t cross over to actual development of game speed, I think we’re really missing the boat, says @CoachSleeve. Share on X

We’re going to talk about what game speed is. We’re going to talk about how we go about developing it. But we’re going to spend a lot of time on how do we analyze that and how do we look at that in the evaluation process of how we are all doing our jobs. We’re gonna go down that rabbit hole of skill acquisition when it relates to your sport.

CVASPS: After reading this, I’m sure you understand why I’m so fired up to welcome Matt to CVASPS this July. He’s a leader in every sense of the word and an open, honest, and candid person to push the profession forward—not just by following the herd but by challenging the status quo to hopefully find better and more efficient ways for us to help our athletes.

We would love for you and your staff to join us at PLAE HQ in Canton, Georgia, on July 21 and 22 for this summer’s edition of The Seminar. It truly is a unique event.

For more info, tap the link, and be on the lookout for the next installment of our presenter Q and A’s here on SimpliFaster.

Since you’re here…
…we have a small favor to ask. More people are reading SimpliFaster than ever, and each week we bring you compelling content from coaches, sport scientists, and physiotherapists who are devoted to building better athletes. Please take a moment to share the articles on social media, engage the authors with questions and comments below, and link to articles when appropriate if you have a blog or participate on forums of related topics. — SF


High School Group Training

Every Athlete Is a Coach: Training Large Groups in a School Setting

Blog| ByZach Even Esh

High School Group Training

In addition to owning a private training facility for over 20 years, I am also a full-time strength coach in a high school. A typical day for me is coaching three groups and seeing 150+ athletes. Time is limited, with each session lasting only 45 minutes. Sometimes, an in-season team will go for 30 minutes. During certain phases of the year, I have groups of 90 athletes with no help—just me coaching a packed house of athletes with varying levels of training experience.

When I first started coaching at this high school about four years ago, the warm-up was extremely simple in the overly crowded weight room (benches and machines were packed everywhere). We did two exercises for the warm-up: pause squats and push-ups. The majority of the athletes (including varsity and upper-level students) struggled to perform a bodyweight squat to parallel. They struggled to perform a proper push-up.

When I started this new position, I remember thinking to myself, these kids are probably going to have a good idea of how to train.

Why? There’s so much information freely and readily available on YouTube and Instagram. I assumed the baseball players and their coach had read up on Eric Cressey. I assumed the football players understood that squats should be a full range of motion and that benching is performed without a back bridge. I assumed the athletes were bombarded with information on social media regarding how training with the correct technique is the best thing for them.

Instead, I saw athletes perform death-defying 1RM benching every day and then curling for 30 minutes. I didn’t see one athlete squat—or, for that matter, do any leg training at all—and I realized I’d been stuck in my bubble for way too long.

Welcome to High School

I had spent my time training athletes at my private facility and the D1 level. I was used to athletes who showed up ready to listen, ready to work, and ready to be coached. Once I began training teams, I had to change the culture and teach them like I taught middle school athletes to train at The Underground Strength Gym.

If you’re starting a new program or taking over an existing one, never assume that the athletes understand what proper training is. In fact, assume nothing! Share on X

If you’re starting a new program or taking over an existing one, never assume that the athletes understand what proper training is. In fact, assume nothing! Looking back at how shocked I was, seeing the difference in a high school compared to the athletes I trained at my private facility…now I shake my head and laugh at myself.

I’ll share with you my experiences and the mistakes I made so that you can hopefully avoid the same mistakes, save yourself time, and get results with your athletes at a faster rate.

Start Them from the Ground Up

Get great at calisthenics (push-ups, iso push-ups, recline rows, lunges, split squats, iso lunges, squats, pull-ups, etc.). Use calisthenics as a warm-up and then add them into the training program with low reps to accumulate volume throughout the training session. With large groups, I often use calisthenics added into the programming, where we sneak them in between sets of barbell and dumbbell training. With large groups, athletes can easily get distracted. Adding calisthenics keeps the athletes active, improves strength and GPP, and builds muscle with the added volume.

Use dumbbells to learn technique/movement patterns and build strength and size before “earning” the right to use the barbell (goblet squats, lunges, Farmer’s walks, military press, chest supported row, shrugs, curls, dumbbell benching at various angles). Have standards with the dumbbell training so athletes have to earn their way to the barbell. After talking with Jim Wendler a while back, I came up with some simple standards and modified them through experience. You can modify these as well to fit your philosophy and unique situation.

Squat Standards: Before an athlete can load their spine, I have the following standards:

  • Goblet squats for 10 reps with 75 pounds (body weight under 175) or 100 pounds (body weight over 175).
  • For girls, it is a 45-pound goblet squat x 10 reps.

My preference before loading the spine with a back squat is to teach the front squat, but this does not always go as planned. Some teams train year-round with me, while other teams only train in season. You learn to make decisions on the fly to avoid turning a training session into a teaching session. I firmly believe that athletes need to work, and sometimes that means the front squat will be introduced another day.

Bench Press Standards: Before an athlete can get under a bar and begin benching, here are the standards:

  • Boys dumbbell benching with 40s in each hand for 10 reps.
  • Girls dumbbell benching with 25s in each hand for 10 reps.

Do I ever break the “rules” and bypass the standards? Yes, mainly if I have a quiet group and it’s not a packed house, we might bypass the dumbbell standards and do technique work on the bench, squat, or front squat.

I will say this, though—anytime it’s crowded, and athletes try to sneak to the barbell without being anywhere near the dumbbell standards, we see a dangerous and poor technique. My advice to you is always lean toward earning the right to use a barbell.

My advice to you is to always lean toward athletes earning the right to use a barbell…It is a mistake to rush the barbell. Share on X

I began these standards with one set of the designated weight with dumbbells and realized that some athletes could almost get “lucky” doing one set at the standard weight, yet they don’t have enough experience in training. It is a mistake to rush to the barbell. So, here’s what I did instead; I transitioned to three sets of these weights/standards to ensure the athletes could handle this work for more than one set and to stop athletes from trying to rush to the barbell.

Do I sometimes make an exception? Yes. If I am lucky to have a group that isn’t so crowded or if an athlete shows up with great frequency and consistency, I will break up a group and teach the barbell lifts earlier or have experienced athletes bring them into their group. This is a reward for consistency coupled with a safe learning environment.

At my private facility, we have, on average, eight athletes per group. Some groups might be four athletes, while at certain times, there are 15–18 athletes. Training 60–90 athletes at one time requires you, as a coach, to be much stricter with your standards and training options.

Simple Training to Maximize Results

While training large groups, I had to become adept at simplifying the training and the explanation of exercises. Having large groups and limitations in terms of space and equipment, I learned to make choices in our training that were easy to teach and easy to learn. This does not mean you’re a lazy coach. It means you must find ways to produce results rapidly and build a broad base of strength and athleticism.

For example, instead of me getting into the fine details of sprinting, I had to take the groups outside to hill sprint and get them to race each other. By racing others or chasing to tag a partner, the athletes began to understand the effort needed to run fast and produce power. It’s easy as a coach to get overly complicated—if you’re short on time, you must make sure you spend time training and getting the athletes better!

Hill sprints became a regular for my athlete groups at the high school. Getting athletes to perform hill sprints is one of the most effective methods to increase their strength! I began with large groups racing each other. Then, I started to make simple changes, such as different starting positions. From there, we began chasing a partner.

All of these small changes improved speed and power. It wasn’t fancy or complicated, but athletes got faster and stronger. If you sprint regularly, you will learn how their sprint work directly relates to improving their strength in the weight room. We have a hill of about 125 feet directly outside our weight room. I keep the volume low, but we sprint 2–3 times per week for 3–5 all-out reps.

Most teams train 2–3 times a week with me in the off-season. Athletes quickly learn that we will never train in the weight room alone, and we often sprint hills, throw med balls outside, and do a wide variety of jump training.


Video 1. Belly Hill Sprint

We sprint from different positions, and I get the athletes to race in some shape or form. They might have to tag someone who starts three steps ahead of them; they might have to race against teammates or another team. I might split the groups between first- and second-year students and juniors and seniors. The key here is getting them to sprint hard and learn to exert force. This has an immense impact on their sports performance, regardless of their sport. I also noticed that regular sprinting boosted their strength in the weight room.

I learned long ago that the athlete who lifts the most weight is not the best athlete. I place a premium on sprints, jumps, and calisthenics. I like to see an element of speed in our training. Share on X

I learned long ago that the athlete who lifts the most weight is not the best athlete. The days of chasing the 1RM to become a better athlete are long gone, but athletes still think it is helpful. This is why I place a premium on sprints, jumps, and calisthenics. I like to see an element of speed in our training. Without any technology at my school, I use the coach’s eye and RPE, emphasizing leaving a rep or two in the tank on barbell lifts and minimizing reps that are grind reps.


Video 2. Hand walking.

After 6–8 weeks of dumbbell training with new athletes at the high school, I usually introduce the trap bar deadlift. Slow and steady is how I get new athletes going. Teaching the trap bar deadlift is easy because they’ve spent six weeks performing the kettlebell farmer’s walk. The start of the farmer’s walk looks the same as a trap bar deadlift. Squat down with a flat back and line up the feet, knees, and hips. Lift! I am essentially reverse-engineering the training system for the athletes.

At my private facility, I am not training 50+ athletes, so I can add sled drags every training session (both during warm-ups and as a finisher), back extensions, sandbag/D ball carries, and lots of band pull-aparts, face pulls, etc. All of these basic exercises build up a tremendous base of strength and stability and help me progress the athletes much faster toward barbell lifts.

At my high school, I have four sleds, but when groups have 60+ athletes, I tell athletes to sneak one or two sets of sleds before the end of the training session. Is it perfect? Absolutely not. The goal is to accomplish the work, not so much to have the most perfectly organized training plan. It’s an emotional understanding in your own mind as a coach that the training is flawed, but you’re getting the crucial aspects of work accomplished.

Athletic Warm-Ups for Strength, Power, and All-Around Athleticism

The power of an athletic warm-up is underrated—I have seen how power skips, hopping, and hand walking (bear crawls, lateral push-up walks) improve an athlete’s power and coordination. The athletic warm-up is not something you want to rush through.

In my early years of coaching, I used to view the warm-ups as exactly that—a warm-up, nothing more. We did 10 reps of squats, lunges, push-ups, ab work, and band pulls for shoulders, and it was all to prep the athlete to train with the weights. Through the years—and now the decades—of coaching, seeing athletes showing up weak and under-muscled, I now view our warm-up as something that builds strength and hypertrophy and preps the mind and body for the work ahead. I call the warm-up a “Prep,” and the athletes understand that it is a crucial part of our daily training.

I now view our warm-up as something that builds strength and hypertrophy and preps the mind AND body for the work ahead. Share on X

Some athletes are so tight in the ankles, hips, and hamstrings that bodyweight squats are not suitable for them. Instead, we use lunges as an exercise to strengthen the legs, stretch the hips, and improve ankle mobility and stability. Sled pushes and sled drags also improve ankle mobility and leg strength. I never imagined in my early years that a bodyweight squat would be a struggle for athletes, but the past 10+ years of coaching have proven me wrong.

When the freshman football players begin training with me at the high school in mid-June, we exclusively do bodyweight and dumbbell workouts. Almost everything is for sets of five, and then as we progress, I teach kids how to determine if they can do eight or 10 reps on a bodyweight or dumbbell exercise. The good ol’ 5 x 5 is GREAT for athletes, especially if you have a crowded weight room and need to keep the flow of the training session going to avoid kids waiting too long between sets and getting distracted.

For example, we have five adjustable benches at my high school. If we’re dumbbell benching or performing chest support rows, and I prescribe 10 reps instead of five, the wait time doubles. The athletes get distracted waiting their turn, as four or five kids might be in line for a bench. I came up with a simple system for training large groups where I can divide groups into two sections, and I vary where they start: sometimes they start with the main lift of the day, and other times they start with the assistance work. At the high school level, the world will not end if your athletes lunge before squats or do assistance work before benching or overhead pressing.

Below is an example of a lower body session:

    1A) Pause front squat 4 x 4.

    1B) ANY jump 4 x 4. (Athletes have a list of jump exercises they can choose from. Beginners do a basic vertical squat jump.)

    1C) Push-ups or pull-ups/recline row (alternate each set) 4 x submax reps.

    2A) Bulgarian split squats 4 x 10 / 10 (New athletes go bodyweight only.)

    2B) ANY kettlebell carry 4 x turf. (New athletes farmer’s walk, experienced athletes choose from a variety of carries.)

    2C) Biceps/triceps 4 x 10–15 reps. (New athletes perform hammer curls or push-ups, experienced athletes have a variety of exercises to choose from.)

I will review the workout in front of the whiteboard rather quickly to keep the athletes focused. My buddy Craig Fitzgerald spoke to me about this, as I told him how kids were fooling around as I broke down the daily training. He asked, “How long are you in front of the whiteboard?” I replied, “About 90 seconds.” Fitz said to me, “That’s too long. They get distracted too easily.” As a high school strength coach, you will constantly evolve as you learn more and experiment with what works and what doesn’t.

You will notice there is freedom and flexibility in exercise selection for experienced athletes, which the kids enjoy because it gives them the power to make choices. I encourage the athletes to have at least one partner so they can coach each other and help decide what exercises they want to use when they have the option to choose.

I encourage athletes to have at least one partner so they can coach each other and help decide what exercises they want to use when they have the option to choose. Share on X

If a dumbbell exercise is subbed for a barbell lift (such as front squats), you simply double the reps, so goblet squats would be eight reps in this example, where the front squat is four reps. The training is focused on the lower body, but high school athletes like to get an arm pump, so this is another opportunity to make them happy, which keeps them coming back. Athletes who are happy and having fun will return to train and be more consistent. Our school trains after school, so even if a coach organizes team training, it cannot be made mandatory. Some athletes can’t get a ride, and others have to go to work, etc.

Building Body Armor

Today, when an athlete tells me they know how to back squat, clean, or bench, I jokingly ask them, “Are you TikTok certified or YouTube certified?” The kids who train with me regularly know you must earn your way to the barbell. This standard might be viewed as “too much” or “he’s not nice,” but my first job as a strength coach is protecting the athlete. This means safety and consistency must precede complexity.


Video 3: Hill Race. We implement hill sprints on the regular, even during the winter—which, as I mentioned earlier, has proven to be one of the simplest and most effective ways to develop speed, strength, and power. Sprinting is good for ALL athletes, even if they are not field athletes.

At the high school level, don’t get overly specific with your hill sprints. Sometimes I cut the distance for the big football linemen, but Jim Wendler said something to the effect of, “If you’re in high school and you can’t run a mile or do 50 push-ups, what special program do you really need? How can your teammates trust you if you’re out of shape?” This reminded me how powerful and important it is for high school athletes to have a solid base of all-around fitness.

When I explain to parents at the pre-season football meeting that my number one job is to protect their son in a sport where kids have broken bones and even been paralyzed, I explain to them how this is accomplished. We get your son stronger, faster, and more confident, and we build muscle, aka body armor. I explain to them that this is a team effort, where Mom and Dad must cook and stock the fridge like their son lives on a farm. I expect their son to do extra stretching and calisthenics at home. Commitment and consistency must be present if results are expected.

Commitment and consistency must be present if results are expected. I can’t protect an athlete who lacks consistency, has poor listening skills, and tries to do their own program. Share on X

I can’t protect an athlete who lacks consistency, has poor listening skills, and tries to do their own program that they learned from Uncle Bob in the basement. Dumbbells and calisthenics are a must, and they are highly underrated. When an athlete shows that he is upset that he can’t bench or squat with his friends, I tell him, “Don’t be upset; go ahead and bench or squat the 100-pound dumbbells. Prove to me that you’re strong!”

Another tip Paul Kolody emphasized to me after I mentioned to him that some of my groups have up to 90 athletes was this: “Tell every athlete that they are a coach! You spot each other, coach each other, and help each other with proper technique.” Now the athletes tell each other to squat lower, keep a flat back, etc.

Getting Athletes to Believe in the Program

Today, we not only use speed and agility training (I prefer to call it game speed, like Tony Villani) to better prep athletes, but these game speed activities also get athletes to “believe” in the program. Why do we use “speed and agility”? Because this speaks the language of the athlete. This is what they see all day on social media, so we need to make an emotional and psychological connection with the kids.

Field athlete or not, we implement game speed. Sprinting and an athletic warm-up are among the best ways to develop athleticism (training that has transfer to sport).

  • Hill sprints (various starting positions, races, etc.)
  • Power skip (height, distance)
  • Frog jumps and broad jumps
  • Hopping on one foot
  • Jumping rope (a lost art form!)
  • Racing against others
  • Tag games
  • Hurdles coupled with sprints

When training large groups at the high school level, focus on training that is easy for you to teach and easy for the athletes to learn, especially in the beginning. This allows you to deliver results for the athlete, and in turn, they believe in you and the program and want to show up consistently. Once consistency and a solid foundation of strength, muscle, and athleticism are developed, you can begin teaching more complex movements to your advanced lifters. It’s easy to get caught up in what other coaches are doing, but it’s crucial to look at your situation and coach accordingly. At the end of the day, it’s ALL about the kids!

Since you’re here…
…we have a small favor to ask. More people are reading SimpliFaster than ever, and each week we bring you compelling content from coaches, sport scientists, and physiotherapists who are devoted to building better athletes. Please take a moment to share the articles on social media, engage the authors with questions and comments below, and link to articles when appropriate if you have a blog or participate on forums of related topics. — SF


Track Lifting

When Should Track Athletes Lift?

Blog| ByMat Clark

Track Lifting

When should track athletes lift?

Is it before practice, when the work is performed without fatigue from sports practice impeding the quality of the lift? Or is it after practice, so athletes can train without fatigue from the weight room interfering with practice quality?

A seemingly simple question, this topic nonetheless remains a source of perennial battles between coaches and athletes, as well as strength and sport coaches.

The Current Rage

There are many great coaches—both strength and conditioning and sport coaches—who insist on exclusively lifting after practice; or, in team field/court sports, after the strength coach has conducted a speed or acceleration session. According to these coaches, the proper order is for the fastest movements always to come first. While this method works fine for team and court sports, it can be problematic when applied in a track setting for sprinters and jumpers.

My experience having participated in and coached every combination of training orders has framed what I view to be the best setup for sprint and jump athletes: SPLIT THE LIFT INTO TWO PARTS. Share on X

For full disclosure, I’ve been on every side of this debate. As a collegiate athlete, we lifted as a team after practice for my entire career. After college, I had to train around graduate school and work, often needing to lift in the morning before practice. As a coach, I’ve trained groups both before and after practice. My experience having participated in and coached every combination of training orders has framed what I view to be the best setup for sprint and jump athletes: split the lift into two parts.

Training Stressors

To understand why, it is helpful to first look at the major stressors induced by training that can impact decision-making, as well as what types of activities are most likely to create them.

  1. Muscular fatigue. Local muscle fatigue resulting from blood acidosis is well known to impair muscle contraction. This is the burning sensation after a hard interval session or higher-rep weight training, especially if taken to failure. While this work can be neurologically taxing, it is always done at submaximal intensities—so the limiting factor in performance is how the body is able to prevent and clear the accumulation of acid in the blood and restore muscle glycogen.
  2. Structural damage. Damage, or microtrauma, to soft tissues is a potent stimulus for growth. Over the long term, this can be a good thing when growth or hypertrophy is the goal. In the short term, though, microtrauma can lead to injuries when combined with high-intensity activities that further stress the already-damaged tissue.
  3. Nervous system fatigue. All types of training ultimately stress the nervous system in some capacity. But true top speed and heavy strength training doesn’t create the same blood acidosis as the methods that create muscle fatigue (if it does, you’re probably doing it wrong), so the limiting factor leading to neurological fatigue isn’t depleted energy stores or acid in the blood. Neurological fatigue impairs the signals sent from the brain to the working muscles, which lowers the force and speed of muscle contraction. This is sometimes thought of as feeling “flat.”
  4. Psychological fatigue. Psychological fatigue destroys focus and motivation, especially when intense training is reserved for the evening after a full day of class and practice. Attending class for 3–6 hours, then having a two-hour sports practice, and then going to the weight room is psychologically draining.

All these stressors can be created to varying degrees with different types of training. While these sources of fatigue and damage have different origins, all can lead to impaired motor control, throwing off movement quality as well as the weight and speed at which it can be performed.

Fears with Lifting Before Practice

With these stressors in mind, let’s look at the fears they inspire that lead many coaches to avoid lifting before practice.

  1. Inducing injury. This fear is easily the most significant one, and it is a valid concern—particularly with hamstrings. Ask most sprinters or jumpers at the college level and beyond, and you’ll likely find an athlete who has experienced some degree of hamstring injury. This fear is usually centered on performing hamstring-intensive movements like RDLs before practice on high-speed or jump days. This can create enough microtrauma in the muscle tissue that the muscle can’t maintain structural integrity while sprinting or jumping, resulting in hamstring injuries.

  1. Interfering with technical execution. I’ve seen this also referred to as a “tension-filled training session.” Essentially, lifting heavy weights creates a pump sensation and/or sustained muscle tension that throws off the contract-relax cycle necessary for efficient sprint mechanics. This lowers the quality of the session and has the potential to ingrain poor habits that can be hard to break.
    Loss of motor control can also lead to degraded sprint mechanics. This, in turn, can increase demand on the hamstrings in a lengthened position while sprinting, creating another route for the dreaded hamstring pull.

  1. Being unable to hit top speeds. This is influenced by the first two fears. The idea is that to improve top speed, athletes need to be fresh enough in practice to actually hit top speed. This process doesn’t work if only submaximal speeds can be achieved. The worry is that muscular or neurological fatigue from pre-practice lifting prevents this from happening and stunts speed development.

Timing Matters

For sprinters and jumpers, many training days are not short bouts of 10–30-meter flys and block starts that can “prime” the lift immediately after. Some are, but there are also fatiguing speed endurance and special endurance intervals, race models, and extensive jump and plyometric sessions that aren’t present in many field and court sports. A set schedule of lifting after practice often means lifting after these taxing sessions.

To the coaches who insist on training after practice to mitigate risk, your fears aren’t invalid. But performing high-intensity/technical movements in the weight room after practice isn’t risk-free either. The main problem when lifting after practice is that most of the time, lifting occurs immediately after finishing track work while muscular, neurological, or psychological fatigue still lingers.

The main problem when lifting AFTER practice is that most of the time, lifting occurs immediately after finishing track work while muscular, neurological, or psychological fatigue still lingers. Share on X

Pre-practice lifting, on the other hand, generally occurs in the morning. Especially at the high school and college levels, lifting before practice means having to plan around class schedules. This typically means there is a break of several hours from the end of lifting until the onset of sports practice, while athletes attend class and eat lunch.

In other words, there is time to recover after lifting in the morning that isn’t there in the afternoon. The same fatigue that coaches are trying to avoid by lifting before practice happens in reverse by having track practice before lifting. Only this time, there is very little time before getting under a bar.

Problems with Lifting After Practice

  1. Sloppy technique. The risk of injury directly from the weight room skyrockets by creating an environment where sloppy technique is almost unavoidable. Poor motor control + heavy/fast movements = high risk. We’ve seen horror stories on social media of athletes breaking bones, tearing tendons, herniating disks, or giving themselves concussions from poor execution of heavy lifts.
  2. Chronic undertraining. The logical response to being exhausted is to accommodate the debilitating fatigue by reducing load and/or the speed of the movements in the weight room. This isn’t ideal either, though, as it leads to chronic undertraining. If this happens on occasion, it may not be a big deal, but stack enough of those training sessions in a row, and it shouldn’t be a surprise when strength and power are significantly reduced.
  3. Increased session cost. Long, drawn-out training sessions spanning three consecutive hours, aside from being tiring in the moment, can extend the amount of time it takes to recover compared to if there is a break between them.

Solving the Paradox

Here’s what we’re left with: we don’t want fatigue from lifting to ruin the quality of speed and interval training at practice or tissue damage to cause acute muscle and tendon injuries from microtrauma induced in the weight room. We also don’t want to hurt, chronically undertrain, or impede recovery by forcing athletes to perform heavy and technically demanding strength and power movements in the weight room after track work that is muscularly, neurologically, and psychologically debilitating.

So, what’s the solution? Split the lift into two parts.

Optimizing Training: Split the Lift

First, I want to make clear that splitting the lift means just that—taking what you would typically do in one training session and breaking it into two parts. It is NOT two-a-day with two full training sessions.

Here are a few recommendations to make this approach work:

1. Keep low-volume, high-intensity, compound strength and power movements in the morning before practice.

This type of training is the sweet spot for track athletes, especially in season. These adaptations are largely neurological, meaning training this way doesn’t generally deplete the athlete’s energy for practice in the afternoon or compromise tissue integrity. This limits the risk of lifting directly causing a hard death during intervals or creating enough damage to pull a hamstring while sprinting and jumping. For many athletes, minimizing hypertrophy is important in-season, and this low-volume, high-intensity approach limits the stimulus to grow while still allowing the athlete to gain strength through increased neurological efficiency.

To the extent that energy may be depleted, the several hours between lifting and practice allows it to be replenished. This ensures that the heaviest and most technically demanding movements can be performed fresh without lowering practice quality.

Many proponents of lifting after speed work make the claim that speed can prime the athlete for the lift. While this can work after true speed (not sloppy conditioning), the reverse can also be true; low-volume, high-intensity lifting can prime speed as well, given proper technical training, consistent exposure, and adequate fatigue management.

2. Avoid highly fatiguing methods like rep-outs, finishers, and other high-volume accessory work or conditioning.

Most strength coaches who work with track aren’t tasked with “conditioning” the athletes. That usually falls under the purview of the track coaches. If we try to turn the weight room into EMOMs, AMRAPs, or HIIT or consistently perform rep-outs and finishers to exhaustion, the athletes will struggle with whatever comes next. Even with a few hours between sessions, the stressor is enough to severely impact practice quality. If additional hypertrophy work needs to be done, save it for after practice.

3. Reserve direct hamstring training for after practice.

Especially if using accentuated eccentrics that are designed to create more damage on movements like RDLs, GHD hamstring curls, Nordics, and good mornings.

The importance of hamstring strength in preventing injuries cannot be understated. Neither can the role hamstrings play in improving sprint and jump performance. All these choices can be excellent additions to a program, but they must be carefully dosed and placed, as they are the movements that have the highest risk of directly causing an injury when performed before speed development and jump sessions. Moving these movements to after practice helps navigate this dilemma. Furthermore, moving RDLs to days where the next day is a recovery day is a good idea as well.

Another benefit of dividing the lift this way is that the block of lifting after practice usually only takes about 15 minutes, and the movements aren’t as technically demanding, says @matclarkansas. Share on X

Another benefit of dividing the lift this way is that the block of lifting after practice usually only takes about 15 minutes, and the movements aren’t as technically demanding. That is a much easier pill for athletes to swallow than having to muster the energy for a 45–60-minute lift when they are completely exhausted.

Here’s an example of what this would look like in-season:

AM portion:

Power Clean 4 x 2 @ 87%

Back Squat 4 x 3 @ 85%

Bench Press 4 x 3 @ 85%

Class, Lunch, Practice              

PM portion:                                                   

RDL 3 x 6

Single Arm Farmer’s Carries 3 x 30 meters

Hanging Knee Raise 3 x 10

Changing Perspective

While strength training is widely recognized as critical for performance improvement, there is often tension between the sport and strength coaches, and strength training turns into a pursuit that competes with sports training instead of enhancing it. To dissolve this tension, we need to reframe the way we view the time spent in the weight room.

Neglecting strength training can severely handicap the performance ceiling of the athlete, but forging a program in isolation from the demands of practice and the timing of the competitive season creates issues too. We need to view lifting weights as one piece of sports training: an invaluable component of performance, not a separate entity distinct from sports training that must be fit in somewhere on the periphery.

With this approach, the different training stimuli can be arranged and seamlessly fused into a larger training plan—one where strength and sport don’t have to compete with each other.

With this approach, the different training stimuli can be arranged and seamlessly fused into a larger training plan where strength and sport don’t have to compete with each other, says @matclarkansas. Share on X

Many coaches will attach the caveat that lifting isn’t sports practice, so it isn’t the priority. As a result, it is always devalued. While it may not be the primary driver of success, what’s the point in purposefully handicapping athletes by neglecting valuable strength and power work or forcing it to be done while they’re completely exhausted? Lifting weights while muscle contractability, energy stores, focus, and motor control are impaired is wrought with risk.

Sure, some people grind through it. But improving sports performance isn’t necessarily about how hard you can grind or how difficult you can make your training environment and endure. It is about doing everything possible to set up an optimal environment that allows you to train and recover effectively and efficiently. Grab the low-hanging fruit. Split the lift.

Since you’re here…
…we have a small favor to ask. More people are reading SimpliFaster than ever, and each week we bring you compelling content from coaches, sport scientists, and physiotherapists who are devoted to building better athletes. Please take a moment to share the articles on social media, engage the authors with questions and comments below, and link to articles when appropriate if you have a blog or participate on forums of related topics. — SF


Push Up Test

How High School Coaches Can Organize and Execute Combine Testing

Blog| ByGreg Cox

Push Up Test

So, you’ve been tasked with creating a high school strength and conditioning program: you’ve worked out the logistics and the scheduling, spoken to the sport coaches, and gotten interest from student-athletes.

Next, to safely introduce the training you have planned, it’s important to get an idea as to where you’re starting from. Without a baseline of any type of assessment, there’s no accurate way to measure progress. A great way to do this is through a testing event or combine day. This article will provide a reason why this type of event is important, what exercises I recommend for assessing your athletes and why, and some ideas and solutions for organizing the event, such as athlete management software like Avolve Sports.

Without a baseline of any type of assessment, there’s no accurate way to measure progress. A great way to do this is through a testing event or combine day, says @strthcoachgreg. Share on X

Why Conduct This Testing?

First and foremost, this kind of testing allows you to engage positively with as many athletes as possible. In situations like this, think about testing that involves simple things such as bodyweight exercises, short sprints, or jumping.

Keep in mind that this may be the first engagement that a young athlete has with structured, or potentially, any sort of training in their lives, so this is a great opportunity to provide a positive first interaction. Your preparation and confidence in the details of your event will directly impact that.

Second, collecting some simple baseline measurements on your athletes will allow you to track progress and assess your program’s efficacy. Being able to show progress and improvement drives buy-in from the other stakeholders in the program, including the athletes themselves.

Lastly, if you’re not testing, you’re just guessing. If you go to write your program and assume that athletes have a certain level of competency and they end up not having it, you have to scrap your program. However, if you can assess their basic physical competencies and then correctly introduce training that improves these skills, then you’re off and running.

What Testing Should You Do?

Since you’ll be training the whole school, it’s important to test physical qualities that:

  1. Apply to all sports.
  2. Can be assessed with scalable tests.
  3. Are easily repeatable.

Additionally, you want to select tests that can be administered and are scalable to athletes at different levels and abilities. You must also feel comfortable administering your selection of tests and properly explaining them to whoever can help you administer them. My suggestions below are about as basic as they come, as it’s important that you select tests you feel comfortable with and believe will give you the best outcome with your athletes.

The goal should be to test major athletic qualities in as few tests as possible. Three simple tests are sufficient for a healthy athlete, says @strthcoachgreg. Share on X

The goal should be to test major athletic qualities in as few tests as possible. Three simple tests are sufficient for a healthy athlete. You should look to test the upper body, the lower body, and an athlete’s straight-line speed. This way, you can get a more well-rounded idea of your athletes’ abilities. For the strength tests, the athletes will get one attempt to post a score, and for the sprint test, they will have two attempts.

Upper Body Test: Max reps push-ups in a minute/static push-up plank hold—done in the weight room (one attempt).

Push-Up Standards: Athletes begin at the top of a push-up with their thumbs under their shoulders. They then perform as many push-ups as possible in one minute. Record their score.

Be sure to watch and take note of what occurs at the low back and the shoulder of the athlete. Can they hold their torso in a straight line from their skull to their feet? Can they keep their elbows at a 45-degree angle to their ribs? Are they able to control their scapula through all the repetitions?

If the athlete is unable to complete any push-ups, have them adjust to doing them from their knees. If they still struggle from there, have them start from the bottom position and push up. Leave a section on the scoresheet to note all these things. It is important that each athlete receive some measurable score, even if that is “zero – could not complete 1.” You are looking for things they can improve upon, so having regressions and many things to observe is important to give them a runway to follow with their training.

Static Push-Up Plank Hold: The same starting position is used, and the athlete is instructed to hold their torso so that their elbows are completely locked out, and their back is flat with a straight line from the heels to the back of the skull. The goal here is to hold this posture for as long as they can. You will record the time it takes for them to drop to the floor or for their torso to lose any semblance of a controlled position. As with the push-up, note where their form begins to break first.

Lower Body Test: Max reps of alternating single-leg squats to bench in two minutes—done in the weight room (one attempt).

Standards: Athletes stand in front of a bench, and beginning with whichever foot they choose, they sit to the bench and stand up off the bench with the same leg, then switch legs and repeat for as many reps as they can in two minutes.

Things to look for: Can the athlete perform this test at all? If they can, does their knee stay stable in space, or does it move left and right? Does the athlete need to “check” their opposite foot on the floor to perform the test at all?

Speed Test: Twenty-yard dash—done in the gymnasium or an adjacent hallway (two attempts)

Standards: Use cones to measure 20 yards. Athletes start standing behind the line, and on their movement, they begin to sprint the distance. Record both of their times on your sheet. 

Note: It’s essential that you conduct this test in a location that is available year-round. If you’re conducting this testing in the fall, you may be able to go outside, but if you live somewhere where there’s inclement winter weather, you may not be able to go outside to retest them in December. A consistent running surface and location are important for gathering valid testing and retesting data.

While these tests aren’t flashy or all that exciting, the important thing is that the testing exists, is well-coordinated, and is safe for all the participants. You’ll get to the traditional testing with weights in the future, but this is truly a “Day 0” approach.

While these tests aren’t flashy or all that exciting, the important thing is that the testing exists, is well-coordinated, and is safe for all participants, says @strthcoachgreg. Share on X

These tests, or something similar to them, are also ones that you can easily implement in warm-up protocols or weekly check-ins with your athletes as you move through the training weeks. Additionally, as you get more comfortable with your program and testing athletes, it may be possible to build more advanced testing batteries for your athletes that are consistent with their training, especially those who stay consistent over their entire time with you.

Logistical Notes

Hopefully, there will be a lot of interest in your program, and you’ll need a few days to a week to get everyone through this initial testing. With these three tests, you will need at least three other coaches or adults to help you organize and score the testing. You can assign each of these three people to a drill. Then, explain to them the standards you are looking for in each drill and allow them to run their individual tests while you coordinate the rotation of everyone through the tests.

Example order for the testing of three groups: (Note that none of the groups go from the single-leg squat to the sprint.)

  • Group 1: Push-Up –> Sprint️ –> Single-Leg Squat
  • Group 2: Single-Leg Squat –> Push-Up –> Sprint
  • Group 3: Sprint –> Single-Leg Squat –> Push-Up

I’d block off 30 minutes for a group of 30 athletes to complete the three tests. If you can get more than three people to help you, it would be advisable to have multiple stations for each test to facilitate getting people through the testing process more efficiently.

The equipment/tools you will need to execute the tests are:

  1. A bench to have the athletes squat down to.
  2. Two stopwatches—one to time the push-up test and one to time the 20-yard sprint. (If you have timing gates, this is a very practical time to use them.)
  3. A measured 20-yard lane for the timed sprint.
  4. Four coaches, including yourself, to assist in managing the testing.
  5. A list of the athletes completing the testing.
  6. A spreadsheet that includes the athletes’ names and a location for entering the scores for each of the respective tests.
  7. Three clipboards and writing implements, each with one of these charts described above.

Avolve Sports Offers Solutions

One of the hardest parts of running these types of events is managing the collection method while the tests are going on and then the subsequent importation of the data when the testing has been completed. This process will likely have you creating the score sheets in Excel, printing them off to score everyone, then collecting the sheets and inputting all that data somewhere (likely back into the same Excel sheet you printed). This data entry and subsequent analysis in and of itself is a time-consuming process. Fortunately, training software has come a long way in the last handful of years, and there are software solutions for this type of event. One of them is Avolve Sports.

Avolve’s data collection is a native part of the software and doesn’t rely on APIs. This makes it possible to collect data even if you’re somewhere without internet or with spotty cell phone coverage. Share on X

Avolve, unlike other similar athlete management software programs, primarily focuses on collecting and organizing the data from combines, testing, or “events,” as Avolve calls them. Avolve also stands out because its data collection is a native part of the software and does not rely on APIs. This makes it possible to collect data even if you’re somewhere without internet or you have spotty cell phone coverage. With its workflows, you can easily organize the athletes into groups, collect the data, generate reports, and then draw corresponding conclusions from the data. With Avolve, all that’s required is the list of athletes participating in the event: the step-by-step process in the software makes it easy to organize everything from there.

Following is the workflow Avolve can offer to create and score an event, all without Excel.

1. Create an Event in the Groups Page

On this page, athletes can be grouped based on the day and times they will complete the testing and labeled accordingly. In this example, they were grouped by class. You’ll also notice a dedicated location to enter the equipment you need to conduct the testing, such as stopwatches and a bench.

Event Creation

2. Assign the Athletes to the Groups You Created

You select the athletes you’d like to place in each group and then assign them accordingly. Don’t worry: If an athlete is not listed in your premade groups and shows up on the day of the event, you can add them from the Scoretracker page shown below.

Adding Athletes

3. Select the Drills You Wish to Do in Your Event

You’ll notice that we selected the three exercises that were described above and applied them to all groups. Following this screen, you are shown a summary of the event you just created and then are presented with the opportunity to “publish” the event.

Adding Drills

Once you publish the event, you will have access to the Scoretracker page for the event. From this screen, you can input the athlete’s scores and any notes regarding their attempts. (These notes could be things that you noticed the athlete did during the testing, such as the things to watch for I listed with the push-up test and the single-leg squat test.) Each coach helping score the event can access this page from the mobile app and input the scores as the athletes complete the testing, even without internet or cell phone coverage.

Scoretracker

After you’ve created this event, it’s also possible to copy it so that you can repeat it at a later date to assess the efficacy of the training you’ve been doing with your athletes. Since the exercises apply to everyone and are easy to implement the second time around, you can track the efficacy of your program by using the same testing battery.

Once you complete this event and have collected all the data, it is imperative to have a plan to reexamine what you’ve done. Avolve also gives you an opportunity to produce reports from your testing instantly after you complete the event. From there, you can look for any trends you want to address with your training in the subsequent months leading up to the time you retest these same movements.

Since you’re here…
…we have a small favor to ask. More people are reading SimpliFaster than ever, and each week we bring you compelling content from coaches, sport scientists, and physiotherapists who are devoted to building better athletes. Please take a moment to share the articles on social media, engage the authors with questions and comments below, and link to articles when appropriate if you have a blog or participate on forums of related topics. — SF


Four people in a gym. One person is kneeling on the ground, while two others stand near a wall with climbing holds. A person in the background observes the scene. Various gym equipment is scattered around.

Adapting to Obstacles on the Fly with Kieran Showler-Davis

Freelap Friday Five| ByKieran Showler-Davis, ByDavid Maris

Four people in a gym. One person is kneeling on the ground, while two others stand near a wall with climbing holds. A person in the background observes the scene. Various gym equipment is scattered around.

Kieran Showler-Davis is the Associate Director of Track & Field/Sprints & Hurdles Coach at Carson-Newman University in Jefferson City, Tennessee. Kieran is a former international sprinter, having competed at the 2010 World Junior Championships and the 2011 European u23 Championships, where he won silver in the 4x100m relay. He later competed for England as a senior on numerous occasions. He moved to the United States to study and compete for Florida State University and Carson-Newman University, where he gained All-American status while also completing his undergraduate studies in business administration and securing an M.Ed. with a coaching emphasis.

Freelap USA: You have seen some great results recently at Carson-Newman, including Makanakaishe Charamba winning an indoor 200m national title and running 10.15, and Devon Moore running a windy 9.99 at Texas Relays. What are some of the reasons for this success?

Kieran Showler-Davis: I think there are several reasons that our sprinters are running as well as they are, and a lot of this comes down to the professionalism in their approach to preparing for competitions. I stress to them that practice and training are only a small part of the equation, and things like sleep, nutrition, and hydration play a massive role. As a coach, it’s not possible to be around the athletes 24 hours a day, ensuring they eat right and go to bed at a reasonable time; so, it falls on them, and I think my athletes do a great job of this.

A lot of our sprinters’ success comes down to the professionalism in their approach to preparing for competition, says @Showler_Davis. Share on X

More recently, the competition within the group has become fiercer. Not long ago, Von was, without a doubt, our best sprinter, running a windy 10.12, and I think he has been responsible for making our recruiting efforts that much easier. Recruits see his progress from 10.5 to a windy 10.1, a lot of consistent 10.2s and 10.3s, and his placing at nationals, and view us as a viable option that can help them improve.

Davis Moore
Image 1. Coach Davis with Devon Moore.

Since then, guys like Maka have come in, training has become more competitive, and they push each other. Von saw Maka’s success last year, which has spurred him on, and Maka now has the goal of representing Zimbabwe in Budapest at the World Championships this year. All of this fosters an environment where getting better becomes easier.

Finally, my extra experience as a coach has made me more secure in my philosophy and what the meat and potatoes of my training plans look like. I still like to experiment and try new ideas, but I feel I have a better understanding of what works in our setting, so I can better guide these athletes.

Davis Maka
Image 2. Coach Davis with Makanakaishe Charamba.

Freelap USA: You were an international sprinter yourself. Can you talk about your background as an athlete and the transition from being an athlete to now becoming a coach? Having had a lot of success in the last couple of years as a coach, looking back, is there anything you wish you could have done differently as an athlete?

Kieran Showler-Davis: I grew up in the south of England and was coached by my parents. I was fortunate to have quite a bit of success, running 20.7 as an under-20 athlete and representing Great Britain at the World Junior Championships in 2010. I started university at Florida State, training under Ken Harnden, who was a big influence on me and my ideas surrounding training methodology, and I ran at a couple of different colleges before ending up at Carson-Newman.

While I’d had some success in the U.S., I typically found the training I’d been doing with my parents had worked well for me, so when I started at Carson-Newman, I wanted to follow the program I’d been doing in the U.K. At this point, I was an older senior, and I don’t know if it was because I had come from a coaching family, but it came naturally to me to help out the younger athletes on the team, and it was something I really enjoyed.

I don’t know if it’s because I came from a coaching family, but it came naturally to me to help out the younger athletes on the team, and it was something I really enjoyed, says @Showler_Davis. Share on X


Video 1. Keiran Showler-Davis winning a race at the South Atlantic Conference meet in 2018.

After I graduated, I wanted to continue to compete, but I was also given the opportunity to continue coaching as a GA, still at Carson-Newman. I continued to enjoy this and really get a buzz from seeing athletes I was helping make progress—and having Von early on meant I had an early taste of success, which no doubt contributed to the enjoyment. To be honest, though, coaching wasn’t something I’d always set out to do, and I didn’t even really know it was an option because, in the U.K., it’s still very much volunteer-based. So, my dad would work his day job and then coach in the evenings, almost as a hobby.

If I had my time again as an athlete, I would follow a “less is more” approach a little more closely. At 16 years old, I ran 21.1 while only training on the track twice per week on Tuesday and Thursday nights and playing football (soccer) on a Saturday, so I had four days a week without any training outside what I might be doing in PE at school. It does make me wonder if sometimes people train for the sake of training, and looking back, I certainly think that large amounts of recovery were very important for me.

Having a better understanding now of what some of the high school and collegiate athletes in the U.S. do in terms of practice and training, I can see how some approaches may not work for everyone.

In addition to this, I would probably take my strength and conditioning and psychological preparation more seriously. When I was at FSU, I remember really liking the strength program that I used there in my second year, and that became a sort of template for what I continued to do. It would have been great to have someone to continue monitoring that for me and pushing me on it.

In terms of psychology, I’m sure many former athletes say, “I wish I knew then what I know now.” I think this comes down to experience—I don’t think there was too much I could have done to fast-track my development in that regard, but it would have been nice to have my 2023 mind in my early to mid-2010s body!

Freelap USA: At Carson-Newman, you don’t have your own track. What are some of the ways you manage your program to work around not having your own facility? Do you think, in some cases, a limitation like this can be a blessing because it forces you to focus on a few key things?

Kieran Showler-Davis: We’re lucky enough to have a high school that allows us to use its track, but we obviously have constraints that not all collegiate programs face. As you mention, though, I think this has an upside, as you’re forced to adapt. For example, a week before our indoor conference meet, the high school that was letting us use its track no longer had room for us; it could have been very easy for us to panic, but as we had faced logistical barriers before, it seemed less daunting to implement a contingency plan. Therefore, it fazed us less.

There have been times when we’ve arrived at the high school track to discover an event taking place, so we’ve had to adjust the plan on the fly. This is something I saw my dad do throughout the years he coached me, and I always thought it was impressive that he could switch the session up if necessary, depending on the type of obstacle in the way. I don’t know if this has made these situations bother me less, but I think I’m a better coach now than I would be if I never had to make sudden changes based on facility access.

I don’t know if this has made these situations bother me less, but I think I’m a better coach than I would be if I never had to make sudden changes based on facility access, says @Showler_Davis. Share on X


Video 2. Practicing block starts in our indoor space.

In addition, our circumstances encourage me to focus more on the meat and potatoes of training that I mentioned earlier and worry less about training “fluff.” For example, when we do our acceleration sessions, I’m forced to choose whether we will do blocks or sled work. While our sleds are stored by our weight room, we have an old gym on the other side of campus where we have some rollout track, and we use this for our block sessions. It may be nice to be able to do a contrast-style workout and alternate between both sleds and blocks in the same workout, but I don’t have that option, so it keeps me focused on the “need to do” without worrying about the “nice to do.”


Video 3. Acceleration training on the track.

Freelap USA: Do you do much in the way of resisted sprinting? Is there much technology you use when training your athletes?

Kieran Showler-Davis: We incorporate some sled work into our acceleration days, but after an initial block of that, and once we start moving on to block starts, we don’t use the sleds because of the logistical constraints that I mentioned. I do have an Exer-Genie, but I only tend to use it during winter or spring break or after our outdoor conference meet when most athletes aren’t practicing. Again, linked back to the previous question and constraints, getting lots of athletes through the Exer-Genie in one session—where you have to adjust the resistance, etc.—is a challenge.

Doing anything in training that requires a lot of waiting around can disrupt the flow of the session, and athletes are more likely to become distracted. If that happens, it’s less likely that the positive outcomes you’d want from a training session will be achieved.

Related to that, we have access to timing gates through our strength staff on campus, and we’re able to take those to the track, but figuring out the logistics of when they aren’t being used and then transporting them off campus adds more layers to implementing this technology.

I use video to provide the athletes with some visual feedback. I find it really helpful, as quite often, watching runs or races in real time makes it very easy to miss things. Therefore, this obviously allows me to go back and watch as many times as I need to, focusing on a different technical aspect each time. This assists me in my decision-making regarding which technical components an athlete will address in their upcoming training.

Freelap USA: What does a typical week of training look like for your short sprinters?

Kieran Showler-Davis:

Monday – Blocks/acceleration 5–6x15m (25–30m long facility with a rollout track).

  • Weights (compound lifts, often contrasting lifts and plyos).

Tuesday – Longer session. We start with something more akin to tempo and increase the speed throughout the year.

  • May start with (300m, 3 mins, 300m, 10 mins) x2 150m, 3 mins, 150m.
  • Later in the year, we may do 160m, 3 mins, 140m, 10 mins, 140m, 3 mins, 120m, 10 mins, 120m, 3 mins, 100m.

Wednesday – Active recovery, medicine ball work, drills, ancillary weights, mobility, extensive plyometrics. (We keep this individual—some find the plyos take it out of them, so we may reduce or remove it.)

Thursday – Shorter track day focusing on sprinting under fatigue.

  • 60-meter progressions, 3x3x60m > 4x3x60m > 3x4x60m > 4x4x60m

Progressing from 1–3 minutes rest between reps and from 5–8 minutes rest between sets.

  • Or we may do something like 2x120m, 2x80m, with 8 minutes rest between each run.

Friday – We start with stadium stairs before progressing to hills.

  • A hill session consists of a trail run at the start, 1–2x600m with 3 minutes rest, but this gets removed as we get closer to the racing season. Then, after the trail run, the hill part of the workout may be something like:
    3x150m with 5 minutes rest between runs, 3x100m with 4 minutes rest between runs, and 2x50m with 3 minutes rest between runs.
    The Friday sessions actually get longer, and the intensity gets lower as the Thursday session increases in quality. I do this to ensure we are being as safe as possible by not doing too much intensity within the same week. For example, hills may start with 60m or 80m reps, while the work done on Thursday is slower.
  • Weights (compound lifts, often contrasting lifts and plyos)

Since you’re here…
…we have a small favor to ask. More people are reading SimpliFaster than ever, and each week we bring you compelling content from coaches, sport scientists, and physiotherapists who are devoted to building better athletes. Please take a moment to share the articles on social media, engage the authors with questions and comments below, and link to articles when appropriate if you have a blog or participate on forums of related topics. — SF


Off Season Speed

Off-Season Sprint Training for Young S&C Coaches

Blog| ByCole Hergott

Off Season Speed

It’s springtime and getting close to the summer, which you and every coach knows is the prime time for speed training to help your teams roll into camp this fall looking and feeling faster than ever. You scour this website looking for the best sprint program, read all the articles you can on speed and how to make athletes faster, dive into the research, and even chat with your local school’s track coach to get as much info as you can before designing the perfect periodized sprint program.

You sit down with all your notes on drills, technique points, and progressions only to stare blankly at your computer, whiteboard, or paper (whatever you program with), lost in all the information. Paralysis by analysis might describe this situation, but I think the best description is simply information overload.

“So, sprint technique drills must be done before any specific sprint drills…but also are useless?”

“Never run after taxing your hamstrings maximally, like doing Nordics…but also do them as part of your warm-up?”

“Do a short-to-long approach…unless your athlete is better suited to a long-to-short approach, of course.”

Umm…what?

Yes, there is a lot of information on sprinting these days. One thing we can all agree upon is that all athletes—team or individual—need to do it to maximize their weight room transfer to sport. But that is about all we seem to agree upon.

If you are like me and work at a small school (which includes a small-school budget and limited access to a track or field), then this article is for you.

Keep It Simple

I will do my best to cut through the info and give you some basic tips on writing out a whole summer of sprint work for your team sport athletes, especially if you are new and don’t know where to start.

First, my disclaimer: I am not a track coach. I work with T&F athletes, but I do not program their sprint or drill work. That is for their sport coaches. I am not a speed expert. I have not developed multiple Olympians from the time they were 12 to becoming world champions. I am simply a university strength and conditioning coach who has learned how to keep it simple and get results.

First off, simplicity wins. Always, says @chergott94. Share on X

First off, simplicity wins. Always. Never been defeated in my realm. At the university level, most athletes want to get faster. Unfortunately, most athletes are already close to their peak levels of speed—especially in the team sport realm. Now, I am not saying athletes can’t get faster, because they all can. To what degree depends on many factors, such as their training age, genetic potential, work ethic, genetic potential, lifestyle factor, and even their genetic potential. Did I mention their genetics? Those play kind of a large role too.

All kidding aside, too often I meet with coaches who want their athletes to be faster (which is what I want too), but more often than not, the answer to their problem is: “Well, then you should have recruited faster athletes.” Obviously, I do not say that, believing that I am the one who can impact these kids and make them into speedsters. Of course, some do become much better. Some get a little better. And some don’t improve at all. That is just the nature of the game. Heartbreaking, really, but the uncertainty of the pursuit of athletic gains is what makes the job so fun (and frustrating).

Anyway, back to the nitty gritty. You have a team of athletes looking to get faster this summer. You have 12+ weeks to get the job done (May–August, depending on how your semesters are structured) and are looking for where to start.

Do we just sprint? Yes.

As fast as we can? Yes.

All summer? Yes.

You can’t get faster if you don’t practice the skill of getting faster, and the only true way to do that in any form that translates to sport is actually to put the boots to the ground and pound. So how do you do it?

Start simple and progress.

If you think of a team sport athlete, what do they need? They need to sprint fast over a short distance, usually 10–20 meters. They need to be able to decelerate, change direction, transition from back to front, front to back, crossover to sprint, sprint to shuffle, and everything in between. To fit it all in, it would take a lot of time and effort to plan out each progression and pattern. Believe me, it does, and it did.

For the first few years in my role as Head Strength & Conditioning Coach, I used to craft each sprint progression for the whole summer carefully. Start with a good field-based warm-up, and move to 5–10 minutes of plyos and bounding drills. Then, work my way into their speed drills so that each week we would progress volume by 10%, change patterns every 3–4 weeks, drop volume to have deloads, and then ramp up again. Linear day would be Tuesday, lateral/change of direction on Thursday. Crafted to perfection. Two days of speed training to ensure their strength gains transferred to the field/court/ice.

My reward for such time and dedication? About 20% of our athletes even did the sessions, and only 50% of those did it correctly. (“Wait, you did all 15 sprints in three minutes?? Okay, here’s the thing about speed training….”)

Needless to say, we did not get much faster.

At the university level, almost ¾ of our athletes aren’t local. The other ¼ must work to afford school, which means they may not be able to make our training times, no matter how flexible I am. Share on X

Why so much mess? At the university level, almost three-quarters of our athletes aren’t local. And the ones that are around must work to afford school, which means they may not be able to make our training times, no matter how flexible I try to be. Going back to my original research on this website and others like it (and this is not knocking it), most of the info or tips I got resulted in me saying, “Yeah, but….”

  • Yeah, but what if athletes only do one session per week?
  • Yeah, but what if they don’t do it at all?
  • Yeah, but what if they are short on time?
  • Yeah, but what if we don’t have the space to sprint 60 meters?
  • Yeah, but what if all we have is a gymnasium?
  • Yeah, but what if athletes go home and supervise themselves?
  • Yeah, but what if unsupervised athletes do sprint drills incorrectly all summer long?

Sound familiar? These were the issues I kept running up against. So, I finally decided to make a change. I decided to reread the words that are my laptop background (“Keep It Simple, Stupid”) and apply them for real. No more confusing progressions people weren’t ready for. No more complicated drills. Time to get down to the basics. Here they are.

Instead of having separate speed days that lasted 30+ minutes and no one wanted to do, I stuck the sprint work at the beginning of each lifting session and made it 5–10 minutes, tops. That way, we hit it 2–3 times a week—and if athletes lifted (which most did), they would at least see the sprint stuff, increasing the chances that they would do it.

The following prep work was done each session (2–4 times a week; see later in this article for weekly breakdown) after a thorough general/dynamic warm-up.

Speed Prep

  • Double leg pogos x 10 in each direction
  • Double leg line hops x 5 front/back and side to side
  • T hops (Hop front, back to middle, side, back to middle, other side, back to middle, back, back to middle—that’s one.) x 3
  • Hop to tuck jump x 3

Following this prep work, we had either a linear or a lateral/agility focus for the session (one of the few structures I kept from before).

Linear

  • Phase 1: Half kneel start 2 x 5 meters, 2 x 10 meters (2 = once on each leg) = 4 sprints, 30 meters total
  • Phase 2: 2-point starts 2–3 x 5 meters, 2–3 x 10 meters = 4–6 sprints, 30–45 meters total
  • Phase 3: Drop-in sprints 2-3 x 10 meters, 2–3 x 15 meters = 4–6 sprints, 50–75 meters total
  • Phase 4: Flying sprints (10m fly-in) 2–3 x 5 meters, 2–3 x 10 meters, 2–3 x 15 meters = 6–9 sprints, 45–90 meters total

This linear progression allows you to start with the basics on the half kneel of working on a good setup, giving them lots of time to get into position and learn to drive out of a low position.

Moving to a two-point stance allows them to have an easier start, still using the same technique points you wanted in the half kneel but now at higher speeds, faster.

Drop-ins allow for the athlete to start moving, which generates greater speeds, especially right off the start.

Fly-ins start to cover more max velocity work, especially as you hit longer sprint zones of 15 meters.

Why only progress to a total of 25 meters? Our gymnasium is only 35 meters long, so we can’t physically do anything further without going outside into the parking lot or busy roads (which isn’t a great idea, trust me).

Lateral/Agility

This is a little more complex and will vary depending on the sport, but to give you some examples, it might look like:

  • Phase 1: Shuffle shuttle (shuffle 5 meters and back as fast as you can) x 2–3 each way, 40–60 meters total
  • Phase 2: Shuffle to sprint (shuffle 5 meters, sprint 5–10 meters) x 2–3 each way, 40–90 meters total
  • Phase 3: Shuffle to sprint to shuffle (shuffle 5, sprint 5–10, shuffle 5) x 2–3 each way, 60–120 meters total
  • Phase 4: Shuffle to sprint to backpedal (shuffle 5, sprint 5–10, backpedal 5–10) x 2–3 each way, 60–150 meters total

Once again, simple. Start with a basic concept: shuffling with a stop and start. (You could even break it down and just shuffle 5–10 meters as fast as possible for phase 1, depending on your athlete’s quality of movement.) Then we add in a transition to a sprint. Afterward, we get them to decelerate and transition back (like playing D in basketball). Finally, they go from lateral movement to forward, decelerate and go backward.

Nothing fancy, but something that teaches important movement qualities (transition, deceleration, acceleration, hip flip, etc.), is fun, and breaks up the monotony of just sprinting forward all the time. These are even better if you have sessions with multiple athletes and can get them to race while doing it. Competition is the best coach.

Structuring a Program for the Entire Off-Season

Breaking this down even more, if you used each phase for 3–4 weeks, slightly progressing the volume of each exercise within the phase itself (from 2–3 sets or 5–10 meters, as mentioned for each drill), you would have a 12–16 weeks off-season speed program all ready to roll.

And if this doesn’t seem like enough or your athletes want more, just repeat each session, depending on your weekly framework. For example, here are some sample weekly layouts you could use:

Three-Day Training Program:

Option 1

Day 1: Linear speed & full-body lift (squats are main movement)

Day 2: Full body (bench press main)

Day 3: Lateral speed & full body (RDL main)

Option 2

Day 1: Linear speed & full-body lift (squats main movement)

Day 2: Lateral speed & full body (bench press main)

Day 3: Linear speed & full body (RDL main)

Four-Day Training Program

Option 1

Day 1: Linear speed & lower (squat emphasis)

Day 2: Upper body

Day 3: Lateral speed & power (hinge emphasis)

Day 4: Upper body

Option 2

Day 1: Linear speed & lower (squat emphasis)

Day 2: Lateral speed & upper body

Day 3: Linear speed & power (hinge emphasis)

Day 4: Lateral speed & upper body

There are plenty of ways to structure the program each week to adjust the amount of exposure your athletes get. I have played around with each, depending on the sport and the time of year (early summer, only twice a week while we hammer a strength or hypertrophy block in the weight room, and then shift to 3–4 times throughout the summer to increase exposures and volume). All of them work; the main thing is that your athletes do it.

There are plenty of ways to structure the program each week to adjust the amount of exposure your athletes get. I have played around with each, depending on the sport and the time of year. Share on X

Now, some of you track coaches or more experienced practitioners might be thinking this is too simple and will never get the results needed for athletes at the university level. All I can say to that is that, after only a few years in my role (heading into year five), I have seen quite a bit. I know this may be simple, it might not have every drill necessary to elicit the perfect response from my athletes, and it might be undercooking them.

But this program has:

  • A higher chance of getting done by everyone (because the keen ones will do everything anyway, and I am not worried about them).
  • A higher chance of getting done well. (The volume is low, so they can focus on max effort for one drill, rest long enough without “wasting time,” and then move on to pumping the iron).
  • A good chance of being enjoyable (which increases the other two).

And at the end of the day, getting athletes to buy in, enjoy training, and get at least some results is about all you can ask for in this job (until those coaches recruit better!)

Peace. Gains.

Since you’re here…
…we have a small favor to ask. More people are reading SimpliFaster than ever, and each week we bring you compelling content from coaches, sport scientists, and physiotherapists who are devoted to building better athletes. Please take a moment to share the articles on social media, engage the authors with questions and comments below, and link to articles when appropriate if you have a blog or participate on forums of related topics. — SF


Next Level Jump Testing

Next-Level Vertical Jump Testing: Fine-Tuning to Develop Better Workouts

Blog| ByKim Goss

Next Level Jump Testing

Although it can be argued that running speed is the No. 1 component of athletic fitness, jumping ability rules in many sports. You don’t have many basketball, volleyball, or gymnastic coaches testing their athletes in the 40, yet there is cause for concern when these athletes unexpectedly lose 2 inches on their vertical jump. Besides assessing leaping ability, vertical jump test results can provide valuable insight into how to design better workouts. There’s a lot to unpack here.

“The vertical jump tells you how quickly an athlete can start a movement and apply force,” says sports scientist Jonathan Wahl, Ph.D. “It’s equivalent to that first step in tennis, that explosion off the line of scrimmage, and that leap out of the starting blocks.” In one 2015 study, researchers said jump tests “may be used by coaches for assessing and monitoring qualities related to sprinting performance in elite sprinters.”

My premise is that to design the best workouts for a specific sport, you should consider using multiple jump tests. Share on X

My premise is that to design the best workouts for a specific sport, you should consider using multiple jump tests. For example, you could make the case that the standing broad jump would be more specific to the start of a sprint, and the vertical jump would be more specific to the upright sprint position. Further, I’ve talked to sprint coaches who believe that a single-leg triple jump is a better test for assessing maximal acceleration than a standing broad jump.

With that sales pitch, let me show you how I’ve refined vertical jump testing over the past two decades to make it more sport specific. Let’s start by reviewing a bit of history on jump testing technology.

The Evolution of Jump Testing

In 1921, Dr. Dudley Sargent developed the Sargent Jump Test. It involves chalking the fingers of one hand and standing next to a wall. Without taking a step, you jump as high as possible and touch the wall at your highest point. The difference between your standing reach and your jump height is your vertical jump.

The next major evolution of this test is to hit a series of moveable plastic tabs, set a half inch apart and mounted on an adjustable pole; the more tabs you hit, the higher your score. This device is called a Vertec, and it is still used in the NFL Combine (image 2).

Frey Mvumvure
Image 1. Shown here with sprint coach Gabriel Mvumvure, in college, Maddie Frey increased her vertical jump from 24.6 to 29.4 inches and her one-step vertical from 26.5 to 31.2 inches. Last year she broke Brown University’s 32-year-old outdoor record in the 200m. (Photos by Karim Ghonem; Frey’s hair and makeup by Day Shimmer Spa)

The Vertec was a dramatic improvement over the wall-and-chalk method, but one problem with both these tests is that it’s possible to cheat. Cheating is not an issue with how high you jumped (although with homemade and knockoff versions of the Vertec, I saw that athletes could often hit an extra tab by slapping it hard and upward). The problem is the starting measurement for the reach. Retracting your shoulders, leaning back, and slightly unlocking your knees can reduce your standing reach by several inches, thus giving you a higher score.

The contact mat, which involves a rubber mat containing sensors attached to a handheld computer (image 2), was the next “step” in vertical jump training. The athlete stands on the mat and jumps; how long they spend in the air determines their vertical jump.

Unlike the Vertec, a contact mat provides smaller jump increments. Instead of measurements such as 20 inches and then 20.5 inches, you can have 20, 20.1, 20.2, and so on. Because kicking your heels up as you jump could increase flight time, coaches should watch for this technique to maintain consistency among their athletes.

The athlete also doesn’t have to strike anything with a contact mat. This means you can perform a jump with your hands down to determine leg power more precisely (because the upper body assists in jumping). You can also measure upper body power (with a plyometric push-up) and use it as an electronic timing system for sprints and shuttle runs, and the one I used could measure multiple jumps.

Vertec Jump Mat
Image 2. Two major devices in the evolution of jump testing: the Vertec and the contact mat.

Because an entry-level contact mat costs about the same as a Vertec and is more versatile, I’ll focus on testing with this device for the remainder of this discussion.

Fine-Tuning Jump Testing

As a starting point for personalizing your jump testing program, consider the sample testing form in image 3. The vertical jumps are ones I’ve been using for more than two decades, and the field tests are the ones used by Gabriel Mvumvure when he was a sprint coach at Brown University. Together, they provide an extensive assessment of athletic fitness for a sprinter.

Jump Testing Report
Image 3. Testing form for vertical jumps and specific field tests for a female sprinter.

Note that all the vertical tests were not performed monthly to save time. Rather, the vertical jump with arms is performed more frequently to give a general estimate of progress and determine if additional tests need to be performed. One of the problems with testing too frequently is that it can consume 1–2 days of practice time, and athletes often slack off on their training during the days before the test to score better.

One of the problems with testing too frequently is that it can consume 1–2 days of practice time, and athletes often slack off on their training during the days before the test to score better. Share on X

I organized the tests in this order for consistency. However, if a multiple jump test is included, it should be performed last because the fatigue it creates could influence the results of the other tests.

Let’s take a closer look at these vertical jump tests, along with some tips on improving their results:

1. Vertical Jump (No Arms)

Description: A standing vertical jump without the assistance of the arms

Athletic Quality: Leg power

Discussion: In many sports, such as hockey, the legs produce power without the arms extending over the head. Because it’s tempting to cheat with the arms at your sides, I have athletes perform this jump with their hands on their hips.

You can also use this test to measure an athlete’s strength deficit, providing insight into whether an athlete needs to focus on strength or explosiveness. I’ve read Eastern Bloc textbooks that use medicine balls of various weights to measure the strength deficit. If there is little difference among the distances the med balls are thrown, an athlete may need to work on explosiveness, such as with plyometrics. It can also suggest that an athlete is overtrained, so modifications must be made to the volume and intensity of their workouts. I saw a dramatic example of the need for such testing when I took Dr. Don Chu’s weight training class at California State University in the early ’80s.

Chu had three athletes perform a chest pass with a 16-pound medicine ball for distance. Two athletes were football players, and I recall one could bench press 380 pounds and the other 400. The other athlete was a javelin thrower who went on to make the Olympic team, weighed about 165, and allegedly only visited the weight room when he was looking for someone. The result?

The football player who benched 400 tossed the med ball 32 feet, and the other tossed it 28 feet. The javelin thrower tossed it 42 feet before it hit the wall! Even though this test was similar to a bench press motion, the football players’ relatively slow strength training methods didn’t develop the explosiveness that the javelin thrower’s training did.

As for jump training research on lower body explosiveness, one study compared the vertical jumps of powerlifters and weightlifters using body weight and an additional 44 pounds and 88 pounds of resistance. The researchers found that the weightlifters performed better in all three tests. Even though the powerlifters can usually squat more than the weightlifters, their training does not transfer as well to dynamic movements.

Although a weight vest can be used to test the strength deficit, the jump can be performed with a barbell on the shoulders (image 4). This method enables you to quickly and precisely add additional resistance, such as one-eighth of body weight and one-quarter of body weight. A hex bar can also be used (image 4). Athletes may find a hex bar more comfortable; however, the jumps may be higher because the traps are more involved.

Bar Jumps
Image 4. Jumps with weights can determine an athlete’s strength deficit. At the left is a squat jump with a barbell across the shoulders, and at the right is a hex bar jump. (Left photo by Joel Moran; right photo by Steve Kinslow, BFS)

2. Vertical Jump

Description: A standing vertical jump using the arms

Discussion: Using your upper body increases vertical jump height, which supports the idea that some upper-body training may be necessary to achieve maximum results in the vertical jump.

With sprinting and plyometrics, asking heavily muscled or overweight athletes to perform high-intensity/high-volume sprint or plyometric workouts is asking for injury. Box jumps are a safer alternative, where athletes jump onto a box and step (not jump) down. They are still performing an explosive concentric contraction, but there is minimal stress as their landing is only a few inches. Video 1 shows a conventional box jump and a weight-release box jump that provides a form of contrast training (post-tetanic potentiation).

What types of plyo boxes are best?

Solid boxes are better than open metal boxes because an athlete’s feet can easily get caught in an open plyometric box. With a solid box, an athlete’s feet slide down if they don’t jump high enough. The metal boxes tend to be cheaper, but the risk of injury may not be worth the savings.

A pyramid shape is more stable than a rectangular design (image 5), and a non-slip surface on the top makes it even better (although it increases the price). Also, with some plyometric boxes, a “booster” can add a few inches of height. Rather than purchasing higher boxes or boosters, some coaches will place thick bumper plates on top of plyo boxes, which should be considered a new level of stupid. This dangerous practice puts the athlete at a high risk of a horrific injury—Google “box jump fail” if you doubt me.

Box Jumps
Image 5. Box jumping is a proven method of increasing vertical jumping ability. Solid pyramid boxes are more stable and safer than open boxes. (Photos courtesy BFS)

Sturdy foam boxes with a cloth covering are the best option (video 1), and many have Velcro to enable them to be securely stacked. Foam boxes are solid, and there is little risk of scraping your shins on the edges of these boxes (and I’ve seen some ugly scrapes in my day—one so bad that the bone was exposed!). The downside is that they are about twice the cost of wood boxes. However, the stacking feature reduces costs because they can be combined to create different heights.


Video 1: Foam boxes prevent scraping the shins and can be stacked securely. A conventional box jump (note the athlete steps down) and a weight-release box jump are demonstrated.

Next, there is weightlifting, and the jumping abilities of throwers and weightlifters testify to the value of these exercises for increasing leaping ability. I prefer the full lifts over the power versions, but both will increase the vertical jump and are less stressful for heavier athletes than many forms of jumping or plyometric training.

Because jerks are a more complex movement, another option is the push jerk, which can be performed by removing the barbell from squat racks (video 2). These movements work the ankle differently than cleans and power cleans, so I encourage athletes to perform some overhead work for more complete development. Because many sprint and jump coaches are reluctant to have athletes squat or perform any lifts from the floor during the season, push jerks are a good alternative because they produce less lower-body fatigue.

I must emphasize that push jerks (and jerks) are not upper-body strength exercises such as the military or bench press but dynamic lower-body movements involving a plyometric component. Share on X

I must emphasize that push jerks (and jerks) are not upper-body strength exercises such as the military or bench press but dynamic lower-body movements involving a plyometric component. Case in point: When I was 17 and weighed about 180, I jerked 335 pounds overhead but missed a 205-pound bench press in that same workout.


Video 2: Push jerks are an effective weight room exercise for increasing vertical jumping ability. The bar can be removed from squat racks or cleaned first.

3. Vertical Jump-Step

Description: A vertical jump using a one-step approach

Athletic Quality: Elastic properties of the lower extremities, particularly the soleus (lower calf muscle)

Discussion: This test involves taking one step and then jumping.

German sports scientist Dietmar Schmidtbleicher is one of the foremost experts on plyometric training. He says there are two basic types of jumping actions, which he refers to as stretch-shortening cycles. “Two types of stretch-shortening cycles exist, a long and a short one. A long SSC (e.g., jump to throw in basketball, jump to block in volleyball) is characterized by large angular displacements in the hip, knee, and ankle joints and a duration of more than 250ms. A short SSC (e.g., ground contact phases in sprinting, high jump or long jump) shows only small angular displacements in the above cited joints and last 100–250ms.”

This difference in stretch-shortening cycles was apparent in my work with figure skaters. As with high jumpers, figure skaters transfer horizontal speed to the vertical with a short stretch-shortening cycle. When only two females had landed a clean triple axel jump in competition, I tested the vertical jump of a Chicago female skater who did a triple axle in a practice session at the Olympic Trials. Her best vertical jump with a step: 18 inches!

Additional options to train this athletic quality include box jumps with one or multiple steps and, of course, bounding exercises. Chu’s classic book, Jumping into Plyometrics, demonstrates many jump variations. As shown in image 6, narrow foam barriers can be easily stacked, decreasing the risk of injury.

Hurdle Jumps
Image 6. Horizontal jumps can be performed with many barriers, including hurdles or these narrow foam barriers that can be stacked. (Photos courtesy BFS)

4. VJ-RT and VJ-LT

Description: A single-leg vertical jump

Athletic Quality: Determines muscle imbalances and foot arch function

Discussion: Muscle imbalances are considered a risk factor for injuries. There has been considerable interest in looking at strength ratios of the quadriceps and hamstrings using leg extension/leg curl machines. Sports scientists later expanded on this idea to include muscle imbalances between each leg. Let’s look at an example of how vertical jump testing can be used to assess imbalances.

With figure skating and the hurdles, the landing leg is often stronger than the takeoff leg because of the higher eccentric stress. In his senior year in high school, hurdler Bretram Rogers suffered a severe hamstring injury that he elected not to have surgically repaired but required many months of rehab. To avoid muscle imbalances, particularly for a hurdler with such an injury history, I included a lot of unilateral exercises in his workouts, and Coach Mvumvure addressed this issue in his sprint workouts. In his senior year at Brown University, after the indoor season, he jumped 24 inches on his right leg and 24.5 inches on his left. During the outdoor season, Rogers broke the 62-year-old outdoor record in the 110m hurdles.

I’ve also found that deficiencies in single-leg jumping ability are often caused by weakness in the muscles that extend (plantar flex) the foot and the muscles of the feet. I say this because by using postural insoles that stimulate the nerves in the feet to reform the arch, I’ve seen as much as 2 inches of improvement in single-leg vertical jumping and up to 3 inches in double-leg jumping in about 15 minutes with male athletes. (FYI: For a better assessment of arch function, I often have athletes perform single-leg vertical jump tests barefoot. Shoes often provide support that gives a false assessment of the postures of the arch.)

To better assess arch function, I often have athletes perform single-leg vertical jump tests barefoot. Shoes often provide support that gives a false assessment of the postures of the arch. Share on X

As for corrective exercises, using a mini-trampoline can be valuable for improving the function of the ankle during dynamic movements. Paul Gagné developed one series of box jump exercises using a mini-trampoline, which can also be performed barefoot (video 3). Says Gagné, “Yes, sports are played on a flat surface, but the elastic qualities of the mini-trampoline help improve the timing of the ankle and foot during dynamic movements, thus helping to avoid injury and improve athletic performance.”


Video 3: Single-leg trampoline jumps to a box help develop body awareness and timing to improve performance and prevent injuries.

5. Depth Jump

Description: Jumps performed off a platform

Athletic Quality: Fast eccentric strength

Discussion: Depth jumps are often used to develop the fast eccentric strength necessary to change directions in sports. Although some coaches have set specific heights using variables such as age and training experience, it’s better to be as specific as possible.

The depth jump test shows at what height jumping results decrease to help determine what height platforms you should use for depth jumps, which are high-intensity exercises (images 7a, 7b, and 7c). Thus, if your max depth jump height is 15 inches, you should keep your depth jumps to 15 inches or less in practice. Using a platform that is too high reduces the plyometric training effect because the athlete will spend too much time on the floor, dissipating much of the stored energy. (An analogy is downhill running. If your hill is too steep, you will expend too much energy braking.)

Depth Jumps
Images 7a, 7b, & 7c. Depth jumps involve stepping off a platform (not hopping, not jumping) and immediately rebounding. (Photos courtesy BFS)

I once tested the vertical jumps of female gymnasts at an elite training club and found that many of these athletes were jumping higher without a step. This could be due to the lack of progressive overload in eccentric contractions, so exercises such as depth jumps could be useful in improving this athletic quality.

For example, I trained a 15-year-old gymnast who could vertical jump 22 inches with and without a step. After two months, she still had identical results in the vertical jump both without and with a step but was up to 24.6 inches. Because she was training 25+ hours a week, I could only add two 15-minute jump training sessions per week, and many weeks she could not handle any additional jump training due to a demanding competition schedule. Six months later, she jumped 26.5 without a step and 27.5 with a step. Had she not been practicing gymnastics, my guess is that there would have been a greater difference in the two measurements. 

Bonus Test #6. Lewis Formula

Description: Vertical jump and bodyweight formula

Athletic Quality: Power

Discussion: While sprinting speed is coveted in many sports, body weight must also be considered when assessing an athlete’s power. Case in point: New England Patriots running back Rhamondre Stevenson.

Stevenson participated in the 2021 NFL Combine, where the best 40 times for a running back was 4.38. Stevenson covered the distance in 4.64, ranking him 31st in that position. Nevertheless, he was considered one of the League’s best last year, with 1,040 rushing yards and 431 receiving yards. The difference is that Stevenson weighed 231 pounds.

Stevenson is better built to plow through an offensive line and break tackles than, say, a 185-pound running back who runs the 40 in 4.50. (FYI: The running back who ran 4.38 in that NFL Combine weighed 175 pounds. Although an accomplished college athlete, he spent most of his NFL rookie year on the practice squad and was waived the following year.)

The point is that besides sprinting speed, coaches should consider an athlete’s power. Power can be assessed with the Lewis formula (see my article on athletic fitness testing). The Lewis formula determines power with a formula that combines an athlete’s body weight and vertical jump. Stevenson had a 31.5-inch vertical jump, making him an especially powerful athlete. The Lewis formula would also be valuable for shot putters and discus throwers.

In the shot put, Ryan Crouser holds the current world record at 76.8 1/4 feet/23.38m (image 13). He weighs 319 pounds and has a 34-inch vertical. In 1988, Ulf Timmermann broke the world record with 75.6. At 262, he had a 36-inch vertical. In the early ’80s, when I lived in California, I trained at the Iron Works Gym in San Jose and worked at the San Jose YMCA. Among those accomplished throwers I often saw were Al Feuerbach (image 8b), Brian Oldfield, Mac Wilkins, Art Burns, and Richard Marks. These men are the athletic embodiment of power.

Throwers
Images 8a & 8b. Throwers often have impressive vertical jumps. Shown are shot put world record holder Ryan Crouser, who has a 34-inch vertical jump despite weighing 319 pounds, and former world record holder Al Feuerbach, who was an impressive long jumper and became a national champion in weightlifting. (Feuerbach photo by Bruce Klemens)

Additional tests many of these contact mats can provide are 60 jumps to measure muscular fatigue and four consecutive jumps to measure reactive ability. In the four-jump mode, the athlete jumps four times as quickly and as high as possible. The software will determine the average ground contact time and average jump height. This data has a specific application to basketball.

Chu said that in basketball, particularly women’s basketball, it’s often not the person who jumps highest who gets the rebound but those who can jump higher on the second, third, or fourth attempt to grasp the ball. As a result, Chu developed a specific jumping drill with a medicine ball to emphasize this athletic quality. (FYI: Chu was the strength coach for the Golden State Warriors for several years.)

As a matter of full disclosure, the 60-jump test is one I’ve never used. Instead, I did a double-leg 12- and 16-inch lateral box jump test for 90 seconds (which I learned from Chu). I found this test correlated well with the anaerobic endurance test used at the Air Force Academy with its football players. Their test involved three consecutive quarter-mile runs with a 60-second rest between reps.

Rise of the Force Plate

Technology has provided us with many exciting new methods of testing vertical jumps, including force plates that assess how you jump and fiber optic techniques that determine how you land. The data collected from these tests is believed to help determine an athlete’s risk of specific injuries, including those to the upper body. One system analyzes the forces produced by breaking down the three phases of a vertical jump (eccentric, isometric, and concentric).

Technology has provided us with many exciting new methods of testing vertical jumps, including force plates that assess how you jump and fiber optic techniques that determine how you land. Share on X

Brandon O’Neall is the head strength coach at Brown University. O’Neall has been an advocate of using the latest technology to enhance performance, incorporating velocity-based training systems with Brown athletes since he took the top position in 2011. Brown University recently acquired one of these sophisticated force plate systems, and it will be interesting to see what his data tells us.

Getting back to the present, there may be other jump tests you like that I didn’t mention, and certainly, there are many other athletic fitness training methods to improve jumping ability than the ones I’ve discussed. The takeaway is that by fine-tuning their vertical jump testing program to make it more sports-specific, a coach can better assess the physical preparedness of their athletes. From here, they can reevaluate their training methods to help athletes overcome weaknesses and achieve the “highest” levels of athletic performance.

Since you’re here…
…we have a small favor to ask. More people are reading SimpliFaster than ever, and each week we bring you compelling content from coaches, sport scientists, and physiotherapists who are devoted to building better athletes. Please take a moment to share the articles on social media, engage the authors with questions and comments below, and link to articles when appropriate if you have a blog or participate on forums of related topics. — SF


References

Goss, K. “The Case Against Stability Training.” Bigger Faster Stronger, March/April 2007.

Loturco I, et al. “Relationship Between Sprint Ability and Loaded/Unloaded Jump Tests in Elite Sprinters.” Journal of Strength and Conditioning Research. March 2015;29(3):758–764.

Hackett D, Davies T, Soomro N, and Halaki M. “Olympic weightlifting training improves vertical jump height in sportspeople: a systemic review with meta-analysis.” British Journal of Sports Medicine. July 2016;50(14):865–872.

Schmidtbleicher D. “Training for Power Events.” Strength and Power in Sport, 1992. pp: 381–395.

Chu, D. Jumping into Plyometrics, 2nd Edition, August 1, 1988. Human Kinetics.

Gagné, P. Personal Communication, February 2023.

Track and Field All-Time Performances Homepage, alltime-athletics.com.

Stone, Michael and O’Bryant, Harold. Weight Training: A Scientific Approach, Burgess International Group, Inc. 1984 pp. 166–168.

Saraland Weight Room

Facility Finders: Saraland High School (Saraland, AL)

Blog| ByJohn Delf-Montgomery

Saraland Weight Room

Today we visit the Saraland High School 10,000-square-foot mega facility, located just outside of Mobile, which houses an incredible indoor turf area and an even better weight room facility. Coach Jon Hersel, in his sixth year at Saraland High School, leads the Sports Performance department and this incredible multipurpose facility! Coach Hersel, the 2019 NHSSCA Alabama Coach of the Year, brings over 20 years of experience in the field, including previous stints at LSU, York Comprehensive School, and IMG Academy.

Saraland Racks
Image 1. The full run of the 5,000-square-foot weight room.

Design

Coach Hersel trains up to 120 athletes at a time in this weight room, which he is able to do because of the setup of the facility. Saraland has 10 full rack/half-combination racks—meaning that on the side closest to the wall is a full cage rack, and the side closest to the platforms are only the half racks with spotter arms.

PLAE installed 20 platforms that are seamless in the ground; it’s a choice I love for the ability to still have flat flooring to space all of those athletes out safely, says @johndelf99. Share on X

PLAE was hired to handle all of the flooring, and they installed 20 platforms that are seamless in the ground; it’s a choice I love for the ability to still have flat flooring to space all of those athletes out safely. Coach Hersel programs the room in four sections: his athletes start from the far left of the room and work to the right of the room, which allows the flow of the space to handle the large groups of athletes that pour in.

This facility is the optimal way to plan a space: the 5,000-square-foot turf facility can be used for warm-ups, speed work, and also as a backup practice area. The 5,000-square-foot weight room is designed similarly to a galley kitchen, where the four stations are set up in a straight line instead of moving all over the weight room. A bonus of having the double racks (from Wright Equipment) is that Saraland saved money and space for 20 rack stations, which typically take up a lot of square footage in the weight room.

“I wanted the room to be able to flow well and take advantage of having access to our covered turf to incorporate sprints, jumps, and medicine ball throws,” Coach Hersel said, “which is the reason why we have the full/half rack combos as well as the platforms.”

Rack Accessories
Image 2. A close-up of the racks at Saraland.

Purchasing

This project was a district plan to help improve their athletics as well as offer a tornado protection shelter (being in Alabama, that’s important). Wright Equipment was selected at the state bid level, which is what coaches deal with sometimes with a weight room project. This process means that companies bid to be able to outfit the space (and then are typically chosen by the district and not by the strength coach who is the professional working in that space). These decisions can often come purely down to cost, but fortunately, in this case with Coach Hersel, Wright won the bid, and they are an excellent option for weight rooms, offering the ability to customize.

I don’t see many racks that feature full branding on the rack—you always see the shields on the backs of the racks—but the racks at Saraland have their “pillars of success” on the sides of their base and their fronts. Wright also follows the new industry norm of 3×3 steel racks with 1-inch holes, so if there is a specialty attachment that Coach Hersel wants from many of the bigger companies that make those tools, they will work on these racks. Because he works with so many different teams and athletes, it is important to have extra bars, multi-grip bars, and safety bars on every rack.

“All of our full/half rack combos have two standard Olympic bars,” said Coach Hersel. “In addition, they also have a multi-grip and safety squat bar, while our storage units have our open-ended hex bars, Thompson Fatbells, landmine attachment, and DC blocks.”

Equipment Rack
Image 3. Storage racks and specialty equipment at Saraland High School, including Thompson Fatbells.

Specialty Equipment

Safety bars, trap bars, and multi-grip bars are still considered specialty bars because of the wide range of options available, but they are becoming a more standard addition in new facilities.

One newer and more revolutionary type of equipment that Saraland has invested in is the Thompson Fatbells. If you have never heard of these (pictured in image 3 under the med balls), they are essentially hollowed-out kettlebells with which you can do any exercise you can perform with a dumbbell. The weight encases your hand instead of being above/below your hand like traditional dumbbells.

With this being a high school, it’s also only fitting to see a smart education board/TV in the weight room—which I think is an elite way to deliver the programming with some of the iPads Coach Hersel uses. This piece of technology is a rarity, and the ability to interact with athletes and the program can be beneficial.

Finally, the turf field joined with this facility can also be used as a specialty piece of equipment, with the ability to do sled work, med ball throw work, and integrated speed work with training. Y’all, I am jealous.

Olympic Lifts
Image 4. The last section of the facility is used for Olympic and accessory movements.

Coach’s Tips

The district had been planning this facility for a while. Although Coach Hersel was not involved in every decision—which is more normal than we would all like to admit—the space is really special. I know many performance coaches outwardly make it look like their department is the frontman and decision-maker for projects like this, but the reality is that budgets, dimensions, and outside relationships have more of an influence than the fact that we are the experts in this area for our schools.

The reality is that budgets, dimensions, and outside relationships (often) have more of an influence than the fact that we’re the experts in this area for our schools, says @johndelf99. Share on X

Sometimes, all we can really do is offer our advice, hope to help the decision-makers make the best choice, and then hope to get the equipment we need to run the program that the individual coach wants to run.

“Space and multi-use equipment are, in my opinion, the two most important things that you need when designing a facility,” Coach Hersel said. “Those as well as equipment, because you don’t usually get the opportunity to renovate or rebuild multiple times.”

Since you’re here…
…we have a small favor to ask. More people are reading SimpliFaster than ever, and each week we bring you compelling content from coaches, sport scientists, and physiotherapists who are devoted to building better athletes. Please take a moment to share the articles on social media, engage the authors with questions and comments below, and link to articles when appropriate if you have a blog or participate on forums of related topics. — SF

Bryan Mann CVASPS

CVASPS Seminar Q&A Series: Bryan Mann

Blog| ByJay DeMayo

Bryan Mann CVASPS

When attendees are asked whom they’d like to see return to The Seminar, my good friend Dr. Bryan Mann is always at the top of the list. Dr. Mann has been on the docket multiple times at CVASPS and has contributed several fantastic chapters to The Manual as well.

A highly driven professional who is always pushing on the research side to help practitioners better understand how to be more productive with the time we get to work with our athletes, Doc is also as humble as they come. He has been a sounding board for me throughout my continued development as a coach, impacting me in ways I can’t even describe. As great of a coach, teacher, and researcher as he is, he’s a first-team “All Good Guy” in my book as well, and I couldn’t be more excited to sit down and listen to his latest thoughts.

CVASPS: What are a handful of the mistakes you routinely see made by strength and conditioning coaches in the United States and worldwide, and what specifically do you feel should be done differently to correct these issues?

Bryan Mann: I think probably the biggest mistake is that people aren’t looking at their own athletes and their own data. They are listening to what others are saying and sharing, but I think there is often a lack of examination of what they are doing. I think there could be a lot said for simply categorizing your athletes into things like age, strength level, performance level, injured or not, and performing really basic statistics like correlations or t-tests and seeing what happens for your groups.

The biggest mistake S&C coaches are making is not looking at their own athletes and data. Instead, they are listening to what others are saying and sharing, says @jbryanmann. Share on X

I can’t tell you how many times I’ve looked at the research and then gone and performed my own tests and found that my athletes and the researcher’s subjects did not match at all. Why did they not match? It could be a plethora of things. It could be that your style of play is different.

I often remark about the transition between Quinn Snyder and Mike Anderson at the University of Missouri basketball program back in the mid-2000s. Quinn Snyder had his style of offense, and Coach Anderson brought in “the fastest 40 minutes” style, like his mentor Nolan Richardson. The athletes who were used to Coach Snyder’s style of play did not do well with Coach Anderson’s style of play. Those not used to full court pressing and flying around the entire time wore down quickly and were often injured. Likewise, I’d wager that those who did well in Coach Anderson’s style of play may not have been as successful with Coach Snyder.

What I’m saying is that it’s not just the sport but the style of play within the sport that dictates what type of athletes you will need and who will be successful. It could also be that the level of athlete is different. Remember, there’s a reason that not every athlete in high school is a college athlete, and college athletes often vary across divisions. If you’re looking at NCAA Division III athlete research—where the rules are very different for how they can train—and trying to apply it to the NCAA Division I athlete who has every opportunity to enhance their performance, the outcomes may be very different. This could be due to genetics, training age, and other factors.

I’m saying that it’s not just the sport but the style of play within the sport that dictates what type of athletes you will need and who will be successful, says @jbryanmann. Share on X

At the end of the day, you have a responsibility to examine your data and see what happens. While you should have expectations based on the research out there, you should also be open to examining what happened in your data. See what happens for your people—does everyone respond in the same manner? If you’re running a single program: Did you do a force-velocity profile pre and post? How did that look? Did the people whose data was similar respond in a similar manner or different? Did everyone who was at a force or velocity deficit respond in the same manner? Did everybody of all of the training ages respond in the same manner?

Most often, the answers to these questions are no, and then it’s fun to figure out why. Once you figure out why, stratify your athletes accordingly and (re)apply the scientific method.

Most people will probably say, “I need SPSS and a bunch of additional skills. I don’t have time to do that.” Well, not so much. Most statistics you can do in Excel with some formulas. If you’ve got some coding background, R should be easy to pick up, and it is a free and powerful statistical tool. The statistics can also be done anytime, anywhere.

CVASPS: What advice would you give a coach to improve their knowledge as a process of continuing education? By which I mean, can you point our readers in a few concrete directions to find the scientific and practical information to improve the methods used to improve performance?

Bryan Mann: Go to the people who innovated the method, not those who imitated it. There are so many people out there who will call themselves an expert but have never done anything. Don’t follow or look at them. Look at the trailblazers. The Al Millers and Al Vermeils, the Yuri Verkhoshanskys, the Issurins, Boscos, Bondarchuks, and Kraaijenhofs of the world. These are the people who have been there, done that, have the t-shirt, and also probably gave it to someone else since they’ve got 10,000,000 of them.

I’d recommend using Google Scholar and Research Gate. Google Scholar is a Google search engine that only searches research articles as opposed to general articles. Research Gate is like Facebook for researchers (or it’s supposed to be). I don’t get on it much, but many people put their work on there for free. It’s a great place to get articles.

If you work in higher education, combine Google Scholar with your university’s library website. Find the article on Google Scholar, as its search engine seems to be better than the library one (at least for me). If the article isn’t available for free, search for it on your library site. It will then find it through its subscriptions and can also do interlibrary loans, where someone scans the article and sends it to you.

Also, I recommend looking at some of the resources people have already put out on specific topics. Find out who the top people are in the area you wish to examine and go find the resources that those people have already put out. Passionate people will put forth clues that everyone else can use to not have to reinvent the wheel. That’s why we started with cave art and then went on to books.

Discover the top people in the area you wish to examine and find the resources those people have already put out. If you really like someone’s info, buy their books and courses, says @jbryanmann. Share on X

If you have someone whose info you really like, buy their books and courses. I can speak for myself in saying that I go into much greater detail/depth with the books and courses I’ve done than what I’ve put out in a tweet or an IG post.

After you’ve done all of that, see where the overlap lies. There is your truth. This is the concrete direction—where everyone in different areas agrees.

CVASPS: For readers unfamiliar with your history, can you provide some background on your niche in the world of athletics, the educational/career path you took en route to your current role, and any notable publications, courses, or products you have available that you’d like to direct readers toward to dive deeper?

Bryan Mann: I’ve been in college S&C since 1998. I started as a student assistant under Rick Perry at Southwest Missouri State (now Missouri State), and within a couple of weeks, I had my own teams. Realize S&C in 1998 wasn’t like today. There was one guy and 500 athletes, so if someone could competently turn the lights on, you had a good role. I happened to know how to do the exercises and spot the exercises, and I had read enough about how to write programs that I hit the ground running pretty quickly.

From there, I interned under Joe Kenn at Arizona State and Pat Ivey when he was at Tulsa, and then back to Rick and SMS. The following spring, in 2004, Pat got the job at Missouri, and I went and worked with him for 15 years there before coming to Miami as a professor—and now, director of sports science and an associate professor. I’m not someone who likes tooting my own horn, but I’ve got a couple of books out there on VBT, a course on it through Stronger Experts, and some content on Strength Coach Network. I’m currently working on getting a plyometrics course and a “deep diving with your data” course, where we will examine relationships between tests and how to use equations to get more out of what you’re already doing.

CVASPS: Can you provide a sneak peek at the topic you will be covering at The Seminar as well as a few useful takeaways on the presentation for those who may not be able to attend?

Bryan Mann: I’ll be talking about force-velocity profiling and how to do it in a meaningful way that won’t kill your time budget.

CVASPS: What’s one question or topic that no one ever thinks to ask you about (or that tends to be under-discussed across the board), and what would you like to add on that subject?

Bryan Mann: I’d like to get up on a soapbox and say that your first priority should be to be a good person and help others be a good person first—winning in sport should be secondary to this. If we would all work together for the common good rather than for our own gain—in real life, on social media, in the metaverse, or wherever—that’s how we all win and push ourselves forward.

If we’d all work together for the common good rather than for our own gain—in real life, on social media, in the metaverse, wherever—that’s how we’d all win and push ourselves, says @jbryanmann. Share on X

It’s basically Game Theory, and the guy who created it won a Nobel prize for it. If we’d quit the infighting of who’s most right and work toward what’s best for everyone, we’d have a lot more questions answered. I believe it was Harry Truman who said, “It’s amazing what can be accomplished when no one cares who gets the credit.”

Since you’re here…
…we have a small favor to ask. More people are reading SimpliFaster than ever, and each week we bring you compelling content from coaches, sport scientists, and physiotherapists who are devoted to building better athletes. Please take a moment to share the articles on social media, engage the authors with questions and comments below, and link to articles when appropriate if you have a blog or participate on forums of related topics. — SF


Mentor and Mentee

Making Mentorship a Two-Way Street: Finding the Power in Stories

Blog| ByMatt Tometz

Mentor and Mentee

This is the story of how I don’t actually remember asking my mentor to be my mentor. Here’s the scene: it’s the end of August before I head off to start graduate school and I’ve coached at the same facility the prior two summers. The Director of Coaching and I always have great conversations, he asks insightful questions, and I genuinely enjoy our interactions. He’s helped me learn and grow beyond just the regular coaching hours, giving advice and direction for my time spent outside the facility. And just like every other young professional, I’ve heard about the importance of having a mentor…except, at this point, no one ever elaborated much beyond that. I never heard about how to find a mentor, how to be a good mentee, or examples of what mentorships look like in real life.

But hey, in theory, it all made sense to me.

Going into grad school with a full ride to be a graduate assistant was simultaneously exciting and nerve-wracking—I’m viewing this as my first actual job in the field. In order to maximize those two years, I know I need help to be the best GA I can be. I need someone who has already done the things that I want to do and someone to provide an unbiased opinion as I accumulate all these first-time experiences. A few days before my departure, about to move over 1,000 miles away from home, I decide I’m going to ask the Director of Coaching to be my mentor. Already having game-planned and rehearsed what I wanted to say, I walked up to him, nervous, heart racing, and reminded myself not to talk too fast.

“I’ve really enjoyed our conversations these last few years and as I go off to graduate school, I’d love for you to be my mentor.”

“Sure, that sounds great. What’d you have in mind?”

“I don’t really know. I just know having a mentor is important.”

This, of course, is pieced together from the bits and pieces I do remember and him retelling me that conversation an entire year later.

Deciding to ask for a mentorship was one of the best things I did as a young professional. At first, our mentorship was nothing more than being email pen-pals and connecting every two or three weeks, but I had someone who “gets it” that was in my corner. The one story I vividly remember from our emails was me almost deciding to leave grad school after barely being there for 30 days.

Deciding to ask for a mentorship was one of the best things I did as a young professional, says @CoachBigToe. Share on X

That first month, I spent an overwhelming majority of my time reading research papers on bar speed, power, and cluster sets of training (and, mainly, squatting). In and of itself, there’s nothing wrong with that. But coming from a coaching/applied background and knowing what I wanted to do (coach), as well as how this role was described to me initially…it just didn’t line up.

My thoughts were, “How do I tell them I’m leaving?”, “What do I even say to justify leaving?”, and “What am I supposed to do when I get back home?” I was miserable, didn’t know what to do, and there was no light at the end of the tunnel—a calm panic would be an accurate way to describe what I felt. I communicated this all over a few emails with my mentor, hoping for an answer (and, honestly, his approval to quit and come back). In response, a simple phrase came across my screen: “The grass is always greener on the other side.” A few other insightful comments followed, along with advice to “Stick it out a little longer, because you never know what could happen.”

Fast forward two weeks—everything changed. I started working with a few sports teams, I wasn’t stuck in a lab all day, and it started feeling like why I wanted to go there in the first place. And that was the beginning of an amazing experience in graduate school. Who knows if I would’ve stayed if I didn’t have the opportunity to express myself, feel heard and understood, and receive advice from an experienced professional?

I’m fortunate enough that this person has continued to tolerate my persistent question-asking to this day and that I can still receive mentorship. Not to give myself too much credit, but beyond simply wanting and seeking advice, I’ve done a bunch throughout our time together to make the mentorship more of a two-way street to maximize it for both of us. In this article, I’m going to share the two action steps that I always made sure to complete that have greatly accelerated and improved the mentorship experience. Additionally, I’ll be sharing the two biggest reasons why this strategy is incredibly valuable for both you and your mentor.

Steps & Strategies

Although this was never an explicit conversation—nor something written out as a deal to officially be a mentee—I settled on two simple but effective action steps. As the mentorship went on, the cycle I found us in was:

  1. I had topics and ideas I wanted to talk about.
  2. I took the advice that was given to me and acted on it.

Doing steps one and two then gave me ideas for the next topic to talk about. Rinse and repeat. It was this feed-forward momentum of conversation, action, conversation, action that built on itself week after week.

Then, as I continued to grow as a professional and the topics of our discussions shifted towards leadership and mentorship, I received feedback about how powerful it was that I took action on almost everything we talked about. I had no master plan at the time—simply put, we had a conversation and the solution made sense, so I acted. But looking back, there would’ve been no growth for me or the mentorship if it ended when the conversation ended.

I received feedback about how powerful it was that I took action on almost everything we talked about, says @CoachBigToe. Share on X

Step One: Be prepared

Odds are, if your mentor is someone you find valuable enough to have as a part of your journey, they already have a lot going on and their free time isn’t always the most abundant. It’s your responsibility to make your time together as valuable, efficient, and effective as possible.

1. Know what you want to talk about. This is not to say that every minute of your meetings needs to be planned out, but even just having a few topics ready beforehand is going to give so much more structure and better results. Something is better than nothing, the more specific the better, but set both yourself and your mentor up for success by coming prepared. The last thing you should ever do is meet simply because it’s your “usual time to chat,” come in unprepared, and assume you’ll both be satisfied by the end.

  • There are two types of topics: theoretical and real life. Theoretical topics are general ones like “off-season periodization” or “managing different athlete personality types.” Which to the general mentee, might seem specific enough. But that’s similar to someone asking me as a Speed and Performance Coach “How do I get faster?” Yeah, that’s a topic, but where the heck am I supposed to start? You can have general topics, but you need specific contexts.
    For example, if I wanted to become a college strength and conditioning coach, here’s how I would present a topic with a specific context: “Let’s talk about off-season periodization in the college setting, and how about for a fall sport like football and spring sport like baseball.” Then, to take this to the next level and be even more prepared, I’d look up the football and baseball team’s schedules from Northwestern University (my local Power 5 school, for example) and use those dates. That meeting is going to be immensely efficient and also effective by the end.
  • The second type of topic is real life. If you are in a mentorship, I’m assuming you have a job/assistantship/internship that you’re working each day. This should give you plenty of opportunities on a weekly basis, if not a daily basis, to come up with examples to discuss. Be conscious of topics arising from your daily life and write them down before you forget.
    For example, I was recently on a consulting call about speed training with the performance staff at a university. It went well enough: not awful, but not amazing, and in the end I wasn’t satisfied with the closing of it all. I brought that to our next meeting along with the notes I had taken, and shared the story from beginning to end. The entire next hour was a whiteboard talk clarifying where it went wrong and brainstorming ways to handle that situation in the future. I had closure on the topic and tools to help me navigate my next call like that. The lesson being: “How do I close the deal when consulting for universities?” paired with “Here’s this detailed and specific example that just happened to me, can we go through it, please?” will set both you and your mentor up for incredibly more successful conversations.
  • Lastly on this topic, it’s important to note the theme that it all comes back to real life and it aligns with where you want to go. Theoretical examples are rooted in real life contexts, and pursuing your goals gives you real life examples.
Theoretical examples are rooted in real life contexts, and pursuing your goals gives you real life examples, says @CoachBigToe. Share on X
  • 2. Take notes. This does NOT mean be glued to your notebook or laptop during your meetings or that you need to write down word for word the entire conversation. But taking notes is a simple way to expedite the learning process and set you up for more success in the future. Additionally, having to ask the same questions multiple times because you forgot your mentor’s answers isn’t very professional and shows you don’t really find the answers valuable enough to remember. Even if you dedicate 10 minutes after every conversation to summarize the topics and main conclusions while the thoughts are still fresh, that’ll yield much greater results than just assuming you’ll remember everything later on.

    • Below is an example of notes I took after a conversation with my mentor. For the record, the legibility of my handwriting does not reflect my ability to write articles or coach athletes….

    Mentorship Notes

    • Eight total bullet points took me five minutes, including some underlining and bracketing for what stuck out to me the most. If you’re actively listening (as you should be), you should be able to concisely summarize each chunk of conversation in a bullet point or two. It’s titled, dated, and concisely summarizes what we chatted about. My brain works by writing stuff down, but the more you do it you’ll learn what clicks for you.
    If you’re actively listening, you should be able to concisely summarize each chunk of conversation in a bullet point or two, says @CoachBigToe. Share on X

    Step Two: Act on the advice

    This is the most important one. A good mentorship is a two-way street and this is your opportunity to hold up your half of the bargain. You are seeking advice because you want to improve—you receive the advice so you should act on it to bring it to life.

    For example, I was chatting with my mentor about the value of the autonomy of coaching in the private sector and my facility at that time. As long as I know what direction I want to go as a professional and in my career, I can be as creative as I want to be with my athletes and fellow coaches to help me get there. Of my wanting to pursue sports science combined with speed development, he said, “As long as the athletes don’t get hurt, they do get faster, and they want to come back (which are all the basic tenants anyways) and whatever you want to do falls in the scope of our programming, go be a mad scientist. Every session you do can be an ‘experiment.’ Then document it and talk about it.”

    My first “experiment” was “Are athletes faster when they race?” It was something we always said, but something I wanted to KNOW. Not to repeat the article I wrote detailing the process, but I slightly modified what we were already programming (which included racing), collected the numbers, and talked about what I found. In that moment it didn’t seem like much, but looking back, that’s what mentorship is and should be: an open conversation about wanting to achieve something more, a collaboration in brainstorming, and then action.

    On the flip side, not acting on advice from a mentor is like not following a nutrition plan for weight loss that you paid for: you might feel good in the moment because you bought the plan, but at the end of the day and many weeks/months down the road, you’ll still be in the same spot you were when you started. Additionally, what kind of message is that sending to your mentor when you accumulate all this time together only to NOT act on the advice? Either that you don’t believe them or don’t actually want to improve. In either case, that mentorship probably won’t last long. When a conversation with your mentor is finished and you’ve both determined an action plan for the advice, do it.

    When a conversation with your mentor is finished and you’ve both determined an action plan for the advice, do it, says @CoachBigToe. Share on X

    Being prepared and taking action brings a pair of benefits:

    Benefit #1: You are providing value back to your mentor.

    As I mentioned, mentorship is a two-way street. People choose to help others because it makes them feel good, they’re “giving back” to young professionals, and it inspires them in return. But eventually, those feelings can fade. You can only take (their advice, their time, their knowledge) for so long until it becomes completely lopsided if they aren’t receiving any value in return.

    Consequently, by acting on the advice of your mentors, you create stories for them as well. From mentoring you, they now have mini case studies where their advice is tested. They’ll learn what works, what doesn’t, and receive your feedback along the way. Then, when it’s the next time for you two to chat, you’re not only bringing engaging topics, but also anecdotes and feedback to elevate the conversation.

    For example, my mentor and I were discussing how social media and building a personal brand are significant foundations for growing as a professional nowadays. My mentor always says that the positive results of consistently posting are unquantifiable. As you subtly become part of the social media algorithms and people see you consistently enough, they’ll reach out to you when something comes up. Then, from there, it snowballs and builds.

    As you subtly become part of the social media algorithms and people see you consistently enough, they’ll reach out to you when something comes up, says @CoachBigToe. Share on X

    Our staff did a seven-day social media posting challenge. I was successful in my seven days and shortly after was asked by a follower to be on a podcast; then, shortly after that podcast was posted, a professional soccer team reached out about consulting. This is not only proof of concept, but also a powerful story that my mentor can now use for the power of his beliefs on social media.

    Saying this isn’t intended to take away from the authenticity of a mentorship; not all motives and interactions are transactional, this all happens subconsciously. But the value the mentor receives in return changes over time: they go from feeling good for giving back to receiving actionable intel. Make your mentorship as much of a learning opportunity for them as it is for you.

    Benefit #2: You start to create and accumulate your own stories.

    How engaging would it be to listen to a podcast if the guest just recited their notes from Strength and Conditioning Theory 101 or Advanced Exercise Physiology? Probably not very engaging…but what if the guest shared their personal stories about applying that training theory to different age groups or how they applied that exercise physiology knowledge but had developed their own more practical version from doing it with a bunch of athletes? Probably much more engaging. The point is we all have the same information, but what makes someone interesting and intelligent is their lens and twist on that information based on their personal experiences.

    I think one of the hardest parts about starting as a young professional, whether it be interviewing, trying to network with other professionals, or even mentoring coaches younger than yourself, is not having your own stories. You can really only speak on theory, what you’ve read in a textbook, and what the standard coaching answer would be. You don’t have enough experiences (aka stories) and anecdotes to share your own perspective. So, when it comes time to answer a tough interview question or share about your current situation when connecting with others, you need your own perspective, beliefs, and relatable stories to stand out and show that you actually know what you’re doing.

    A former intern from my current facility is now a full-time strength and conditioning coach at the college level. He reached out wanting to discuss programming for top speed training. He came with specific examples of what he was doing and his first round of potential solutions. We discussed how many sprints per session depending on the time of year (pre-season, in-season, off-season), days of the week, and how to evaluate the data.

    But the tone of the conversation flipped when I asked, “At how many flying 10-yard sprints do you start to hold your breath and get a little nervous that it’s too many reps?” He said, “I don’t know, 6 or 7. How about you?” This is when it switched from textbook talk to sharing my own experiences. We talked about my successes and findings from being creative with our top speed training, what I seem to always come back to despite all the variations, and what I’ve found from the data of my own athletes.

    My advice resonated more with him because it wasn’t a one-and-done statement, it was advice followed by “and here’s why: (insert real life experience).” Although that anecdote might or might not be a direct result of me being mentored, it’s an awesome example of patience (something my mentor reiterates often, and I’m rolling my eyes just thinking about trying to be patient), knowing that I wouldn’t have been able to have that conversation and give that advice without all the stories I accumulated while coaching.

    My advice resonated more with him because it wasn’t a one-and-done statement, it was advice followed by ‘and here’s why: (insert real life experience),’ says @CoachBigToe. Share on X

    Takeaways

    Mentorship is a two-way street and just showing up to your meetings and saying you want to get better isn’t enough. That’s not going to maximize your time together, nor set you or your mentor up for as much success as you could. Instead, be prepared and take action. You must come prepared with questions and topics and take notes along the way. Then, your homework is to act on the advice and find out for yourself the truth of the advice in real life. Finally, come prepared to your next chat by bringing those results so they can learn too.

    One of the stories my mentor references the most—and one of the stories I’m most proud of—goes like this:

    On a random November evening, I’m outside doing yardwork and come back inside to find a voicemail on my phone. The message is from a very well-known coach in the field—in fact I own his book—and at first I almost don’t believe it. Once the shock fades, I pause and think to myself, “Wait, how the heck did they get my number?” Then I listen to the voicemail and hear that they’re calling about a job opening and want to gauge my interest.

    But that’s not the crazy part…the crazy part is how they got my number. A technology company recommended me for the job…but not just any technology company. This company I had worked with on a variety of projects and whose products I had created content about for my own brand. This all combined as a demonstration that my knowledge, expertise, and professionalism were deemed worthy enough to recommend me to the coach. Not to go into the specifics, but this is a perfect example of connecting with and working hard for the right people, making good content geared towards where you want to go, and being patient (insert eye roll if you must). Those three things are some of the biggest themes of our mentorship together.

    I know that my mentor uses me, the advice he has given me, and the stories I’ve created from our time together when it comes time for him to share his own experiences and anecdotes on leadership. And that’s how it should be. So not every session has to be ground-breaking and change the coaching world, but ask yourself every few meetings or after a big project, Would my mentor be excited to share this story with others? And if so, you’re on the right track.

    Since you’re here…
    …we have a small favor to ask. More people are reading SimpliFaster than ever, and each week we bring you compelling content from coaches, sport scientists, and physiotherapists who are devoted to building better athletes. Please take a moment to share the articles on social media, engage the authors with questions and comments below, and link to articles when appropriate if you have a blog or participate on forums of related topics. — SF


  • Plyo Pushup

    A Complete Upper Body Power Training Guide

    Blog| ByBrandon Holder

    Plyo Pushup

    In the chaotic world of competitive sports, upper body power is required to successfully strike, block, throw, and absorb the high-impact forces that occur throughout the upper extremities. If these areas aren’t adequately prepared, it can lead to consequences down the road, increasing the potential risk of injury to the wrists, elbows, and shoulders.

    Although the body should be trained as one system, specific upper-body-focused training may sometimes be necessary. Combat athletes (such as boxers and mixed martial artists), football linemen, and baseball, softball, and volleyball athletes may require additional attention due to the dynamic actions required of the upper limbs in these sports or positions.

    Upper body power development should receive a similar amount of focus as the lower body. Programming upper-body-specific power exercises in training programs is a start. This article will lay out exercise options with that goal in mind and explain how to implement them into a training program.

    Training Considerations

    The upper body will follow the same training principles that apply to the lower body: progress movements from slow to fast, general to specific, low to high intensity, and so forth.

    The force-velocity curve and breakdown of extensive- or intensive-based movements still hold the training accountable. Differences between their two body segments will determine how your athletes respond to the training and the rate of their exercise progression.

    Even if you’re not purposefully training the lower body for power, chances are high that athletes already have a much better base build in comparison to their upper half. Share on X

    Even if you’re not purposefully training the lower body for power, chances are high that athletes already have a much better base built in comparison to their upper half. Considering that we live our lives on our feet, play sports with high impacts on our lower body, and hopefully had great childhoods where we played and jumped off tall structures…our lower body has already been exposed to high demands.

    When prescribing upper body power exercises, start at a lower training volume and intensity. Progressing exercises only when appropriate will help keep everyone injury-free throughout the training process.

    Extensive Upper Body Training

    Extensive-based movements are performed at submaximal levels with the intention of fluidity, rhythm, and quality of exercise execution. Think of these exercises as building up the training base. This is done to build resiliency and robustness in the upper body and to prepare better for the more aggressive intensive exercises to come.

    Medicine Ball Extensive Series

    Training extensive qualities of the upper body can be challenging compared to the lower body. As mentioned, you cannot load the upper body with as much volume, and there aren’t as many viable options, such as skips, hops, and jumps, as performed with the lower body.

    Medicine balls will be the star when training these qualities—specifically, rubber-encased, hard-shelled medicine balls. One that, when you forcefully throw it at a wall, bounces back at you with equal force for you to absorb.


    Video 1. Athletes can perform these throws to the wall from the chest, overhead, or forehead position, as well as with various starting positions and speeds. They can perform them for repetitions or for time. These movements are fantastic to help create upper body rhythm and timing.

    Regardless of the exercise, when performing it, stand around an arm’s length away from the wall and maintain a strong body position—nothing should be moving except the upper extremities performing the exercise.

    Perform with a lighter medicine ball of 4–6 pounds before progressing, but even then, these movements aren’t intended to be done with a heavy medicine ball. Keep the repetitions around 5–10 per exercise and 2–4 sets per session. When performing for time, I saw these first through Mike Tucker’s annual Sprinttember plan. Perform them off the clock: 10 seconds on, 20 seconds off, for 3–5 rounds. 

    Intensive Upper Body Training

    Intensive-based movements are performed maximally, in lower volumes, with the intent to increase power outputs. When programming these more powerful exercises, it’s important that athletes perform them as violently as possible.

    When programming these more powerful intensive-based movements, it’s important that athletes perform them as violently as possible. Share on X

    Medicine Ball Intensive Series

    Medicine balls will be used again here, but this time focusing on throwing maximally as opposed to making fluid and rhythmic throws.

    Still, use a lighter medicine ball—6–8 pounds, depending on the exercise—and focus on releasing the ball as violently as possible. The throws here will be done for 10–20 total repetitions per workout. You can progress to heavier medicine balls, 10–15 pounds, but don’t forget that the ball must be blasting out of the throws.


    Video 2. Several throws will be performed from a kneeling or supine position to ensure that the upper body is the primary mover, but don’t feel you need to be limited. You can utilize countless variations; the video demonstrates a few commonly used exercises.

    Sled Training Options

    Using the sled to train upper body power with movements such as presses and rows can be beneficial to isolate the upper half. However, if I had to choose only one exercise with the sled, I would go with sled throws.


    Video 3. Essentially, use the sled the way we did with the medicine balls: starting on the knees, focus on pushing the sled away from the body as explosively as possible. You can progress this by performing the throw as you fall into a push-up position.

    Follow similar training recommendations for these exercises, 10–20 total repetitions per series.

    Push-Up Depth Drop Series

    Similar to depth drops, the push-up depth drops should only be programmed for individuals who have built up a strong base of training and upper body preparation. If the athlete struggles to perform bodyweight push-ups, this would not be an appropriate movement.

    The series will progress upon each movement, starting with just a simple drop and catch and then leading up to the full drop and rebound:

    • Push-Up Depth Drop—Catch
    • Push-Up Depth Drop—Catch, Rebound with Pause
    • Push-Up Depth Drop—Rebound

    Start with 8–10 total reps, and increase the volume before progressing to the next level. Ensure that the athlete can demonstrate control throughout the exercise.


    Video 4. I recommend performing these exercises off a height of around a few inches. A pair of 45-pound bumper plates, or small boxes around a similar height, works great.

    Increasing the height of the drop would not be my main priority with this exercise, but it could be appropriate in certain cases. 

    Drop-and-Catch Chin-Up Series

    The drop-and-catch chin-ups follow the same guidelines as the push-ups. I would only use this exercise with those athletes who are fully prepared and have a high training age.


    Video 5. Keep in mind that just because an athlete can do something doesn’t always mean they should—if the juice isn’t worth the squeeze for this exercise, there are plenty of other options.

    Assisted Plyometric Push-Ups

    If used correctly, overspeed training methods can be very effective: apply this to the push-up with just a resistance band. Loop the band across the safety pins of a power rack a few notches above the ground and start with the band slightly under the chest.


    Video 6. When performing an assisted plyometric push-up, drop down explosively and focus on pushing the body away from the ground.

    The amount of force required to withstand the return down will be beneficial enough, along with exposing the upper body to this higher output. This can also be introduced by first performing with a pause between repetitions or by performing off a bench to create a more advantageous starting position.

    Perform for 10–20 total repetitions per series.

    Concentric-Only Training

    Barbells and dumbbells certainly have a place in this training guide. Performing some of our tried-and-true movements, such as presses and rows from a static position, is a fantastic way to isolate the concentric portion of the movement.


    Video 7. For each exercise, set up the implement on pins or blocks around the starting position. This position can get more specific if necessary to meet the needs of the individual or sport.

    Each exercise will be performed from a complete dead stop. Perform the concentric portion as fast as possible. Then, control the implement, returning it to the starting position. The movement should be at a complete rest, back in the dead stop position, before performing the next rep.

    If performing a set of five, for example, break up the set so it seems to be five individual reps.

    Programming

    Understanding how to program these exercises with the larger picture in mind is important. Having exercises that can be solutions to a problem is great, but if not applied appropriately, they could do more harm than good. Start by assigning basic movements, and progress steadily throughout the year. If working with individuals one-on-one, you can tailor this specifically to their needs; but even in a larger team setting, these movements can be laid out efficiently.

    Some variables to consider when programming for upper body power are the individual, needs of the sport, and time of year. Share on X

    Every situation will be different, depending on several variables—when in doubt, though, err on the side of caution for exercise and volume prescription. Some variables to consider when programming for upper body power are the individual, needs of the sport, and time of year.

    Time of Year

    When training upper body power in athletes, keep these four phases of the year in mind.

    Off-Season

    The off-season is set up to make strides in developing for the upcoming season. This time ideally should be the longest period devoted to physical preparation (with less time dedicated to the technical and tactical preparation of the sport).

    The off-season should be used to primarily train extensive exercises. There still needs to be some intensive training focus, but this time is to build the base for the future.

    Train extensive qualities spread out 2–3 times per week, following the guidelines listed in the exercise. One to two intensive-based movements are appropriate but dependent upon the individual.

    Pre-Season

    This is the final stage, ramping up to the season. By this point, training for upper body power should begin shifting to more intensive-based exercises. Focus on specific high-output movements that will prepare athletes for the demands of their sport.

    Train intensive-based qualities twice a week, following the guidelines listed in the exercise. Train extensive-based movements throughout the warm-ups as necessary.

    In-Season

    In-season training is unique to each situation. The focus is on maintaining health and keeping the athletes available throughout the season. While we want to keep a grasp on training for power, it is important to examine what the sport itself may be providing.

    The ability to perform all the dynamic actions of the upper body is vital to fully prepare our athletes for competition. Share on X

    For example, if working with an offensive lineman in-season—who is getting plenty of upper body reps on the field in the trenches of the line—then you should use your training program to aid the on-field work and not continue to pile on additional volume of the same.

    Prescribing even 1–2 intensive- or concentric-based exercises per week can go a long way. The nature of the exercise will limit muscular soreness and help develop or maintain power qualities: a win-win situation.

    Post-Season

    Immediately following the competitive season, I recommend stepping back from training and allowing the body and mind to recover. If there is training happening, I would keep volume and intensities low and focus on extensive exercises.

    These are just some very general training guidelines. Every situation will have its own unique set of problems to solve, but these are some guidelines to offer a start to your training layout.

    Final Takeaways

    The ability to perform all the dynamic actions of the upper body is vital to fully prepare our athletes for competition. Implementing upper-body-specific training doesn’t have to alter a program completely. Utilize the exercises and principles shown throughout this guide to develop power qualities in the upper body successfully.

    Since you’re here…
    …we have a small favor to ask. More people are reading SimpliFaster than ever, and each week we bring you compelling content from coaches, sport scientists, and physiotherapists who are devoted to building better athletes. Please take a moment to share the articles on social media, engage the authors with questions and comments below, and link to articles when appropriate if you have a blog or participate on forums of related topics. — SF


    • « Go to Previous Page
    • Page 1
    • Interim pages omitted …
    • Page 25
    • Page 26
    • Page 27
    • Page 28
    • Page 29
    • Interim pages omitted …
    • Page 164
    • Go to Next Page »

    Primary Sidebar

    FEATURED

    • Using Speed and Power Data to Bucket and Train Faster Athletes
    • Plyometric Training Systems: Developmental vs. Progressive
    • 9 (Fun!) Games to Develop Movement Skills and Athleticism

    Latest Posts

    • Rapid Fire—Episode #15 Featuring Kyle Brown: What is Universal Speed Rating (USR)?
    • Why We Don’t Perform Hang Cleans
    • 1080 Sprint: Four Essential Tips You Won’t Find in the Manual

    Topics

    • Adult training
    • App features
    • Artificial Intelligence
    • Athlete
    • Athlete performance
    • Baseball
    • Buyer's Guide
    • Career
    • Certifications
    • Changing with the Game
    • Coach
    • Coaching
    • Coaching workflows
    • Coching
    • College athlete
    • Course Reviews
    • Dasher
    • Data management
    • EMG
    • Force plates
    • Future innovations
    • Game On Series
    • Getting Started
    • Injury prevention
    • Misconceptions Series
    • Motion tracking
    • Out of My Lane Series
    • Performance technology
    • Physical education
    • Plyometric training
    • Pneumatic resistance
    • Power
    • Power development
    • Practice
    • Rapid Fire
    • Reflectorless timing system
    • Running
    • Speed
    • Sports
    • Sports technology
    • Sprinters
    • Strength and conditioning
    • Strength training
    • Summer School with Dan Mullins
    • The Croc Show
    • Track and field
    • Training
    • Training efficiency
    • Wave loading
    • What I've Added/What I've Dropped Series
    • Youth athletics
    • Youth coaching

    Categories

    • Blog
    • Buyer's Guide
    • Freelap Friday Five
    • Podcasts

    COMPANY

    • Contact Us
    • Write for SimpliFaster
    • Affiliate Program
    • Terms of Use
    • SimpliFaster Privacy Policy
    • DMCA Policy
    • Return and Refund Policy
    • Disclaimer

    Coaches Resources

    • Shop Online
    • SimpliFaster Blog
    • Buyer’s Guide
    • Freelap Friday Five
    • Coaches Job Listing

    CONTACT INFORMATION

    13100 Tech City Circle Suite 200

    Alachua, FL 32615

    (925) 461-5990 (office)

    (925) 461-5991 (fax)

    (800) 634-5990 (toll free in US)

    Logo of BuyBoard Purchasing Cooperative. The word Buy is yellow and shaped like a shopping cart, while Board and Purchasing Cooperative are in blue text.
    • Facebook
    • Instagram
    • Twitter
    • YouTube

    SIGNUP FOR NEWSLETTER

    Loading

    Copyright © 2025 SimpliFaster. All Rights Reserved.