• Skip to content
  • Skip to primary sidebar
SimpliFaster

SimpliFaster

cart

Top Header Element

  • Facebook
  • Instagram
  • Twitter
  • YouTube
  • Login
  • cartCart
  • (925) 461-5990
  • Shop
  • Request a Quote
  • Blog
  • Buyer’s Guide
  • Freelap Friday Five
  • Podcast
  • Job Board
    • Candidate
    • Employer
    • Facebook
    • Instagram
    • Twitter
    • YouTube
You are here: Home / Blog

Blog

Danney Ball

Game On: How to Play “Danney Ball”

Blog| ByAlan Bishop

Danney Ball

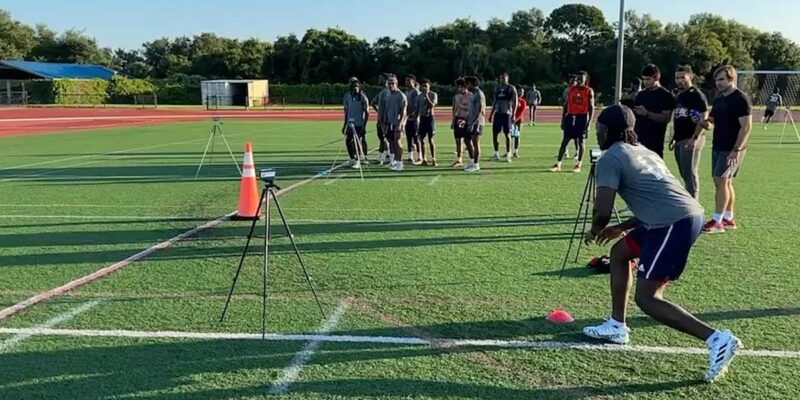
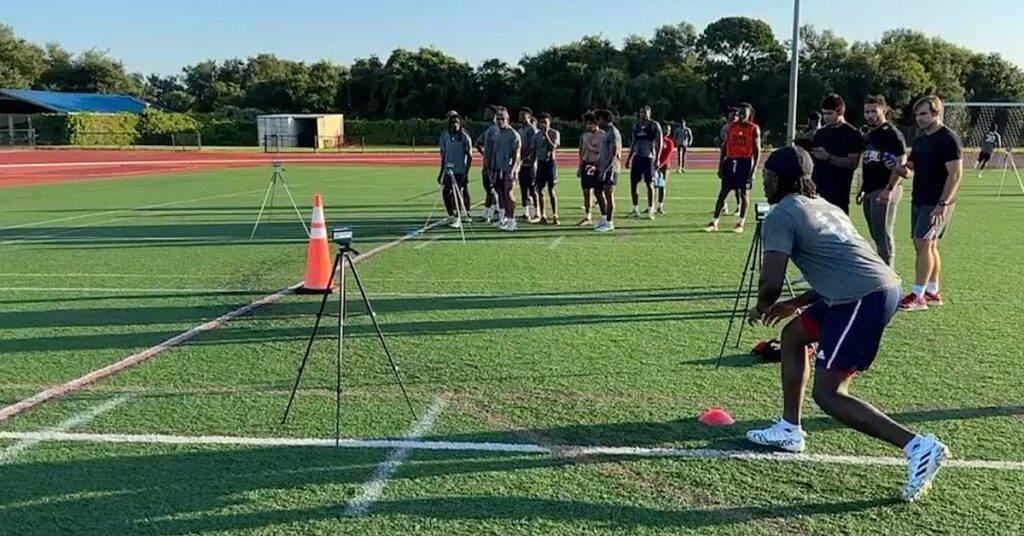
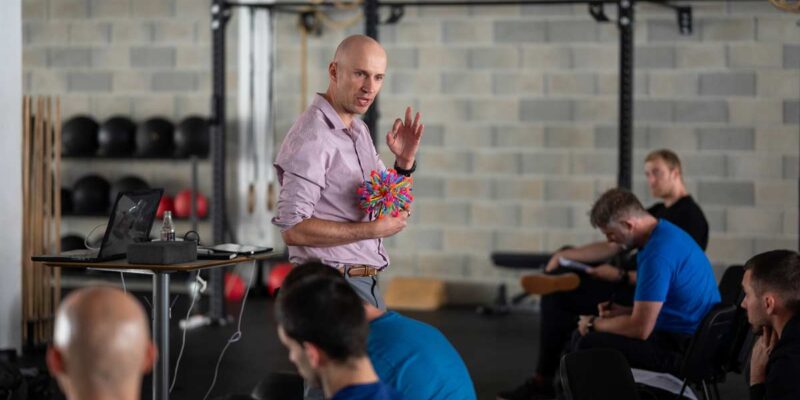
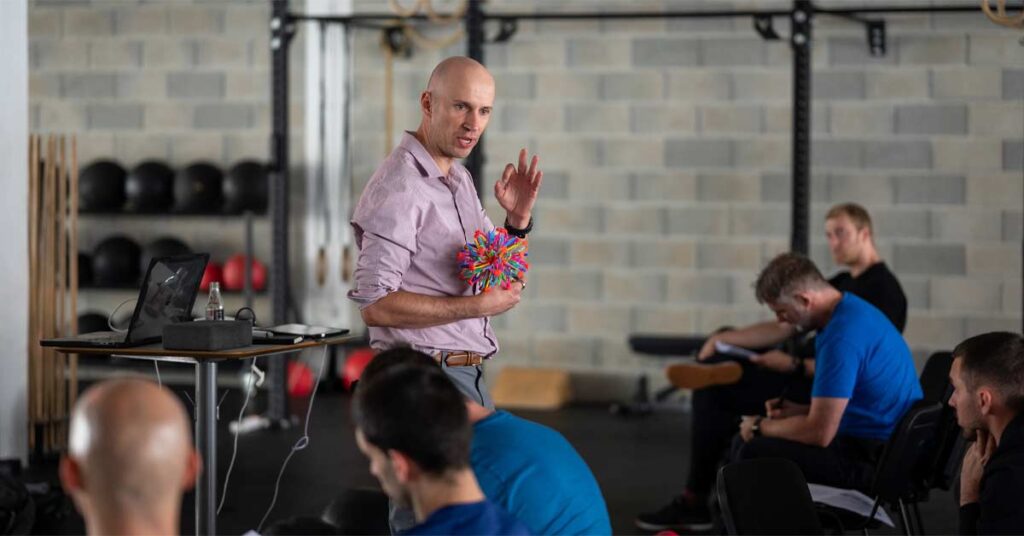
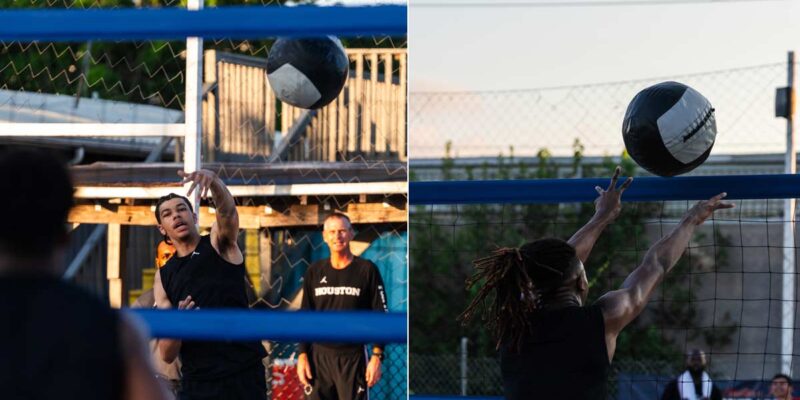
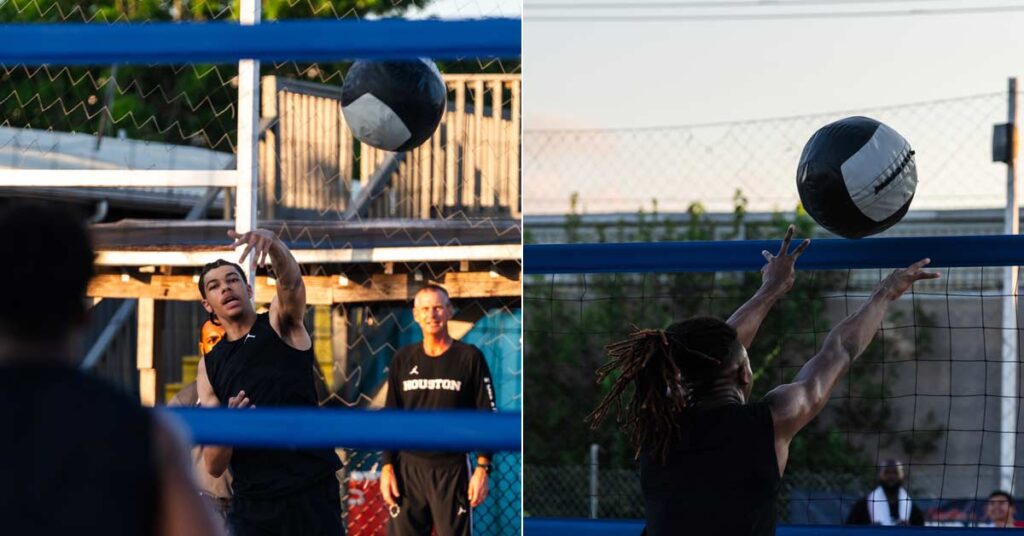
In the summer of 2016, videos began circulating of James Harrison out in the Arizona heat playing a grueling game of what looked like sand volleyball. The twist was that the four NFL players on the court weren’t bumping, setting, and passing a normal volleyball back and forth—they were catching and hurling a 12-pound medicine ball over the net. The game was called “Danney Ball” after its creator (and Harrison’s strength coach), Ian Danney.

James Harrison, the Super Bowl Champion and All-Pro linebacker, was gaining a great deal of attention in the off-season for his freakish feats of strength. Not only was the Danney Ball video circulating, but so were videos of Harrison doing 1,800-pound sled pushes, repping out 400-pound earthquake bar squats and 300-pound Duffalo bar bench presses, and making light work of hanging band technique Z presses. In the background of all these training videos was Ian Danney.

Make no mistake: the demonstrations of physical strength displayed by Harrison are incredibly impressive, but the insane amounts of weight being moved in the training videos weren’t what piqued my interest. I kept coming back to the game of Danney Ball, knowing there was something special there that I could use with my guys.

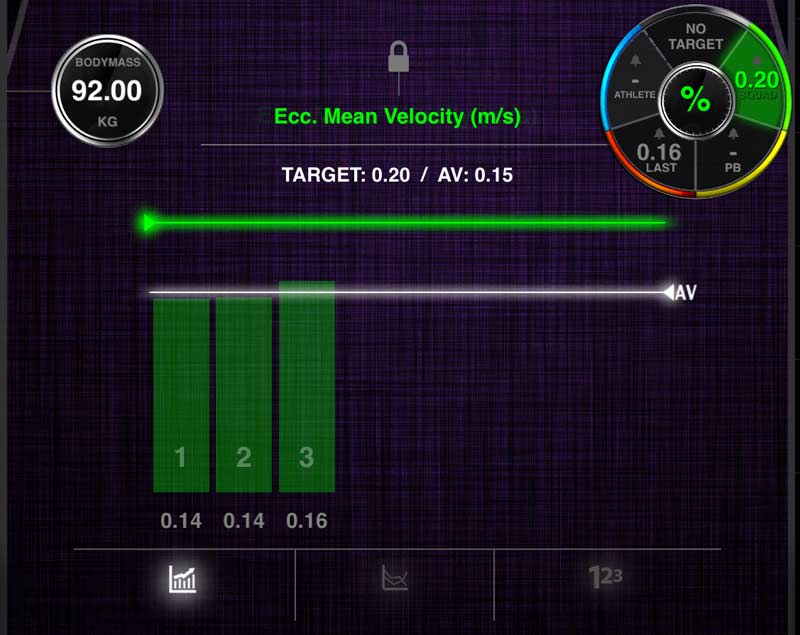
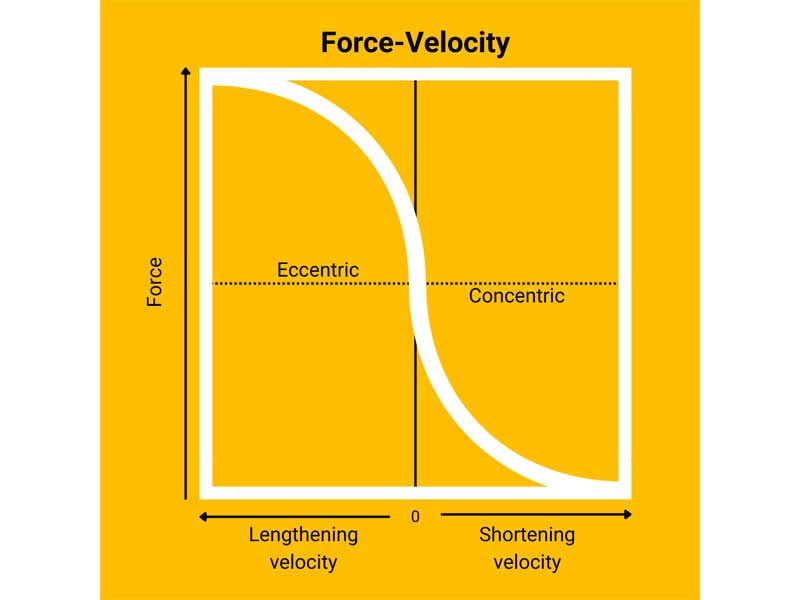
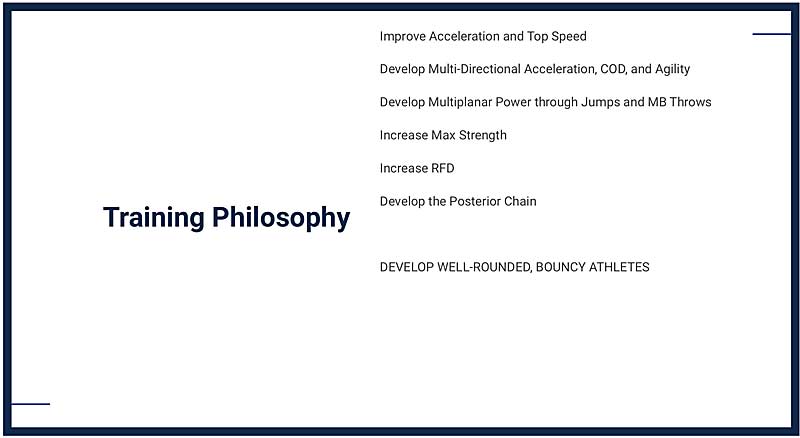
With Danney Ball, Ian Danney came up with one of the most competitive ways to surf the load-velocity curve using light loads in an intent-driven manner, says @CoachAlanBishop. Share on X

The load-velocity curve is an inverse relationship between the relative load (weight) used in an exercise and the effect that load has on the velocity (speed) of the exercise. A well-designed training program should, in the words of renowned strength coach Ben Prentiss, “surf the curve.” This means there should be time spent with heavy loads moving slow, light loads moving fast, and everything in-between. Competition and small-sided games have a unique way of positively influencing training intent, and in my opinion, Danney came up with one of the most competitive ways to surf the curve using light loads in an intent-driven manner.

The focus of this article is not to dive into the merits of med ball training, provide the latest training plans to surf the load-velocity curve, or debate weightlifting versus throws. My goal here is to recognize Ian Danney for his unique training method and provide a blueprint for other coaches to see how I’ve implemented the game with the athletes I train at the University of Houston.

Throw Catch Medball
Image 1. University of Houston basketball players competing in a Danney Ball tournament on a sand volleyball court using a 12-pound medicine ball.

Evolution of Danney Ball: Houston Basketball Style

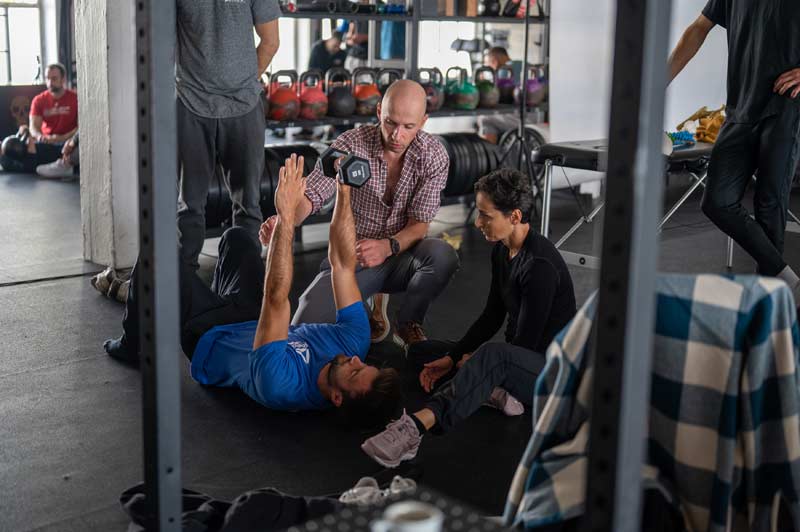
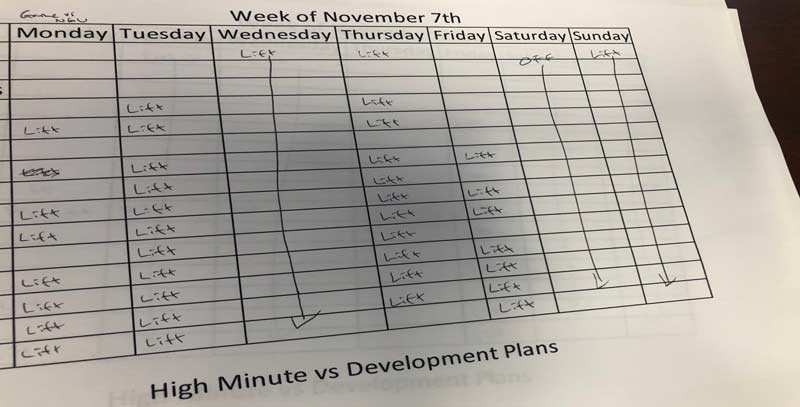
The NCAA permits Division 1 Men’s Basketball an eight-week summer calendar of off-season training. At the University of Houston, we follow the summer school academic calendar to get these eight weeks of training in. We split this time into four weeks of training in June and four weeks of training in July. I utilize these weeks for training dedicated to general physical preparation and the saturation of many physical attributes. We only have 32 training sessions during these eight weeks, and I don’t believe in wasting valuable days with nonsense training. These 32 sessions are pragmatically structured to try and elicit the greatest adaptations possible.

Danney Ball becomes an effective outlet to mix it up and have some fun but still get in a meaningful day of training, says @CoachAlanBishop. Share on X

That said, however, none of our players are here on a weightlifting scholarship. Make no mistake about it, we have a great training culture, and our guys work their butts off in the weight room. But they are there to play ball, and sometimes it’s nice to get out of the building for a change of scenery. This is where Danney Ball becomes an effective outlet to mix it up and have some fun but still get in a meaningful day of training.

View this post on Instagram

A post shared by Alan Bishop (@coachalanbishop)


Video 1. Danney Ball 2023, University of Houston Basketball.

What You Need and How to Play

Getting started is relatively easy. Here’s what you need to know.

Medicine Ball

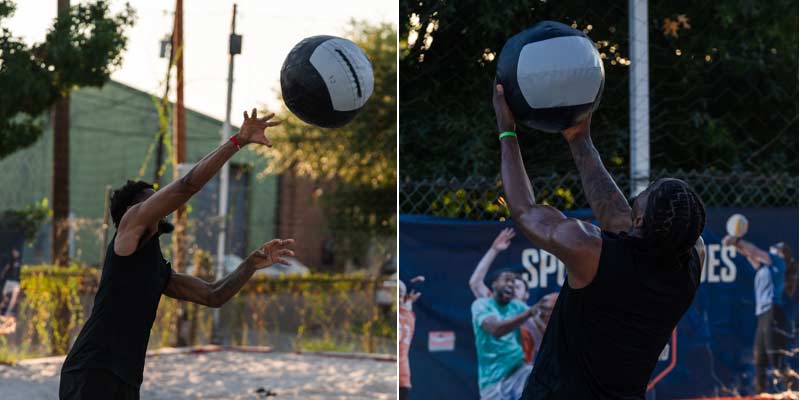
I’ve used both heavier and lighter balls, but I’ve come to the conclusion that 12-pound medicine balls work best with my players.

Playing Surface

We play the game on a sand volleyball court. I’m a big believer in the potential benefits of sand pit training for the foot and ankle, but for the sake of this article, I won’t get into that. Inevitably, a game of Danney Ball turns on a strategy of making your opponents sprint all over the court to wear them out. When played on sand, you’ll see far more effort in sprinting and selling out to catch the ball.

No player wants to land face first on a wooden court diving for a med ball, and no coach wants to lose their job because the starting point guard fractured their wrist diving on wood to catch a med ball in the off-season. For the most competitive and safe games possible, play on sand.

Teams

Each team consists of two players. In a perfect world, one of those players is an upperclassman, and the other is an underclassman. In an even more perfect world, one of those players is a guard, and the other is a big.

I’ve seen videos posted of other coaches playing different variations of med ball volleyball with up to six kids on each team, but this ultimately defeats the purpose of the game. Having more than two players on each team shrinks the surface covered by each player during the game and reduces the number of throws each player executes. I won’t budge on this—no more than two players per team.

Having more than two players on a Danney Ball team ultimately defeats the purpose of the game, shrinking the surface covered by each player and reducing their number of throws, says @CoachAlanBishop. Share on X
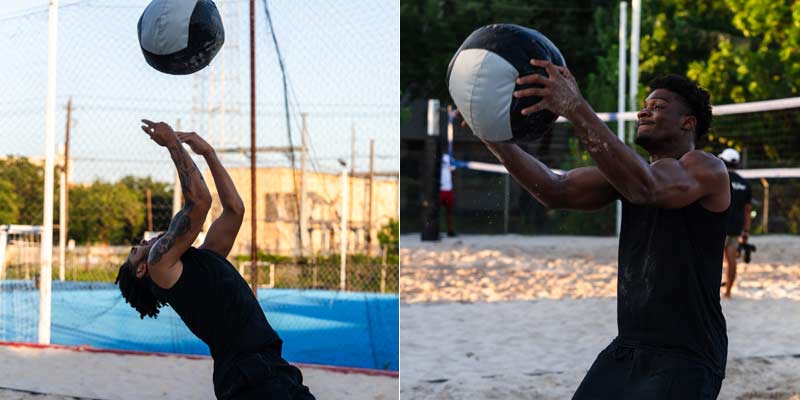
Overhead Serve
Image 2. Serving from a backward overhead throw that the opposing duo must catch and immediately return over the net.

Scoring

Each game is played to three points, “Rally Style.” This means a point is awarded every possession, keeping the speed of the games moving fast and making each throw/catch more meaningful. Once all games are played, we play a championship bracket with the championship game being played to five points.

Games

Teams compete in a round-robin tournament, with each team facing every other team one time. Once a team scores three points, they get the win. After all the round-robin games are played, the four teams with the best records play in a single elimination Final 4.

Round-robin schedule generators can be found online with a quick Google search.

Rules

Each serve is a backward underhand throw from outside the line.

After the initial serve, the ball is caught and immediately thrown back over the net. There is no passing to teammates. Whoever catches the ball must immediately stop where they catch it and throw the ball back over the net.

This is where some subjectivity comes into play. My rule is that players must make a best effort to stop immediately after the catch and immediately return the throw from where the ball was caught. This can get a little tricky as players start sprinting around the court—sometimes momentum carries them into an extra step after the catch. But as long as they make a legitimate effort to stop all momentum immediately and return the throw immediately, they’re fine.

An important nuance to emphasize before the game starts is that “out of bounds” for Danney Ball is based on volleyball rules, not basketball rules. In basketball, the ball is dead when a player or the ball touches the line. In volleyball, the ball is still considered “in” if it touches the line, AND players can touch the ball when they are outside the lines. This means players might catch the ball inbounds, but momentum carries them a step over the line—in this case, the ball is still live and can be returned. If a ball is thrown over the net and hits the line, the throwing team gets the point.

Like the key rules with any small-sided game, if these out-of-bounds rules aren’t established prior to the start of tournament play, you’ve set yourself up to listen to everyone argue for the next 10 minutes. ESTABLISH THESE RULES BEFORE THE GAME STARTS.

View this post on Instagram

A post shared by Alan Bishop (@coachalanbishop)


Video 2. Danney Ball 2023, University of Houston Basketball.

Shout-Out to History: Hoover Ball

Even though this article is meant to provide clarity on how to execute Danney Ball in a team setting, it is fitting to include a shout-out to President Hoover and his physician, Joel T. Boone.

In 1928, Hoover and Boone were returning from a trip to South Africa aboard the battleship Utah when they witnessed the sailors exercising with a game of “bull in the ring” using a medicine ball. I’m not an expert in the rules of 1920s naval exercise games, but the gist of it was that the sailor in the middle of the ring tried to intercept the ball being passed by the sailors on the outside. This game led to the creation of “Hoover Ball.”

Hoover Ball
Image 3. President Herbert Hoover playing “Hoover Ball” with a 6-pound medicine ball (photo in public domain via the Herbert Hoover Presidential Library and Museum and National Archives).

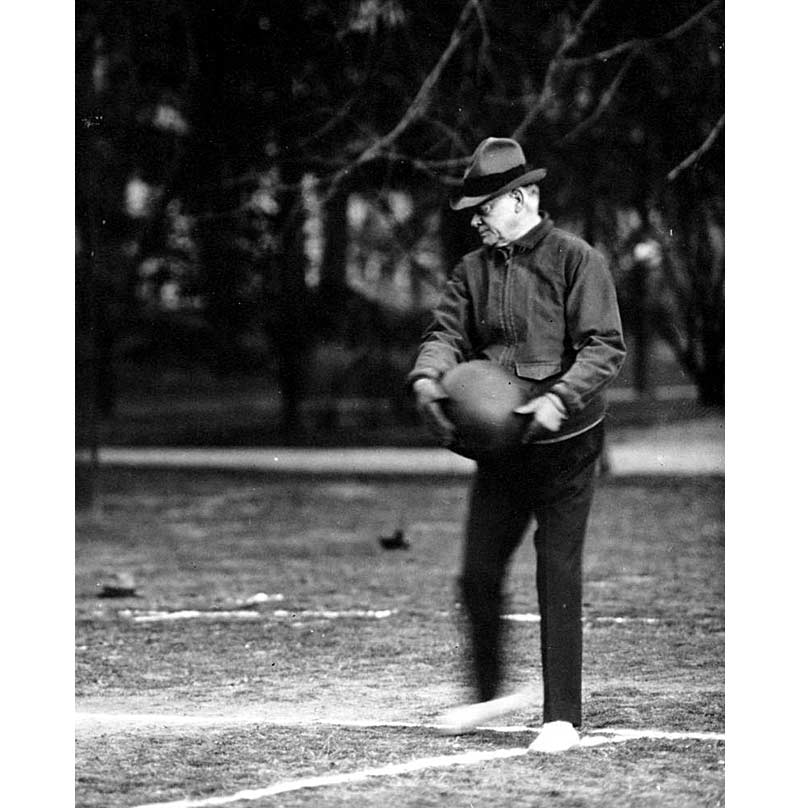
Hoover Ball was played on the White House lawn from 7:00–7:30 a.m. Monday thru Saturday, using a 6-pound medicine ball and an 8-foot net in a game with rules that have been described as a hybrid of volleyball and tennis. Teams consisted of 2–4 players. This was President Hoover’s preferred method of exercise, and by all accounts, he was extremely dedicated to his daily workout routine of 30 minutes of rigorous Hoover Ball.

I think it is fitting that this little bit of training history be included in the article to give credit to Hoover and Boone for their innovative approach to exercise. Including it also helps clarify that there are some subtle differences in how the games are played, which brings me to an important point. Whenever I post photos or videos of our guys throwing med balls on a sand volleyball court, the comments are always a combination of “young” coaches praising the game of Danney Ball and “old” coaches praising the game of Hoover Ball.

Whether you call it Danney Ball or Hoover Ball, the important thing is getting a great training session in, says @CoachAlanBishop. Share on X

I learned about the game from videos of James Harrison being coached by Ian Danney, so I call it Danney Ball. If you learned it from the Hoover archives and call it Hoover Ball, more power to you. The important thing is getting a great training session in, whatever you call it.

Since you’re here…
…we have a small favor to ask. More people are reading SimpliFaster than ever, and each week we bring you compelling content from coaches, sport scientists, and physiotherapists who are devoted to building better athletes. Please take a moment to share the articles on social media, engage the authors with questions and comments below, and link to articles when appropriate if you have a blog or participate on forums of related topics. — SF


Small Sided Games

Small-Sided Games: The Vaccine to Non-Contact Injuries

Blog| ByJoey Guarascio

Small Sided Games

Strength and conditioning coaches are always on a crusade for the holy grail, and like the myth, it is impossible to find. Like most innovation, it starts with a problem that needs to be considered with a different thought process to find answers. Strength and conditioning coaches seek to prepare athletes for the demands of the game so that they can be robust and resilient and perform at higher levels than before. Although this mythical program that can be deemed “the greatest” in athletic development doesn’t necessarily exist for everyone’s circumstances, S&C coaches are getting closer to solving their inherent problems with preparing athletes for the demands of the game.

Football is played five months out of the year, which leads to a huge chunk of time spent working on general abilities in the off-season. There’s a notion that strength and conditioning work removed from sports training for half the year hinders the growth of the athlete and lessens the transfer of newfound abilities into game play. You don’t win games by having the strongest team; you win games by having the most skilled team. Players will have to abandon the ladder or four-cone box drill, and the question the S&C has to ask is whether they are ready for the completely reactive environment associated with field sports.

Unlike many field and court sports, football out of season traditionally has less skill development—specifically in the area of small-sided games and agility training methods. In this series of articles, I will introduce progressions and drills that aim at attacking the training void between general training and specific training as it pertains to American football.

Agility and small-sided games are two crucial components of sports training. Agility refers to the ability to change direction quickly and efficiently in response to the environment, while small-sided games are modified versions of traditional sports that involve fewer players and smaller playing areas. Incorporating both training concepts into an off-season program will decrease the shock that accompanies the chaos of play and lessen the chance of injury.

Small-Sided Games: The Game Teaches the Game

The sport of football has been using small-sided games for years to help develop specific skills of the game, and by football, I mean soccer. Small-sided games reduce the number of players or field size from normal game play, and American football uses SSG in practice with inside run, 7-on-7, and even tackling drills. The use of SSG does not have to end once the season is over—in the off-season, it is critical to continue the skill development that accompanies SSG exposure. Using reduced field space in evasion/tracking drills will allow players to focus on position and get them valuable reps in a scenario that occurs frequently in game play. We will go through the progression in a later article, but readers should know that it does not require a complicated process of drill progressions:

  • Find a piece of the game that is common.
  • Reduce the players to focus the attention of the active participants.
  • Close down the field space to allow the players to work on specific skills.

By removing variables, players can really dial in on the specific techniques of the situation.


Video 1. Small-sided and reaction games in football training.

The Injury Issue

One of the greatest threats to the success of a team is injury. Injuries are an unfortunate part of the game, and there is no true way to completely prevent them outside of simply not playing. The S&C coach has to problem-solve injury trends and provide training that addresses the major issues accompanying the sport. While the term “injury prevention” is a fallacy, I truly do believe injury mitigation can be accomplished with the right training environment. Too often, we see a focus on general training leading up to the competitive season without the inclusion of full-speed, reactionary drills (SSG) and wonder why athletes get hurt in the first few practices of training camp.

Reaction and positioning go hand in hand, so to not bridge the gap between general and specific training is setting the athlete up for failure, says @CoachJoeyG. Share on X

Reaction and positioning go hand in hand, so to not bridge the gap between general and specific training is setting the athlete up for failure. In the research paper “Noncontact Anterior Cruciate Ligament Injuries: Risk Factors and Prevention Strategies,” the authors stated “Control over the dynamic restraints, independent of the motor control level, can be considered to occur both in preparation and in response to external events. Preparatory actions occur on the identification of the beginning of an impending event or stimulus as well as its effects, whereas reactions occur in direct response to sensory detection of effects from the arrival of the event or stimuli.” This is where the importance of SSG in preparation for specific conditioning plays such a pivotal role in the mitigation of non-contact injuries.

Football Injuries
Figure 1. A comparison of injuries in American collegiate football and club rugby. S&C coaches can get on the right path to mitigation by providing training modalities that address these problems. Data adapted from: Comparison of Injuries in American Collegiate Football and Club Rugby (sagepub.com)

Several other researchers have also spoken on this subject, pointing toward incorporating specific modalities like SSG in training. A study published in the Journal of Strength and Conditioning Research found that athletes who participated in small-sided games had better sprint performance and agility than those who did not. Another study published in the Journal of Sports Sciences found that small-sided games were more effective at improving aerobic fitness than traditional training methods.

Strength and conditioning coaches are trying to find a way to develop the energy systems in a specific way to increase capacity for the demands of the sport, which would lead to fewer injuries. Less fatigue present in continuous game play will lead to less chance of injuries, and research has shown that SSG can provide that better than traditional conditioning due to the locomotion demands and rest/work ratios. Furthermore, a study published in 2014 found that small-sided games were associated with a lower risk of injury than full-sided games. When athletes train in similar environments to game play, they are prepared for the demands of the game.

Season-Ending Injuries

Components of Agility

General skills make up the foundation of great agility alongside increased peripheral vision and faster reaction times (OODA loop). Acceleration, deceleration, COD, and max velocity are the underlying attributes that help determine success in the open environment of play. With deficiencies in any of these areas, the chances of being elite diminish. It’s the price of admission, so to speak, because if you lack the general athleticism to keep up with the more athletically endowed players, reaction times can only make up so much ground. A skill is how well someone can perform a task; in the chaotic realm of sport, the task in football comes down to two simplified themes: to create space or close space depending on whether the player is on offense or defense.

Locomotion Demands

If you are an offensive player, you are trying to create space; the counterpart to that is if you are on defense, you are trying to close space. The beauty of football is that offensive players can be defensive in plays, like an offensive lineman in a pass set.

The four general skills stated above allow this to happen more rapidly. Zatsiorsky stated, “an increase in sports performance, the time of motion decreased.” This is multifactorial and should demand the attention of the strength and conditioning coach to allocate time to building the general locomotion skills necessary to move faster while concurrently exposing athletes to reactive environments in a planned and progressive manner. It’s like learning how to say the alphabet before embarking on the journey of writing an essay—you want to make sure that you can spell the words properly and write the correct letters.

In a profession that preaches “slow cooking” athletes, we are too often quick to say that in the developmental stages, we should just let the athletes figure it out in play versus giving them clues first on how to figure out the complex task of faster game play. What’s wrong with an emphasis on both?


Videos 2 and 3. Speed and agility development in training.

Deceleration

One of the main catalysts for injury is not having the coordination or capacity to stop movement. S&C coaches train and prepare athletes for the demands of the sport while improving the underlying factors affecting faster sports motion. Deceleration, in particular, is the underpinning factor in greater change of direction and max velocity speeds, which are directly responsible for creating and closing space but also prevention of non-contact injuries.


Video 4. Training deceleration on the football field.

Dr. Damian Harper defines deceleration as: “[The] ability to proficiently reduce whole-body momentum, within the constraints, and in accordance with specific objectives of the task, while attenuating and distributing the forces associated with braking.”

Deceleration ability may be the biggest determining factor in performance when looking at general skills and their effect on sports, says @CoachJoeyG. Share on X

Deceleration ability may be the biggest determining factor in performance when looking at general skills and their effect on sports. In the research article “Change of Direction Tasks: Does the Eccentric Muscle Contraction Really Matter?,” Helmi Chaabene stated, “From a practical observation, suggest that coaches should consider implementing eccentric strengthening, which is the main muscle contraction regime activated during deceleration, in their training program directed at promoting COD outcome.” Not training or preparing for the high-intensity deceleration events in sport can lead to compensation mechanics or severe injury.

COD and the Four Main Pillars

Change of direction and agility are not the same! You can change direction without a stimulus, whereas agility is a change of direction brought on by an environmental cue. COD is one of the biggest determining factors in faster game play—the only sport that doesn’t have COD is track. A 10.5 time in the 100m is only useful on the football field if you can navigate defenders.

Increasing acceleration and max velocity output is extremely important but is not the end of the rainbow. The gold is getting these general skills to transfer to specific skills like tracking, closing, and evading, which have more components than just running fast. Change of direction is directly affected by another general skill: deceleration. As previously stated, what’s the point in speeding something up if we cannot slow it down? A skill gets better with rehearsal, so while increasing the contributing factors to speed, COD, and deceleration, strength and conditioning coaches also need to reinforce the biomechanical positions that are associated with advantageous change of direction movements.

When you break down the tape of game play, four distinctive change of direction movements stand out:

  • 180-degree cut
  • 90-degree cut
  • 45-degree cut
  • Maneuverability

These movements show up over and over again. In many situations, they change together. When you avoid training these positions, you remove the bridge between speed and game speed. Training these components of COD is learning the alphabet. It’s the old metaphor of learning to crawl before you run.

When you avoid training change of direction positions, you remove the bridge between speed and game speed, says @CoachJoeyG. Share on X


Videos 5 & 6. Training angled cuts and maneuverability.

OODA Loop

Game speed and OODA loops are two concepts that are important in sports training and competition. Game speed refers to an athlete’s ability to perform at the same speed and intensity as they would in a game or competition. This involves not only physical speed but also mental quickness and decision-making ability. When I see people train in closed drills or general skills the entire off-season without the presence of open reactive environments, my mind always goes to the Mike Tyson quote, “Everyone has a plan till they get hit.” Peripheral vision and pattern recognition are two of the main drivers of fast reaction times and increased OODA loop processing.

The OODA loop is a decision-making process coined by military strategist John Boyd. It stands for:

  • Observe
  • Orient
  • Decide
  • Act

In sports, athletes must constantly cycle through this process to make quick and effective decisions on the field. They must observe the situation, orient themselves to the environment and the actions of their opponents and teammates, decide on a course of action, and then act on that decision. Increased game speed hinges upon the ability to cycle through this loop and use the appropriate strategies from a movement standpoint. We have all coached that one kid who was fast as hell in testing, but for whatever reason, the game moved too fast for him, and he played slower than his capabilities. An athlete’s inability to discern the environment from potential threats slows down the “decide” and “act” portions of the loop, leading to what a lot of coaches have termed “paralysis by analysis.”

Coaches can incorporate the OODA loop into sports training by focusing on decision-making skills and situational awareness. You can create drills and exercises that require athletes to quickly observe and react to changing situations, forcing them to cycle rapidly through the OODA loop. Game speed training can include drills and exercises that simulate game situations and force athletes to react quickly and make split-second decisions.

These critical pieces of training—game speed and the OODA loop—are important concepts in creating a transfer from general skills to specific skills. Athletes who can perform at game speed and quickly cycle through the OODA loop are more likely to be successful on the field. It’s not the fastest athlete who wins; it’s the athlete who plays the fastest. Coaches and athletes should incorporate these concepts into their training and practice routines to improve their performance and decision-making abilities.

It’s not the fastest athlete who wins; it’s the athlete who plays the fastest, says @CoachJoeyG. Share on X

The OODA loop can also be linked to injury rates in sports. In high-speed and high-impact sports, such as football, athletes constantly make split-second decisions that can have a significant impact on their safety. Therefore, having a well-developed OODA loop is crucial for athletes to avoid injuries.

The OODA loop helps athletes quickly observe and orient themselves to their surroundings, make informed decisions, and act on those decisions with precision and control. By cycling through the OODA loop rapidly, athletes can make split-second decisions that can help them avoid collisions, adjust their movements to avoid injury, or protect themselves. Game speed and the OODA loop can also help athletes develop their adaptability and flexibility.

The game of football is chaos, and no play is identical. Having the ability to react to an ever-changing environment will give players a competitive advantage and protect them from bad positions that could lead to the risk of injury. By incorporating these concepts into training and practice routines, athletes can develop their decision-making abilities, mental toughness, resilience, and adaptability, all of which can contribute to their success on the field.

Having the ability to react to an ever-changing environment will give players a competitive advantage and protect them from bad positions that could lead to the risk of injury, says @CoachJoeyG. Share on X

In the next three articles, I will touch upon:

  1. How GPS can help create specific thresholds and guide planning for SSG and agility to match practice stressors.
  2. How to progress from closed COD drills and advance them into open reactive environments.
  3. How to incorporate and plan these sessions into the training week.

Every coach wants faster game speed and a decreased chance of injury, and small-sided games can deliver. SSG and agility training, when paired with general skills and capacities training, can produce a robust athlete that is able to handle any situation with accuracy and precision.

Since you’re here…
…we have a small favor to ask. More people are reading SimpliFaster than ever, and each week we bring you compelling content from coaches, sport scientists, and physiotherapists who are devoted to building better athletes. Please take a moment to share the articles on social media, engage the authors with questions and comments below, and link to articles when appropriate if you have a blog or participate on forums of related topics. — SF


Mullins Swinford Summer School

Summer School Session 4 with Coach Tanner Swinford

Blog| ByDan Mullins

Mullins Swinford Summer School

Week Four of Summer School featured another coach with an excellent vision for their program—Coach Tanner Swinford, the Strength & Conditioning coach from Rockport-Fulton High School. Coach Swinford joined us to discuss the opening month of his first program in the high school setting and eloquently communicated his vision for training field and court athletes as a complementary approach. He detailed his own experience as an athlete: riddled with injury and dealing with a separation of skill transfer between the weight room and the field, which ultimately produced a powerful athlete who couldn’t do as much as he potentially could have if the gap between the two were bridged.

Coach Swinford’s complimentary approach prioritizes efficient movement on the field, evident by his detailed approach to speed programming. He bridges the gap by implementing COD teaching using the grid system and a competition-based approach to break up the potential monotony of training. This competition-style approach is built over the course of a block in order to ensure all pieces of the needed skills in that match-up are taught and repped prior to the competition.

Swinford Acceleration

Programming with Small-Sided Games

This episode provided excellent insight into the field-based progressions that Coach Swinford is using in order to build his program. Taking inspiration from Dan Pfaff, Charlie Francis, Les Spellman, and Boo Schexnayder, the fundamental tenets of speed are each met in Coach Swinford’s comprehensive program. A highlight of this session is how Coach Swinford mixes up his agility work with innovative, small-sided games to allow for competition while still achieving the stimulus he desires.

“The kids really like this,” Swinford said of their partner-based chase and shadow games. “For me this is just a substitute for traditional tempo, but the kids stay more engaged in it and they really enjoy doing it.”

Coach details multiple weeks of these options in the discussion of his program—listeners can fill several pages of notes on the speed section of this episode alone.


Video 1. This week’s full session with Coach Tanner Swinford.

Panel Q&A

This week’s panel included Coach Aja Campbell, Director of S&C at The Mary Louis Academy and owner of ATTAGIRL; SimpliFaster’s own Mark Hoover; and Joe Stokowski from Grayson HS in Loganville, Georgia.

Coach Aja Campbell asked: “At this time of the year, with the number of athletes and the diversity of age and sport that you coach, how do you manage coaching recovery and nutrition?”

Coach Swinford: “Before each session, I try to explain to my athletes that while our time together is limited, and we will train hard and push for adaptation, you must take care of your body the other 22 hours each day. I use the analogy of the bank—if you’re not going to the bank (proper nutrition) to make the deposit, you won’t be able to withdraw later (performance). We use SportsU for communication, and I try to post content there for our athletes and parents to get good information on recovery and nutrition to save time and increase the chances of information sticking.”

I use the analogy of the bank—if you’re not going to the bank (proper nutrition) to make the deposit, you won’t be able to withdraw later (performance), says @TannerSwinford. Share on X

Coach Joe Stokowski: “How are you differentiating multiple sports with the number of athletes and the time that you have them?”

Coach Swinford: “So far this off-season, because I just took over for this program, the first four weeks have been general athletic training without much differentiation. The reason for this is that I want to see how our kids move, what general competencies they execute well, and what general work we need. For instance, we aren’t good hingers right now, so I am making note of that so we can teach and regress when needed. When we get to school, it will be easier because I will have smaller groups—but right now, with groups of over 100 athletes at a time with minimal help from other coaches, my goals are general and to assess what we can and cannot do.

Coach Mark Hoover: “Do you get much resistance when you try to implement a regression from, for instance, a back squat?”

Coach Swinford: “It has been tough in that regard, because for so long here, it’s been about load it up and then we would complete whatever our workout was…and then kids would go max out their deadlift after school! What has really helped has been gaining buy-in from our ‘best’ players and those in the weight room. Other athletes seeing our top performers excel and benefit from our programming is certainly helping gain buy-in from other athletes who have been relatively resistant.”

What has really helped has been gaining buy-in from our ‘best’ players…other athletes seeing our top performers excel and benefit from our programming is certainly helping gain buy-in, says @TannerSwinford. Share on X

Next Week

On Tuesday, July 11, we will hear from Muhammad Abdellatif, the Strength and Conditioning Coach at Rome High School in Rome, Georgia. Coach A will be talking about his transition to a football powerhouse in Rome and how he’s earned buy-in from a legendary coach and some big-time players in a short amount of time. See you Tuesday at 8:00p.m. EST, click this link to join!

Since you’re here…
…we have a small favor to ask. More people are reading SimpliFaster than ever, and each week we bring you compelling content from coaches, sport scientists, and physiotherapists who are devoted to building better athletes. Please take a moment to share the articles on social media, engage the authors with questions and comments below, and link to articles when appropriate if you have a blog or participate on forums of related topics. — SF


Zac Cupples Speaking

Insights from Zac Cupples on Compression and Expansion Strategies for Athletes

Blog| ByBarrett Snyder

Zac Cupples Speaking

During the summer of 2021, I was scouring the internet, seeking alternatives to the “sleeper stretch” in order to better compel shoulder internal rotation (IR) in overhead athletes. While the sleeper stretch had garnered high praise from the overhead athlete and physical therapy community for decades—it’s often considered a staple movement within many baseball and shoulder rehabilitation programs—a handful of new alternatives to address shoulder IR inefficiencies have begun to gain steam in recent years. In large part thanks to the contributions of the Postural Restoration Institute (PRI), it was starting to become clear that the cause of poor shoulder IR might not even be a result of the shoulder itself.

At the time, I was interning under the guidance of renowned Philadelphia-area strength and conditioning coach and educator Rob Rabena (who will always have my gratitude), and he steered me toward Las Vegas physical therapist (PT) Zac Cupples. Rabena noted that Cupples would be able to clearly explain that it is the rib cage that forms the base for our shoulder girdle, and our shoulder motion can be profoundly influenced by altering dynamics within the rib cage. Thoroughly impressed by Cupples’ explanation, I began hastily consuming more and more of his content before ultimately joining his mentorship program in 2022.

During our conversation for this interview, Cupples revealed a bit of wisdom that I continue to reflect on and seek to implement on a daily basis. When I asked how we, as coaches, can continue to improve our craft (in addition to making our athletes better), he said:

“It starts with cultivating your relationships and assembling a team around you comprised of individuals who are predominantly smarter and more proficient than yourself. It may sound counterintuitive, but this will ensure you are continually being pushed to enhance your own skill set, which can prove challenging if you are the smartest person in the room. Multiple heads are better than one, and you can advance your coaching mastery more rapidly if you are constantly engaging with others [who are] always willing to help nudge you in the right direction.”

(Improving your coaching) starts with cultivating your relationships and assembling a team comprised of individuals who are predominately smarter and more proficient than yourself, says @ZCupples. Share on X

PT Session
Cupples graduated from St. Ambrose University’s Doctor of Physical Therapy program in 2011 and then went on to obtain both his Orthopedic Specialist Certification (OCS) and Certified Strength and Conditioning Specialist (CSCS) certification in 2013. He has been a PT clinical director, continuing education reviewer, and National Basketball Association (NBA) PT and Assistant Strength Coach. Despite his highly regarded academic and industry accolades, if you ask Cupples what experience he valued the most, he will enthusiastically point to his time in Indianapolis, when he interned for the legendary Bill Hartman at IFAST University. As the Illinois native’s admiration for Hartman has grown over the years, in a similar vein, so too has my admiration for Cupples.

Prior to embarking on this journey with Cupples, I was completely oblivious to the idea of posterior expansion versus muscle compression, sacral nutation versus counternutation, and rib cage dynamics, let alone the varying axial skeleton archetypes. While Cupples was able to cast light on crucial industry topics I was otherwise unfamiliar with, it was (is) his ability to unscramble otherwise ambitious topics and present them in a digestible manner that proved to be his most helpful quality.

Cupples’ ability to unscramble otherwise ambitious topics and present them in a digestible manner proved to be his most helpful quality. Share on X

At the conclusion of our May mentorship call, I sought to glean from Cupples serviceable insight that coaches and/or athletes can directly apply:

  • Programming considerations for sport athletes who present a narrow vs. wide infrasternal angle (ISA) predisposition.
  • Deciding if it is appropriate to feed a speed athlete more compression or expansion strategies.
  • How to navigate using heavy strength training to increase compression potential without limiting movement capabilities.
  • Training sprinters in the weight room to ensure a proliferation of IR to maximize max propulsion.
  • The benefit vs. potential hindrances of table tests.
  • Why the “stack” proves necessary for all athletes and gym-goers alike to master.

Wide vs. Narrow Infrasternal Angles

In recent decades, due to the contributions of Hartman, Cupples, Ryan Maron, and a handful of others, coaches can better predict their athletes’ tendencies, compensatory strategies, and developmental needs based on their axial skeleton archetype. An axial skeleton archetype describes the shape of the individual’s spine, thorax, and pelvis. The two broad categories each of us fall into are a wide infrasternal angle and a narrow infrasternal angle.

A majority of Cupples’ recent clientele have consisted of rotational athletes, particularly golfers, for which he describes those who present as a wider frame having a structural build more conducive to force production, which can be identified during their golf swing, as they often turn more horizontally. By contrast, he explained, narrower-framed individuals are built more for rotation and flexibility, leading to a more vertical turn and swing.

“You could look at the ISA as a measure of how someone is built,” Cupples said. “Based on this, there are certain things that structure is more adept at doing than other things. From here, you can then make predictions about how one should present based on the body structure.”

In short, a wide ISA (usually wider than 90 degrees) is characteristic of an individual who has an exhaled, or compressive, biased axial skeleton. The wider anterior rib cage is how their body produces inhalation. Contrarily, a narrow ISA (usually less than 90 degrees) has a more inhaled, expanded/eccentric axial skeleton. The narrow anterior rib cage is how their body exhales.

As a coach, by identifying which ISA (a bony structure we are incapable of changing) our athlete best identifies with, we can better predict how their compensatory breathing strategies might influence their movement capabilities and the natural orientation of their axial skeleton. As a result, we will be in a better position to know which exercises to program and interventions to use to impact the athlete’s overall movement as necessary.

By identifying which ISA our athlete best identifies with, we can better predict how their compensatory breathing strategies might influence their movement capabilities. Share on X

For example, a wide ISA will generally bias in the following ways: “belly breather” with a diaphragm that is descended anteriorly and has difficulty expanding the posterior axial skeleton. From a more movement-based perspective, a wide ISA has a heavy internal rotation and force production bias. This is due to skeletal structure and a pelvis biased toward a state of sacral nutation, allowing for a greater amount of space to move horizontally.

With this, those having a wide ISA will often reveal themselves to be more proficient in movements that require tremendous IR. Exercise and movement examples where a wide ISA will likely be more proficient include:

  • Deadlift (KG, BB, trap bar)
  • DB and BB press
  • Box squat
  • Hip-dominant back squat
  • Hip-dominant step-up
  • RFESS
  • RDL (BB, DB, and SL)

Conversely, one of the main reasons athletes with a wide ISA struggle to move vertically (such as during a squat) is because their ability to counter-nutate the sacrum will be limited, making it challenging to create external rotation, or ER (think the initial descent of a squat). However, this does not mean we cannot provide them with vertical squat movements and ER-dominant exercises to enhance their athletic capabilities. Examples to restore and/or promote verticality and ER in a wide ISA would include:

  • Heels-elevated DB Zercher squat, goblet squat, and front squat
  • Heels-elevated split squat
  • Knee-dominant step-up
  • Goblet lateral lunge
  • Landmine press variations
  • Alternating incline press

On the other hand, a narrow ISA will bias toward external rotation, force absorption, and vertical hip displacement and present with a more counternutation sacrum. Exercise and movement examples where a narrow ISA will likely demonstrate greater proficiency due to the ER requirements of these movements include:

  • Vertical-biased squatting variations (goblet, SSB, front, overhead)
  • Rotation capabilities
  • Quad-dominant spit squat (vertical torso split squat)
  • Landmine press

Meanwhile, if we want to gradually program exercises to drive IR and compression in an otherwise ER- and expansion-dominant individual, we could implement the following:

  • Box squat
  • SSB squat
  • Bilateral hinge progression-DB RDL to KB deadlift to trap bar deadlift
  • Floor press to DB press
  • Kickstand RDL to SL RDL

Keep in mind, as Cupples has reminded me on numerous occasions, identifying a client’s ISA angle is an invaluable data point to aid in programming guidelines, but do not misidentify it as the be-all and end-all. (He has an elaborate and excellent encyclopedia on the varying ISA biases that can be found here.)

Creating Space

During recent mentorship calls, Cupples and I focused mainly on the idea of compression versus expansion strategies and identifying the athlete’s needs based on their limitations and sport of choice: an easy-to-digest example would be a powerlifter versus a contortionist.

As one might expect, a powerlifter needs to be able to compress (increase internal pressure) to move heavy weight from point A to point B, making them a prime candidate for compression-biased coaching strategies. However, as Cupples has articulated, a steady diet of too many compression-based movements (let’s use pressing as the example) can reduce overall motion. This may contribute to pain.

As such, a coach needs to identify how to promote compression to aid sporting movement while also using expansion-based strategies to ensure long-term health.

Keeping this in mind, we can flip the script and see how a contortionist would benefit from an elaborate exercise library of expansion movements to reaffirm their ability to maneuver in and out of various positions. This is because a contortionist primarily relies on their ability to create space (availability of movement options). While compression exercises should not be eliminated from a contortionist’s program, as a prerequisite amount of strength is vital to ensure prolonged stability, we can see that too much compression would reduce space and shrink movement choices.

Regardless of what sport the athlete competes in, it is essential to identify if the sport requires a demand bias toward compression, expansion, or a combination of both. Share on X

Regardless of what sport the athlete competes in, it is essential to identify if the sport requires a demand bias toward compression, expansion, or a combination of both (tennis, baseball, golf). A sprinter is an interesting case study due to the compression (propel force into the ground) and expansion (short ground contact) demands of the movement.

“If a sprinter works mostly in the sagittal plane, I try to increase available movement by working on rotations and the other motions they may lack,” Cupples told me, explaining that his responsibility as a coach is first and foremost to keep the athlete healthy, and that would entail, believe it or not, providing contrasting movements to sprint training.

By balancing out the amount of compression a sprinter produces on the track with expansion exercises in the weight room, a coach can restore adequate movement—which ideally would result in less pain and fewer injuries. Once that goal has been accomplished, Cupples believes the next step is choosing strategies and movements alternative to the sprint itself, where the athlete can effectively produce force. A handful of advantageous movements to drive posterior expansion for all athletes are as follows:

  • Wall sit
  • Bench posterior
  • Seated posterior expansion with external rotation
  • Wall posterior expansion with external rotation
  • Dorsal rostral thoracic expansion with posterior hip stretch
  • Low reaching sit


Video 1. Wall posterior expansion with external rotation. This will drive posterior expansion and shoulder external rotation and loosen up the upper back muscles. 


Video 2. Wall sit posterior expansion. This will drive posterior expansion, shoulder external rotation, and hip internal rotation.

Along similar lines, there remains a constant trade-off when it comes to weight training for field sport athletes. We can conceptualize it as follows: If I am committed to increasing my strength in the weight room, I need to learn how to raise my force production. Additionally, if I desire to raise my force production, I must create more pressure. To create more pressure, I need to reduce the number of options available.

Consequently—and here comes the trade-off—if I limit relative motion, the availability of movement options will decrease, and my potential to move effectively (rotate, shuffle, run forward and backward) will likely spoil. This proves to be quite the dilemma. As Cupples believes, the key with all training qualities is giving the person in front of you “enough.” Analogous to a diet, athletes are not required to consume whole foods 100% of the time to see results—there are elite performers who devour “dessert” every day.

“The way to determine what is enough is by measuring,” Cupples explains. “Ideally, you are looking at a cluster of performance indicators (joint motion, force testing, field performance, etc.) and then determining what the bottlenecks are that are limiting performance. From there, it’s a matter of addressing those bottlenecks until the next one rears its head. Test and retest.”

One of the performance indicators mentioned above is joint motion, which table tests have proven to be adequate in measuring. Table tests prove valuable because they provide a constrained way of examining an athlete’s movement capabilities.

“It’s hard to constrain dynamic movements as much,” Cupples says. “But when working with athletic populations, you’ll need to measure more variables than just range of motion, as there are more needs besides that. But what is nice is if you see table tests trend negatively over the course of a season, it can possibly be a canary in the coal mine for an issue.”

If you see table tests trend negatively over the course of a season, it can possibly be a canary in the coal mine for an issue, says @ZCupples. Share on X

One of the themes Cupples echoes constantly is that coaching is not linear or logical, nor does it always make sense on paper—as coaches, we need to adapt to each athlete’s needs, and the more tools in our toolbox, the more proficient we become at doing this.

Internal Rotation for Sprinting and the Stack

As we returned to the topic of sprinting, I sought to inquire about IR and its relationship to ground contact time and max propulsion. As Hartman once explained, a sprinter lands on their foot near, or right before, max propulsion, which in turn equates to the maximum amount of internal rotation (downward force) being propelled into the ground. Due to the stipulation that we need IR to produce force, it is not uncommon to observe sprinters presenting an anterior-oriented pelvis while leaning their chest and head forward in unison.

Having said that, a sprinter’s ground contact time needs to be purposely succinct to eliminate the elongation of the foot remaining on the ground (which would reduce speed). This then begs the question I posed to Cupples: What various dynamics can we use in the weight room to train our body to produce high levels of IR while reinforcing the need to be quick off the ground?

This first entails working on activities that encourage this rapid transition of force from the foot to the floor and back up again. This could be done by performing repeated jumps, band-assisted hop and stick, continuous hurdle jumps, and for advanced athletes, RRLL. Remember, we want to emphasize to the athlete not to “stick” the landing. Sprinting itself is still the best teacher, but these rapid weight room activities should not be neglected.

As we neared the end of our discussion, I gravitated away from speed-specific modalities and sought Cupples’ opinion on all things the “stack.” For those who are unaware, aside from Cupples’ classic wit, an extensive collection of brim hats, and loyal sidekick Ted, he is probably best known for his mantra, “If you can’t stack, you can’t talk to Zac.” One of the most underrated tools to improve performance, the stack is a movement strategy that involves stacking the thoracic diaphragm on top of the pelvis.

One of the most underrated tools to improve performance, the stack is a movement strategy that involves stacking the thoracic diaphragm on top of the pelvis. Share on X

“The stack is foundational for improving movement options,” Cupples said. “It allows for ‘normalizing’ the respiratory mechanism, giving you the potential to have all of your movement options available.”

Cupples-PT

This would allow for the greatest opportunity to maximize intraabdominal and intrathoracic pressure during movement. During the stack, when we take a breath of air, we should ideally see a multidirectional expansion in the rib cage.

This multidirectional expansion due to proper stacking should enhance relative motion among the ribs, allowing the ribs to separate to make room for an increased amount of air in the lungs while providing greater movement option potential. Keep in mind that the stack is not a posture we MUST hold; it is quite the opposite.

“It’s a movement strategy used to allow for multidirectional movement throughout the body,” Cupples said. “The end result is the appearance of a stacked body. There are several cues focused on (eyes, ground contact, breath, etc.) that can be applied in ALL movements.”

In pointing to sports as an example, he continued, “You need to look at where the play is happening. That’s using the eyes. When you cut, you must push off the foot a certain way to maximize the change of direction. You are ALWAYS breathing. The stack provides consistency within cueing and focus points, making a coach’s job easier over the long haul. The ribcage should expand in all directions during the stack, not migrate forward as a unit.”

For those unaware of how to go about coaching the stack, here is your best resource.

As I began this piece by sharing, it has always been my impression that the hallmark of a good coach, teacher, and educator lies in their ability to restructure otherwise rigorous topics and present them in a digestible form for their athletes and students to comprehend. I have found Cupples stellar in this regard, thanks to his use of numerous visual aids, multiple outside references, constant words of encouragement, impressive level of patience, and genuine sincerity. Just make sure you first learn how to stack, or you can’t talk to Zac.

Since you’re here…
…we have a small favor to ask. More people are reading SimpliFaster than ever, and each week we bring you compelling content from coaches, sport scientists, and physiotherapists who are devoted to building better athletes. Please take a moment to share the articles on social media, engage the authors with questions and comments below, and link to articles when appropriate if you have a blog or participate on forums of related topics. — SF


Eccentric Training GymAware

Eccentric Training and GymAware: Keys to Quantifying Metrics that Matter

Blog| ByLoek Vossen

Eccentric Training GymAware

We all know the highly effective adaptations from eccentric training, but in practice, most coaches and athletes only measure and prescribe training on concentric metrics like 1RM. According to a scientific survey, only 42% of practitioners monitor eccentric load, and only 25% use eccentric-specific testing.1

Nowadays, you can easily measure eccentric training and performance metrics with a velocity-based training device like GymAware RS and GymAware FLEX. Here’s why this is useful when prescribing training and monitoring performance.

Why Quantifying Eccentric Movements Is Important

Not all eccentric movements are the same, and each has its unique benefits.2 If you’re chasing after a certain benefit, like hypertrophy, it’s important to accurately prescribe the eccentric exercise. Eccentric load, eccentric velocity, and eccentric time under tension are three important ingredients that determine your training adaptation.

Not all eccentric movements are the same, and each has its unique benefits. If you’re chasing after a certain benefit, it’s important to accurately prescribe the eccentric exercise, says @loekvossen. Share on X

If you want to measure your eccentric performance and track progress over time, it becomes even more important to have objective data. Here’s a list of eccentric metrics, provided by GymAware, that can help prescribe eccentric training and track eccentric performance over time:

  • Eccentric peak and mean force and power
  • Eccentric peak and mean velocity
  • Eccentric time under tension
  • Eccentric dip and bar path
GymAware-App
Image 1. Example of the GymAware app, showing the eccentric mean velocities of your workout in real time.

Quantify Eccentric Load and Eccentric Force

The most straightforward way to quantify your eccentric load is by looking at the weight. Although this could work for a single individual, it’s impossible to create a systematic training approach based on weight simply because the difficulty of lowering 80 kilograms is not the same for me and you. In fact, even within an individual, weight alone doesn’t describe how challenging the exercise is.

During concentric movements, coaches try to solve this by creating training programs based on %1RM. This allows them to put weight into perspective. Eccentric movements don’t have such a one-repetition maximum because, per definition, you’re lowering the weight, no matter what the load is. For some, the lack of an eccentric 1RM is a reason to use the concentric 1RM to determine eccentric load. However, that would contradict the goal of this article: to quantify eccentric training with eccentric metrics.

It’s not just a matter of principle. Using the concentric 1RM to determine eccentric load is also not ideal since it assumes a fixed relationship between concentric and eccentric muscle performance. In more practical terms, it assumes that doing five eccentric reps at 120% of the concentric 1RM is the same difficulty for me as it is for you. If we have a different force-velocity profile, this may not be the case. Moreover, this method of using 1RM also implies that there are no significant day-to-day differences in 1RM that would otherwise affect the load.

Using the concentric 1RM to determine eccentric load is not ideal since it assumes a fixed relationship between concentric and eccentric muscle performance, says @loekvossen. Share on X

One eccentric metric that does allow you to quantify eccentric load is the eccentric movement velocity. Suppose you are lowering a weight that is so heavy you cannot lift it or hold it in place isometrically. For these kinds of eccentric movements, the higher the load, the faster you drop it—assuming you are always doing your best to slow down the process of lowering the weight.

This phenomenon is represented in the force-velocity curve. Note that for concentric movements, it’s the other way around: the higher the load, the lower the velocity.

Force-Velocity
Image 2. The force-velocity curve shows that during eccentric movements, the higher the force, the higher the (lengthening) velocity. (Source: molab.me)

If you and I have the same eccentric velocity in the above-described eccentric movement, you could say we train at the same relative load in the force-velocity curve. You can now use velocity zones to target a specific area of the force-velocity curve, similar to (though not exactly the same as) concentric velocity zones.

Moreover, measuring eccentric velocity instead of using concentric 1RM also solves the issue of daily variance. On a bad day, you’ll be using less weight to train at the same eccentric velocity. This works like an autoregulated system: the better you feel, the more weight plates you’ll be putting on your barbell to match the velocity target.

This way of training is called velocity-based training (VBT) and it requires a VBT device that measures not only the concentric but also the eccentric velocity of your movement, in real time. The GymAware RS and GymAware FLEX do exactly that.

GymAware
Image 3. GymAware RS linear position transducer (left) attached to the bar (right).

When you combine one of these hardware devices with the additional GymAware Cloud software, you can go beyond mean and peak eccentric velocity with metrics like mean and peak eccentric force and power. I’ll talk about these metrics in a bit when we look more closely at quantifying eccentric performance progress.

But first…

Should You Use High Loads or Low Loads?

Now that we can quantify eccentric loads, should you be aiming for high or low loads?

Before we can answer this, we need to define “high” and “low.” In scientific literature, a high load is considered a load that you cannot lift concentrically. High loads will force you to lower the barbell. The eccentric force that you apply during those high-load movements is larger than the maximal concentric force. Several terms are related to this type of training:

  • Eccentric overload
  • Supramaximal eccentric loading
  • Heavy negatives
  • Accentuated eccentric loading

According to scientific research, high-load eccentric exercises induce greater increases in eccentric strength than low loads.2 Even within these supramaximal loads (>1RM), greater increases in hypertrophy are found with heavier loads. Additionally, heavy eccentric training induces both qualitative and quantitative changes in the tendon, with heavier supramaximal loads increasing tendon force and stress more.2

In practice, this means that as long as you do your best to slow down the process of lowering the weight, high bar velocities (as a result of higher loads, explained earlier) result in superior training adaptations. However, to limit soreness, it is advised not to aim for eccentric durations shorter than two seconds.

There is one practical challenge with these supramaximal loads: how to lower an object that you cannot lift. You can use a spotter (or two), to help lift the weight in the concentric phase. Weight releasers can do the job too. Just like the two-movement technique, lift the weight via a compound exercise, and lower the weight with an isolated exercise (or lift a weight with two legs and lower it with one). I’m sure that coaches who read this are experienced enough to know which technique suits their athletes best.

Quantify Eccentric Velocity and Time Under Tension

We already talked about using eccentric velocity to quantify eccentric load during supramaximal exercises (>1RM). In these exercises, the velocity is a result rather than a choice, given that you do your best to slow down the process of lowering the weight.

Eccentric velocity itself—regardless of whether applied in submaximal or supramaximal loads—is an important metric to look for, says @loekvossen. Share on X

However, eccentric velocity itself—regardless of whether applied in submaximal or supramaximal loads—is an important metric to look at. For instance: a very slow supramaximal eccentric movement using isokinetic dynamometry results in different muscle adaptations compared to a fast supramaximal eccentric movement.

Additionally, a deliberately slow-paced submaximal eccentric movement, with the aim of extending the eccentric time under tension, is different from a deliberately accelerated supramaximal eccentric movement to decrease the eccentric force.

Both previously mentioned VBT devices (GymAware RS and GymAware FLEX) display real-time mean and peak velocity and eccentric time under tension. If you want to do slow eccentric movements, you can set an eccentric countdown timer that automatically starts when you begin the eccentric phase of your movement.

Flex App
Image 4. Example of the FLEX Stronger app, showing the eccentric mean velocities of your workout in the review screen.

Should Eccentric Training Be Fast or Slow?

Based on scientific studies, increases in eccentric strength become more pronounced when the testing velocity corresponds to the eccentric velocity used in training.2 Additionally, fast eccentric training is superior to slow eccentric training when it comes to improving:

  • Eccentric and concentric strength and power.
  • Vertical jump, drop jump, stretch-shortening cycle efficiency, and sprinting performance.
  • Fast-twitch fibers hypertrophy (cross-sectional area) and IIx fiber composition.

This indicates that slow-tempo (low load) eccentric movements to increase the eccentric time under tension are probably not the most effective.

Obviously, the eccentric movement velocity correlates with the eccentric time under tension of a single repetition. This scientific publication that talks about incorporating eccentric training found that you can expect an eccentric duration of 8–10 seconds at 110%–120% of concentric 1RM.3 At higher loads (125%–130% of concentric 1RM), the eccentric duration drops to around 4–5 seconds.3 Another publication mentions that an even shorter eccentric duration of 2–3 seconds is ideal for maximizing hypertrophy but advises not to go any lower, to limit soreness.4

Quantifying Flywheel Training: The Ideal Fast Eccentric Training?

A combination of high-load and high-velocity eccentric movements results in high muscle (motor unit) tension and high exercise-induced muscle damage. This is thought to be why a combination of high-load, high-velocity results in a higher hypertrophic response.2

Flywheel inertial training (FIT) is a scientifically proven example of how you can easily train eccentrically with high velocities, says @loekvossen. Share on X

Flywheel inertial training (FIT) is a scientifically proven example of how you can easily train eccentrically with high velocities. The eccentric load depends on the size of the flywheel + the energy you put in the flywheel (inertia) during the concentric phase and your eccentric deceleration strategy.


Video 1. Flywheel training explained (source and full article: Create eccentric overload in flywheel training)

The challenge with flywheel training is that it’s difficult to quantify the load due to the combination of several factors determining the eccentric load, mentioned above. With the new app update of GymAware, you can start quantifying the load of flywheel training by measuring the concentric and eccentric velocities. Recent research shows that the mean velocity of a flywheel exercise is a valid method to quantify load and individualize the prescription of flywheel training.5 You can attach the VBT device to the flywheel handle or harness. You can also use the GymAware jump strap to measure core velocity or attach the VBT device to an additional barbell/PVC pipe.

By looking at the eccentric dip—available in both the GymAware iPad app and the FLEX Stronger app—you can also control the eccentric technique during flywheel training.

Quantify Eccentric Performance Progress

So far, we’ve talked about quantifying eccentric movements and implementing these numbers into training. How about tracking eccentric performance over time? “You can’t improve what you can’t measure!”

There are several ways you can use eccentric metrics to track progress over time. Some examples of progress that you can measure using GymAware:

  • Increased peak or mean eccentric force (N)
  • Increased eccentric peak power (W)
  • Increased eccentric rep duration at a given supramaximal weight (s)
  • Decreased peak or mean velocity at a given supramaximal weight (m/s)

You can also look at changes in the force-velocity curve, for instance, by comparing your maximal eccentric force with your maximal concentric force. Literature shows that the eccentric strength is approximately 20%–50% greater than the concentric strength, but where do you fit in this range?4 The GymAware Cloud software allows you to track all these changes over time within and between individuals.

BONUS: Quantify Eccentric Movement Technique

Eccentric training is the shortest route to muscle damage and delayed pain (DOMS) if you don’t take the time to slowly progress the intensity over the course of a training program.1 The best way to safely incorporate eccentric training into your program is by measuring and controlling the eccentric load, with all the eccentric metrics mentioned earlier.

On top of that, you can prevent injuries by maintaining a good technique when eccentric loads and velocities are high. I already mentioned that GymAware measures the eccentric drop, for instance in a squat. Additionally, the real-time bar path visualization ensures you maintain a proper technique.

Bar Path
Image 5. Real-time bar path visualization using GymAware RS or GymAware FLEX.

Wrap Up

I hope this article has inspired you to consider using data to quantify your most effective training: eccentric training. If so, don’t forget to start by measuring your current eccentric performance so you can track it over time using the metrics provided.

If you’re new to these metrics, I recommend learning more about velocity-based training (VBT) in general via my PDF download.

Since you’re here…
…we have a small favor to ask. More people are reading SimpliFaster than ever, and each week we bring you compelling content from coaches, sport scientists, and physiotherapists who are devoted to building better athletes. Please take a moment to share the articles on social media, engage the authors with questions and comments below, and link to articles when appropriate if you have a blog or participate on forums of related topics. — SF


References

1. McNeill C, Beaven CM, McMaster DT, and Gill N. “Survey of Eccentric-Based Strength and Conditioning Practices in Sport.” Journal of Strength and Conditioning Research. 2020;34(10):2769–2775.

2. Douglas J, Pearson S, Ross A, and McGuigan M. “Chronic Adaptations to Eccentric Training: A Systematic Review.” Sports Medicine. 2017;47(5):917–941.

3. Mike J, Kerksick CM, and Kravitz L. “How to Incorporate Eccentric Training into a Resistance Training Program.” Strength and Conditioning Journal. 2015;37:5–17. 10.1519/SSC.0000000000000114.

4. Schoenfeld B. “The Use of Specialized Training Techniques to Maximize Muscle Hypertrophy.” Strength and Conditioning Journal. 2011 Aug;33(4):60–65. doi: 10.1519/SSC.0b013e3182221ec2

5. Martín-Rivera F, Beato M, Alepuz-Moner V, and Maroto-Izquierdo S. “Use of concentric linear velocity to monitor flywheel exercise load.” Frontiers in Physiology. 2022 Aug;13, 961572.

Strength and Conditioning Books

10 Books Every Young S&C Coach Should Read (From a Fellow Young Strength Coach)

Blog, Book Reviews| ByBrandon Holder

Strength and Conditioning Books

Every successful strength and conditioning coach prioritizes their continuing education, blocking off time to focus on broadening their knowledge and developing their craft. While I prefer more social means of continuing education—such as attending seminars and talking shop or visiting other coaches—reading is required to take your knowledge and coaching abilities to the next level, and it has little barrier of entry in today’s age.

Too often, though, young coaches get caught up in books that only go into specific, specialized programs or books that are not applicable to where they are in their careers. These books are important and have a time and place, but there is so much that can also be learned from reading more general, principle-based books…or even stepping outside of the strength and conditioning circle and reading books that don’t tie directly to the subject!

Too often, though, young coaches get caught up in books that only go into specific, specialized programs. Share on X

Earlier in my career as an intern, I read any and every piece of training material that I could get my hands on. I devoured books, articles, and podcasts daily. While I still do this, I am a bit more selective now. I originally read books that I had no foundation to be reading—books that were well over my head at the time—and while I wasn’t taking away much from them at that moment, I figured I was doing a good enough job.

When I took a step back and took my own advice—focusing on more applicable books for me, whether they were training related or not—I found more meaningful information on how to better coach, communicate, and connect with those around me. This led to success on the floor and growth in my young career.

Here are 10 books I would recommend other younger strength and conditioning coaches invest in and read.

Zatsiorsky Jamieson Willink

1. Science and Practice of Strength Training—Vladimir M. Zatsiorsky

Starting the list off is one of the single best strength and conditioning books available. Science and Practice covers all the necessary components of strength and conditioning training and covers all the information required to have a larger base of knowledge on the subject.

The book is broken into three parts:

  1. Basics of strength and conditioning
  2. Methods of strength and conditioning
  3. Training for specific populations

Each section builds off the previous one, wrapping up in a complete manual that you can refer to for years to come.

Key Takeaway: This  really set the foundation that I built upon in all my future reading and studying. This book changed how I understood and utilized certain training methods, such as the maximum, repeated, and dynamic effort methods.

Science and Practice of Strength Training really set the foundation that I built upon in all my future reading and studying. Share on X 
Coming from a powerlifting background, I had a different understanding and knew of only one way to utilize these methods—in reality, however, the scope of these and many other strength and conditioning principles are much greater than just the few scenarios they are typically associated with. I can now use all of these training methods outside of the powerlifting realm, if appropriate.

2.Ultimate MMA Conditioning—Joel Jamieson

Next up is the best conditioning-specific book, but with the most unfitting name. Even if you have no desire to work with MMA athletes, there are so many benefits to be gained from reading this book.

Jamieson not only breaks down the physiology of each energy system in a way which makes sense, but also goes into detail on how they are connected. Along with this, he includes a complete training guide on conditioning methods and how to lay them out in an organized fashion.

It’s called strength and conditioning for a reason; don’t be one-dimensional in your training if you’ve yet to pick this up.

Key Takeaway: This book completely changed how I prescribed conditioning in a training program. What was once an afterthought or left up to the individual to do on their own was now something that I felt confident and more inclined to take responsibility for.

Also, this book taught me the value of the aerobic system and how training my athletes aerobically was not going to kill their strength and power gains. In fact, the opposite is true—expanding their gas tanks allows us to train more at higher qualities, recover better, and have a wider base to build the other two energy pathways upon.

3. Extreme Ownership—Joko Willink

The first non-training related book on the list. Extreme Ownership at its core is about taking responsibility for a situation regardless of your involvement—this is a requirement of any leader and a great sign of maturity.

Taking responsibility for a situation regardless of your involvement is a requirement of any leader and a great sign of maturity. Share on X

When coaching, there are numerous factors out of our control, yet somehow we are still responsible. This book can help us better manage and understand these situations.

Willink also goes into a lot of interesting personal stories, which make the book an easy and enjoyable read.

Key Takeaway: While I am typically not a fan of this style of book—military principles for the everyday person—I believe I found this book at a right time, when I needed to better accept responsibility for the situations in which I was involved.

I took away a greater sense of control within my day-to-day working schedule. So much of my work within the private and collegiate setting was being altered due to schedule or coaching changes—all things out of my control, but which I still had to account for. Just because my 60-minute session was cut to a 20-minute session doesn’t mean that the day was ruined; we can still get the most out of those 20 minutes.
Holiday Bartholomew Fergus Francis

4. Ego is the Enemy—Ryan Holiday

Ego is the Enemy is a philosophical book that targets a person’s number one flaw: themselves.

While I recommend any book written by Ryan Holiday, this book spoke to me the most. Some examples of particularly effective chapters include “Become a Student,” “Always be a Student,” “Get Out of Your Own Head,” and “Entitlement, Control, & Paranoia.”

Key Takeaway: After reading some of those chapter titles, it should be clear why I would recommend this book to a young coach. Like many, when I first got into coaching, I thought that I knew a lot more than I actually did. While I wasn’t flat out disrespectful, my attitude certainly hindered many opportunities to learn and grow as a coach because my own ego was in the way.

Like many, when I first got into coaching, I thought that I knew a lot more than I actually did. Share on X

If I had read this book sooner, I know that I would have been better off for it. There are moments that I remember where I would disagree with a coach on miniscule things such as slight exercise variations or them showing up 5 minutes late to sessions, even after I agreed to it. Looking back at these specific moments, I know that my own ego was directly causing the issue to be intensified whereas I could have corrected it and saved myself a lot of internal stress.

5. Conscious Coaching—Brett Bartholomew

This was one of the first strength and conditioning “coaching communication” books I came across. Conscious Coaching lays out how to better build a genuine level of buy-in with those you work with.

Bartholomew opens up and shares his own personal struggles at the beginning of the book, creating instant buy-in from the reader—which was something I appreciated. The book then dives into specific athlete archetypes and tenants of trust, offering immediate applicable material. 

Key Takeaway: I remember reading this book at a time when I just started putting more of an emphasis on learning the “art of coaching.” Instead of sets and reps, I was focusing more on communication and connection. Mind you, this is where I personally felt my greatest strengths in coaching were.

After reading Bartholomew’s book, I realized that I still had a long way to go. Brett broke down communication similar to how many break down a periodization plan. I was hooked, and this led me to continue with more education on these subjects.

My main takeaway was adjusting my delivery of communication for different individuals. I was fortunate that I worked with a wide array of clients, so I could practice the same message delivered but in different tones, verbiage, and layers of explanation. This sounds like common sense, but it is a skill…and skills need to be sharpened.

My main takeaway was adjusting my delivery of communication for different individuals. Share on X

6. The Process—Fergus Connolly and Cam Josse

With the subtitle The Methodology, Philosophy, & Principles of Coaching Winning Teams, this is a must-read for coaches to better grasp the additional factors outside of the physical preparation that goes into winning games.

The Four Coactive Model presented in the book should be a requirement for every coach to understand. The model demonstrates that the complete package of physical, tactical, technical, and psychological pieces is required by an athlete and team to be successful. Each model can be broken down even deeper from there.

Key Takeaway: This book was eye-opening and really hit home for me at the time, showing me that squat and hang clean numbers have little involvement with wins in the sporting field.  It changed how I view my role in strength and conditioning and made me understand that I am just a small piece of the larger picture.

With the help of this book, when implementing games into my training programs, I could actually break down the purposes of offense and defense in a much more intelligent manner. It caused me to view everything in terms of creating or limiting space and opened an entirely new facet of cueing with my exercises.

The book mentions a takeaway game, which helped me fill some time with my larger youth team sessions in a productive manner, and that alone makes it worth the read.

7. Charlie Francis

This may be cheating, but anything written by Charlie Francis cannot be left off a list for young coaches, whether it be The Charlie Francis Training System, Speed Trap, or any other random articles that you can find buried within the depths of the internet.

This may be cheating, but anything written by Charlie Francis cannot be left off a list for young coaches. Share on X

Well ahead of his time, Charlie Francis discusses countless ideas and methods in detail that have greatly contributed to the field today. It’s also just astonishing reading some of his training notes, and prescriptions throughout his writing.

Key Takeaway: Reading Charlie Francis changed what I consider to be speed training. Having him break down the zones of speed training proved to me that much of what I was doing for “speed training” was actually quite the opposite.

Along with this (and countless other things), reading Francis changed how I implemented rest and recovery when training my athletes. I don’t believe I used a stopwatch—except to time sprints—before I came across Charlie Francis. Now I have a stopwatch to monitor the rest between reps, between sets, the time of tempo runs, etc. to better control these training variables.

Taleb Boyle Ferrazzi

8. Skin in the Game—Nassim Nicholas Taleb

Many of Nassim Taleb’s books go into complex teachings and thoughts. Skin in the Game is no different, but it focuses on a concept strength and conditioning coaches should strive for. As the title implies, you need “skin in the game” to develop your skills and abilities as a young coach.

This book was first recommended by Keir Wenham-Flatt and applies directly to those in the private sector or who oversee others in a department. Take your time on this one and focus on grasping the concepts rather than just finishing the book.

Key Takeaway: My biggest takeaway from reading Skin in the Game was to treat myself more like a business and put myself out there more through a range of means (such as writing this article). Reading Taleb changed how I handled working in the private sector—even though I worked for someone else, I used that time to really work for myself and begin to build a body of work. It also brought me to understand that even if I wanted to make a small change in the space, I had to put myself out there no matter how uncomfortable it became at times.

My skin in the game led to better results and success in the long term.

9. Functional Training for Sports (2nd Edition)—Michael Boyle

Mike Boyle created an extremely sound book on strength and conditioning within athletics. The book has a complete training layout of exercise selection, progressions, and regressions that alone would earn it a spot on this list.

Functional Training isn’t going to go over highly advanced training models or new, unique exercises. In fact, the book will be quite boring if that is what you are expecting. What Boyle does is break down the fundamentals of strength and conditioning and excel at them—considering how long Boyle has been in the game and consistently successful, we would be silly to not at least read his work and try to listen!

What Boyle does is break down the fundamentals of strength and conditioning and excel at them. Share on X

Key Takeaway: Functional Training exposed me to a completely different world of training: not praising barbell back squats, using chin ups as a primary exercise, and a dominant focus on single leg training.

Reading this changed how I viewed prescribing exercises. I didn’t have to perform any particular exercise, especially at the athlete’s expense. Putting square pegs in round holes leads us nowhere, and implementing the basics at a high level still produces dramatic results.

10. Never Eat Alone—Keith Ferrazzi

At one time, it was almost impossible to enter a bookstore and not see this bright, orange, national best seller on the shelves. The book even became a bit oversaturated—though it just has too much to offer the young coach not to discuss it.

Never Eat Alone focuses on developing relationships in impactful ways and can be used within any job setting—especially for coaches who will potentially be dealing with athletic directors, station commanders, head coaches, parents, and athletes from all walks of life.

Key Takeaway: This book changed my perspective on relationship building in a genuine way—just because I have to work to develop a relationship and network doesn’t make it any less genuine. If anything, it’s what is best for everyone involved.

Just because I have to work to develop a relationship and network doesn’t make it any less genuine. Share on X

After reading this book I started being more mindful when reaching out to coaches. Yes, I’m still reaching out for the correct reasons, but I understood to respect their time much more and had an actual objective for the contact opposed to just “talking shop” with someone I just met. Now when I reach out to coaches I do not know, it is for a detailed, specific reason with much more intent behind the contact.

Create Your Own Takeaways

This list provides a helpful start, but it’s just that: a start. I recommend buying hard copies, reading them multiple times, highlighting spots, making notes, and most importantly, applying their teachings in the real world.

Even if you have already read these books, read them again—having time pass and being in a new place in life will offer a different perspective, exposing new insights or shining a new light on what you previously understood.

Since you’re here…
…we have a small favor to ask. More people are reading SimpliFaster than ever, and each week we bring you compelling content from coaches, sport scientists, and physiotherapists who are devoted to building better athletes. Please take a moment to share the articles on social media, engage the authors with questions and comments below, and link to articles when appropriate if you have a blog or participate on forums of related topics. — SF


Hakan Andersson Sprinter

A Master Class in Coaching Sprinters with Håkan Andersson

Freelap Friday Five| ByHåkan Andersson, ByDavid Maris

Hakan Andersson Sprinter

Håkan Andersson has been coaching sprints for almost 40 years. His knowledge of applied sprinting and sport science is one of balance. The impact of his coaching can be seen in the athletes he has coached and the education he has provided.

Coach Andersson has served as national team coach for the Swedish national track and field team and personal coach to some of Sweden’s most successful sprint runners, including Peter Karlsson (6.58/10.18/9.98w), Johan Wissman (20.30/44.56), Torbjörn Eriksson (10.30/20.58), Tom Kling Baptiste (6.65/10.27), and Stefan Tärnhuvud (6.67/10.35), to name a few.

Freelap USA: The Scandinavian summers provide great weather for sprinting, while it can be very cold in the winter. How much does your climate influence the type of training you do, and what are some of the solutions you have found to help sprinters within your situation?

Håkan Andersson: In the past, we were rather influenced by traditional American sprint training systems that involved high volumes of low- to medium-intensity sprinting done throughout the winter with a “long-to-short” approach, as this suited our winter climate. This is because, during the Scandinavian winters, it is not possible to run fast outdoors due to the snow and negative temperatures.

In the Scandinavian countries, we have a very limited supply of talented sprinters, and for most of the sprinters we do have, maximum velocity tends to be an area in which they need to develop. In that sense, endurance isn’t hugely important, as they need to improve their acceleration and maximum velocity before emphasizing speed endurance. Therefore, the system we used pre-1990s—very much a result of the climate—was not optimal for the maximal development of sprinters.

Nowadays, in Sweden, we have something like 30 or 35 indoor halls in a population of 11 million where we can train. These started being built in the 1980s, and they gave us the opportunity to sprint at high intensity all year round. However, the problem with training indoors, particularly on the older three- to four-lane tracks, is that running on the tight bends isn’t good from an athlete health perspective—so running long distances at high intensity indoors in the winter months was still a bit of a challenge.

This has become better as bigger, six-lane tracks where the bends are not so tight have become more common. However, the design of banked curves is still very much a consideration when planning training programs, particularly for the faster men. A 10.20 guy will find it harder to negotiate tight indoor bends than an 11.60 female. Therefore, mainly for health reasons, we try to stick to the straights as much as possible and run back-to-backs when working on endurance.

In our hometown, we have a 135-meter straight indoor track, so we can break up 200m–300m efforts into 2–3x100m efforts, but it is a little bit more tiring with multiple accelerations, and we lose a bit of the rhythmical development that I like about the longer runs. Therefore, if circumstances allowed me to implement longer, faster sprints earlier in the winter, I would do so.

If circumstances allowed me to implement longer, faster sprints earlier in the winter, I would do so, says @sprintcoachSWE. Share on X

Another thing we don’t have is access to grass. We tend to be indoors from November until as late as the beginning of May, and this means we mostly train on hard rubber, which is great for speed but not always for health. So, to get around that, we try to run on astroturf or gymnastics floors.

Finally, during our winters, we also miss the sun. That has a huge impact on many aspects connected to sprint training and performance, so most of the elite athletes in the Scandinavian countries go away to camps in warmer climates (as much as their budget can tolerate), which can make a huge difference.

Freelap USA: One of the training methods I best know you for is repeated short sprints at high intensity with incomplete recoveries. What led you to their implementation?

Håkan Andersson: My training philosophy has been organic and, for the most part, a trial-and-error process, but others have also influenced it. In 1987, Esa Peltola (coach of Arto Bryggare FIN and Patrick Johnson AUS) and Professor Antti Mero wrote an excellent book on physiology and biomechanics for sprinters, and they were the first who introduced me to the concept of the “short-to-long” approach.

Apart from that, they also suggested emphasizing high volumes of shorter sprints (60m–100m) with incomplete recovery in the early preparation periods. Sometimes these volumes were very high, and I think there were influences from the East Germans and perhaps also from Carlo Vittori in Italy.

A few years later, I was introduced to the Italian coaching legend Carlo Vittori by a good friend and mentor of mine, the late Carmelo Bosco. Carlo Vittori used a very successful sprinting system—primarily with Pietro Mennea, former world record holder in the 200m—suggesting large volumes of short sprints (60m–100m) with incomplete recovery, similar to that of the Finns.

My wife, who is Canadian, introduced me to the late Brent McFarlane, and through him, I got a chance to meet Charlie Francis in the early 1990s. Charlie influenced most coaches of my generation, and he also espoused a short-to-long approach with large volumes of short sprints at high intensity, but not as volumized as that previously proposed by Mero et al. and Vittori.

Finally, one of my biggest influences in athletics has always been the amazing Norwegian coach Leif Olav Alnes, who currently coaches Karsten Warholm. When we started our friendship in the early 1990s, he had a bunch of Norwegian sprinters running in the 10.20s or faster, including an athlete named Geir Moen. Alnes took Moen from a plateau at around 21 seconds to 20.17 to win the 200m at the European Championships in Helsinki in 1994, and he also ran 10.08 in the 100m.

In Oslo, they had a training facility that meant the furthest distance they could run was 70 meters, but they did huge volumes of that, and it was laid as a foundation even for Moen’s main event, the 200m. I remember being at a training camp together in Portugal, and Geir ran around 40 runs of 80m, all < 2.90 for the 30m–60m fly…I’ve never seen anything even remotely like that before or after. These extreme volumes served Geir Moen very well, but we should remember that he was a very well-tuned “tractor” with tremendous work capacity, but not necessarily a highly talented Ferrari…

Sometimes these types of sessions are termed “phosphate runs,” but it’s worth noting that these workouts won’t just challenge the phosphate system. For example, 3x4x60m will become glycolytic pretty quickly if done with incomplete recoveries. While we know that, via supplementation, we can increase the body’s phosphocreatine stores, it’s less clear if we can do that via training unless there is hypertrophy of fast twitch muscle fibers. (I suppose the jury is still out on the matter.)

The Italians call this type of training “alactic anaerobic power” or “capacity training,” but after a while, you are definitely NOT alactic, and most high-level sprinters will hit <20mmol/L at the end of such sessions. From a metabolic standpoint, my understanding is that this type of training is more of a stressor and developer of the enzymatic systems connected to the energy systems involved.

Implementing these training methods presents challenges, however, because factors like age, training age, injury history, athlete profile, how elastic an athlete is, etc., will dictate what kinds of volumes, recoveries, and density between sessions an athlete can handle. I coached two athletes—Tom Kling-Baptiste, who ran 10.27 for 100 meters, and Johan Wissman, who ran 44.56 for 400m—at the same time. They were totally different animals, and the latter could probably run as he did because of very different muscle fiber composition and much higher oxygen uptake to maintain intensities with far less recovery than the former. Therefore, I think it becomes very useful to time the sprints to monitor the intensity and check that there isn’t too much of a drop-off. Finally, as always, it’s important to monitor technique so that the quality of the practice doesn’t diminish throughout the session.

Freelap USA: You have spoken about the benefits of using slightly submaximal sprints from a motor learning and skill development perspective. Can you outline the benefits of this type of practice for a sprinter?

Håkan Andersson: The motor pattern during short sprints at approximately 95% resembles maximal sprinting to a much greater extent than sprinting at 85%. I also believe that this kind of training has the potential to positively impact sprinting mechanics to a much greater extent than any sprinting drill.

In my experience, shorter sprints at medium- to high-intensity sprinting is a way to reach a higher total volume of high-intensity sprinting in one session than longer sprints at the same intensity and will, at the same time, allow us to target many of the specific technical demands of maximal sprinting.

I think sprinting is a technical event, and these techniques take time to learn; if you only do a couple of sprints in a session, it will be far harder to develop these skills, says @sprintcoachSWE. Share on X

Ballet dancers practice for 6–8 hours a day to learn skills and movements; relatively large volumes are required to allow for enough exposure to a skill to master it. I think sprinting is a technical event, and these techniques take time to learn, and if you only do a couple of sprints in a session, then it will be far harder to develop these skills.

Running at these percentages also allows the athlete to think about what they’re doing and implement the coach’s feedback into their runs. Conversely, if an athlete is sprinting at maximum effort, then there’s little to no room for any conscious thought, making it impossible or at least challenging to improve technique!

When thinking about the length of the sprint distance, if you only run 60 meters, then you’re running 50% acceleration and 50% upright running. In contrast, if you run 80 or 100 meters, the majority becomes upright running—but this is much more demanding. In the lead-up to indoors, most of the reps will be in the 60m–70m zone, but when we get to spring and prepare for the outdoor season, we go up to 80 meters and maybe 100 meters. So we progress the distance of the runs to give the athletes greater exposure to the technical components of maximum velocity sprinting as we go through the annual training cycle.

Leading into the season, a typical session here might be 2x60m, 80m, 100m with six-, eight-, and 15-minute recovery at 95%+ intensity. Hence, the recoveries are greater to allow for a higher intensity. But we still don’t go all-out with effort, so technical aspects can still be addressed, and I think this is paramount.

I would like to make it clear, though, as the mechanics consolidate and the sprinter matures and is able to sprint faster, my take is that loading with even greater volumes is probably NOT the right way to go. Just the fact that a person can sprint faster also means that the stress on the system will get higher, and the optimal volume of sprinting will probably have to be lowered. I’ve seen some that become masters at repetitive sprinting—that’s not what we want since there are no competitions like 5x5x60m with incomplete recovery…

Freelap USA: You are known for integrating technology into your coaching. Can you share some considerations that need to be addressed when implementing resisted and assisted sprints? How necessary are these training methods?

Håkan Andersson: Yes, I do like technology and use some regularly, but I also recognize the danger of getting too engaged and forgetting the basic skills of coaching. I prefer easily accessible technology that can give me instant feedback on some of the metrics that I feel are useful rather than waiting one week for a biomechanical report.

I prefer easily accessible technology that can give me instant feedback on some of the metrics that I feel are useful rather than waiting one week for a biomechanical report, says @sprintcoachSWE. Share on X

In Scandinavia, it wasn’t possible to do resisted sprinting using a hill a lot of the time because the hills were covered in snow, so we used sleds—but I wasn’t a big fan of this because I sensed that sleds disturbed the rhythm due to the inconsistent tension on the athlete throughout the stride. For example, if you had an elite male sprinter pulling 40 kilograms on a sled, you would find that the load oscillates between 0 and 70 kilograms throughout the different parts of the movement. So, in the 1990s, we started experimenting with various machines for resisted sprinting to make the load feels smoother.

In the past, many coaches used the 10% rule; meaning don’t load heavier than slowing a sprinter more than 10% in a certain distance. I believe we have gone past that and realized that resisted sprinting can be implemented much more precisely.  One of my main uses for resisted sprinting is to offer greater exposure to the mechanics of early acceleration. For example, if you have a 10.20 sprinter pulling around 30% of body weight (approximately 60% with sled), they’ll probably hit a maximal velocity of around 6 meters per second, which is about the velocity at the second step. So, therefore, pulling this load allows the athlete to practice multiple “step 1-2s” in a single rep from a technical and force perspective.

As I mentioned, we train indoors in the winter, so we don’t have access to a tailwind. We have been creating our own means of assisted sprinting for about 30 years, and I think it’s a very good tool when used correctly. To ensure that there is effective transfer to unassisted sprinting, it’s great if, along with your eyes as the coach, you’re able to measure at least velocity, stride length, and stride frequency.

Normally, if you pull an athlete with too much assistance, the flight times and flight distances increase, as do the braking forces, and the technique might become compromised. As I said, assisted sprinting can be a very good tool, especially in the peaking period, but it is a double-edged sword and should be monitored carefully! If there is a subpar technique, it can really mess up an athlete. It’s possible to pull many athletes at a world-record pace, but they can look dreadful technically, and there’s such a high risk in this instance with potentially zero rewards.

To try and avoid these outcomes, when we first started implementing these methods, a paper mill in town provided us with huge rolls of paper that enabled us to measure stride length, and we used photocells so we could measure the flying 20-meter time. From there, we could calculate the frequency, and by the end of the 1990s, we were able to attach a rotor encoder to these machines to also track instant velocity. Using all this information, our findings reinforced Antti Mero’s research that for most sprinters, there was a threshold of about 103% of maximum velocity, and any faster than that, technique would deteriorate.

Today we can get instant feedback from new and exciting technology not only about velocity, stride length, and stride frequency but also on key kinematic metrics like contact time, contact length, flight time, and flight distances. In my view, these are very useful, especially in regard to implementing assisted sprinting in your program.

These days, you have the DynaSpeed by MuscleLab and the 1080 Sprint, which are both great machines, as they work with precise and constant pulling or braking forces. These machines are fantastic, the technology is very promising, and the only real limitation for many coaches is the expense. However, as with all technology, over the next few years, I think the cost will likely come down, making these types of machines a more affordable option.

Freelap USA: What would a typical training week look like for your sprinters during a specific preparation period?

Håkan Andersson: We usually sprint three times in a microcycle. I think it is very difficult to do more than that, so with those three sprint sessions, one focuses on acceleration, one on maximum velocity, and one on specific endurance. Even three times a week can be too much for some; therefore, we sometimes use 9- or 10-day microcycles. In the final stages of competition preparation, however, sessions tend to be a mixture.

By this time of year, the maximal velocity session is no longer repetitive sprints with partial recoveries, but it may involve a combination of high-speed runs and assisted sprinting with long enough recoveries to facilitate the very high intensities we’re looking for. Therefore, this session is done first, after the rest day. Earlier in the annual cycle, when maximum velocity sessions had larger volumes, shorter recoveries, and, therefore, lower intensities, acceleration sessions would have been the first session of the week as this is where the highest intensities would have been seen.

While I classify the sprint sessions this way, it isn’t to say there can’t be some crossover between those sessions; for example, the acceleration session may have some longer rhythmical runs toward the end. In addition to those three sessions, we’d try to fit in one low-intensity session, such as tempo runs on grass, if possible. All the while, you try to maintain resistance and jump training, which may or may not be on the same day as the sprints, depending upon running volumes that day.

I also think that at this time of year, for a given day, you can usually have an idea of the type of work you will be doing and the goal for the session. But you have to be very responsive to how the athlete looks and feels and be prepared to adjust volumes and loads, so it becomes very important to monitor outputs to guide these decisions.

In this case, it is less likely that you can follow a strict training plan like you might have earlier in the training year. That said, a week of training at this time of year may look something like this:

Monday – Maximum velocity: 30m flys, 70m or 80m runs, or a complex of 1) resisted run, 2) assisted run, 3) normal run

Tuesday – Resistance training

Wednesday – Easy: rudimentary plyos, general strength, flexibility, hurdle mobility

Thursday – Acceleration and resistance training: a couple of resisted sprints to 20m, 3–4 technical 10m sprints, 2–3 sets of 30m or 40m accelerations, and a very relaxed 150m to finish

Friday – Easy (as Wednesday).

Saturday – Sprint endurance. 100m athletes: 120m or 150m runs. 200m athletes – a couple of fast 250m runs or 150m, 200m, 250m.

Since you’re here…
…we have a small favor to ask. More people are reading SimpliFaster than ever, and each week we bring you compelling content from coaches, sport scientists, and physiotherapists who are devoted to building better athletes. Please take a moment to share the articles on social media, engage the authors with questions and comments below, and link to articles when appropriate if you have a blog or participate on forums of related topics. — SF


Knees Over Toes

What’s Up with “Knees Over Toes”?

Blog| ByKim Goss

Knees Over Toes

When I started writing for Iron Game publications a half-century ago, I championed the cause that squats would not damage the knees. With the preponderance of research studies since then dispelling misinformation about the King of Lifts, you would think this case would be closed. Not quite.

From my perspective, strength coaches rarely have their athletes perform rock-bottom squats. As for cleans that involve rebounding out of the low catch position…ah, not a chance. Instead, many are often content to focus their leg training on partial-range step-ups, high hex bar deadlifts, and the so-called Bulgarian split squat.

Let’s see how we got here and explore the renewed interest in “knees over toes” exercises, starting with a tribute to the first champion of the squat, Paul Anderson.

(Lead image courtesy of Ben Patrick)

The Squat King

As a teenager, I purchased a copy of Paul Anderson’s book of training methods, which he graciously autographed. Why did I invest in a book by someone who encouraged me to squat heavy and drink cow’s blood? Because it was written by one of the strongest men in history.

Born in 1932, Anderson won a gold medal in the 1956 Olympics in weightlifting, but what captured the attention of the Iron Game community were his accomplishments in the squat. As a teenager, Anderson stood  5 feet 9 1/2 inches, sported 33-inch thighs, and squatted over 500 pounds. When he was 20, he unofficially squatted 660—30.5 pounds over the world record. In 1954, he squatted 820 and did quarter squats with 1,800 pounds. Anderson’s thighs grew to 36 inches, and his body weight to 360. Performing as a professional strongman, Anderson eventually squatted 900 pounds for 10 reps and 1,206 pounds for a 1RM.

In Anderson’s era, the strength coaching profession was in its infancy, and few athletes lifted weights. No one cared how weightlifters or any other athletes squatted. Share on X
Paul Anderson
Image 1. Paul Anderson was a strongman whose accomplishments in weightlifting, squatting, and strongman events made him an Iron Game legend. (Left photo courtesy Paul Anderson Youth Home; right photo by Bruce Klemens.)

In Anderson’s era, the strength coaching profession was in its infancy, and few athletes lifted weights. No one cared how weightlifters or any other athletes squatted—until 1961. That was the year Karl K. Klein’s questionable study about the association between squats and knee stability was published. Note the word “questionable.”

One of the subjects in Klein’s study was Bill Starr. Starr broke the world record in the Olympic press and wrote the strength training classic, The Strongest Shall Survive. Starr said Klein measured knee stability by applying manual pressure to a metal device that extended above and below the subject’s knee.

In a letter published in Strength and Health magazine in 1963, Starr said the study was not double-blind because Klein would ask the subjects if they did squats before he applied pressure. “The gadget which he placed on the lifters’ knees could be manipulated by the examiner to obtain any reading that he so desired,” said Starr. He added that many lifters quit the experiment “since he was exerting so much pressure that he hurt their knees.”

Several years later, sports science researcher Earle J. Meyers tried to replicate the study using a copy of Klein’s testing device. He concluded that “the deep squat and half-squat exercises did not produce significant differences in their effect on collateral ligament stretch, quadriceps strength, or knee joint flexibility.”

Klein expanded on his work with a book he co-authored with Dr. Fred Allman, Jr., in 1969 called The Knee in Sports. Although Klein was fine with the parallel squats that would pass in many of today’s powerlifting federations, the message passed on to the sports and medical communities was that squats—any squats— were bad for the knees.

Squat
Image 2. The publication of “The Knee in Sports” led to misinformation about the dangers of performing full squats. The photo at the right is the squatting depth recommended by the authors. (Lifting photo by Bruce Klemens.)

Eventually, the scientific community countered the squat stability issue with research studies and position papers that expanded on Meyers’ work. One of the most prominent researchers on the subject was sports scientist Dr. Mike Stone, a former weightlifter. Stone and Jeff Chandler, Ed.D., co-authored a position paper on the squat endorsed by the National Strength and Conditioning Association (NSCA) in 1991. Extensively referenced, the paper concluded, “Squats, when performed correctly and with appropriate supervision, are not only safe but may be a significant deterrent to knee injuries.”

Despite the position paper, the NSCA adopted a conservative approach to squat depth by recommending that the knees should not extend beyond the toes. Share on X

This position paper helped the cause, but for some reason, the NSCA adopted a conservative approach to squat depth by recommending that the knees should not extend beyond the toes. In their position paper, the general recommendation was that the trainee should “descend only until the tops of the thighs are parallel to the floor or slightly below” and “the shin should remain as vertical as possible to reduce shear forces at the knee. Maximal forward movement of the knees should place them no more than slightly in front of the toes.” These recommendations were reflected in study materials for their strength coaching certification, such as their textbook, Essentials of Strength Training and Conditioning.

In the description of the squat in this NSCA textbook, the accompanying drawing and text recommended only squatting until the tops of the thighs are parallel to the floor (image 3) and not bouncing out of the bottom. Now consider the low squat positions of an elite weightlifter snatching and an elite weightlifter squatting in image 3. Why is the NSCA apparently okay with the sport of weightlifting but not with the squatting depth performed by weightlifters?

Squat Depth
Image 3. The top left drawing shows the low squat position in an NSCA textbook. The top right photo shows an extreme “knees over toes” squat position achieved by an elite weightlifter, and the bottom photo shows an elite weightlifter squatting. (Top right photo by Bud Charniga, bottom photo by Ryan Paiva, LiftingLife.com)

While this debate was happening in athletic fitness training, the bodybuilding world took a different path, led by Vince Gironda.

The Gluteless Training Guru

Gironda was an accomplished bodybuilder who also “walked the talk” as a personal trainer. He coached Larry Scott, the first Mr. Olympia, and earned the nickname “Trainer to the Stars” for his work with Hollywood celebrities. His clientele included Cher, Clint Eastwood, James Garner, Burt Reynolds, Denzel Washington, and Carl Weathers.

Gironda believed conventional squats widened the hips, making a physique look blocky. “Full squats build the gluteus maximus (buttocks) by the forward position of the upper body and the depth of the movement.” In many leg exercises, these requirements resulted in the knees extending far over the toes. The sissy squat was his favorite, and he even wrote a book called The Sissy Squat.

Gironda Sissy Squat
Image 4. Vince Gironda (center) was a bodybuilder who trained champion bodybuilders, including Mr. Olympia Larry Scott (right) and many Hollywood celebrities. Gironda promoted leg exercises that extended the knees well in front of the toes.

Gironda’s barbell sissy squat was awkward and required considerable balance, reducing how much resistance could be used. However, many weight training machines available today enable you to easily perform exercises that allow you to extend your knees over the toes and do not involve a forward torso position.

Many weight training machines available today enable you to easily perform exercises that allow you to extend your knees over the toes and do not involve a forward torso position. Share on X

Image 5 shows examples of modern bodybuilders performing exercises on machines according to Gironda’s guidelines.

You’ll notice in both these exercises that the knees extend well in front of the toes and the heels are lifted, as in the Gironda sissy squat. However, because the resistance slides on guided rails in these two exercises, the trainee can put maximum effort into working the quads. Also, advanced training methods, including heavy eccentrics and force reps, can easily be performed with these machines to overload all areas of a muscle’s strength curve.

Leg Machines
Image 5. The knees-over-toes style of working the quads can be performed with machines commonly found in commercial gyms. (Photos by Miloš Šarčev)

One criticism of the leg training methods that exclude the involvement of the glutes, particularly leg extensions, is that the hamstrings are less active than in the squat. This inactivity puts excessive stress on the anterior cruciate ligament. During a conventional squat, the hamstrings help neutralize the pull of the quadriceps to cause anterior tibial translation, a shear force that tries to pry the joint apart.

A complementary knees-over-toes timeline could be attributed to Canadian strength coach Charles R. Poliquin (image 6) and his approach to knee rehabilitation. As Coach Poliquin’s primary editor for over two decades, I had a front-row seat to this experience. 

The VMO Distraction

Over 30 years ago, Poliquin told me about his general approach to knee rehabilitation. It focused on first targeting the quad muscles medial (inside) of the knee with partial-range exercises, then gradually working the entire quad by increasing the range of motion. He called the specific muscle he wanted to work the VMO, an acronym for vastus medialis oblique. (FYI: We now know that this muscle can be divided into two sections, the vastus medialis longus and the vastus medialis obliquus, which have different lines of pull on the knee.)

Poliquin Goss
Image 6. Charles Poliquin (right) and Kim Goss supervising the training of Maegan Snodgrass, a weightlifter who competed in the Junior World Weightlifting Championships, broke school-age American records, and earned a gymnastics scholarship to Utah State University. Coach Poliquin was an advocate of performing full squats. (Photo courtesy “BFS” magazine.)

Poliquin used this approach to leg training with the Canadian National Women’s Volleyball Team in the ’80s. When Poliquin started working with these athletes, most of them suffered from patellar tendinitis, a painful inflammation of the patellar tendon.

Poliquin told me that because volleyball players seldom bend their legs through a full range of motion, the muscles that exert an outward pull on the kneecap become stronger than those that pull the knee inward. This imbalance affected the tracking of the kneecap, causing this overuse injury.

Poliquin stressed the importance of starting athletes with full “knees-over-toes” squats at an early training age to keep the knees healthy. Share on X

Here is the three-step progression Poliquin told me he used with these athletes:

  1. Petersen Step-Up. The Petersen step-up is a partial step-up to target the muscles on the knee’s medial (inside) portion. It starts with the working leg a few inches off the floor, the heel elevated, and the knee slightly bent. As the leg straightens, the athlete rocks backward to minimize the shearing stress on the knee (thus, it can be performed in the early stages of rehab). The descent involves lowering the heel and raising it again before returning to the start.
Peterson Step-Up
Image 7. The Petersen step-up emphasizes the medial part of the quadriceps, development shown to an extreme level in these elite bodybuilders.(Photos by Miloš Šarčev)
    Because so many people did not perform the Petersen step-up correctly (thanks partly to the countless YouTube videos performing it wrong), Poliquin later substituted it with a simpler version called the “Poliquin step-up.” One difference between the Poliquin and the Petersen step-up is that the entire foot of the working leg is placed on a wedge board. Also, to focus more on the working leg in both exercises, Poliquin would have you lift the toes of the trailing leg to avoid pushing off with that leg.
  1. Front Step-Up. When an athlete could perform a Petersen step-up with the working leg at shin level, it was time to progress to the front step-up. He would have you start with the knee slightly below the crease of the hip. Again, the toes of the trailing leg were lifted. When the athlete could comfortably perform step-ups with the upper thigh parallel to the floor, the next progression would be the Australian squat.
  2. Australian Squat. High-bar full squats were the final step in this knee rehab protocol. The term “full” means descending so that the hamstrings cover the calves and the knees travel in front of the toes. This contrasts with the low-bar parallel squats performed by powerlifters that minimize the involvement of the quads. According to Poliquin, the further the bar moves down the back, the more the load shifts away from the quads and onto the glutes, erector spinae, and hamstrings.

One squat variation Poliquin often prescribed during this phase was the Australian squat (video 1), which emphasizes the quads in the external range (i.e., the area closest to the hip). It also reduces the compression forces on the spine because the torso remains vertical longer. Poliquin showed me this variation over 30 years ago, so I had always called it the Poliquin squat. However, I recently heard it was initially called the Australian squat, so I stand corrected. 


Video 1. The Australian squat emphasizes the quadriceps muscles closer to the hip. It begins with a slow descent and the knees extending in front of the toes.

Poliquin stressed the importance of starting athletes with full “knees-over-toes” squats at an early training age to keep the knees healthy. He also extended his approach to other popular leg exercises, particularly lunges and split squats. Although it took many years after Poliquin presented his opinions on leg training, research proved that the highest compressive forces on the knee were at 90 degrees. There’s more.

A 2013 review of 164 research papers concluded that there was no greater risk of developing chondromalacia, osteoarthritis, or osteochondritis performing deep squats than with quarter and half squats. Share on X

A 2013 review of 164 research papers concluded that there was no greater risk of developing chondromalacia, osteoarthritis, or osteochondritis performing deep squats than with quarter and half squats. Further, the researchers concluded that quarter and half squats could contribute to long-term damage to the knees and spine. “With the same load configuration as in the deep squat, half and quarter squat training with comparatively supra-maximal loads will favour degenerative changes in the knee joints and spinal joints in the long term. Provided that technique is learned accurately under expert supervision and with progressive training loads, the deep squat presents an effective training exercise for protection against injuries and strengthening of the lower extremity.”

Charles R. Poliquin passed away on September 26, 2018, but in recent years, internet influencer Ben Patrick (lead photo) has been preserving his legacy by promoting Poliquin’s approach to knee rehabilitation and training.

Knees Over Toes Goes Viral

Patrick was a promising college basketball player who suffered chronic knee pain that led to numerous surgeries. Poliquin’s work impressed Patrick so much that he booked a phone consultation. Patrick followed Poliquin’s advice; soon, Patrick’s knees became pain-free, and his jumping ability improved dramatically.

Patrick shared his success on social media and created a fitness consulting company incorporating many of Poliquin’s ideas. At last count, Patrick’s YouTube channel has north of a million subscribers, and his followers include 2,291 success stories. Because of his emphasis on full-range leg exercises, Patrick took on the nickname of the “Kneesovertoesguy.”

One benefit of full-range exercises is that they increase the strength, mobility, and stability of the ankles. Share on X

One benefit of full-range exercises is that they increase the ankles’ strength, mobility, and stability. Check out video 2 of my two former athletes, Sesely and Nicole. In it, Sesely performs the snatch, and Nicole performs the clean and jerk. Sesely demonstrates remarkable ankle strength and stability in saving her lift, and Nicole is shown using the elastic properties of the Achilles to help her bounce out of a heavy clean. 


Video 2: The first female lifter in this video shows remarkable ankle strength and stability while saving a snatch. The second lifter demonstrates the elastic properties of the Achilles by bouncing out of a heavy clean. Both lifters, coached by the author, broke New England weightlifting records.

Besides being able to lift impressive weights with acrobatic saves, full-range exercises performed quickly help prevent injuries, particularly to the ankles and Achilles tendon. According to strength coach and posturologist Paul Gagné, ankle mobility reduces the stress on the foot and Achilles, thus reducing the risk of injury. Case in point: weightlifters.

Ankle, Achilles tendon, and foot injuries are rare in weightlifting, despite weightlifting shoes being low cut and providing minimal lateral support. Note the female athletes in image 8. The first photo is of a 105-pound lifter collapsing awkwardly with 268 pounds, placing her quads and ankles in a position of extreme stress. The second photo shows a 165-pound lifter dropping 297 pounds on her legs. Neither lifter was injured due to a protective mechanism called the “reflective release.”

“Reflexive release is an extremely rapid, complex switching from muscle tension to relaxation in response to some sudden loss of equilibrium, fall, injury or other unanticipated event in sport,” says weightlifting sports scientist Bud Charniga. “This mechanism precludes conscious effort to move or fall in such a way to avoid injury. Circumstances where reflexive release can be effective in injury avoidance are too fast for mind–to–muscle actions to be useful.” Charniga adds that the isometric and near-isometric methods commonly used by bodybuilders and powerlifters would suppress the reflective release mechanism.

Contrast those results with the number of NFL and NBA players who injure their ankles and tear their Achilles tendons without being touched. Or the fact that an estimated 70%–75% of all ankle sprains and strains are considered non-contact injuries. (For a deep dive on this topic, check out my article on ACL and Achilles injuries.) There’s more.

Lift Mistakes
Image 8. Despite awkwardly missing these heavy lifts (268 and 297 pounds, respectively), neither weightlifter was injured due to their ability to relax muscles quickly, which they developed by performing dynamic, full-range leg exercises. (Photos by Bud Charniga).

Besides preventing injuries, Gagné says ankle mobility is a critical component of speed and jumping ability. “One indicator of elastic strength is your ability to lift your big toe and dorsiflex the foot, which your flexor hallucis longus and extensor hallucis brevis muscles control. The higher you can raise your big toe without strain, the more elasticity you have in the foot and the Achilles. And the more elastic energy you have, the higher you can jump and the faster you can run.”

How do you develop high levels of elastic strength if you’re not a weightlifter? I have a few suggestions. Share on X

So, how do you develop high levels of elastic strength if you’re not a weightlifter? I have a few suggestions.

Train the Way You’re Going to Fight

One problem with recommending full-range exercises is that many athletes can only perform a partial squat due to a lack of ankle flexibility. One dynamic stretch I’ve used with sprinters and cross country runners at Brown University to address this issue is to have them perform a squat while standing on a wedge board (aka slant board) with the smaller angle facing you (video 3). It’s a simple, effective way to stretch both calf muscles: the gastrocnemius (upper calf) and the soleus (lower calf). For best results, perform this movement barefoot.

For variety, change the position of the feet. Pointing your feet inward increases the stretch on the calf’s lateral (outside) part, while pointing the feet outward works the calf’s inside (medial) part. Gagné says a beginner should start with an angle of no more than 5 degrees. “You generally do not want beginners to use more than a 5-degree angle because a higher wedge may put too much pressure on the Achilles tendon and jam the subtalar joint.”

Because most squat wedge boards are at about 20 degrees, one way to compensate is to stand further away from the edge, starting with the ball of the foot on the board. As your flexibility improves, move up on the board. 


Video 3: A wedge board can be used to perform a dynamic stretch for both calf muscles: the gastrocnemius and soleus. (This soccer photo and the modeling photo in video 1 by Joel Morel.)

When mobility improves, a progressive next step would be ankle squats (video 4), which strengthen both calf muscles through a full range of motion. These are performed with your heels a few inches apart and feet and knees flared out. You squat all the way down and only come three-quarters of the way up. Max weights are not used.


Video 4: Ankle squats are an effective exercise to strengthen the gastrocnemius and soleus through a full range of motion.

Charniga saw elite weightlifters performing this exercise in 1974 and had this to say: “This technique of squatting where the shins are actively tilted forward with flexing knees and near vertical trunk incorporates the soleus and other single-joint plantar flexion muscles of the shank. These muscles contract eccentrically as the Achilles tendon stretches, accumulating elastic/strain energy in the process. When the athlete reverses direction, the aforesaid soleus and other single-joint plantar flexion muscles perform what can be described as a reverse-origin insertion contraction. That is to say the origin of these muscles in the middle of the shank moves towards the insertion on the heel.”

This last statement should be of interest to strength coaches who have their athletes spend their limited training time on isolation exercises for the tibialis anterior, such as the dynamic axel resistance device introduced by Robert Gajda in Total Body Training, a book he co-authored with Richard H. Dominguez, MD. The tibialis anterior muscle helps a weightlifter move under the barbell quickly when their feet are off the platform (image 9, left) and assists in moving the shin forward when the foot is on the floor. Note the development of this muscle (along with the calves) of a weightlifter in image 9 (right). Performing weightlifting movements would make such isolation training redundant.

Lifting Shoes
Image 9. The tibialis anterior muscle on the shin helps a weightlifter pull their body under the bar during a snatch or clean, along with helping to shift their knees forward during the pull. These muscles are often highly developed in these athletes. (Left photo by Viviana Podhaiski photo, LiftingLife.com; right photo by Bud Charniga.)

Is there a downside to using wedge boards? Yes, particularly if these exercises are performed instead of conventional lifts for extended periods.

“If heels-elevated exercises are used occasionally to develop more muscle around the knee joint, fine,” says Gagné. “But overusing it creates less ankle mobility because you’re in a state of semi-plantarflexion.” Further, according to a 2003 study published in the Journal of Strength and Conditioning Research (Fry et al.), restricted ankle motion increases the stress on the hips and lower back. There’s more.

If you’re an athlete seeking to perform at peak levels with minimal risk of injury, take measures to improve your ankle mobility and focus on squatting heavy and squatting deep. Share on X

Gagné says using a wedge board to push the knee further over the toes than they can go with the feet on the floor may damage the knees. “Removing the foot from the equation creates large shearing forces on the patella tendon, which may lead to tendonitis and ligament laxity,” says Gagné.

If you use wedge boards to occasionally help you achieve higher levels of quadriceps development, particularly around the knee, you should be okay. If you’re an athlete seeking to perform at peak levels with minimal risk of injury, take measures to improve your ankle mobility and focus on squatting heavy and squatting deep!

Since you’re here…
…we have a small favor to ask. More people are reading SimpliFaster than ever, and each week we bring you compelling content from coaches, sport scientists, and physiotherapists who are devoted to building better athletes. Please take a moment to share the articles on social media, engage the authors with questions and comments below, and link to articles when appropriate if you have a blog or participate on forums of related topics. — SF


References

Strossen, RJ. Paul Anderson: The Mightiest Minister. Ironmind Enterprises, May 1, 1999.

Klein, Karl. “The deep squat exercise as utilized in weight training for athletics and its effects on the ligaments of the knee.” Journal of the Association of Physical and Mental Rehabilitation. 1961;15:6–11.

Todd, TR. “Karl Klein and the Squat.” National Strength and Conditioning Association Journal. 1984 June;6:26–31. (Correction: Ref 32: The last name of the journal title should be Rehabilitation.)

Starr, B. “Letter to the Editor.” Strength and Health, August 1963.

Meyers, EJ. “Effect of selected exercise variables on ligament stability and flexibility of the knee.” Research Quarterly. 1971;42(4):411–422.

Klein, KK and Allman, Fred L. The Knee in Sports. Jenkins Publishing Company, January 1, 1969.

Stone, MH and Chandler, JT. “NSCA Position Paper: The Squat Exercise in Athletic Conditioning.” National Strength and Conditioning Association Journal. 1991;13(5):51–58.

Baechle, TR. (Editor). Essentials of Strength Training and Conditioning. Human Kinetics, pp. 369–370, 1994.

Gironda, V. The Sissy Squat. January 1, 1975.

Hartmann H, Wirth K, and Klusemann M. “Analysis of the load on the knee joint and vertebral column with changes in squatting depth and weight load.” Sports Medicine. 2013 Oct;43(10):993–1008.

Gagné, P. Personal Communication, June 5, 2023.

Charniga, B. “Should Female Weightlifters Be Injury Prone?” Sportivny Press, January 23, 2018.

Charniga, B. “Practical solutions to the problem of Achilles rupture and the proliferation of injuries to the lower extremities of football players.” Sportivny Press, February 17, 2017.

Dominguez, RH and Gajda, R. Total Body Training, Warner Books, pp. 247–248. 1982.

Fry AC, Smith JC, and Schilling BK. “Effect of Knee Position on Hip and Knee Torques During the Barbell Squat.” Journal of Strength and Conditioning Research. 2003;17(4):629–633.

Autonomy Lift

Autonomy 2.0—Program Less to Get More

Blog| ByMatt Aldred

Autonomy Lift

As strength and conditioning coaches, we aim to improve the athletic performance of our athletes and strive for a healthy and high performing team. The beauty of this profession is that everyone attempts to reach this goal differently; everyone has their own philosophy, their own mentors, their own biases, their own personal experiences, and their own way of doing it.

No one program is an exact copy of another; even if it starts off that way, it will inevitably change to fit the new training environment, team, culture, and group of athletes.

We take real pride in how our strength and conditioning programs look, what our progressions are, and how our testing numbers have changed. These are all inherently good things—they hold us accountable to our work and can lead to an evaluation of the extent to which we are or are not doing a good job. We should be constantly learning best practices for the training and care of our athletes, have growth rather than fixed mindsets, be curious to learn from all sports and coaches, and always be willing to adapt or change our minds if sufficient evidence causes us to rethink our old methods.

I find it funny, though, how over the past five years of working at Furman, one of the biggest learning curves for me has actually been letting some of my programming go and giving it over to the athletes. Giving them a choice during optional workouts is a no brainer for me now because:

  • The buy-in is high
  • The intent is high
  • The energy is high
  • The attendance is high
One of the biggest learning curves for me has actually been letting some of my programming go and giving it over to the athletes, says @SCoach_Aldo. Share on X

Giving some of the choices up to the athletes is so effective that, in some cases, the overall training frequency during the summer is actually 50% higher than if they just choose to attend the mandatory team lift sessions.

Two years ago, I wrote an article on how we incorporate autonomy as part of our training process at Furman. Over these past couple of seasons, I’ve seen some developments within that autonomy training and I’d like to write in further detail about what’s changed in our process since then, what the athletes have taught me about autonomy, and how it’s the easiest way for our athletes and coaches to level up a development program.

Training Frequency

Summer training is one of the most significant uninterrupted phases of training for most Division 1 men’s basketball teams. For us at Furman, this consists of eight weeks of weight room sessions and on-court workouts from June to the end of July/early August. Within this time frame, I’m given three to four lift sessions a week. The biggest reason I’m able to train the guys more than that during the summer block is because I offer optional workout times/days and, within these sessions, give them the autonomy to choose which exercises and workouts they perform that day.

As a result of this, there is not a day I come into work that I’m not training an athlete, whether that is a Monday morning or a Sunday afternoon (yes, unfortunately our schedule in college athletics is rather varied). This is something that reflects our program’s culture of hard work, development, and deliberate improvement now model (#ALLDIN).

For the sessions that I’m given in which the players have to be there, I’m able to program holistically and specifically to the athletes’ needs. With the 13 scholarship players we have, I usually write between five and eight different programs. These mandatory sessions usually last one hour and are performed either with the full team present or in smaller lift groups based on class schedule.

Outside of these mandatory sessions, as noted earlier, I give the athletes the choice to get in extra work throughout the week. These sessions are optional and usually last 20-40 minutes, with the main difference being the freedom I give them to choose what they want to do in these sessions. If an athlete wants to train on a non-team lift day, it’s likely they will have an idea of what they want to work on for that lift, so I’m very comfortable letting them carry out this plan. After they complete that self-prescribed workout, the athlete feels they have taken a step in the right direction on their own personal development journey.

After they complete that self-prescribed workout, the athlete feels they have taken a step in the right direction on their own personal development journey, says @SCoach_Aldo. Share on X

Employing Athlete Autonomy

An example of an optional autonomy workout could be that the athlete wants to work on “power and feeling explosive” during this particular session. They enjoy Olympic lifting, so want to do some hang cleans and box jumps to “feel bouncy.” I suggest jump rope to warm up and a barbell complex before we do a more specific hang clean warm up. The athlete tells me they also want to “work some arms” after the power work. I ask the athlete how many sets and reps they want to do in the A series—I then use my knowledge of programming and their weekly load so far to discuss the best set and rep scheme. This is a great time to check in on the athletes training knowledge and briefly educate why performing eight reps on a hang clean isn’t ideal for power development!

After the reps and sets have been discussed, the athlete can perform the hang cleans and box jumps under my supervision. For the B series they want to do some biceps and triceps work, so I have them choose two arm exercises, we discuss sets and reps, and I supervise the B series. During the lift, I take the opportunity to check in on their diet, stress, sleep, life, etc. I may even jump in on the B series with them. At the conclusion of the lift, they’ve just completed a micro-dose of training stimulus (20-40 mins) between their larger doses of stimulus (~60 mins) on the mandatory lift days. This extra session is a win-win and is one of the biggest reasons why I love these optional autonomy sessions—what could have been a three-day S&C training week has now become a four-day training week.

If I were to add up the extra sessions the guys performed this past year—which I in fact did keep a record of—the number would FAR exceed that of just the mandatory lift sessions. While this is an obvious statement, I would question you right now, how many optional sessions do you think your athletes actually perform with you? How could you increase that number? How do you get athletes to come in and train on days that aren’t mandatory?

If I were to add up the extra sessions the guys performed this past year, the number would FAR exceed that of just the mandatory lift sessions, says @SCoach_Aldo. Share on X

Our model at Furman has shown that giving athletes autonomy on these extra days leads to a significant increase in buy-in and the perceived value of the weight room to their development, which then leads to increased participation in these sessions, which results in an increase in training frequency, which, when added up, makes a huge difference to the end result. It’s similar to how we view warm-ups. Working on physical capacities in the weight room and on court warm-ups for 5-15 minutes each day might not seem like much, but when this is added up over weeks, months, and years, that’s a lot of physical capacity development. The same can be said for these smaller lift sessions between the longer mandatory sessions.

For example, let me break it down to you with a summer training block:

  • 8 weeks of summer training, 4 mandatory hour sessions a week, 0 extra sessions a week = 32 total S&C sessions
  • 8 weeks of summer training, 4 mandatory hour sessions a week, 1 extra session a week = 40 total S&C sessions
  • 8 weeks of summer training, 4 mandatory hour sessions a week, 2 extra session a week = 48 total S&C sessions

Going back to my opening point, if our jobs are centered on athletic performance development, how many training opportunities would you like your athlete to have that would contribute to meeting those performance development goals: 32, 40, or 48?

Now, I understand some of you may be scoffing at this and saying you’d prefer 32 quality sessions with adequate rest between than 48 sessions to better elucidate the imposed stress and compensating response to the S&C program. This is a valid statement for some professional athletes, especially those who compete in weight lifting competitions. However, for our college basketball athletes, a day off will likely involve them shooting on the gun, watching some film with a coach, going to the training room to get some treatment, and/or getting a stretch from me.

If we had a heavy leg day the day before and the athlete wants to come in the weight room for some core work and arm accessory work (yes, bis and tris), is that going to have a negative effect and blunt some of the training adaptation for the lower body from the previous day’s sessions? I’m hedging my bets by saying no, especially for low training age athletes—which is often the case with collegiate basketball players. They need as much time in the weight room as possible. Some post-lift foam rolling and stretching is always recommended, too, so their recovery could even be improved with this extra session.

Some post-lift foam rolling and stretching is always recommended, too, so their recovery could even be improved with this extra session, says @SCoach_Aldo. Share on X

Preparing Athletes for the Future

Now, to add some more context to these optional autonomy lifts: will I be the primary coach in some of these sessions and tell an athlete what to do that day? Absolutely, it’s my job to know more than they do about the training process and athletic development. Will some athletes come in for extra sessions and ask me to give them a lift for that day? Yes. Will I get low-minute guys in extra during the season to keep working on certain physical qualities that will best prepare them to play when called upon? Yes. Will I get low-minute guys in on game days to do some power work to prep them for the game but also to give them some jump exposures so that if they don’t play, they’re getting some game intensity work in? Yes.

However, in order to really increase training frequency, in my opinion some autonomy sessions are needed. I’ve had athletes say “I’ll come in tomorrow (to the weight room), but only if I get to choose what I’m doing.” Come on in. I’ll take this 10 out of 10 times if it means an athlete gets an extra training session in. I’m certain everyone reading would too, but ask yourself: would an athlete feel comfortable asking you this? Or, would they fear being laughed at? In order to drive up training frequency, the weight room has to be seen as a place of development, not pain; as a place of improving on court performance, not an Olympic weightlifting hall or a military barracks where the consequence for asking a coach the wrong question results in burpees. Nothing screams insecurity or power trip to me more than athletes not having a say in their development in the weight room.

For me to think I know it all regarding athletic performance development is ludicrous. For me to think I know it all about a sport I played up until I was—wait for it—12 years old, is beyond dumb. Let the athletes take the wheel some days and work on what they want to work on. If you ask the right questions, you can learn a lot during those autonomy lifts. The athlete feels respected and trusted to give an opinion on their current program and whether they feel it’s making a difference in their physical capacities, and it gives you a chance to better understand their needs and what works for their body versus others’. If an athlete is always doing some type of plyometrics on these optional autonomy sessions, it’s likely they don’t currently feel explosive enough. Perhaps a conversation should take place to dive deeper into this. That talk could unearth something that has been on the athlete’s mind for a while.

Allowing autonomy also helps prepare the athlete for the next steps in their career. We’ve had numerous athletes play abroad and have some mandatory S&C sessions with their respective teams’ S&C coach. “Champions do extra,” though, right? So, if the player wants to get an extra session in and the S&C coach isn’t available, it’s up to the athlete to create a workout and execute it. If the countless optional sessions they’ve had at Furman can better prepare them for these workouts or a hotel game day workout, then great!

Allowing autonomy also helps prepare the athlete for the next steps in their career, says @SCoach_Aldo. Share on X

Giving an athlete autonomy also, to an extent, shows you the athlete’s internal motivation and drive to succeed. With our athletes at home for May, it’s fun to see who reaches out to ask for programs, who sends me clips of them training, and who goes radio silent for the month! If for whatever reason they have a change in training environment, are they able to think for themselves and create a solid workout without me being there? I really hope so!

Programming with Autonomy in Mind

I take a lot of pride in the detail I put into my programming and the years that it has taken me to produce a solid, well thought out, holistic program. I also feel very proud when my athletes come in to train on optional days and I see them train with good form, give great effort, and carry out a solid lift. I see my coaching role as a teaching role; I want to transfer all the pertinent knowledge I have about performance to my athletes. If I haven’t taught them anything and have only instructed them on the what not the why, that’s a complete failure on my part.

To keep track of the extra sessions, I create a very simple Excel file which labels the semester of training we are in, the players’ names, and which days they train. This gives me weekly and monthly totals. This information is great for holding athletes accountable to their goals and also keeps me in check with doing the same. If an athlete’s goal is weight loss, I have to make sure they are seeing me more often than the team lifts twice a week. It’s also a way to write notes regarding the stretches I performed pre- and post-practice so I can hold myself accountable to helping them best prepare and recover for practices/games.

Autonomy Notes
Image 1. An easy way to keep track of how often your athletes train is through a simple Excel sheet.

I recently asked one of my athletes why he likes the autonomy lifts; he replied, “They are the most fun lifts, the best energy sessions.” He also said how he liked that—from my perspective as a coach—I then get to see what everyone wants to work on and maybe that can help me program for them.

This athlete always loves doing core work. Aside from the fact that he wants a six-pack, it’s helpful for me to see that and to keep challenging him with different core exercises. The athlete also referenced the best energy to our Saturday morning sessions in the summer. For some guys, that could be their sixth lift of the week. To have them in on a Saturday morning, often doing prowler sprints and racing against each other, is a great sign of where our culture is at.

As an added tidbit, my own workout on those Saturdays is to do one exercise of each of the athlete’s whiteboard workouts, for as many rounds as I can before our leadership guys call time on the lift. It’s a great way for me to interact with the guys and gives me an opportunity for some sweat equity with them! As to why he feels they are the best energy sessions, it makes sense that everyone’s spirit is up and they are having fun, they did after all choose to be there that day to get extra work in. Letting them be the DJ on my Apple music account probably contributes to that extra energy, too!

Working out with the team is a great way for me to interact with the guys and gives me an opportunity for some sweat equity with them, says @SCoach_Aldo. Share on X

Game Day Lifts

On rare occasions, I have a real lightbulb “wow” moment when coaching the team. One of those moments happened in-season this past year. I have an optional lift every home game day that takes place an hour before we meet as a team for film. It’s open to everyone. My walk-ons and redshirts always come, and low-minute guys come also. One particular low-minute guy had struggled in the weight room his first year with us; his effort was below standard and we had many a conversation about improvement and being held accountable to one’s body of work.

Fast forward to this season and I’m having to stop the athlete from lifting for too long during one of his autonomous game day sessions, in fear of a residual fatigue effect for the game later that day. He didn’t want to stop—he wanted to keep training. From being in a mental space of not enjoying the weight room and not applying himself fully, I’m now having to take the dumbbells out of his hands and tell him to get a stretch before heading to film. I wonder if he would have had that attitude of self-improvement that day if I had created the workout for him? Self-motivation is a beautiful thing when you’re in the driving seat of your development, not the passenger seat.

Self-motivation is a beautiful thing when you’re in the driving seat of your development, not the passenger seat, says @SCoach_Aldo. Share on X

Basketball Autonomy

Basketball athletes show autonomy most days they are in the facility. Every time they choose to shoot on the gun or with a partner, they are making a decision to work on an area of their game they want to improve. They may decide one day to try and hit a certain number of consecutive free throws, or work on some ball handling; again, it’s a decision they get to make regarding which skills to improve. So why can’t the same thing be applied to weight room work? Why can’t the athlete make that decision to work on a specific area a couple of times a week?

Recovery Autonomy

Let’s all assume you have a trustworthy, hard-working athlete with a great attitude. I am a firm believer that this athlete inherently knows what works for them from a recovery perspective. Nowhere is autonomy more impactful and prevalent than in an athlete choosing which recovery modality to use to reduce soreness and make them feel more recovered before the next session. Take, for example, an athlete who hates ice baths; they stress them out and they can’t sit it one for longer than a minute. Compare that with an athlete who tolerates them well and can be in there for 15 mins.

Recovery is all about downshifting the sympathetic nervous system and upregulating the parasympathetic nervous system. You want the athlete relaxed, you want nasal breathing, you want to reduce their stress to encourage effective recovery. The athlete you made have an ice bath is all tensed up hating the ice bath; they don’t want to be in there and would probably name a few alternative therapies that would help them recover more optimally.

As much as I enjoy giving the athletes a say in their physical development, I would argue the case even more so for giving them a say in their recovery. Giving them the choice and some decision making will again lead to further questions and understanding of the coaches’ and trainers’ point of view, which will contribute to a more effective individualized holistic athletic performance program for that athlete.

As much as I enjoy giving the athletes a say in their physical development, I would argue the case even more so for giving them a say in their recovery, says @SCoach_Aldo. Share on X

Conclusion

As a strength and conditioning coach, I want to be a facilitator for student development, encouraging self-discovery and ownership with all aspects of their learning and training. Our aim should be creating an environment that allows room for experimentation, reflection, and growth.

Give it a try—for your next optional session, when an athlete texts you and wants to train, ask them what they want to work on. Say that you are there if they need guidance and that the weight room is open and available for whatever they want to work on. Do let me know how it goes. I’m raising my morning coffee in a toast to autonomy. Give the athletes a say in their development and watch the buy-in and results reach a new level.

Since you’re here…
…we have a small favor to ask. More people are reading SimpliFaster than ever, and each week we bring you compelling content from coaches, sport scientists, and physiotherapists who are devoted to building better athletes. Please take a moment to share the articles on social media, engage the authors with questions and comments below, and link to articles when appropriate if you have a blog or participate on forums of related topics. — SF


Antwann McCray Summer School

Summer School Session 3 with Coach Antwann McCray

Blog| ByDan Mullins

Antwann McCray Summer School

Occasionally you meet someone whose energy is infectious, even from a distance—Coach Antwann McCray is that type of person. Energy, however, isn’t the only thing that Coach McCray brings to the table: everyone participating live for Episode 3 of Summer School witnessed how Coach McCray’s thorough, thoughtful programming considerations—mixed with his passion for athletes and building relationships—provide all the foundations of a highly successful coach ready to execute a powerful athletic development model.

The development of this episode begins as a representation of this industry and the many positive potential benefits of social media. I’ve interacted with Coach McCray via Twitter and observed his program from afar, but we finally met in person at the Plae Clinic in Charleston, SC. In our limited time together, it was apparent that there was something special about him; so, naturally, when there was a cancellation this week with our scheduled presenter, Coach McCray was the perfect candidate. On a two-day notice, he stepped up and shined in his first speaking opportunity.

Coach McCray is the strength and conditioning coach for high school and college groups at 11.11 Elite Training in Greenville, SC and is also taking over the strength and conditioning program as a full-time S&C at a local high school. Coach is a football alum of Gardner-Webb and Lenoir-Rhyne, where he majored in exercise science while competing in the NCAA. His first professional opportunity came training middle school athletes, where he had the opportunity to develop his coaching philosophy and refine his coaching. Now, as a soon-to-be high school S&C responsible for all sports, his passion for athletes and rich background of diverse training styles will pay off.

Identifying and Developing Your Philosophy

In this episode, we discuss the specific tenets of Coach McCray’s training approach. These include:

  • RFD development’s seasonal timing.
  • Matching exercise and stimulus selection with fieldwork.
  • Selecting training priorities across all sports.

For coaches starting out in this industry—or even those who have been in the game for a while—establishing and communicating a coaching and training philosophy can help athletes, parents, and other coaches understand what you believe, what your expectations are, and the way that you will train.

Training Philosophy
Figure 1. Each training program must first establish an identity or a philosophy that governs how athletes in their program will train. A well-thought-out training philosophy will help coaches guide the ship and define the buckets they must fill throughout the long-term athletic development model.

Building an exercise library for desired traits that fit your program constraints is vital to staying on the map of your training philosophy. Often, in seeking the implementation of ‘new’ principles or movements, coaches can stray from their philosophy. This is not to say that the philosophy or method of thinking should never be evaluated or updated, but identifying a component of a training block and rationalizing how it fits your program’s desired qualities is a critical necessity of any athletic program. Essentially, coaches must be able to answer the question: “Which tenet of my training philosophy does this exercise/stimulus develop?”

Often, in seeking the implementation of ‘new’ principles or movements, coaches can stray from their philosophy. Share on X
Top Speed Training
Figure 2. Identifying lists of your “go-to” drills can help keep training fresh while ensuring you do not deviate from your training philosophy. Above are listed a few of the options that Coach McCray uses to fill his athletes’ acceleration and top-speed buckets.

Video 1. This week’s full session with Coach Antwann McCray.

Panel Q&A

This session came with many questions as the panel sought to dig deep into understanding precisely who our presenter was and his system. This week’s panel included Elton Crochran from Veterans Memorial HS in San Antonio and Kyle Jacksic, Director of Strength and Conditioning at Ardrey Kell High School.

Coach Croc

Early in the session, Coach Crochran asked “what do you want your identity in this industry to be?”

Coach McCray: “We often feel the need to have this big, raspy coaches voice to project a sense of control, but what we as coaches must be is whom our athletes need most. My playing career is over, and I cannot live the rest of my career through my athletes. I must put the athlete first and their needs, their personality, their goals—not mine.”

My playing career is over and I cannot live the rest of my career through my athletes. I must put the athlete first and their needs, their personality, their goals—not mine, says @AMacAOM. Share on X

Kyle Jacksic

Coach Jacksic asked: “When are you working RFD (Rate of Force Development) in the competitive calendar for your training?”

Coach McCray: “RFD is a staple in our program. I believe that while you may identify one portion of your philosophy as a goal for a block—such as max strength—that doesn’t mean that the only stimulus we train for during that block is max strength. We work RFD into everything we do—whether moving light weight fast or a heavier load with maximal intent, RFD is involved with each of our sessions.

Dan Mullins

Coach Mullins asked: “As a coach who has been in the private sector and is now fully experiencing the high school team setting, as you program for and implement your training with the high school, how can we push past the good coach-bad coach relationship of the public and private sector?”

Coach McCray: “The most important piece to this is that both parties must remember we aren’t in it to prove which coach is the best; we’re in it to put the athlete first and do what’s best for them. That has to be where the conversation starts. From there, identifying holes in the team setting that, for whatever reason, can’t be filled because of time, technique, space, whatever it is, and the private coaches can start there to fill those needs. Team coaches who communicate well can identify those for the coaches so that when the athlete goes to the private facility, the coach is already aware of areas that can be supportive and not take away from the team training.

Looking Ahead to Session 4

For Session 4, we head to the Lonestar state to hear from Coach Tanner Swinford, the Director of Strength and Conditioning at Rockport-Fulton High School, who practices what he preaches and programs! Register here to join the email list for the link sent out each Sunday. See you all Tuesday, June 27 at 8p.m. EST.

Since you’re here…
…we have a small favor to ask. More people are reading SimpliFaster than ever, and each week we bring you compelling content from coaches, sport scientists, and physiotherapists who are devoted to building better athletes. Please take a moment to share the articles on social media, engage the authors with questions and comments below, and link to articles when appropriate if you have a blog or participate on forums of related topics. — SF


Small College Weight Room

Building an S&C Department from the Ground Up with Michael Gragg

Freelap Friday Five| ByMichael Gragg, ByJoey Guarascio

Small College Weight Room

Michael Gragg, SCCC, CSCS, has been the Head Strength and Conditioning Coach at Harding University (DII, Arkansas) since 2021. He is Harding’s first-ever strength and conditioning coach and oversees the sports performance efforts for more than 400 student-athletes. Prior to HU, he was a strength and conditioning coach at Northern Arizona University, responsible for the training and development of men’s and women’s basketball and sprinters, and he assisted with football. Before NAU, Gragg was a graduate assistant at TCU and an intern at Battle Ground Academy (Franklin, TN). In college at Harding University, Gragg played in 43 games as an offensive lineman and earned his B.S. in Exercise and Sports Science and his M.S. in Education.

Freelap USA: After you were hired as Harding University’s first strength and conditioning coach, what were your top priorities and goals for establishing the department?

Michael Gragg: It was important to identify early in the process if I was being hired to check a box that would fulfill the NCAA requirement of having a certified strength and conditioning coach on staff. I was happy to realize they sought me to establish what would become a significant support system for the student-athletes and to mentor strength and conditioning students in our Master of Science in Strength and Conditioning (MSSC) program. Throughout the interview process, my goal was to establish a congruence of vision between myself and the university. Being sure the athletic department and coaches knew exactly what to expect with me joining the team was a must.

Communication and collaboration were my top priorities. I intended to get a sense of what every sports coach was doing for S&C (if anything). Sit-down meetings with coaches and athletic trainers were vital for gathering information about team training history. I made an effort to chat with as many student-athletes as possible about their weight room experience—the good, bad, and memorable. There are plenty of funny AND horrifying stories about what some athletes experienced in the weight room and during conditioning before I arrived.

Freelap USA: The importance of building buy-in is often discussed in strength and conditioning—what tips do you have for sustained success in developing relationships in the athletic department? 

Michael Gragg: There are a few things that led to success in earning trust in the athletic department. I was very intentional and invested substantial time and energy in getting to know the student-athletes. It was incredibly valuable to ask how I could best serve them, what their expectation of me was, and how I could deliver on those expectations. Seeking feedback and honestly assessing what the athlete is thinking and feeling begins by being vulnerable with them first. It’s powerful to stand in a room of athletes and ask, “Hey, what do y’all like or not like about the training? What questions do you have? How can I be a better coach for you today?”…and then be very receptive to the feedback.

I was deliberate in learning every athlete’s name in the first week—regardless of team size—and engaging with them by name. Attending practices is a critical aspect of gaining buy-in. Being present and available at practice enables you to get to know athletes when they are in their true element. Having players and coaches feel as though they are your top priority goes a long way in building trust over time.

Our sports coaches appreciated that now, S&C training was off their plate, and they could prioritize recruiting and other valuable responsibilities in the off-season. The new voice in the room holding players accountable, echoing team standards, and leading athletes toward continued growth aided team development and was a key factor in buy-in with sports coaches.

It took nearly two years to get every team all-in with S&C, but I believe patience, results with other teams, and not burning bridges with sports coaches early on paid dividends, says @MichaelGragg. Share on X

For the coaches who did not want S&C involved with their teams early on, I was very careful not to intercede with what they had been doing successfully for years. I took an indirect approach but was persistent in getting to know these coaches and athletes by stopping by practices for the occasional stretch or recovery session to demonstrate the value of S&C outside the weight room. It took nearly two years to get every team all-in with strength and conditioning, but I believe patience, results with other teams, and not burning bridges with sports coaches early on paid dividends.

With our sports medicine staff, it is a priority to check in daily with a sit-down meeting, a pop-in talk, a chat at practice, or a quick text. It is up to us to ensure we are in the loop with our athletic trainers and sports coaches on all injuries and training modifications. We never assume or expect anyone will communicate vital information; instead, we consistently seek information from the source. Additionally, we program in a way that mitigates the risk of injuries based on the needs of the sport, and we are prepared to build in training modifications when needed.

Being familiar with injury history and modifying for individual needs was a small thing athletes and athletic trainers greatly appreciated. By encouraging student-athletes to live up to their potential and pursue excellence and by serving as a support system, we work as a team to promote the holistic development of their minds, bodies, and spirits.

Ultimately, production matters, and a pivotal piece to building buy-in is RESULTS. Our strength and conditioning department offers safe, appropriately challenging, and technically sound training that provides exactly what athletes need to support their athletic endeavors and mitigate the risk of injuries in an environment where they will be empowered and supported daily. Those simple things executed at a very high level build buy-in.

Freelap USA: For a Division II university, you have a good-sized staff of graduate assistants and interns. How did you go about building and developing your staff?

Michael Gragg: When hired, I was the only full-time S&C coach. During my first semester on campus, the demand for strength and conditioning among all of our teams was very high, and attempts to bring in volunteer interns had no success. I pitched the idea of creating graduate assistant positions to help train the teams and increase our MSSC program’s enrollment numbers. If the four graduate assistant positions had not been approved, the strength and conditioning department would not have blossomed into what it is today. The students in the MSSC program who were not GAs observed the importance of getting in the weight room, and before I knew it, we regularly had staff meetings of 8–9 young coaches growing together every day.

Establishing and upholding a department culture was essential once we had multiple young coaches working together. We are unified in keeping the athlete at the center of everything we do, and we have clear expectations for how we will coach and carry ourselves daily. Those things, paired with quality time, led to a cohesive team of disciplined coaches who challenge and hold each other to be their best.

Bringing in young and hungry strength and conditioning coaches is vital to the success of our department. Involving current GAs in interviewing candidates helps them prepare for their own future interviews and allows us to determine if the candidate is a good fit for our team. Once a GA demonstrates their ability to do what is required at a high level, they have earned the trust and autonomy to do their job while knowing they have my support and guidance when needed.

Through staff readings, presentations, program defense, peer evaluations, and feedback, we learn to think critically, are refined by the fire, and become eminently prepared for the next opportunity. Share on X

I would not be the coach I am today if not for my two internships and GA experience that led to a strong desire to create an environment of continued professional development amongst our staff. Through staff readings, presentations, program defense, peer evaluations, and individual feedback, we learn to think critically, are refined by the fire, and become eminently prepared for the next opportunity.

Freelap USA: What obstacles have you overcome while establishing the strength and conditioning department?

Michael Gragg: Every S&C staff member will navigate obstacles to operate smoothly and pursue continued growth. Because our GAs and interns are doing phenomenally in their roles, many have earned jobs after their first year. I make an effort to be involved in the GA’s planning process while also allowing them the autonomy required for growth to avoid a lack of consistency from our staff to the teams. Ideally, this allows sport coaches and players to trust there will be results from year to year even though the S&C coach may change. This highlights the continued need to attend competitions and be present in the weight room periodically to keep relationships strong.

Like many small school strength and conditioning departments, we have our share of budget constraints. Our MSSC program budget allows us to provide a stipend to our graduate assistants (which has grown year to year) and has furnished valuable pieces of technology (GPS, force plates, VBT, HR monitoring). However, the funds for equipment maintenance, upgrades, and weight room supplies come solely from our donors or from individual sports teams investing their budget into S&C. We have been able to slowly add equipment and make the enhancements required to pursue excellence largely because our administration, sport coaches, donors, and S&C department have a shared desire for keeping the student-athletes’ development central to what we do.

Freelap USA: A certified strength and conditioning coach working with all athletes is still uncommon in many high schools and small universities. What advice would you offer to school or university administrators looking to invest in strength and conditioning?

Michael Gragg: Every university and high school should have a certified strength and conditioning professional whose sole responsibility is to direct and oversee the training of all student-athletes. The benefits that a strength and conditioning coach provides extend far outside of the weight room. I would encourage administrators to explore the value of strength and conditioning and hope they come away realizing our role is way more than “bigger, faster, stronger, and better conditioned.” If supported by an administration that fosters collaboration between strength and conditioning, sports medicine, and sport coaches, a high-quality S&C department will aid in mitigating the risk of injuries in training, practice, and competition. It will enhance the physical, mental, and spiritual well-being and performance of athletes, which results in improved team success in and out of competition.

Administrators who have the desire to promote strength and conditioning should make every effort to staff and fund the department adequately. If compensated fairly, athletic departments have a better chance of enticing higher-quality candidates and have an opportunity to retain coaches for longer periods. There are too many S&C departments that are a revolving door of head and assistant coaches due to coaches being overworked and underpaid. The true value of a strength and conditioning department, just like exercise, reveals itself over time and allows for long-term athletic development.

The true value of a strength and conditioning department, just like exercise, reveals itself over time and allows for long-term athletic development, says @MichaelGragg. Share on X

It should be the standard that athletic administrators evaluate the S&C department’s performance and its impact on athlete development and encourage open communication and teamwork with all parties that influence student-athlete performance. This should take place under the supervision of an administrator with a strong understanding of health and human performance. Ultimately, the support from the athletic administration allows for a sustainable strength and conditioning department and sets the foundation for long-lasting student-athlete health and performance.

Since you’re here…
…we have a small favor to ask. More people are reading SimpliFaster than ever, and each week we bring you compelling content from coaches, sport scientists, and physiotherapists who are devoted to building better athletes. Please take a moment to share the articles on social media, engage the authors with questions and comments below, and link to articles when appropriate if you have a blog or participate on forums of related topics. — SF


Off-Season Basketball Training

Calling All Hoopers! Off-Season Training to Increase Your Vertical Leap

Blog| ByHarvey Meale

Off-Season Basketball Training

Every basketballer is, on some level, interested in jumping higher. The problem is that it’s incredibly difficult to make meaningful progress on your vertical while in-season. Your entire bandwidth is conditioning and going to games and practices. Most student-athletes will be lucky if they can find time to get in the weight room once or twice per week.

This is why the off-season is the perfect opportunity to get some serious reps under your belt, so by the time the next season rolls around, you’re faster, stronger, and jumping waaaay higher.

Today I’m going to tell you a few of the crucial things high school or college-level hoopers should be thinking about if they want to make meaningful progress on their vertical jump this off-season.

Let’s begin!

Specialize in a Single Sport as Early as Possible

Having played both basketball and volleyball in high school at the state and national representative levels, I really struggled with managing all the various commitments to different teams in each sport. I never really found myself with a proper off-season, which hindered my ability to make the sort of progress I wanted in the gym.

My recommendation is to choose a single sport and not over-commit yourself to too many teams, tournaments, or camps, such that you actually get a full 8–14 week off-season.

If you’ve found yourself with 3–4 sporting commitments per week, even during the off-season, you’re really going to be overdoing it from a total training volume perspective when you add a 4–6 day per week vertical jump program into the mix.

The off-season is a golden opportunity to focus on your physical development as an athlete and should be treated as such.

Begin with a Proper Deload

The first step to a successful off-season is to give yourself the better part of a week to let your body heal. This is particularly important if you’ve just gone through a grueling post-season.

The key to a successful deload is to be disciplined.

While a wide range of approaches to deloading can be effective, sitting around playing 2K all day and vegging out on the couch isn’t one of them! Let’s keep it simple with some principles that I’ve personally had success with.

The first step to a successful off-season is to give yourself the better part of a week to let your body heal. This is particularly important if you’ve just gone through a grueling post-season. Share on X

Keys to a Successful Deload

What we’re effectively trying to do here is let our body repair the worn-down muscles and connective tissues while still sending a signal to the brain that says we’re continuing to use our muscles…. So heal them but don’t atrophy them.

  • Reduce volume by 50%­–70%: You’ll still want to do some training, but it will be a tiny fraction of what you’re used to. If when you previously walked into the gym, you’d do 5×5 back squats, just do two sets. It should feel like the worst workout you’ve ever had, stopping your working sets right before you start to feel something!
  • Maintain fairly high intensity in the weight room (~90%): This means you should still be lifting about as heavy as you were prior to the deload but easing off just a little bit. Lifting relatively heavy will ensure you hang onto all your strength and muscle throughout the deload. Shoot for about 90% of the weight you were using the week prior to your deload, but don’t push it if you’re too banged up.
  • Eliminate or modify jump volume: If you were doing lots of jumping or plyometrics toward the end of the season, you have the option of entirely removing plyometric training during the deload or simply switching out exercises for lower-intensity alternatives. For example, instead of doing 10 depth jumps per session, you might do 4–5 box jumps instead.


Video 1. Box jumps are ideal for deloads, as they’re a fantastic way to continue jumping while eliminating those brutal landing forces, which will help your joints recover.

    You can also continue doing extensive plyometrics like pogo jumps and single-leg line hops but reduce the overall volume to about half.
  • Lots of movement: Movement promotes blood flow. Blood carries nutrients to our muscles, which enables the healing process to take place. Instead of relaxing on the couch all day, make sure you get outside and do at least 1.5–2 hours of low-intensity steady-state activity.
    This can be as simple as a very light jog or walk, some yoga, or even just going to shoot some hoops for a couple of hours.
    If you have access to a swimming pool, hydrotherapy of any sort is a great way to get some movement in the “lowest impact” environment on Earth! The water effectively bubble-wraps your body so your joints can focus on healing. Simple movements like butt kicks, high knees, leg swings, and flutter kicks all work great. You could also just swim a few laps as long as that’s relatively easy for you.
  • Include mobility work/static stretching: Fifteen to 20 minutes of some very basic mobility work will help prevent you from getting tight during the deload week. I also recommend spending 2–3 minutes stretching out your calves, hips, quads, and glutes/lower back. Spend a little longer on areas that you feel are particularly tight.
  • Maintain your diet: You need to be super conscious of your diet during the deload week to not gain unwanted body fat. If you feel as though you’re burning significantly fewer calories than you were at the end of the season, you might actually want to reduce your overall caloric intake slightly. You still need to eat mostly whole, unprocessed foods and get in plenty of protein.
  • Sleep: When it comes to recovery, the real magic happens during sleep. Since this whole week is about recovery, you should ensure you’re consistently getting as close to eight hours of sleep as possible.

How long you should deload for will be determined by how much fatigue you have accumulated during the season. I recommend five days for most athletes, give or take.

The amount of fatigue you’ve accumulated during the season will determine how long you should deload for. I recommend five days for most athletes, give or take. Share on X

If you’ve had a brutal post-season and your body feels like it’s been hit by a truck, take a full seven days to deload. If you didn’t get much action toward the end of the season and feel mostly fine, a four-day deload should be plenty.

Create an Off-Season Game Plan

If you really want to shock everyone when you return to the court next season as a completely upgraded athlete, you’ll need to be strategic about your approach to the off-season.

I’m about to cover the four most important things to consider if you’re interested in maximizing your vertical jump progress this off-season. Use these recommendations to formulate your own off-season game plan.

1. Prioritize Durability and Longevity

Basketball is one of the highest-impact sports, which means it’s incredibly taxing on your body, particularly your joints—this is why most NBA players will retire before their 30th birthday. One of my biggest regrets as an athlete was not taking better care of my body as a senior in high school. I lifted and jumped at least six days a week.

The result?

Tendonitis, meniscus tears, and painfully slow progress on my vertical jump. My recommendation is to treat your body the same way Lebron treats his. Sure, you probably can’t afford to spend over $1 million per year on your body, but you need to approach it with the same mindset.

Optimize for longevity.

Strive to be like Kadour Ziani, who is still freaky athletic in his late 40s, and not like me, embarrassingly immobile in my late 20s.

I strongly recommend you start by familiarizing yourself with the ‘knees over toes’ methodology by learning how to bulletproof your ankles and knees. Share on X

I strongly recommend you start by familiarizing yourself with the knees over toes methodology by learning how to bulletproof your ankles and knees by integrating exercises like the Patrick step or Poliquin step-up. Whenever you run, change direction, or land, you’re in this exact position.

Knees Over Toes
Image 1. These exercises are designed to train us to become strong in that “knees past toes” position, which is super common throughout a basketball game.

Historically, we’ve been taught to avoid training in this “knees over toes” position, and I was once told, “Your knees should never travel past your toes” when squatting. But then strength and performance coaches like Charles Poliquin, Carl Petersen, and more recently, Ben Patrick began having huge success having their athletes challenge this idea by exposing the body to this challenging position.

Almost 34% of collegiate-level basketballers have some sort of patella tendonitis. Vertical jump coach Nathanael Morton recommends that athletes with jumper’s knee (or any amount of knee pain) begin their training protocol focusing on knee durability and not proceeding to heavy lifts like squats and plyometrics like depth jumps until their knees are pain-free.

An example of a knee durability and rehab protocol workout might look like the following.


Video 2. If you have access to a sled you can pull, use that. If you have access to a treadmill, you can use that (power it off) and walk backward. Even just walking backward (ideally up a hill) will be effective.

These movements make fantastic warm-ups and do an exceptional job of driving blood flow into the knee. Perform the movement for 1–2 minutes until you notice a quad pump. I recommend 3–4 sets.

Patrick Steps


Video 3. Bend so that your working leg’s knee extends past your toes. Reach out as far as you can with your off leg and gently touch your heel to the ground.

Perform 2–4 sets of 15–30 reps.

Slant Board Eccentric Squats


Video 4. With your heels elevated, focus on a slow and controlled descent.

Perform three sets of 10 reps.

ATG Split Squat


Video 5. Starting with one foot out in front of you, lunge down in a controlled manner so that your front knee extends past your toes.

Perform 2–3 sets of 5–6 reps.

Morton recommends repeating similar workouts 4–6 times per week until you can get through the workout without pain. In addition to the above, I’d recommend doing tibialis raises to increase your ability to safely absorb landing forces using your muscles instead of your joints.

Never work through pain…and for the love of God, do your mobility and flexibility work!

The off-season is, above all else, an opportunity for you to mend your body.

Never work through pain…and for the love of God, do your mobility and flexibility work! The off-season is, above all else, an opportunity for you to mend your body. Share on X

After you’ve taken care of any tendonitis, niggling injuries, and poor mobility, you’ve earned the right to enter the weight room to start taking strides toward becoming bigger, faster, and stronger.

2. Take a Structured Approach for Best Results

Understand—at least on a surface level—what a strategic approach to increasing your vertical jump looks like. Depending on which program you choose to follow, you might hear phrases like:

“Accumulation → Transmutation → Realization”

Or even

“Foundation → Integration → Translation”

Put simply, you should break your off-season into 3–4 smaller periods, each with a particular training focus.

Initially, you’ll start with some sort of fairly light accumulation period where the goal is to build work capacity and get your body used to a structured training environment. During this phase, you’ll do pretty basic lifts at moderate weights, as well as mostly extensive plyometrics and only a couple more challenging movements.

The idea here is to ease into things and get our bodies used to lifting and jumping a lot.

Example exercises will include things like:

  • Pogo jumps
  • Ankle jumps
  • Full-range back squats
  • RDLs
  • Pull-ups

Many programs will also focus largely on strength development during the first phase, as opposed to power/ballistic movements and plyometrics.

After 3–4 weeks of “building the base,” you’ll look to start ramping things up with more advanced movements where we’re really trying to drive adaptation using that foundation we established in the initial phase. Expect some more difficult higher-intensity (aka heavier) lifts, more intensive plyometrics, more power and ballistic movements, and some complex/conjugate training.

Example exercises will include:

  • Heavy back squats
  • Power cleans and med ball tosses
  • Depth jumps
  • Back squats followed by depth jumps
  • Trap bar jumps
  • Bounding

We aim to peak in explosiveness for the final 3–4 weeks of the off-season and then prepare our newfound athleticism for the court.

We do this by backing off slightly on the lifting/strength volume and upping the power and plyometrics. We reduce the weight used in our power movements and look to move the weight as fast as possible. The closer we get to the end of the program, the more focused we become on jumping.

We do another small deload in the last week of the program to flush out any accumulated systemic fatigue, and the result will hopefully be your highest jumping performance yet!

Choosing the Right Program

Unless you’re a sports science major, you likely won’t understand the complexities of the effective programming and periodization that go into a well-constructed vertical jump program.

For most athletes, I believe it’s smarter to outsource your vertical jump program to an expert who has created a system designed for maximum progress over the duration you have available.

I believe it’s smarter for most athletes to outsource their vertical jump program to an expert who has created a system designed for maximum progress over the duration available. Share on X

Sixty dollars is a fairly small cost for complete guidance over 14 weeks—that works out to $0.60 per day to help you optimize your training and create the most impressive transformation possible.

There’s a vast range of different vertical jump programs on the market, and I’ve personally purchased each of them to determine which products make the most sense for which athletes.

Here are a few things to consider…

Duration

Vertical jump programs typically range in duration from eight weeks to 16 weeks, with a couple of exceptions going for longer. You must identify exactly how long your off-season will be before beginning your pre-season commitments.

Some athletes might only have eight weeks available, whereas others might have a full 14 weeks. Before investing in a jump program, find out how long it goes, so you can get something that’s a good fit for you.

Access to Equipment

I can appreciate that not every athlete will have the luxury of a fully kitted-out gym. Some of you will have access to only very basic equipment, and some of you will have no equipment whatsoever…

Certain jump programs require certain types of equipment, whereas others require no equipment at all. Figure out what equipment you imagine you’ll have access to, then pair that up with an appropriate program.

Experience Level

Certain programs are very challenging, whereas others are super simple and geared more toward beginners. Ask yourself how much experience you have in the weight room and with plyometrics.

If this is your first attempt at meaningfully increasing your vertical jump, start with a program geared more toward beginners and younger athletes.

My recommendation?

I recommend Overtime Athletes’ Elite Vertical Academy because it checks all of the boxes:

  • Includes a “beginner” version for younger and less experienced athletes.
  • Includes a “bodyweight” version for athletes who don’t have access to equipment.
  • The main program still has a lot of advanced movements in it, so it’s great for more advanced athletes too.
  • Its 12-week duration is ideal for most off-seasons.
  • Significantly more affordable than other options.

I’ve written a full article comparing each of the different vertical jump programs you’re welcome to check out for more information.

3. Don’t Neglect Skills Work and Upper Body Training

As a younger athlete, I was so obsessed with being able to dunk that I had no interest in skills work. As a result, I ended up with a horrific handle and an inability to finish around the rim—despite being able to jump reasonably well.

Make sure you’re still dedicating at least 1–2 sessions per week to skills. I’d recommend allocating some time to ball handling and shooting—focusing on shots you’re likely to take in a game.

It’s also very easy to fall into the trap of only training legs and completely skipping upper body day when you’re focused on increasing your vertical jump.

Luckily, most decent vertical jump programs these days realize the importance of a powerful upper body and bake a healthy amount of upper body training into the program. But if you’re creating your own vertical jump program, remember to include each of the three following movements:

  1. Chin-ups—Often referred to as the “upper body squat,” this compound movement hits most of your upper body and is a super-efficient way to build general upper body strength.
  2. Bench press/shoulder press—Or push-ups/military press if you don’t have access to a bench. Being a strong presser has a massive carryover to how well you’ll be able to pass the ball.
  3. Med ball tosses—With the many different variations of med ball tosses, you can build upper body power that will directly impact your arm swing when jumping, but it will also make you a far better passer.

I believe doing the above three exercises just 1–3 times per week is all you need to maintain and develop upper body strength and power while you’re focusing primarily on developing your vertical jump.

You should also keep playing some basketball each week (~1 session), just to help with basic conditioning and keeping your eye in.

If you’re playing pickup basketball 2–3 times per week, you’ll likely not get the most out of your vertical jump program, which will have you training 4–6 days per week already.

4. Double Down on Diet and Sleep

I cannot stress how important this is—if you’re treating yourself like a professional athlete, getting eight hours of sleep per night is table stakes.

Eating a clean diet with adequate amounts of protein is a given. Just being on break is not an excuse to get sloppy with your diet. Your shopping list should include foods like the following:

  • Rice
  • Chicken
  • Pasta
  • Oatmeal
  • Eggs
  • Red meat
  • Salmon

We also know that vitamin D levels correlate with the size and number of fast-twitch muscle fibers—those you use when jumping. So ensure you get plenty of sun every day and aren’t cooped up inside playing video games all day!

Your fast-twitch muscle fibers also prefer carbohydrates as a source of energy, so I recommend fueling up with rice, pasta, and oats instead of taking a low-carb/keto approach.

It doesn’t matter how hard you train or how diligently you follow your jump program; you will never make meaningful progress if you’re not taking your diet and sleep seriously. Share on X

Remember, it doesn’t matter how hard you train or how diligently you follow your jump program; you will never make meaningful progress if you’re not taking your diet and sleep seriously.

Final Thoughts

Every so often, you’ll notice a guy show up to pre-season training looking like a completely different athlete…they’re taller, stronger, faster, and wait, what’s that? He just threw it down on a fast break!?

Damn, that guy really leveled up during the off-season!

You can be that guy.

Create a game plan, follow a structured program, and take your nutrition and recovery super seriously. Treat your off-season as an opportunity to level up, not an excuse to relax and slack off.

Since you’re here…
…we have a small favor to ask. More people are reading SimpliFaster than ever, and each week we bring you compelling content from coaches, sport scientists, and physiotherapists who are devoted to building better athletes. Please take a moment to share the articles on social media, engage the authors with questions and comments below, and link to articles when appropriate if you have a blog or participate on forums of related topics. — SF


References

1. Patrick, Ben. Knee Ability Zero, Onyx Publications, 2021.

2. Beyond the Rim 1, Nathanael Morton.

3. Hutchinson MK, Houck J, Cuddeford T, Dorociak R, and Brumitt J. “Prevalence of Patellar Tendinopathy and Patellar Tendon Abnormality in Male Collegiate Basketball Players: A Cross-Sectional Study.” Journal of Athletic Training. 2019 Sep;54(9):953–958.

4. Cannell JJ, Hollis BW, Sorenson MB, Taft TN, and Anderson JJB. “Athletic performance and vitamin D.” Medicine & Science in Sports & Exercise. 2009 May;41(5):1102–1110.

  • « Go to Previous Page
  • Page 1
  • Interim pages omitted …
  • Page 23
  • Page 24
  • Page 25
  • Page 26
  • Page 27
  • Interim pages omitted …
  • Page 164
  • Go to Next Page »

Primary Sidebar

FEATURED

  • Using Speed and Power Data to Bucket and Train Faster Athletes
  • Plyometric Training Systems: Developmental vs. Progressive
  • 9 (Fun!) Games to Develop Movement Skills and Athleticism

Latest Posts

  • Rapid Fire—Episode #15 Featuring Kyle Brown: What is Universal Speed Rating (USR)?
  • Why We Don’t Perform Hang Cleans
  • 1080 Sprint: Four Essential Tips You Won’t Find in the Manual

Topics

  • Adult training
  • App features
  • Artificial Intelligence
  • Athlete
  • Athlete performance
  • Baseball
  • Buyer's Guide
  • Career
  • Certifications
  • Changing with the Game
  • Coach
  • Coaching
  • Coaching workflows
  • Coching
  • College athlete
  • Course Reviews
  • Dasher
  • Data management
  • EMG
  • Force plates
  • Future innovations
  • Game On Series
  • Getting Started
  • Injury prevention
  • Misconceptions Series
  • Motion tracking
  • Out of My Lane Series
  • Performance technology
  • Physical education
  • Plyometric training
  • Pneumatic resistance
  • Power
  • Power development
  • Practice
  • Rapid Fire
  • Reflectorless timing system
  • Running
  • Speed
  • Sports
  • Sports technology
  • Sprinters
  • Strength and conditioning
  • Strength training
  • Summer School with Dan Mullins
  • The Croc Show
  • Track and field
  • Training
  • Training efficiency
  • Wave loading
  • What I've Added/What I've Dropped Series
  • Youth athletics
  • Youth coaching

Categories

  • Blog
  • Buyer's Guide
  • Freelap Friday Five
  • Podcasts

COMPANY

  • Contact Us
  • Write for SimpliFaster
  • Affiliate Program
  • Terms of Use
  • SimpliFaster Privacy Policy
  • DMCA Policy
  • Return and Refund Policy
  • Disclaimer

Coaches Resources

  • Shop Online
  • SimpliFaster Blog
  • Buyer’s Guide
  • Freelap Friday Five
  • Coaches Job Listing

CONTACT INFORMATION

13100 Tech City Circle Suite 200

Alachua, FL 32615

(925) 461-5990 (office)

(925) 461-5991 (fax)

(800) 634-5990 (toll free in US)

Logo of BuyBoard Purchasing Cooperative. The word Buy is yellow and shaped like a shopping cart, while Board and Purchasing Cooperative are in blue text.
  • Facebook
  • Instagram
  • Twitter
  • YouTube

SIGNUP FOR NEWSLETTER

Loading

Copyright © 2025 SimpliFaster. All Rights Reserved.