• Skip to content
  • Skip to primary sidebar
SimpliFaster

SimpliFaster

cart

Top Header Element

  • Facebook
  • Instagram
  • Twitter
  • YouTube
  • Login
  • cartCart
  • (925) 461-5990
  • Shop
  • Request a Quote
  • Blog
  • Buyer’s Guide
  • Freelap Friday Five
  • Podcast
  • Job Board
    • Candidate
    • Employer
    • Facebook
    • Instagram
    • Twitter
    • YouTube
You are here: Home / Blog

Blog

Athlete Sleep

Sleep and the Elite Athlete—Where Are We Now?

Blog| ByCraig Pickering

Athlete Sleep

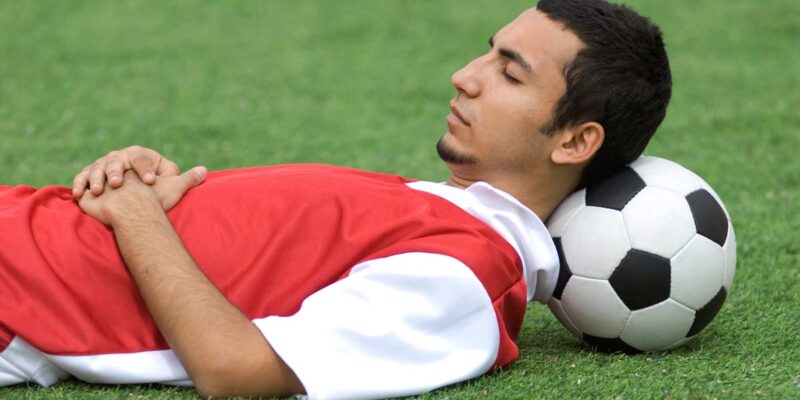
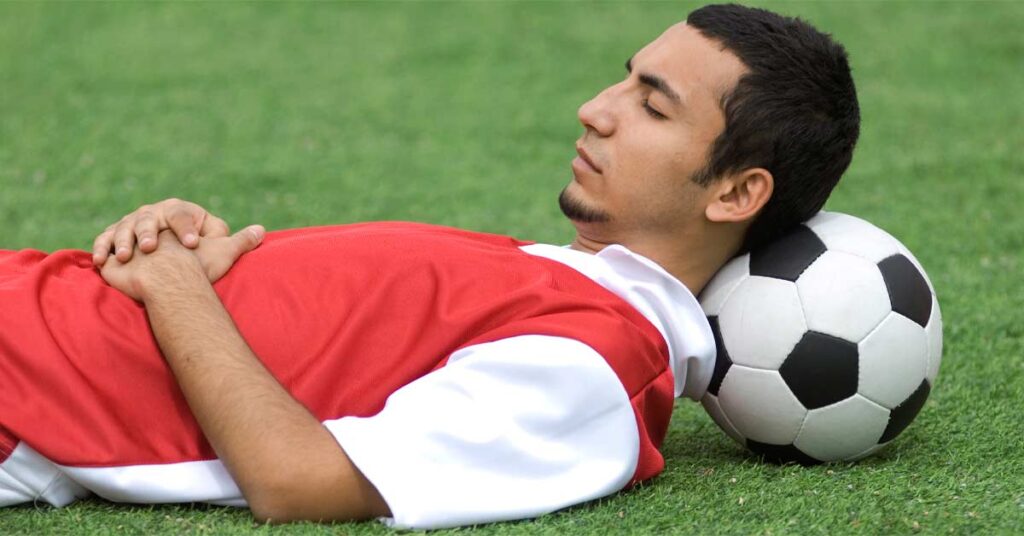
Almost 10 years ago, I wrote an article for this website highlighting some research on the role sleep plays in elite performance. The article was hugely popular at the time and is still frequently shared on social media, suggesting that the topic of sleep—particularly the role it plays in performance—is of interest to many in the sporting sphere. Sleep has also captured the interest of many researchers in the field of sport, meaning that our knowledge in the area is accelerating rapidly.

Given this interest—and the amount of new research since that original article was published—a close look at what we now know about the connection between sleep and elite athletes is well worth a close look. Updating our knowledge in an area is always important, especially when we consider that over 80% of all peer-reviewed research on the topic of sleep and athlete performance comes from 2011 onwards.

Why Do We Sleep?

Sleep is essential for both the brain and body, with research highlighting that even just one to two weeks of partial sleep restriction:

  • Impairs cognition and our ability to learn and form memories.
  • Harms mental health.
  • Disrupts cellular growth and recovery.
  • Changes our metabolism.
  • Weakens our immune system.

Sleep is a normal part of the typical human 24-hour day-night cycle, in which a period of alertness and wakefulness is followed by sleep, a period of recovery. Normal human sleep has two main types: non-rapid eye movement sleep (non-REM), and rapid eye movement sleep (REM). Non-REM has three progressive stages: stage 1 and 2, which are termed light sleep, and stage 3, which is termed deep (or slow wave) sleep. During non-REM sleep, the brain is mostly inactive, while it is highly active during REM sleep; the vast majority of dreams occur during REM sleep. In young adults, around 60% of all sleep is light sleep, 15% is deep sleep, and 25% Is REM sleep.

When we sleep, a number of hormones are released, including growth hormone. This hormone is crucial for the repair and growth of the body’s tissue—of particular interest to athletes are its beneficial effects on muscle growth, repair, and bone building. Around 95% of the daily production of growth hormone occurs during stage 3 sleep, highlighting the importance of sleep for adequate growth and repair. Other important hormones related to sports performance, such as cortisol and testosterone, follow a circadian rhythm. As such, their release can be disrupted by sleep deprivation.

While it is generally considered that there are no serious consequences from moderate sleep loss—defined as around 6 hours sleep per night—over reasonably prolonged periods, there is evidence that chronic, sustained sleep loss (around 4-6 hours per night) does have long-term health implications. Individuals who habitually sleep for around 5 hours per night tend to have an increased risk of type-II diabetes, obesity, and cardiovascular disease, along with an increase in overall mortality.

There is evidence that chronic, sustained sleep loss (around 4-6 hours per night) does have long-term health implications, says @craig100m. Share on X

The true reason(s) as to why animals sleep is currently unknown and hotly debated. There are several theories, which include sleep having an overall restorative effect on the body, allowing it to recover and repair following the waking state, as well as a clear cognitive component with sleep having a vital role in learning and memory consolidation. Whatever the true reasons for humans needing to sleep—and it’s unlikely there is just one—it’s clearly something that is important for all of us to do, and do properly. And yet, we don’t; the average total sleep duration of adult humans has steadily decreased, from around 9 hours per night in the 1950s, to just over 7 hours in the 1980s. A 2013 survey in the US reported an average sleep of 6 hours 51 minutes on workdays, despite respondents reporting, on average, that a total sleep time of 7 hours 17 minutes was required for them to operate optimally the next day. If the normal population of people have such poor sleep, what does it look like in athletes?

Sleep and Elite Athletes

Perhaps the best paper on sleep in elite athletes comes from 2017 from a group of researchers in the UK led by Luke Gupta. In their paper, the authors had two aims:

  1. To understand the patterns and quality of sleep in elite athletes.
  2. To understand what may harm sleep in elite athletes.

In total, they found 37 studies that met their inclusion criteria, comprising athletes from Olympic, Paralympic, and team sports. Overall, the results suggest that elite athletes typically have a lower sleep efficiency, spend more time in bed, experience greater sleep fragmentation, and take longer to fall asleep than non-athletes. When comparing between sports, individual athletes tend to have poorer sleep quality than team sport athletes.

Elite athletes also tend to experience sleep disturbances, with ranges of 13-70% reported in studies. There is some research that suggests sleep disturbances are more common in female athletes. One way of measuring sleep quality is the Pittsburgh Sleep Quality Index (PSQI), a validated survey. Research using the PSQI suggests that as many as 60% of athletes report disordered sleep and up to 26% of athletes experience highly disturbed sleep. As part of a large-scale project driven by the Australian Institute of Sport, researchers examined various markers of performance health in athletes prior to the 2016 Rio Olympic Games. There were strong relationships between increased levels of stress and poor sleep—defined as lower sleep quality, increased sleep disturbances, or increased time to fall asleep. In addition, in the same group of athletes, over 50% scored above 5 on the PSQI, which is indicative of poor sleep.

There were strong relationships between increased levels of stress and poor sleep, says @craig100m. Share on X

These findings are potentially worrying for a number of reasons. As outlined above, sleep appears to somewhat regulate the release of a variety of hormones important for recovery. In addition, there is a growing body of research which suggests that disturbed sleep is associated with poorer mental health outcomes in athletes, as well as burnout and mood disturbances. A lack of sleep also appears to negatively affect cognitive function; REM sleep is crucial for developing memories and learning motor skills, and so a reduction in this type of sleep will harm learning. A 2014 review, published in Sports Medicine, highlights the effects of sleep loss on exercise performance, as well as the response to exercise. The results make for sobering reading. Reductions in sleep appear to harm exercise performance—especially aerobic exercise—and increase the post-exercise inflammatory response, meaning recovery time will increase.

Sleep and Youth Athletes

Clearly, elite athletes need to ensure they get sufficient sleep—and many of them don’t—but about youth athletes? A 2020 paper from Current Sports Medicine Reports provides a thorough review on how sleep affects performance in youth athletes, and it makes for interesting reading.

Sleep for youth athletes can be a challenge due to the various competing demands on their time. Youth athletes typically spend 6-8 hours per day at school (including travel to/from and extra-curricular activities), along with homework, spending time with friends, training, and, in some cases, undertaking part-time employment. This leaves little time in the day for sufficient sleep; and, often, youth athletes will prioritise other activities at the expense of sleep. The American Academy of Sleep Medicine recommends that teenagers aged 13-18 get 8-10 hours of sleep regularly; we know from at least one study that many youth athletes get less than 8 hours of sleep per night. For example, this study on youth gymnasts found that over 91% slept for less than 8 hours per night. In this study, a group of adolescent athletes consistently got less than 8 hours sleep per night; in another, 40% of collegiate athletes regularly sleep for less than 7 hours per night during the week; and, finally, athletes from state netball teams in Australia regularly achieved less than 8 hours sleep per night.

It’s worth pointing out, however, that this isn’t just a problem that affects young athletes; it affects youngsters regardless of whether they’re an athlete or not. This was highlighted in a 2019 paper, which compared 625 adolescent elite athletes to 391 adolescent non-athletes. The authors found that the athletes slept for longer than non-athletes, but that both groups fell short of the up to 10 hours recommended sleep. This can have further implications, as evidenced by a 2018 study on elite Gaelic athletes. Here, the authors found that “poor sleepers,” as quantified by the PSQI—a validated sleep assessment tool—had significantly lower general health, increased stress, and increased confusion when compared to athletes who were classified as good sleepers. This connection with wellbeing has been reported elsewhere; for example, in a group of youth athletes, daily reported wellbeing scores were correlated with sleep duration, a finding that has been replicated. This highlights that the very perception that they have not slept well means they typically feel worse the next day, which can harm their performance and wellbeing.

“Poor sleepers,” as quantified by the PSQI, had significantly lower general health, increased stress, and increased confusion when compared to athletes who were classified as good sleepers, says @craig100m. Share on X

Even getting enough sleep—in terms of hours—may not be enough for youth athletes. In a study on Dutch elite youth athletes, the researchers reported that 41% of the athlete cohort were classified as “poor sleepers” on the Global Sleep Quality Score, despite the average sleep duration time being above 8 hours. This holistic score includes aspects such as sleep quality (how deep is your sleep), sleep latency (how long it takes you to fall asleep), sleep disturbances, sleep medication use, and daytime dysfunction.

This all has an impact on the performance of youth athletes. For example, in the study on Australian netballers mentioned earlier, the best two teams in the competition achieved an average of just over 8 hours of sleep per night, while the worst two averaged just over 7. In addition, there is an increasing amount of evidence highlighting the role that a lack of sleep plays in increasing the risk of injury. In a study from 2014, the authors found that school-aged athletes who slept for less than 8 hours per night were 1.7 times more likely to have experienced an injury than those who slept for more than 8 hours. As such, it’s clear that a lack of sleep is common in high level youth athletes, and with this lack of sleep comes a whole host of problems.

Why Don’t Athletes Get Enough Sleep?

Returning to the study from Gupta and colleagues mentioned earlier, the second part of the paper aimed to explore some of the reasons elite athletes may have poor sleep. They identified three key risk factors for why athletes may have poor sleep:

  1. Competition—Research highlights that a number of athletes report poor sleep the night before a competition, although this is somewhat inconsistent. In research where sleep quality is determined via questionnaire (i.e., the athletes self-report), typically athletes have poorer sleep immediately before competition, and there is some evidence that this effect is greater in higher standard athletes. However, when sleep is measured by objective measures—most commonly wrist actigraphs—there appears to be no difference in sleep efficiency or sleep onset latency before a competition when compared to normal training. In fact, using this method, there is some research that reports increases in sleep time and sleep efficiency in athlete pre-competition (i.e., they slept better).
    This suggests that athletes may perceive they sleep worse prior to competition—perhaps due to stress—but actually there may not be any differences. There is less inconsistency in the results of studies exploring sleep post-competition; here the research is clear that athletes tend to have less total sleep and a significantly delayed bedtime (the two likely being linked). This suggests that competitions, likely because of the late start and use of stimulants such as caffeine, may harm sleep quality post-event—an important consideration when it comes to planning recovery techniques. There is some evidence that increases in cortisol, as a result of the stress of competition, also harm sleep. Specifically in track and field, there is evidence that, as they get closer to competition, elite athletes have worse sleep.
  1. Travel—Having to travel for competitions or training camps is a common occurrence for elite athletes. Travel itself appears to have no impact on sleep (aside from early-morning or late-night travel), but the jet lag associated with travel across time zones can negatively affect the time taken to fall asleep, as well as the time spent asleep.
  2. Training—The research suggests that athletes wake earlier, and, as a result, sleep less on days that they’re training. There is a consistent and strong relationship between training start time and total sleep time, such that the earlier training starts, the less athletes sleep. I know this sounds obvious, but it highlights that athletes don’t typically go to bed earlier when they have morning training, they just sleep less—meaning, it’s something coaches must keep in mind when scheduling training. The intensity of training also appears to affect sleep, with more intense training periods associated with a decrease in sleep efficiency and an increase in time taken to fall asleep. 

Another potential reason why athletes don’t get enough sleep is their regular use of caffeine. Caffeine is a common and well utilized ergogenic aid, with clear performance enhancing effects; a review I was part of back in 2020 highlighted the consistent beneficial effect of caffeine on performance. Caffeine also harms sleep quality and duration, as highlighted in a 2017 review. These effects were present at surprisingly low doses of caffeine; for example, consuming 1-2 double espressos (~200mg caffeine, the same as most pre-workout formulas) sixteen hours before sleep had a negative effect on the sleep quality. Because athletes regularly use caffeine, they are therefore likely to suffer some sleep disturbances as a result.

Because athletes regularly use caffeine, they are therefore likely to suffer some sleep disturbances as a result, says @craig100m. Share on X

This effect is increased post-competition, especially if the competition is in the evening. As a moderate caffeine user during my competitive days, I regularly would not sleep, or only get to sleep for a couple of hours, the night after a competition. This effect is not limited just to me; a 2018 study in elite rugby union players reported an average of 1.5 hours less sleep the night after a game (with bedtime being 3.5 hours later), which was linked to the use of caffeine by these players. The authors found that increases in caffeine concentration in the saliva of the players was associated with an increased time to fall asleep, a reduction in sleep efficiency, and less sleep overall. 

The environment in which we sleep is crucial in setting the foundations for optimal sleep. Ideally, we need it to be cool, dark, and quiet. Getting it wrong can have significant implications. For example, in a study of collegiate athletes based in the US, 42% of athletes had poorer sleep quality on campus—their primary place of residence—than when travelling for sport. These various drivers of poor sleep in athletes are good to know—but what can we do about them?

Sleep-Based Strategies to Support Performance

Given that we know sleep quality and duration are important, and we know that elite athletes don’t always get enough sleep (or enough high quality sleep), an obvious question is: “How can we improve this?” Fortunately, that’s the topic of this review article published in 2018; here, the researchers explored a variety of sleep interventions designed to improve athletic performance and recovery.

One easy, low-cost strategy is sleep extension—increasing the amount of time we spend asleep. This was explored in a 2011 study, where the authors supported a group of basketballers to increase their nightly sleep from 6.6 hours to 8.4 hours. As a result of increasing their sleep, the athletes improved their sprint speed, shooting accuracy, and reaction times, as well as their overall mood and feelings of fatigue. A similar study, this time from 2015 and in tennis players, showed that increasing the sleep time of athletes for a week improved their serving accuracy.

Another simple solution is improving the sleep hygiene of an athlete. In studies where athletes have ensured their room is cool and dimly lit, had access to sleeping aids such as ear plugs, and avoided technology use for 15-30 minutes before bed, they tend to sleep for longer and experience better quality sleep than those with poorer sleep hygiene. Even in studies where improving sleep hygiene doesn’t increase the quality of sleep, the athletes reported that they felt their sleep was improved, which is important in and of itself.

Interestingly, a couple of studies have identified that enhancing post-exercise recovery may enhance night time sleep. In one study, athletes utilized cryotherapy post-training, which maintained their sleep to a greater extent than in athletes who were in the control group. Similar results were reported in a study using red light irradiation as a form of recovery.

Enhancing post-exercise recovery may enhance night time sleep, says @craig100m. Share on X
The 2018 review article discussed above also outlines what an optimal sleep intervention for athletes might look like, which they summarize here. Similarly, a 2021 expert consensus article, published in the prestigious British Journal of Sports Medicine, also devised a “sleep toolbox” for practitioners to use with athletes. Their key steps are:

  1. Provide sleep education for athletes. In a sample of coaches, less than 50% had discussed sleep hygiene best practices with the athletes they worked with, even though the evidence suggested sleep hygiene education enhances the sleep of athletes. As such, sleep education is a low-cost first step to enhancing the sleep of your athletes.
  2. Sleep screen athletes and refer to help when needed. There are a number of sleep monitoring tools that could be utilized by athletes to better understand their sleep. Some of these require technology that may be expensive, but some are also low-cost, such as a sleep diary or sleep questionnaire. A common questionnaire that explores overall sleep hygiene is the Athlete Sleep Behaviour Questionnaire (ASBQ). It’s important to realize your scope of practice here; sleep issues may require support from medical practitioners. If you’re interested in finding out more about monitoring sleep, this review article provides an excellent summary.
  3. Encourage opportunities to nap. Sleeping in the daytime for a short period has a number of potential benefits, including improvements in alertness, concentration, motor performance, and overall mood. Naps can become increasingly important if the athlete cannot get sufficient sleep overnight—for example if they have an early morning wake-up for training or travel. There is even some evidence that naps are beneficial even when overnight sleep is sufficient.
There is even some evidence that naps are beneficial even when overnight sleep is sufficient, says @craig100m. Share on X
  1. Utilize sleep banking and extension. Sleep banking is where athletes get more sleep before a period of anticipated sleep loss, for example before a long haul, overnight flight across multiple time zones. Sleep extension involves sleeping for longer than normal. Both have been shown to improve performance and, in the case of sleep banking, mitigate the effects of sleep loss.

Finally, in 2019, the NCAA Interassociation Task Force on Sleep and Wellness published their guidelines for optimizing sleep in high level athletes. Their recommendations are:

  1. Maintain a regular sleep schedule as much as possible, including on weekends.
  2. Seek bright light during the day, especially in the morning, and avoid bright light at night where possible.
  3. Keep the bedroom cool, dark, and comfortable.
  4. Avoid caffeine for at least 6 hours before bed, as well as other stimulants. Alcohol has a negative impact on sleep quality, and should be avoided.
  5. Avoid consuming excessive food and drink pre-bed, as these may disrupt sleep by increasing trips to the bathroom.
  6. Avoid obsessive clock watching if you can’t sleep; it increases mental activity, making it harder to fall asleep.
  7. If you find it hard to fall asleep at night, avoid napping during the day.
  8. Use beds for sleep only, with all other activities taking place outside of bed. This is especially true if you can’t sleep, with the recommendation being that you get up and try to sleep a short while later.

Final Takeaways

Getting enough sleep—and of sufficient quality—is critical for athletes, with poor sleep linked to reduced performance and increased injuries. Typically, both elite and youth athletes don’t get enough sleep, putting them at risk of underperformance.

There are many steps we can take to support the sleep of the athletes we work with, which are outlined in this article. It’s worth taking some time to consider how you might support the athletes you work with to get more sleep, as the research suggests many of us have the knowledge to do so, but don’t quite take that first step. Doing so may lead to the performance breakthrough your athletes deserve.

Since you’re here…
…we have a small favor to ask. More people are reading SimpliFaster than ever, and each week we bring you compelling content from coaches, sport scientists, and physiotherapists who are devoted to building better athletes. Please take a moment to share the articles on social media, engage the authors with questions and comments below, and link to articles when appropriate if you have a blog or participate on forums of related topics. — SF


CNS Fatigue

Optimizing Performance by Managing Muscle Stimulation and Calcium Ion-Related Fatigue

Blog| ByBill Miller

CNS Fatigue

By Bill Miller and Barrett Snyder

In the realm of rigorous exercise and performance training, you’ve likely encountered the phrase, “Pain is weakness leaving the body.” This mantra, along with various other quotes, encapsulates the notion of pushing through discomfort and exhaustion to achieve fitness goals. It’s the relentless pursuit of things like endless drop sets, subjecting yourself to grueling lower-body training sessions that rival marathons, or enduring hours upon hours of stadium stairs amidst stifling humidity, all to prove your unwavering determination and commitment to the “grind.”

We’ve all experienced these moments. Contemplating further, however, we must question the true efficacy of these methods for athletes over the long haul—particularly athletes who participate in overhead sports that require a formidable display of power and explosiveness, as well as rapid concentric and eccentric movements.

Crafting a truly effective strength and conditioning program is often predicated on striking a critical balance between stimulating repetitions and managing muscle fatigue and damage. The key question arises: How can coaches skillfully navigate this delicate tightrope, maximizing athletes’ time in the weight room to ensure that muscle stimulation and progressive overload continue while minimizing muscle damage and fatigue throughout the process?

In this installment, part one of a two-part series, we will unveil essential training considerations coaches should explore before hastily jotting down exercises, sets, and rep schemes on an athlete’s program sheet. We begin by exploring factors such as fiber type proportion, level of voluntary activation, and working sarcomere length and their impact on muscle damage and, consequently, training frequency. In addition, we will unravel the enigma of calcium ion-related fatigue and its detrimental effects on athletic performance progression. Our goal during this two-part series is to empower coaches with invaluable insights to craft training programs that maximize results.

Training Considerations

When developing your program, consider the answers to these two important questions:

1. How susceptible is each specific muscle to damage during the course of an overhead athlete’s workout routine?

This will prove to be consequential because the total amount of muscle damage experienced (specific to each muscle) during a training session will determine the amount of time required for adequate recovery. To decipher this answer, we can use three key metrics initially proposed by infographics architect Chris Beardsley:

  1. Fiber type proportion
  2. Level of voluntary activation
  3. Working sarcomere lengths

A detailed analysis of these metrics reveals that not all muscles possess the same vulnerability to muscle damage. This directly affects our programming for overhead athletes, especially during a competitive season in which they must maintain a state of freshness to perform at their peak on the field.

2. How much calcium ion-related fatigue does our program induce?

Calcium ion-related fatigue is essential to measure and understand because it significantly affects muscle function and performance. During muscle contraction, calcium ions are released from storage sites within muscle cells, initiating the process that allows muscles to contract and generate force. However, as muscles repeatedly contract and relax, the accumulation of calcium ions can lead to fatigue.

Calcium ion-related fatigue is essential to measure and understand because it significantly affects muscle function and performance, says @billmills. Share on X

Key Metrics That Help Determine Muscle Damage

As stated above, these three metrics show how muscles differ in their vulnerability and resiliency to muscle damage. Knowing these differences can help you with the optimal programming of your training sessions.

1. Fiber Type Proportion

As we recall from academia or certification materials, muscles with a higher proportion of fast-twitch muscle fibers exhibit lower oxidative capacity and tend to undergo a more pronounced inflammatory response when subjected to various training modalities. Consequently, our fast-twitch muscle fibers are more susceptible to heightened muscle damage, leading to increased levels of fatigue.

On the other hand, muscles characterized by a higher proportion of slow-twitch fibers, known for their oxidative nature, have demonstrated greater resistance to muscle damage resulting from repetitive contractions. This resilience is likely attributed to their elevated mitochondrial content. In practical terms, this information suggests that we can program a greater number of stimulating repetitions for these muscle groups during training sessions, leveraging their slow-twitch tendencies and enhancing the potential for recoverability.

Examples:

The biceps and triceps brachii have both been shown to require greater amounts of rest between workouts than other muscles in the body because of greater muscle damage susceptibility. This conclusion was likely reached because these muscle groups are two of the most fast twitch in the body. In addition, the pectoralis contains a greater percentage of fast-twitch fibers, making it more susceptible to muscle damage. Conversely, on the other side of the spectrum, we have slow-twitch muscles, a prime example of which is the quadriceps, which can be trained more frequently and does not require as much time to recover.

Incorporating biceps, triceps, and pectoral movements into the training programs of overhead athletes can yield significant benefits from a performance and health standpoint, says @billmills. Share on X

Incorporating biceps, triceps, and pectoral movements into the training programs of overhead athletes can yield significant benefits from a performance and health standpoint. The pectoral muscle plays a key role during the acceleration phase of the throwing motion. In contrast, the triceps play a crucial role in rapid force production and joint stability around the arm. In addition, the biceps and brachialis are essential during the deceleration phase of the throwing motion, decelerating the extending elbow and pronating forearm. As such, you can use the exercises below to improve force production and deceleration during the throwing motion. Just be mindful that these muscle groups are more susceptible to increased muscle damage and fatigue due to their higher concentration of type-II fast-twitch muscle fibers.

  • Medicine ball chest pass
  • Dumbbell Zottman curl
  • Overhead triceps pull-apart
  • Triceps push-downs
  • Band-assisted explosive push-up
  • One-arm explosive landmine press
  • Dumbbell hammer curl


Videos 1&2. Medicine Ball Chest Pass and Overhead Triceps Pull-Apart.

2. Voluntary Activation

The concept of voluntary activation pertains to the regulation of the number of high-threshold motor units that are engaged during each contraction. Although it would be inaccurate to make a sweeping generalization that all fast-twitch muscles consistently exhibit high activation levels, it is generally observed to be the case (except for hamstrings, which we will discuss in the following paragraph). On a similar note, like fast-twitch muscles, muscles with a high degree of voluntary activation are more susceptible to damage than those with slower activation rates.

Examples:

The biceps brachii and the triceps brachii have previously demonstrated 94%–99% levels of voluntary activation and 94%–96% levels of voluntary activation during maximal isometric contractions, respectively. Compare this to the oxidative quadriceps, which have expressed deficiencies of 15%–20% beneath the anticipated force production amid voluntary contractions, according to Beardsley.

Like fast-twitch muscles, muscles with a high degree of voluntary activation are more susceptible to damage than those with slower activation rates, says @billmills. Share on X

Regarding the hamstrings, it is noteworthy that they experience a high level of voluntary activation even though various studies have not consistently classified them as predominantly fast-twitch muscles. However, apart from the hamstrings, lower-body muscles have generally been observed to exhibit reduced levels of voluntary activation compared to their upper-body counterparts.

As previously mentioned, biceps and triceps movements can offer valuable benefits in an overhead athlete’s workout routine, aiding in acceleration and deceleration capabilities during the throwing motion. In addition to the exercises listed above, we can incorporate isometric movements to aid in the performance enhancement of these muscles. Further, given the hamstrings’ essential role in the sprinting motion, we should look to incorporate ways to isolate the hamstrings during training bouts to enhance their capabilities.

However, as we expressed a word of caution in the former section, it is essential to exercise prudence in managing the training volume for these muscle groups, considering their elevated levels of voluntary activation.

We can look to isolate the bicep, triceps, and hamstrings by incorporating the following:

  • Iso bicep curl
  • Iso triceps push-down
  • Straight leg deadlift
  • Seated hamstring curl
  • Prone hamstring curl
  • Nordic hamstring curl


Videos 3 & 4. Iso Triceps Push-Down and Straight Leg Deadlift.

3. Working Sarcomere Lengths

These are described as follows: “The lengths of the sarcomeres inside a muscle over its joint angle range of motion. It allows us to see if the muscle can experience (1) active insufficiency (and so will be trained poorly by exercises involving peak forces at very short muscle lengths) and (2) stretch-mediated hypertrophy (and so will be trained more effectively by exercises involving peak forces at very long muscle lengths).”

While it is acceptable and often necessary for a coach to program longer-length exercises (stretched positions), we are aware that muscle damage, and thereby calcium ion-related fatigue, becomes much more prevalent as a consequence of training at longer lengths and stretched positions. As coaches, it is crucial to be mindful of this aspect, especially when designing training programs during the in-season period, when athletes will be participating in multiple field competitions throughout the week.

Muscle damage, and thereby calcium ion-related fatigue, becomes much more prevalent as a consequence of training at longer lengths and stretched positions, says @billmills. Share on X

Examples:

Stretched position exercises can be defined as movements where the most demanding phase occurs at the lower end of the range of motion. These types of exercises include overhead pull-downs, chest presses, and various squat variations.

  • Rear foot elevated split squat
  • Reverse lunge
  • Walking lunge
  • Single-arm pull-down
  • DB chest press
  • Overhead lat pull-down
  • Hack squat


Videos 5&6. Reverse Lunge and Single-Arm Pull-Down.

Calcium Ion-Related Fatigue

The onset of fatigue related to calcium ions happens when there is a rise in the concentration of calcium ions within the cytoplasm following prolonged and failure-driven training sessions, inadequate rest periods between sets, and long, drawn-out sets with excessive repetitions. This phenomenon has a significant risk of hindering the progress of our athletes during the course of their training sessions and impeding their future advancements. It is crucial to note that the more fatigue our athletes accumulate, the longer the recovery time required before noticeable enhancements in performance can be observed.

In terms of programming application, the main question remains: How can we provide our athletes with enough stimulus to enhance performance without causing excessive calcium ion-related fatigue? Below are several examples that coaches can employ to accomplish this objective.

Concentric-Only Contractions

While concentric-only training will cause muscle damage (there is still a contraction), the damage remains minimal compared to exercises encompassing an eccentric component.

Examples:

  • Squat from pins
  • Concentric DB row
  • Concentric trap bar deadlift
  • TRX sled row
  • Floor press
  • Pin press


Videos 7&8. Concentric Trap Bar Deadlift and TRX Sled Row.

It is important to acknowledge that eccentric movements do play a crucial role in athlete training, as they contribute to increasing muscle fascicle lengths, reduce the risk of muscle strain injuries, and aid in deceleration capabilities. However, it is equally essential to recognize that these eccentric exercises tend to induce greater fatigue. Therefore, we highly encourage careful programming of eccentrics to allow the athlete ample time to recover, especially during the competitive season.

Eccentric overload training modalities can be incorporated into an overhead athlete’s program by performing the following movements:

  • Eccentric overload rotator cuff movement
  • Eccentric overload one-arm row
  • Eccentric overload single-leg split squat


Videos 9&10. Eccentric Overload Rotator Cuff and Eccentric Overload One-Arm Row.

Low Rep Sets with Heavy Weight

Coaches can increase the load the athlete is using, thereby minimizing the repetitions performed during a given set. A set of 5–8 repetitions with a moderate to heavy load will ensure the athlete is provided with the necessary stimulus to forge adaptations while curbing calcium ion-related fatigue for the duration of the training session.

For advanced athletes who possess knowledge of their one-repetition maximum capabilities, a prudent approach involves instructing them to maintain 1–2 reps in reserve during the completion of each movement. Although training closer to failure facilitates enhanced activation of fast-twitch muscle fibers, which is particularly beneficial for sports demanding speed and power, it is essential to recognize that these very fibers are more susceptible to muscle damage and fatigue caused by calcium ion accumulation, owing to their lower mitochondrial density. By adopting a training strategy that incorporates relatively heavy loads while leaving a few reps in reserve, we can effectively ensure that the athlete receives sufficient training stimulus while mitigating the risk of excessive fatigue.

It is essential to recognize that fast-twitch fibers are more susceptible to muscle damage and fatigue caused by calcium ion accumulation, owing to their lower mitochondrial density, says @billmills. Share on X

Below is a chart based on the research and information laid out above. It details each muscle group, the prevailing fiber type, and recommendations for athletes.

Muscle Group Chart

In the second part of this discussion, we will delve into the influence of central nervous fatigue (CNS) on an athlete’s performance and explore successful strategies to alleviate its effects. Additionally, we will present sample training programs featuring exercise variations carefully selected to foster consistent progress for overhead athletes, both in their on-field endeavors and within the weight room.

Since you’re here…
…we have a small favor to ask. More people are reading SimpliFaster than ever, and each week we bring you compelling content from coaches, sport scientists, and physiotherapists who are devoted to building better athletes. Please take a moment to share the articles on social media, engage the authors with questions and comments below, and link to articles when appropriate if you have a blog or participate on forums of related topics. — SF


Barrett SnyderBarrett Snyder is a CSCS and holds an M.S. in Sports Management and a Master of Business Administration (MBA) from Drexel University. He is currently a J.D. and Ph.D. candidate.

Athlete Nutrition

How to Wear Your “Nutritionist Hat” as an S&C Coach

Blog| ByCole Hergott

Athlete Nutrition

As S&C coaches, the role and responsibilities of a nutritionist often fall onto our plate by default. Why? We are the “experts” in the human body, we train the athletes, and nutrition falls within the scope of physical preparation.

While it would certainly be beneficial to have a registered dietitian on staff at your school or facility, the industry has yet to expand into every space and every sector—so if you find yourself wearing the “nutritionist hat” at your institution or space, here are five key tips to get you going and help you be an asset in that area.

1. Get Certified

Yes, it is okay to give recommendations on what athletes should eat without being a certified dietitian (depending on where you live). This can be as simple as letting athletes know how much protein they should be eating per day, how many carbs they need to fuel themselves for their activity level, how much water to drink to stay hydrated, or how many calories they need for their body composition changes (muscle gain, fat loss, or maintenance).

For me, this all comes down to how educated you are on the subject. After all, the more you know, the more you can confidently share with your athletes. Instead of going back to school for a master’s degree in sports nutrition (or diving in and becoming an RD), getting a certification can help you learn as well as prove you are at least somewhat qualified in this area.

The first thing to do when tackling the nutrition side of training is to ensure you know what you’re talking about; the second is to ensure you know how to communicate it to your athletes/clients. Share on X

I have my Precision Nutrition (PN) Level 1 certification and highly recommend it. I wanted a certification that not only gave me expertise on the science of nutrition and how the body uses food for fuel but also taught me how to coach my clients through making big changes—which are inevitable when dealing with nutrition. There are other certifications that might dive deeper into the actual science and bioenergetics of nutrition (ISSN, ISSA), but PN offered both the science and coaching I was looking for, so I went with it. After all, the first thing to do when tackling the nutrition side of training is to ensure you know what you’re talking about; the second is to ensure you know how to communicate it to your athletes/clients.

You also don’t need a Ph.D. in Nutrition to work with most athletes. They may be elite in their sport, but they often reach that level in spite of their diets. I have found that my knowledge of nutrition and eating habits is often far above what is required to assist my athletes. For example, I have only had to refer out two people in the last five years. 

2. Ask Questions

As I just mentioned, most athletes don’t know what they don’t know. So, it’s silly to expect them to come and ask me about how much protein they should be eating or if Pop-Tarts are really the best breakfast for them. Athletes (especially at the university level) live by an “if it ain’t broke, don’t fix it” mentality—so you need to show them that what they’re doing is broken (if it is). This can take many forms, but some options are:

  • Weekly nutrition tips (how much protein to eat, why your body needs carbs).
  • Social media posts or sharing others’ content.
  • Asking athletes what they had for breakfast/lunch/dinner that day.

Tip of the Week
The main thing you’re trying to do is start a conversation and get them thinking about their eating habits. Once again, most athletes believe that the chicken in their salad at lunch is good enough because “Yeah, I ate protein today,” but they don’t understand how much they need. I have found that after doing a tip of the week on something like “Start Your Day with Protein!” (see image above), the lights turn on, and the questions flow in because you now showed them that what they’re doing is broken, and they need to fix it.

For example…

Q: How much protein should I have at breakfast?

A: Aim for 20 grams to start your day. But some is better than none!

Q: What if I don’t eat breakfast?

A: Then I recommend you start. It doesn’t have to be anything big (e.g., bacon and eggs); just try eating something, and we can build on that.

Q: Is cereal a good source of protein?

A: Most cereals are not. Some, however, (like Vector) do have a decent amount of protein—so if you add 1–2 cups of milk, you have a decent, protein-filled breakfast. Otherwise, you can still have your cereal (e.g., Cheerios, Corn Flakes), but I recommend adding another protein-rich food such as Greek yogurt, a couple of eggs, or a scoop of peanut butter.

3. Food Logs

Another interactive thing I have found to be successful is asking athletes to complete a two-day food log: one weekday (Mon–Fri) and one weekend day (Sat/Sun). That way, as a coach, you can get a sense of what they eat on a typical day. This is huge, as most athletes I speak with about their eating say, “I eat pretty healthy.” Okay, what is “pretty healthy” to you? As I have found out, it can range from not eating any processed sugar at all to only eating fast food two meals a day instead of all three meals, like some people they know.

Getting athletes to complete a food log allows you to see what they eat and give specific recommendations instead of shooting in the dark with general tips, says @chergott94. Share on X

Getting athletes to complete a food log (as shown below) allows you to see what they eat and give specific recommendations instead of shooting in the dark with general tips like “eat breakfast,” “drink more water,” and “eat more protein” (even though those alone would cover about 80% of the issues…). An additional benefit for the athlete is that having them write down everything they consume in a day (food and drink) allows them to see their whole “diet” in front of their eyes, which can often help them realize the changes they need to make on their own. (“Oh, I should stop eating a box of cookies at midnight,” or “I should eat more for lunch before training.”)

Food Log

4. Be Available

One of the best things I did was set a “Nutrition Office Hour” each week. Weekly, I send out the link to sign up for a 15-minute block during this hour. I believe this is crucial, as most people are not comfortable opening up about how they want to lose weight in front of a large group after their team training session. This gives them a more intimate setting to do so.

This one-on-one format also ensures they have your undivided attention instead of you trying to watch athletes finish their lifts while contemplating how to tell this athlete that they shouldn’t go Keto. Some weeks I don’t have anyone signed up, but other weeks people couldn’t sign up because it was booked. I have found that if they know you will have a slot each week, there will be times for them eventually. And if it really is important, they will wait until there is a slot.

5. Follow-Up

Following up is something I have recently started to get better at. After giving tips and meeting with athletes about their eating, it is important to follow up and make sure they are actually doing it. I have recommended to most athletes who sign up for my office hour for them to sign up again in a couple of weeks so we can go over their progress…but that rarely happens.

After giving tips and meeting with athletes about their eating, it’s important to follow up and make sure they’re actually doing it, says @chergott94. Share on X

As a coach, it is important for you to follow up with them to make sure they are doing what you planned together and see if it is working. This could be a quick email or, after a lift, just asking, “How are your eating habits coming along?” This may open a can of worms for you to deal with, so be ready to hear all the excuses in the world as to why they couldn’t eat breakfast this week.

But the follow-up is crucial so they know you truly care, you are holding them accountable, and you are with them for the long haul that most nutrition and eating journeys are. I keep a list of all the athletes I have met or chatted with in this area and reach out to them at least once a semester to see if I can help with their next step (if they have one).

Keep the Hat Light

Again, I want to clarify that I am not implying registered dietitians or sports nutritionists are not valuable members of a high-performance staff or that you shouldn’t implore your administration to hire them. But we all know that budgets are tight, and those roles (among many others) often fall to us. This is kind of crazy when you think about it because everyone eats multiple times a day, and we then have no one in charge of what athletes put in their bodies to fuel the rest of their day/performance/recovery.

So, if you are going to put on that hat, it is essential to be prepared so you can actually help your athletes and be an asset to your department without adding too much extra load to your own demanding schedule. The tips I outlined above take very little extra time (aside from studying for the certification exam). The others (tips, social media, office hours, follow-ups) take me an extra two hours a week (with one of those being my office hour), so, not a ton more work for a ton of payoff.

Peace. Gains.

Since you’re here…
…we have a small favor to ask. More people are reading SimpliFaster than ever, and each week we bring you compelling content from coaches, sport scientists, and physiotherapists who are devoted to building better athletes. Please take a moment to share the articles on social media, engage the authors with questions and comments below, and link to articles when appropriate if you have a blog or participate on forums of related topics. — SF


Ab Barbell Rollout

HardCORE Training: Progressive Methods to Strengthen the Lower and Upper Abdominals

Blog| ByKim Goss

Ab Barbell Rollout

Strength coaches are always looking for the next best exercise or training tool, but often what’s “new” is rediscovering the best of what’s old. The iron boots I used over a half-century ago have been transformed into MonkeyFeet, and the Super Killer Squats I first read about in a muscle magazine in the 70s are now wedge board squats. Another training method that is getting a double-take is the abdominal rollout.

As “core training” is an important topic in physical and athletic fitness training, I want to trace the history of a few of the most popular methods to train the abdominals. Included will be a discussion on the ab wheel, sit-ups, crunches, ab rockers, and ab crunch machines. After discussing the good, the bad, and the worthless of these methods and devices, I’ll make a case for the barbell rollout as a “go-to” core exercise for athletes interested in achieving athletic superiority.

(Lead photo by Karim Ghonem)

Enter the Ab Wheel

I was introduced to this device in the late 60s by magazine advertisements. The ab wheel was promoted to the general public as an easy tool to tone your abs and reduce your waistline (Image 1), and sales quickly exceeded millions of dollars.

Ab Wheel
Image 1. The ab wheel is a simple exercise device that promised a trim waistline.

For the untrained or deconditioned, the high levels of tension an ab wheel can produce may cause abdominal injury and lower back pain, particularly if the exercise is performed incorrectly. To reduce the risk of injury, it’s essential to maintain a neutral spine (posteriorly rotating the pelvis) throughout the exercise. More specifically, the exercise should begin with the lower back flat or slightly rounded, and you should extend as far as you can maintain this posture.

For the untrained or deconditioned, the high levels of tension an ab wheel can produce may cause abdominal injury and lower back pain. Share on X

The end range of an ab wheel (when the arms begin to extend) is especially challenging. One way to assist beginners is to perform the exercise while kneeling on a low platform, such as an aerobic step. An analogy would be a push-up progression where you start from a standing position with your hands on a wall (vertically), move to a push-up on a bench where your body is positioned at an angle, then finish on the floor (horizontally).

There are many types of ab wheels. One type has a spring attachment that winds up when you extend and uncoils to assist you on the return. Fitness model and former collegiate softball player Jordan Dwyer demonstrates one of these devices in Video 1.


Video 1. The basic ab wheel exercise is performed on the knees. This modern ab wheel unit has a spring device that helps the athlete return to the start.

Not living up to the promise of reducing waistlines quickly contributed to a lack of interest in the ab wheel and a renewed interest in traditional exercises, such as sit-ups. “Bootcamp” programs, inspired by military training, became popular—but not for long, thanks to the pioneering research of Spine Biomechanics Professor Stuart McGill (Image 2).

McGill’s research on the effects of spine bending and compressive loading included direct loading on pig cadavers, which he says are a reasonable representation of human spines. He also conducted epidemiological investigations comparing groups that performed sit-ups and those that did not. McGill concluded that flexion of the spine during these exercises and the muscle activity needed to perform them created stresses that could eventually damage the discs. McGill added that he was involved in several case studies involving military and law enforcement personnel who were required to perform the sit-up test for time. He said they all “had a history of discogenic back disorders, which reduced when sit-up training was replaced with a core stabilization approach.”

Stuart McGill
Image 2. Dr. Stuart McGill has pioneered research on the effects of sit-ups on spine health. (Photo courtesy Dr. Stuart McGill)

With sit-ups getting a bad rap, many in the fitness community endorsed crunches as the go-to abdominal exercise. Crunches were easy to do and required no special equipment. Performing crunches on a Swiss ball also became popular because they increased the range of motion of the exercise and, unfortunately, the potential risk of a sports hernia (i.e., athletic pubalgia).

With sit-ups getting a bad rap, many in the fitness community endorsed crunches as the go-to abdominal exercise. Share on X

Next, home ab crunch rocker devices soon appeared that supported the neck to relieve neck strain (Image 3). However, there are several ways to prevent neck strain with crunches. One is to reduce tension on the back of the neck by pressing your fingers against your forehead. Through an effect known as reciprocal inhibition, providing resistance that causes the muscles on the front of the neck to contract will cause the muscles on the back of the neck to relax. That said, ab rockers and traditional crunches do not provide enough resistance to create a significant training effect for more than a short period. This issue inspired the development of seated ab crunch machines.

Ab Crunches
Image 3. Ab crunches and ab rockers were popular sit-up alternatives. (Illustrations by Sylvain Lemaire, Hexfit.com)

Seated ab crunch machines provide progressive resistance, usually with a selectorized weight stack. In the early 80s, I was a Nautilus instructor at the San Jose YMCA (where many elite track and field athletes trained, including world record holder Al Feuerbach). This YMCA, along with many others, purchased a complete circuit of Nautilus machines.

Unquestionably, the abdominal crunch machine was the most popular, and members wanted to perform several sets (which was against the Nautilus protocol, but I often let them slide if there wasn’t a line). Many other gym instructors also told me about the popularity of these ab crunch machines; other equipment manufacturers took notice with their own variations.

Although crunch machines are here to stay, the next core training phase the general public latched onto was planks. Planks also got the seal of approval from McGill.

And that brings us back to the ab rolling, which could be considered a dynamic form of planks.

Although it’s reasonable to assume that those who created the ab wheel invented the exercise, its history goes back to the early days of professional strongmen. To perform the exercise, they would use a barbell so they could progressively increase their resistance (Image 4).

Although it’s reasonable to assume that those who created the ab wheel invented the exercise, its history goes back to the early days of professional strongmen. Share on X
Rollout
Image 4. The barbell offers progressive resistance for ab rollouts. Shown is Nicole Morales, a weightlifter coached by the author who broke New England junior and senior weightlifting records. (Kim Goss photo, Steve Kinslow design)

One notable Iron Game athlete who performed barbell rollouts was Mark Cameron (Image 5). In 1980, Cameron became the second (and still the lightest) American to clean and jerk 500 pounds. He told me he would use 242 pounds (110 kilos) for reps during workouts.

Mark Cameron
Image 5. Mark Cameron was the second American to clean and jerk 500 pounds. He often included barbell rollouts in his training. (Photo by Bruce Klemens)

One of my colleagues who has been prescribing barbell rollouts to his athletes for over 30 years is strength coach and posturologist Paul Gagné. He says it’s one of the most unique abdominal exercises “because the range of motion is large and it’s all anti-gravity.” However, he only prescribes it after a preparatory period of lower abdominal training—let me expand on his approach.

Facts and Fallacies of Lower Ab Training

The rectus abdominis extends from the top of the sternum and rib cage to the pubic bone and is the muscle that gives us the envied “six pack” (Image 6). The rectus abdominis is a single muscle, but for program design purposes, Gagné divides it into two sections: supraumbilical (above the belly button) and subumbilical (below the belly button).

Rectus Abdominus
Image 6. The rectus abdominis is the muscle responsible for “six-pack” abdominal muscles. (Photos by Miloš Šarčev.)

The entire rectus abdominis is somewhat activated in nearly every abdominal exercise, but Gagné says it is possible to emphasize specific segments. Compare this approach to how bodybuilders (including Arnold!) target the upper area of their pectorals by performing bench presses on an incline.

The entire rectus abdominis is somewhat activated in nearly every abdominal exercise, but Gagné says it is possible to emphasize specific segments. Share on X

Many strength coaches are fond of saying, “Train movements, not muscles.” In the case of the lower abdominals, Gagné asserts that all macro movements depend on micro movements. “Functional training that simulates the movements in sports is fine, but only so long as each segment is strong enough to coordinate those movements properly.”

The lower abdominals play a critical role in preventing injuries and producing the highest levels of athletic performance. For example, lower abdominal weakness may cause the pelvis to rotate excessively forward during sprinting. These mechanics can affect stride length, increase stress on the hamstrings, and reduce the shock-absorbing qualities of the spine (Image 7). Research supports this theory, even suggesting that pelvic posture may be more important for preventing hamstring injuries than stretching.

A study on the link between hamstring injuries and flexibility was published in 1993. The 34 subjects included rugby, hurling, and Gaelic football athletes. “The results of the study indicate that while differences in hamstring flexibility are not evident between injured and noninjured groups, poorer low back posture was found in the injured group.” They concluded that coaches should regularly monitor the posture of these athletes.

Gagné says the problem is compounded if one side of the lower abdominals is significantly weaker. This imbalance could cause excessive spinal rotation, leading to possible disc injury.

Lower Abs
Image 7. The lower abdominals help maintain optimal pelvic alignment by countering the pull of muscles that flex the hip. Note the before and after postures, taken two weeks apart, of a young gymnast who worked with the author. In the before photo, her rotated pelvis was placing excessive stress on her hamstrings and lower back, along with contributing to round shoulders. (Photos courtesy BFS magazine; Illustration by Sylvain Lemaire, Hexfit.com.)

According to Gagné, before performing barbell rollouts (or using an ab wheel), you should have sufficient lower ab coordination and strength to maintain a neutral spine during the exercise. This involves screening athletes with two simple tests.

Abdominal Testing Basics

The first test determines if you have the body awareness (proprioception) to activate the lower abs.

Lie on your back with your knees bent at 90 degrees. Place your hands on your chest and rest your head on the ground. Try to lift your hips straight up a few inches, exhaling hard as you do so (Image 8). If you can’t perform this movement without pulling your knees towards your head, or if you have to brace your elbows on the floor or lift your head, you have weak lower abdominals. “This lower abdominal raise is just about the only movement you could say is purely subumbilical,” says Gagné.

’This lower abdominal raise is just about the only movement you could say is purely subumbilical’, says Gagné. Share on X
Lower Ab Test
Image 8. The lower abdominal strength test can determine the readiness of an athlete to perform ab roller exercises correctly. Demonstrating this test for Coach Gagné is his athlete Justine Dufour-Lapointe, 2014 Olympic Champion in moguls skiing. (All Gagné athlete photos by Paul Gagné.)

If one of his athletes fails the lower abdominal strength test, Gagné would have them practice this movement (or other exercises) until they can pass it. Often, athletes can pass the test after just a few training sessions.

The second test measures the coordination between the abdominal muscles and the muscles that flex the hip. It is discussed in the popular physical therapy textbook Muscles: Testing and Function, first published in 1949. The difference between this test and a straight-leg raise exercise is that you must keep the lower back pressed against the floor during the movement.

To perform the test, have a partner place their hands underneath your lower back, lightly touching the vertebrae directly under your belly button. Have your partner extend your legs until they are perpendicular to the floor, supporting them briefly. Press your spine against the floor and slowly lower your legs, exhaling as you do so, with your partner holding their free hand a few inches away from your ankles so your legs don’t collapse (Image 9).

To score 100 percent, a male must lower their legs all the way down without arching their lower back, and a female to about 15 degrees from the floor. The two standards are needed because women carry more of their total muscle mass in their lower extremities.

The two standards are needed because women carry more of their total muscle mass in their lower extremities. Share on X
Ab Test Progressions
Image 9. This leg-lowering exercise determines the coordination between the upper and lower abdominals.

With those prerequisites out of the way, you’re ready for the next phase of abdominal training: barbell rollouts!

Next-Level Ab Training with Barbell Rollouts

When an athlete is ready for barbell rollouts, there are several ways to progress. Gagné recommends starting from the knees, then from a low platform, and finally (for the super advanced) from a standing position. Let’s take a closer look at each.

Level 1: Kneeling on the Floor. As with the ab wheel, one of the key technique points in performing a barbell rollout is to keep the spine in a neutral position (Image 10).

Placing a towel or padding under your knees will make the exercise more comfortable. You should initiate the exercise by moving your hips forward and stopping if you feel your lower back arching. Only when your hips have moved as far as they can do you initiate the use of your arms.

During the exercise, keep your head in line with your spine, which will help prevent you from arching your lower back. Also, grip the barbell hard to stabilize your upper back. Gagné says gripping hard is also an exercise to help correct round shoulders.

As for breathing, during these barbell rollouts, you exhale during the most challenging part of the exercise. More specifically, you inhale as you extend, hold your breath at the fully-extended position, then slowly exhale (with pursed lips) as you return.

Rollout Pad
Image 10. This exercise determines the coordination between the upper and lower abdominals. Demonstrating ideal technique in this exercise is Maxime Dufour-Lapointe, a 2014 Olympian in moguls skiing.

To help you perform the exercise correctly, wrap an elastic band around your upper thighs, close to your hips (Video 2). Have your partner stand behind you. As you extend, the pull of the band will help you maintain a neutral spine and enable the trainee to extend further.


Video 2: Using a band across the upper thighs provides feedback on exercise posture and assists the trainee with the exercise.

Level 2. Kneeling on Low Platform. This variation requires a low platform (Image 11), about 4 to 6 inches, such as the height of an aerobic step. While using a platform makes the ab wheel exercise easier, it’s harder with a barbell. “Because of the barbell’s higher position, I prefer performing two progressions before standing,” says Gagné.

An alternative to kneeling on a low platform is to use smaller diameter plates, although they tend not to roll as smoothly as the large bumper plates. Again, placing a towel or some other padding under the knees would make the exercise more comfortable.

Kneeling Rollout
Image 11. The kneeling version on a low platform, such as an aerobic step, is the next level of intensity for barbell rollouts. Note the position of the athlete’s lower back during the exercise.

Level 3. Standing. This is the most challenging variation and requires good hamstring flexibility. You should perform it on a non-slip surface or with your feet against a wall to prevent slipping. Before trying it, do a few workouts without the barbell to get accustomed to the movement (Image 12).

From standing is the most challenging variation of barbell rollouts and requires good hamstring flexibility. Share on X

Handwalk Progression
Image 12. Before progressing to the standing barbell rollout, first practice with just bodyweight.

When you’re ready for the barbell, start with the barbell close to a wall or power rack to prevent you from collapsing and falling facedown (Image 13). After a few sessions, you should be comfortable with the movement to perform it away from a wall.

Wall Stability
Image 13. Use a wall when first performing a standing rollout to prevent you from collapsing. Demonstrating is Chloé Dufour-Lapointe, 2014 Olympic Silver Medalist in moguls skiing.

Start with the bar close to the shins, head down, and slowly extend as far as possible under control (14). Don’t be discouraged! You may only be able to extend a few inches at first. If hamstring flexibility is an issue, start with your knees slightly bent until your flexibility improves from performing this movement.

Turf Full Rollout
Image 14. The start and mid-point point position of the standing barbell rollout. Demonstrating is Olympian Francis Luna-Grenier, a Canadian weightlifter Gagné trained.

Coach Gagné has developed many other variations of barbell rollout exercises, along with more extensive abdominal training protocols. However, the approach described here is a good start and one that he has used with Olympians, professional athletes, and the general population. The bottom line is to find ways to increase the resistance progressively with abdominal training. Barbell rollouts are a practical option to help you accomplish just that!

Since you’re here…
…we have a small favor to ask. More people are reading SimpliFaster than ever, and each week we bring you compelling content from coaches, sport scientists, and physiotherapists who are devoted to building better athletes. Please take a moment to share the articles on social media, engage the authors with questions and comments below, and link to articles when appropriate if you have a blog or participate on forums of related topics. — SF


References

McGill, S. Personal Communication. June 26, 2023.

McGill, S. Low Back Disorders: Evidence-Based Prevention and Rehabilitation, 3rd Edition. Human Kinetics, May 8, 2015.

Schwarzenegger, A. The New Encyclopedia of Modern Bodybuilding, pp. 308-309. Simon & Schuster, 1998.

Hennessey L., and Watson A.W. Flexibility and posture assessment in relation to hamstring injury. Br J Sports Med. 1993 Dec;27(4):243-6.

Kendall, F.P., et al. Muscles Testing and Function, 4th Edition, pp. 156-157. Williams & Wilkins, 1983.

Young Coach Lessons

The 3 Biggest Mistakes I Made During My First 3 Years of Coaching

Blog| ByMatt Tometz

Young Coach Lessons

If I had to pick one concept from psychology to summarize coaching development, it would be the Dunning-Kruger Effect. Although that might come off as a little cliché, if you experience it firsthand, you will realize why it’s so commonly used. In popular terms, the concept traces a progression where:

  • When you first learn about something, you’re excited and feel like you know everything because your knowledge on that topic just exponentially increased (the Peak of “Mount Stupid”).
  • Then you become aware of the vastness and depth of that topic, which causes you to feel like you know nothing (Valley of Despair).
  • You embark on a long, slow journey of increased knowledge (Slope of Enlightenment).

Dunning Krueger Graph
For me, year one of full-time coaching was definitely the Peak of “Mount Stupid,” with year two being the Valley of Despair and year three marking the ascent out of those depths and beginning up the Slope of Enlightenment. And what moved me forward through these peaks and valleys were the hours and hours and hours…and then even more hours, all just coaching—coaching kids as young as nine years old up to professional athletes and working with those whose goals range from becoming a pro athlete to making the high school team to just wanting fitness as part of their weekly routine. And doing so in settings ranging from a one-on-one with an athlete all the way to 100+ athletes I met just five minutes prior.

Starting my (hopefully) graceful rise after falling off the peak of Mount Stupid, I want to share the three biggest mistakes I’ve made and, consequently, what I’ve learned. Hopefully, I can expedite your learning process just a little bit as I start my long climb up the Slope of Enlightenment.

Mistake #1: Thinking I Had Enough Stories from Just One Year of Coaching

The one story that marks the beginning of my descent from Mount Stupid—and that will forever make me cringe every time I think about it—comes from a phone call I had after only a few part-time summers and a graduate assistantship under my belt…

I connected with an extremely well-known coach in the speed development space, someone I followed for a while and who made a significant impact on my and my coworker’s training philosophies. We scheduled a phone call, and I was an eager combination of nervous and excited. That phone call finished in about 27 minutes but felt like an eternity…the conversation was stale; it was just me asking questions and interviewing them with no real back-and-forth. I felt like I completely blew my one opportunity, which caused me to lose more sleep that night than it probably should have.

As time heals all wounds, I reflected on that phone call and realized that at that point in my coaching career, I just didn’t have enough stories, says @CoachBigToe. Share on X

As time heals all wounds, I reflected on that phone call and realized that at that point in my coaching career, I just didn’t have enough stories. We could replace the word stories with experience, but you’ll see why stories makes more sense with my examples below. Stories allow you to do two main things:

Contribute to Conversation

I’ve connected with more coaches over the last three years­—both intentionally and unintentionally networking—than most coaches probably will in their whole career. Many of those calls I planned to be 45 minutes long instead lasted three hours. This is because the other person had a background and interests similar to mine, the anecdotes we shared we both found interesting and fit well together, and so on. The conversation flowed, and I felt we connected more deeply than with the typical phone call.

On the flip side, I’ve also had phone calls I planned on lasting 45 minutes that ended up being barely 30 (like the one I shared above), and even those I initiated, I couldn’t wait just to finish. During those calls, the other coach and I didn’t really have anything in common, and I brought nothing to the table besides my questions from stalking them on the internet beforehand.

With that being said, I’m pleased to announce that the success rate of all my networking phone calls is dramatically higher in year three than in year one for one simple reason: I have more stories. I can contribute to the conversation by sharing interesting anecdotes, opinions, and insights to make it more of a back-and-forth than an interview. I can provide value to the other person with my unique experiences that can help them learn and grow instead of me just taking information from them.

Demonstrate Expertise

Although this story is from grad school, you’ll still learn from my embarrassment… It was the beginning of the second year of my master’s program, and because I knew graduation was inevitable, I started applying for jobs. Come October, I get a response from an application to schedule an interview with a professional baseball team. I learned who would be on the Zoom call, researched their backgrounds, and prepared notes for what I assumed they’d ask me relative to my experience and that role.

I had some experience, including a few part-time summers coaching and one semester of doing collegiate sports science, but that was pretty much it. My notes consisted of definitions of concepts from my textbooks and research studies I read in class. Once I finished my preparation, I had this feeling in my gut that it wouldn’t go well…and the interview turned out predictable and boring, like something was missing. And in retrospect, I know what it was: real-life stories.

Fast-forward 3 1/2 years, and I was interviewing again with a professional baseball team. The opening question of the interview was, “Tell me about a time you optimized the data reporting process.” I said, “I actually used to send Excel documents every day to the coaches with the athletes’ wellness data. Then I realized we only met weekly and made decisions based on the week, so why was I sending daily data? I changed to just having reports for the meetings but was ready to answer any questions they had between meetings. The coaches told me they felt less overwhelmed with one report per week instead of seven and were actually excited to see the data as it aligned more with their decision-making processes. As all sports science follows a data-discussion-decision flow, we needed to look at what decisions and at what frequency we wanted to make them, then work backward from there.” I received incredibly positive feedback about that answer, which definitely was not something I could’ve said 3 1/2 years earlier.

Everything in performance is a shade of gray, so when ‘it depends’ is the correct answer, you’ll have stories to turn that into ‘it depends, and here’s why,’ says @CoachBigToe. Share on X

Within stories is the opportunity to discuss nuance. Everything in performance is a shade of gray instead of black and white, so when “it depends” is the correct answer, you’ll have stories to turn that into “it depends, and here’s why (insert story).”

Lesson: Stories matter, and you need a lot of them. 

Mistake #2: Believing What I Put on Paper Is What Causes Improvement

The first year of full-time coaching is a blur; everything’s new and exciting due to the exponential learning rate. And this story takes place during my second year, right when coaching started to slow down in my mind as I felt more comfortable and collected. I had both my largest group and longest-training group so far…

It was the fall, and I was training a group of 12 sophomore high school baseball players. They were all friends; they worked and competed hard; everyone involved enjoyed a great experience. The group doubled their initial six weeks and were with me for 12 total weeks. The fall then ended, and it was time for winter training to pick up in anticipation of tryouts, with much of the group being varsity hopefuls. However, three athletes of the group decided to continue training until tryouts for another six weeks.

Finally, tryouts came and passed, and the athletes/parents relayed the good news about making the team with very positive feedback about the training and the results it created. However, a theme appeared from those texts, with some being much more satisfied with the results than others…it wasn’t the ones who worked the hardest or the ones I wrote a special secret program for. It was the three athletes who continued training and were with me the longest.

Programming on paper feels great. It’s systematic, objective, and easy to say, “We did more than last time.” However, as you’ll learn with coaching more and more sessions, rarely does it go 100% as planned. Athletes come in a little beat up from practice, some miss sessions with outside injuries, and sometimes a long day of school completely destroys all their focus for the day. So being able to take a step back and ask, “What is the least I have to do today to cause improvement (minimal effective dose)?” and “How do I get my athletes to do that for as long as possible?” creates a long-term mindset that sets up both you and your athletes for the most success.

There are plenty of other examples I could share about athletes not setting PRs all summer, then they go on vacation for a week or two and finally PR because they’re actually recovered, or athletes leaving for 3–4 months then hitting PRs because puberty just gave them a little more size and strength…but I don’t want to run this point into the ground. Just understand that what you put on paper is the minimum for good training, so focus on the intangibles, like the environment you create and the relationships you develop to ensure that training becomes long-term.

What you put on paper is the minimum for good training, so focus on the intangibles, like the environment you create and the relationships you develop to ensure that training becomes long-term. Share on X

Lesson: What really causes change is good, fundamental training done over a long period.

Mistake #3: Believing My Athletes’ Expectations About Training Will Always Align with Mine

There was a high school athlete who had trained with me for well over a year, during which time I got to know him pretty well. His priority was definitely to enjoy himself but also to work hard when the time came. I was skeptical about his big plan and athletic goals, but hey, it’s his life to live and not mine.

His goals changed from making the high school baseball team to just wanting to work out consistently, and one day his energy was lower than usual, and he wasn’t talking as much. The workout had an incredibly slow pace, and I started to get paranoid that we wouldn’t get through the training, which would cause him and his parents to feel like they didn’t get their money’s worth.

Long story short, this athlete just went through a breakup, so we ended up sitting and talking for 30 minutes. I was still paranoid about our lack of work when my athlete said, “I’m really glad I can come to work out, and we can talk, and you’ll listen. I feel much better about everything.” I’ve been seeing that athlete ever since, and honestly, the quality of workouts has also improved.

I describe it like this: every session you coach, you typically have 2–3 expectations of what will happen, and your athlete also has a list of 2–3 expectations. Here’s a standard list of three for coaches:

  1. Your athletes will work hard.
  2. Your athletes will actively pursue their goals.
  3. Your athletes will have a great time doing so.

Those are definitely my top three as a coach for most of my sessions, and they probably cover a majority of the day-to-day coaching. But the thing is…your athlete’s list won’t always align with yours. This list could range from “I’m going to have a great time and hang out with my buddies,” to “This workout will get me out of the house and help me work toward my first fully healthy season,” to “I’ll become one step closer to earning a college scholarship.” Coaches run into issues when they automatically assume their athlete’s list does and should align 100% with theirs. And this is something I learned the hard way—it won’t.

You typically have 2–3 expectations of what will happen, and your athlete also has a list of 2–3 expectations. Your athlete’s list won’t always align with yours, says @CoachBigToe. Share on X

Going back to the story above, what would’ve happened if I only cared about the workout and projected my own expectations on him at that moment? Probably a lot of frustration for both of us, and who knows how long our time training together would’ve continued?

Now, let me address some concerns you might be having—this is not to say that you can’t hold athletes accountable or are not allowed to work hard. And this is not to say that your athletes will never have athletic goals that inspire you as a coach to do your best. But they won’t align 100% of the time. And sometimes, the solution is as simple as asking, which I have done before because it’s obviously not fair to expect the same list from a fifth-year bench warmer who just wants to be healthy compared to their teammate who’s a future draft pick.

Save yourself the headache and frustration: ask them what they want to get out of each training session and their goals, and ask yourself, “How do I give my athlete what they need today?” The great coaches understand that, almost always, the answer is more than just giving them a really good workout.

Lesson: Effective, long-term training relationships compromise between meeting your athlete where they are and creating a higher standard to help them achieve more than they thought they could.

There’s No Lesson Like Experience

Some of these lessons you may have nodded along with, and they made sense in theory, with the anecdotes helping drive the point across—but as much as I’d love to do the learning for you, you’ll need to experience these things yourself. Nothing would make me happier than if my crash and burn off Mount Stupid makes your fall a little easier. It’s a quick climb up and a quick fall down, but then a long trip ahead.

I’m very excited about all the smaller Mount Stupids I’ll climb along the way and the cool stories they’ll give me. Having an awareness of these lessons and how they can manifest in everyday training could make you better able to recognize them and adapt while on your own journey.

Since you’re here…
…we have a small favor to ask. More people are reading SimpliFaster than ever, and each week we bring you compelling content from coaches, sport scientists, and physiotherapists who are devoted to building better athletes. Please take a moment to share the articles on social media, engage the authors with questions and comments below, and link to articles when appropriate if you have a blog or participate on forums of related topics. — SF


Olympic Weightlifting Mobility

A Strength Coach’s Guide to Training Mobility for Olympic Weightlifting

Blog| BySergii Putsov

Olympic Weightlifting Mobility

Navigating the intricate world of Olympic weightlifting? It’s about more than just strength—mobility plays a crucial role too! This comprehensive guide sheds light on the importance of mobility and its impact on performance, injury prevention, and longevity in the sport.

For those struggling with limited mobility, this read could be your game-changer.

What Is Mobility in Olympic Weightlifting?

Mobility in the realm of Olympic weightlifting refers to the body’s ability to move through its complete range of motion without pain or restriction. This athletic discipline necessitates a broad range of complex and dynamic movements, each requiring a blend of strength, coordination, and, yes, mobility.

In Olympic weightlifting, two key lifts are executed—the snatch and clean & jerk. Both lifts demand that athletes hoist heavy weights from the ground to overhead, involving every major muscle group and joint in the process. Mobility comes into play as a fundamental aspect that makes these lifts possible.

In Olympic weightlifting, two key lifts are executed—the snatch and clean & jerk. Mobility comes into play as a fundamental aspect that makes these lifts possible. Share on X

The notion of mobility extends beyond mere flexibility. While flexibility relates to the ability of your muscles to lengthen, mobility is more holistic. It’s the capacity of your joints to move freely and fully in a controlled manner, integrating muscle flexibility, joint range of motion, and the nervous system’s ability to coordinate and control these movements.

Why Is Mobility So Important in Olympic Weightlifting?

Olympic weightlifting is a powerful display of human strength and agility, and mobility lies at the heart of this sport. Mobility is important in Olympic weightlifting because it enables the following:

1. Performance Enhancement

Improved mobility acts as a catalyst for efficient performance in Olympic weightlifting. When your joints can move freely, your body mechanics become more fluid and precise. This increased freedom translates into seamless, powerful lifts requiring less brute force and more calculated strength.

As a result, athletes with superior mobility can better their lifting techniques, reducing the undue strain on muscles and, ultimately, allowing them to lift more weight securely and proficiently.

2. Injury Prevention

Given their dynamic nature, Olympic lifts necessitate a full range of motion. This range puts considerable stress on joints and muscles, especially if mobility is compromised.

When mobility is limited, the body tends to compensate by overloading certain muscles and joints while underusing others. This imbalance can lead to strain, overuse injuries, or worse, acute injuries like sprains and tears. Therefore, prioritizing mobility mitigates these risks, fostering healthier, safer workouts.

3. Longevity in the Competitive Sport

In the realm of competitive Olympic weightlifting, longevity is often closely tied to an athlete’s commitment to mobility training. Regular mobility work maintains a healthy range of motion, reducing the wear and tear on joints and muscles that can accumulate over time.

In competitive Olympic weightlifting, longevity is often closely tied to an athlete’s commitment to mobility training. Share on X

This proactive approach not only aids in preserving your body’s physical health but also ensures that your performance doesn’t wane prematurely. In essence, superior mobility could mean the difference between a fleeting career and a long, successful tenure in the sport.

4. Posture and Balance

A lifter’s posture and balance are fundamental to safe and effective weightlifting. Good mobility fosters the maintenance of an upright, balanced posture, particularly under heavy loads. This upright posture is essential during Olympic lifts to distribute the weight evenly and prevent undue stress on the spine.

Moreover, balance, a critical aspect of successfully completing a lift, is augmented with good mobility. This is because the body is better equipped to make the minute adjustments necessary to stay stable when it’s not restricted by stiffness or immobility. Therefore, enhancing mobility directly contributes to better posture and improved balance, which are crucial to Olympic weightlifting.

The Seven Best Olympic Weightlifting Mobility Exercises

Mobility exercises are like the unsung heroes of Olympic weightlifting. Here are seven exercises that can bolster your mobility, helping you become a more robust and efficient athlete.

1. PVC Pipe Pass-Throughs

This exercise is incredibly straightforward yet highly effective in improving shoulder mobility, a key aspect for both the snatch and clean & jerk lifts in Olympic weightlifting. To begin, hold a PVC pipe (or a broomstick if a pipe isn’t readily available) with a grip wider than your shoulders.

Start with the pipe in front of you at waist level. Keeping your arms straight, gradually lift the pipe up and over your head, continuing until it reaches behind your waist, thus completing a full circle if your mobility allows it. The goal is to make the circle as wide as possible while maintaining a straight-arm position throughout the movement.


Video 1. PVC frontal rotation.

This range of motion not only enhances shoulder flexibility but also strengthens the muscles around the joint, providing a solid foundation for successful lifts. Remember, the exercise isn’t about speed but control and precision. Take it slow, focusing on the smoothness of the movement. With regular practice, you should see an improvement in your lifting posture and performance.

2. Deep Squat Prayer Stretch

This powerful mobility exercise focuses on increasing flexibility in the hips, groin, and ankles, all of which are vital in Olympic weightlifting. Start by adopting a deep squat position with your feet slightly wider than shoulder-width apart and your toes pointing outward. Now, bring your palms together in a “prayer” position, and use your elbows to gently push your knees outward.

This increases the stretch in your hips and groin. Keep your back straight and chest up, and try to sink your hips lower while maintaining your balance. Remember, the goal isn’t about going deep quickly but progressively increasing the depth of your squat over time while ensuring proper form.

Regular practice of the deep squat prayer stretch will not only enhance your lower body mobility but also contribute significantly to the stability required in Olympic lifts.


Video 2. Deep squat stretch with plate.

3. Deep Goblet Squat

This highly beneficial exercise is an excellent tool to improve hip, ankle, and lower back mobility, which are critical for executing lifts in Olympic weightlifting.

To perform a deep goblet squat, you begin by holding a kettlebell or a dumbbell close to your chest. Your feet should be shoulder-width apart, with your toes pointing slightly outward. Engage your core and maintain a straight back as you lower your body into a squat. Aim to go as deep as your flexibility allows, ideally until your thighs are parallel to the floor or even lower.

Keeping your heels grounded throughout the squat is crucial to maximize mobility benefits. As you descend, push your knees out slightly to accommodate your torso, and maintain your balance by keeping the weight close to your chest.

By practicing deep goblet squats regularly, you not only enhance your lower body mobility but also strengthen your quads, glutes, and core, thus facilitating improved performance in weightlifting. Always remember to perform the movements slowly and in control, prioritizing form and depth over speed.

4. 90-90 Hip Rotation

This particular exercise, named for the 90-degree angles you form with your legs, is an excellent method to increase hip mobility and flexibility, which are essential components for effective Olympic weightlifting.

Begin by sitting on the floor, setting both legs at 90-degree angles—one leg in front of you and the other to the side. Your front knee and ankle should both be at 90 degrees, as should your back hip, knee, and ankle. Maintaining a tall spine, gently lean forward to feel a stretch in your front hip.

Then, slowly rotate your body to switch which leg is in front, rotating at the hips. This hip rotation should be done slowly and deliberately, focusing on maintaining the 90-degree angles.


Video 3. Regular practice of the 90-90 hip rotation will significantly improve your hip mobility, aiding in the execution of lifts and reducing the risk of strain or injury in these critical joints.

5. Supported Side Lunge Mobilization

This exercise is a valuable tool for enhanced mobility in Olympic weightlifting, particularly targeting the hips and inner thigh muscles.

Begin by assuming a wide stance and using a sturdy support like a rack or pole for balance. Bend one knee and sink into a side lunge, keeping the other leg straight. This movement increases flexibility in the hip joint and strengthens the surrounding muscles, contributing to a more secure and effective execution of weightlifting exercises.


Video 4. Regular practice of the side lunge can significantly improve lifting performance.

6. Cat-Camel Stretch

Get on your hands and knees. Begin by arching your back, pulling your belly button toward your spine (the cat position). Then, lower your belly toward the ground and lift your chest and tailbone toward the sky (the camel position). This stretch increases the mobility and flexibility of the entire spine, including the thoracic region.

7. Thread the Needle
Start on all fours, then slide one arm under your body toward the opposite side, rotating your upper body. Try to reach as far as possible while keeping your lower body stationary. This exercise enhances thoracic rotation and stretches the upper back muscles.


Video 5. Kneeling deep chest opener.

The Best Times for a Mobility Routine in Olympic Weightlifting Training

Identifying the most beneficial time to engage in a mobility routine is a multifaceted consideration largely contingent on the individual athlete’s daily schedule, personal body responses, and specific training regimen.

Despite this subjectivity, it is possible to delineate three primary junctures during which mobility exercises can be seamlessly incorporated into an Olympic weightlifting routine and yield fruitful results.

1. Before a workout

The pre-workout phase is a strategic opportunity to integrate mobility exercises. Serving as an excellent warm-up routine, these exercises help prime the muscles and joints for the intensive lifting session that lies ahead.

This preparatory stage entails raising the body temperature to optimize muscle performance, enhancing joint lubrication to ensure smooth movement, and expanding the range of motion to facilitate the execution of complex lifting techniques.

As a result, incorporating mobility exercises before a workout helps reduce the likelihood of injuries and enhances overall lifting performance by readying the body for the strenuous activity it is about to undertake.

2. During a workout

Integrating light mobility exercises amidst the sets of a weightlifting workout can be advantageous for the athlete. This strategy, often termed “active recovery,” allows for maintaining the warmth and mobility of the joints and muscles without inducing fatigue or overexertion. The brief respite that the body experiences between heavy lifting sets can be effectively utilized to perform light mobility exercises, keeping the body active while subtly aiding its recovery. This continuous movement prevents the muscles from cooling down or stiffening, ensuring the body remains ready for subsequent sets.

The brief respite that the body experiences between heavy lifting sets can be effectively utilized to perform light mobility exercises, keeping the body active while subtly aiding its recovery. Share on X

3. After a workout

The period immediately following a workout is a prime opportunity to concentrate on mobility exercises. Post-workout, the muscles are already warm and, therefore, more receptive to the benefits that stretching and mobility exercises confer.

Engaging in mobility work after an intensive lifting session assists in the cool-down process, which is vital for returning the body to its resting state. Additionally, it encourages recovery by promoting blood circulation, which delivers nutrients to the muscles that have been exerted during the workout.

It also plays a role in alleviating post-workout muscular tightness and helps mitigate delayed onset muscle soreness, enhancing overall comfort and readiness for future training sessions.

The Importance of a Rest Day

Beyond these primary workout phases, some athletes may find additional benefits from dedicating entire sessions to mobility work on their rest days. These sessions can serve as an active recovery day and help enhance overall flexibility, joint health, and mobility without the added stress of weightlifting.

However, the crucial factor to remember is consistency. The benefits of mobility work compound over time, and it’s the regularity and commitment to this aspect of training that yields significant improvements.

The benefits of mobility work compound over time, and it’s the regularity and commitment to this aspect of training that yields significant improvements. Share on X

Prioritizing mobility in your routine, no matter when you choose to do it, can contribute substantially to enhancing your performance and prolonging your longevity in Olympic weightlifting.

Frequently Asked Questions

What is mobility in Olympic weightlifting?

Mobility in Olympic weightlifting refers to the ability of an athlete to move their body through a full range of motion without restriction. It involves both the flexibility of the muscles and the freedom of movement in the joints. Good mobility is essential for performing the snatch and the clean & jerk with correct form and efficiency. It aids in performance enhancement, injury prevention, and overall lifting longevity.

How often should I do mobility exercises for Olympic weightlifting?

Mobility exercises should ideally be a part of your daily routine as an Olympic weightlifter. You can incorporate them into your warm-up before training sessions and your cool-down afterward. Also, consider dedicating specific sessions to mobility work on rest days. Regular and consistent mobility work is key to enhancing performance and reducing the risk of injuries.

How can I improve my hip mobility for Olympic weightlifting?
Improving hip mobility for Olympic weightlifting involves the regular practice of targeted exercises. These can include deep goblet squats, hip circles, 90-90 hip rotations, and supported side lunge mobilizations. Always remember to perform these exercises with correct form and control, focusing on gradually increasing your range of motion over time. Consistency is key to seeing improvements in hip mobility.

Prioritize Mobility

Having a mobility routine is an integral part of the Olympic weightlifting training process. It’s not just about enhancing performance but also about ensuring safety, longevity, and overall athletic well-being. So, make mobility a priority in your training regime.

Now, over to you, weightlifters. Share your experience in the comments below—what mobility exercises have helped you the most in your Olympic weightlifting journey?

Since you’re here…
…we have a small favor to ask. More people are reading SimpliFaster than ever, and each week we bring you compelling content from coaches, sport scientists, and physiotherapists who are devoted to building better athletes. Please take a moment to share the articles on social media, engage the authors with questions and comments below, and link to articles when appropriate if you have a blog or participate on forums of related topics. — SF


Cone Chaos

Game On: Cone Chaos

Blog| ByJeremy Frisch

Cone Chaos

As a strength and conditioning coach, youth sports coach, and dad of four growing kids, I’ve spent countless hours at various ball fields. Over the years, I have come up with hundreds of ideas involving many different activities, drills, and games in my never-ending quest to have fun and improve the athletic ability of the young athletes I’m working with. I wish I could say that all of these ideas were great…but many went down like lead balloon and ended up in the trash.

Every now and then, however, a gem emerges that stands the test of time.

At Teamworks sports performance in Clinton MA, we do not have the luxury of an outdoor field right next to the gym, so we often will do separate field sessions at one of the local football fields down the street. To be honest, I have always enjoyed getting out of the gym and on the field to open up on our speed training and do extra “movement skill” work. If anyone reading this has seen my articles, videos, and courses, they know how I feel about the importance of varied movement for the development of athletic abilities in young athletes. As much as I Iove the gym, nothing beats some open field space and little creativity.

Most young athletes these days spend an inordinate amount of time playing just one or two sports. Oftentimes, these sports are played non-stop, year-round. Gone are the days of kids playing outside with their friends, making up their own games. This change is unfortunate, because those marathon sessions of play activity were a great environment to develop and rehearse a variety of athletic skills. Consequently, these days, most young athletes are exposed to a very narrow range of movements throughout the year. They are always repeating the very specific movement skill-set that their sports require, while missing out on the variety of movements that playing other sports and games provides.

It’s no surprise, then, that pediatric sports injuries are on the rise—mostly because our current generation of young athletes are over-skilled and underdeveloped. This is the reason why gameplay has become such a huge part of my overall athletic development philosophy.

It’s no surprise, then, that pediatric sports injuries are on the rise—mostly because our current generation of young athletes are over-skilled and underdeveloped, says @JeremyFrisch. Share on X

Cone Chaos

Over the past decade, one game has emerged as a perennial fan favorite among all the athletes I coach: Cone Chaos. I have used this game with kids as young as elementary school all the way through college-level football players. From the name, you can probably guess that the game is another variation of the classic game of tag, but it’s so much more than that. Cone Chaos requires:

  • Teamwork
  • Offense and defense
  • Scoring
  • Time constraints

The beauty of this game is that the only real equipment needed is a stack of cones and a stopwatch. This is an important consideration when planning field sessions, because a lot of the time I can’t carry much equipment in my car other than some cones, bands, and tennis balls. This, in fact, is how the game was invented: I needed to come up with a game that was highly competitive, trained the skills that I wanted, and required minimal equipment and set-up time.

The beauty of this game is that the only real equipment needed is a stack of cones and a stopwatch. This is an important consideration when planning field sessions, says @JeremyFrisch. Share on X

Although Cone Chaos can be played 2v2, it’s more fun and rewarding if you can play it as 3v3 or with even more players. So, for the purpose of this article, I’ll be explaining with 3v3 or above.

Enter Cone Chaos

Here’s a brief rundown of the game, with a diagram—there is a designated offensive team and a defensive team.

Rules

The defense must defend each cone area. Numerically, there is always one more cone area than there are defenders. For example, in this case, there are 3 defenders protecting 4 cone areas. In 4v4, there will be 4 defenders covering 5 cone areas. Defenders must tag offensive players trying to knock over the cones. Tagged players must “clear” themselves back out in the safe zone after being tagged.


Video 1. High school athletes playing cone chaos.

The offensive team has a set time (30-40 seconds) to knock down as many cones as possible, and players can only knock down one cone at a time. Each time an offensive player knocks down a cone or gets tagged, they must “clear” themselves by hustling back into the safe zone. Offensive players are allowed to score a knockdown in any cone area. They can also run up and down the safe zone area, where they cannot be tagged.

After the timed 30 seconds is up, teams count how many cones were knocked down. Then, they switch sides with offense going on defense and defense going on offense. After each team has gone through one round, the team with the most cones knocked down wins that game—we typically play a seven-game series, where the first to win four games is the overall winner.

3v3 Cone Tag
4v4 Cone Chaos

Another great version of this game is played with hula hoops instead of cones. In this variation of the game, the offensive players have to simply step a foot inside the hula hoop  to score.


Video 2. Young athletes play the hula hoop variation of Cone Chaos.

Rules

The offensive team has 30-40 sec to step into a hula hoop as many times as possible.

Each time an offensive player steps into a hula hoop or gets tagged, they must “clear” themselves by running back into the safe zone.

The defense must defend the hula hoop area. There is always one more hula hoop area than there are defenders. For example, in this case there are 4 defenders protecting 5 cone areas. Defenders must tag offensive players trying score/step into hula hoops. Tagged players must “clear” themselves in the safe zone after being tagged.


Video 3. Full team playing hula hoop version of Cone Chaos.

After 30 seconds is up, teams count how many times the offense stepped into the hoop areas. Then they switch sides. Offense goes on defense and defense goes on offense. After each team has gone through one round the team with the most hula hoop entries wins the game.  In this variation, we also typically play a seven-game series, where the first to win four games is the overall winner.

Hoop Chaos

Why We Play

Most field and court sport athletes find both versions of this game highly competitive and enjoyable. They feel there are many similarities to their sport skills—for example, there are similarities to playing zone defense in basketball, where an athlete covers an area rather than a man. Our offensive-minded football and basketball players love the strategy involved in creating the space needed to score.

Some of the most important athletic qualities evident in Cone Chaos:

  • Creating space on offense for scoring
  • Closing space on defense for tags
  • Scoring
  • Defensive positioning
  • Acceleration
  • Deceleration
  • Tracking
  • Reaction
  • Change of direction
  • Team work
  • Strategy
  • Conditioning
What I notice the most is that during game play, my athletes go all out—they push themselves much harder in a competitive situation than they ever do in training, says @JeremyFrisch. Share on X

What I notice the most is that during game play, my athletes go all out. They push themselves much harder in a competitive situation than they ever do in training. In my opinion, if you want skills to transfer to sports, games are the golden ticket to bridge that gap between training and sport. Cone Chaos is a fun and highly competitive way to train the skills needed in field and court sports, and the beauty of this game is that it’s scalable both to the size of the team and to different ages.

Since you’re here…
…we have a small favor to ask. More people are reading SimpliFaster than ever, and each week we bring you compelling content from coaches, sport scientists, and physiotherapists who are devoted to building better athletes. Please take a moment to share the articles on social media, engage the authors with questions and comments below, and link to articles when appropriate if you have a blog or participate on forums of related topics. — SF


Readiness Jump Testing

Efficient Readiness Testing with Jump Mats for Any Setting

Blog| ByJustin Ochoa

Readiness Jump Testing

As coaches, we’re constantly searching for ways to help our athletes get the absolute most out of their time in the gym. One of the most effective ways we can do this is by implementing a readiness testing protocol into our programs—this helps us manage athlete load and stress and individualize programming and autoregulation methods. It can also play a role in limiting risk factors related to overuse injuries in athletes.

Sounds like such a no-brainer, right? And with the tools and resources we have access to today, this is easier than it’s ever been.

Or…is it?

Sure, the amount of technology we have to test and monitor outputs is at an all-time high, but with that also comes the much harder part of the equation—managing that data. After all, data alone is just a bunch of numbers with no context. It’s worthless without the time or knowledge to actually manage and analyze it.

The amount of technology we have to test and monitor outputs is at an all-time high, but with that also comes the much harder part of the equation—managing that data, says @JustinOchoa317. Share on X

We’ve seen a massive emphasis on the data management side of the sports performance industry. Most professional and high-level collegiate sports teams now have sports scientists on staff who are solely responsible for interpreting athlete data and communicating findings to the athletes and staff. It is no longer enough to simply collect data or track progress; you have to know what it means, why, and what to do next.

That alone can be a full-time job on top of all the other hats performance coaches wear. I fell victim to this issue early in my career—I tried to test and track everything. I tested and tracked so much that I couldn’t even analyze what I was collecting. Trying to influence athletes to get wearables for the RHR and HRV, trying to get athletes to fill out daily questionnaires with clarity and honesty, trying to use VBT data to create my own RPE scale that would determine the athlete’s workload, trying to combine all of the above and more in the name of athlete management…you name it, I probably tried it for at least three months. The result was a lot of wasted time, a lot of wasted money, and potentially leaving results on the table due to majoring in the minors.

I had to turn to the old adage—addition by subtraction—and throw out things that weren’t delivering a substantial bang for my buck in terms of return(s) on investment: time, money, or attention.

One assessment I kept and continue to find value in is measuring athlete readiness via jump testing. No, it’s not perfect. It has pros and cons, but it delivers high-quality info for coaches. Even at first, it was a daunting task that almost didn’t make the cut because I made it way harder and more complex than it needed to be. I also made a huge mistake in how I conducted my readiness testing. In this article, I want to share some best practices for readiness jump testing and hopefully give you takeaways to utilize in your own environment.

One assessment I kept and continue to find value in is measuring athlete readiness via jump testing. It has pros and cons, but it delivers high-quality info for coaches, says @JustinOchoa317. Share on X

What Is Readiness Jump Testing?

If you’re not familiar with the concept of readiness testing, it’s not as fancy as it may sound. And it’s certainly not proprietary to the performance field: readiness testing is simply a way to measure and monitor how prepared an athlete is to perform the given tasks at hand. In most cases, that would be a workout, a practice, or a game.

Coaches can use a test or series of testing protocols to develop readiness standards for their athletes and then compare the results of each session to the baseline to determine how “ready” that athlete is for that day’s tasks. They can then alter the plans appropriately if the situation warrants it.

Readiness Testing
Figure 1. There are myriad ways to test readiness and even more ways to interpret those tests. There is no one-size-fits-all approach; typically, the more individualized it is, the better.

Aside from jump testing—the actual topic of this article—a few other methods that I won’t go too deeply into include:

  • Wearable tech: Oura Ring, Whoop Band, FitBit, Apple Watch, HRV products, etc.
  • Questionnaires: How did you sleep? How is your mood? What have you eaten today?
  • Other training data: VBT data, force plate data, RPE post-session, etc.

All these are great options, but jump testing delivers the best results with a reasonable investment of time and money combined with higher compliance from the athletes and coaches involved. These tests provide valuable data on an athlete’s neuromuscular system, power output, and reactive capabilities.

All jumps and jump testing I talk about throughout this article will refer to jumps on a jump mat. I use the SkyHook Jump Mat. Other popular options include the Plyomat, the Just Jump mat, the Swift EZ Jump, and the Jawku Vertical Jump Tester. These tests can also be performed on force plates or with a Vertec system.

Types of Jump Testing

Keep in mind that I am trying to simplify jump testing and get it down to the most necessary components possible. There are dozens of jump-testing options out there—especially when it comes to force plate data—and some rabbit holes we can dive down (for better or for worse). This article will not cover an exhaustive list—I’ll be detailing my three most used, most repeatable, and most valid ways to test on jump mats.

1. Countermovement Jump (CMJ)

The CMJ—aka a regular ol’ vertical jump test—has been one of the most utilized and reliable testing methods for not only measuring athlete readiness but also force and power outputs. It’s time-sensitive, affordable, repeatable, and, most of all, objective.


Video 1. Countermovement jump using the Skyhook contact mat: “Step on the mat, jump as high as you possibly can, and land safely on the mat.”

The higher the vertical, the more we can assume about that athlete’s power production potential. Additionally, the more we can assume about some of their other athletic qualities, such as relative strength and sprint speed.

On our CMJ tests (and all jump tests), we let athletes use their own unique jump technique with little to no cueing. We correct potentially dangerous movements, which are rare, but other than that, I want to see the athlete use their own strategy to produce the jump. Our training programs can address all of the other factors not relevant to measuring the athlete’s readiness on that given day.

We correct potentially dangerous movements, which are rare, but other than that, I want to see the athlete use their own strategy to produce the jump, says @JustinOchoa317. Share on X

As it pertains to the readiness of an athlete and their CMJ performance, we use a “stoplight” system to help autoregulate that athlete’s program if needed.

  • Green means go, proceed as normal, maybe even push it.
  • Yellow means proceed with caution or slow down to reassess the situation.
  • Red means stop and reassess the situation, possibly changing some programming.

We also use the athlete’s baseline testing with statistical values such as standard deviation and coefficient of variation to help get that daily testing number down to the true performance change. This helps influence conversations and programming decisions based on how much that performance has dropped compared to their baseline. I’ll cover that process and scale in-depth later in the article.

2. RSI Pogo Jump

Another jump test I absolutely love for training and readiness purposes is the RSI pogo jump test. I use a 4/2 method; others use a 10/5 method. Tomayto, Tomahto.

The reactive strength index, or RSI, measures an athlete’s ability to utilize the stretch-shortening cycle efficiently. This not only represents an athlete’s elasticity and reactive ability, but it can indicate neuromuscular efficiency as well. RSI can also help drive programming decisions in terms of which end of the force-velocity curve an athlete needs to tailor their training toward.


Video 2. RSI Pogo Jump: The measurement itself, although it’s kind of unclear what unit of measurement RSI actually is, is calculated by dividing jump air time (or jump height) by ground contact time.

You can get to a really good RSI score by having a lot of air time with minimal ground contact time—producing large amounts of force in a very small amount of time. You can alter your score, whether positive or negative, with a change in either one of those components.

The 4/2 method, which is built into the SkyHook Jump Mat that I use, is performed by hopping onto the mat and then completing four pogo jumps in a row before landing safely on the mat. Each jump has its own recorded air time and ground contact time. The software will take the best two of those four jumps to produce the athlete’s RSI score. The PlyoMat also provides this exact method. A slightly different version is featured on the Just Jump mat, where the athlete jumps four times, and it takes the average across those four jumps to produce the RSI score.

The 10/5 jump is a similar concept that I used in the past before switching from IMUs to jump mats. This test is a series of 10 pogo jumps, with the RSI calculated from the last five of those 10 jumps.

In my opinion, all of these test options can be useful. As a coach, you know your setting and athletes best, so ultimately, it’s up to you to choose the best method for your environment. What device you use could also play a role in which methods you choose. I chose to go with what is built into my device to help me save time and guarantee consistent testing protocols.

3. Drop Jump Test

This is also a measurement of RSI, but in a less repetitive method in terms of the athletic outputs. Rather than multiple jumps, the drop jump involves stepping off a box or platform (onto a jump mat) and immediately performing an explosive jump upon landing.

Similar to the 4/2 RSI test, this drop jump test emphasizes an athlete’s ability to rapidly switch from eccentric to concentric, making it a great training tool that also serves as a test: both “tests” are also common plyos that most athletes do some variation of in training.


Video 3. In testing, it’s crucial to ensure that the box or platform athletes drop from is always the same height. In training, we’ll progress the height of drops, but in testing, we don’t want to tarnish our test validity by jumping from various heights and comparing apples to oranges.

Making a Test Part of Your Routine

Again, these are not the only tests available for readiness testing, but they are the ones I have the most confidence in—they are easy to coach and execute, athletes enjoy them, and they can all be performed on a jump mat.

My test of choice is the RSI 4/2. We do it daily. I would suggest choosing one test and making that the test. Sure, you could test all three because they technically showcase three different force production strategies, but then you would be right back at square one: data overload. Simplifying things is the name of the game here. So, choose one, roll with it, and master it.

I would suggest choosing one test and making that THE test. Simplifying things is the name of the game here. So choose one, roll with it, and master it, says @JustinOchoa317. Share on X

We have our testing baked into the warm-up. All of our warm-ups feature breath work, mobility work, some dynamic stretching, and rudimentary plyometric drills before each athlete breaks off into some personalized “daily vitamins” in their warm-up.

The final piece of our warm-up always includes some sort of nervous system excitement in the form of a jump or throw; then, we follow that up with our testing for the day. It doubles as a readiness test but also another explosive drill for the athlete to prepare them for whatever may be next in their session for the day (i.e., sprints, lifting, skill work).

The method allows us to test the athletes when they’re feeling as ready as possible for that given day, and it also builds some routine into the process to help the athlete feel comfortable with the tests.

Readiness Jump Testing Protocol

Ok, I’ve rambled long enough about the prerequisites—now it’s time for the main course. (But then I may go back to rambling for a bit, so please stick around.)

This will be the most important section of this article because it corrects the mistake I made during the first five years of readiness jump testing in my own program. It wasn’t until I read “Establishing the Reliability & Meaningful Change of the Drop-Jump Reactive-Strength Index” (Beattie & Flanagan) that I realized I was making a huge mistake in my readiness tracking.

The mistake was that I was not accounting for the completely normal fluctuation in results that may occur, not only between trials but also within the same day, due to various factors. And what Beattie & Flanagan proved in their research is that we must take those fluctuations into consideration during baseline testing to build in a “zone” or “range” of what’s normal since normal is a moving target.

Not including this method can create a phenomenon of crying wolf—not by the athlete, but by the coach. Failing to account for the variance of what is normal can create a false-negative, leading to the coach overcorrecting, overanalyzing, and making far too many unnecessary changes to the athletes’ programs when they likely could have let them train as normal and keep those valuable reps.

You know the phrase, a strength coach’s first job is to do no harm, right? Well, do no harm was starting to feel like do no work. My readiness testing was starting to feel like I was in search of reasons to autoregulate the programs and “keep them fresh,” but really, I was just taking away good opportunities to impose some stress on a fully ready and able young athlete.

When I reflect on that brief time in my career, I loved the results the athletes got, but I also wonder: “Could we have gone harder?” “Could I have pushed them a little more?” “How much better would those athletes be if I did?”

The reality is that since jump mats give us fractional results, this concept posed a legitimate issue for me because the jump results are not on the inch or the half inch; they are presented in tenths of inches. This makes it very common to have three very similar-looking jumps that are not the exact same result. For example, it’s not uncommon for a trial of three vertical jumps to look like this:

  • Attempt 1: 29.73
  • Attempt 2: 30.12
  • Attempt 3: 28.83

I have never seen an athlete perform three identical jumps on any jump mat system. I have never even seen two of the three jumps be identical. By not accounting for this, I was making my testing inaccurate and inconsistent—thus, rendering it invalid.

What Beattie & Flanagan discovered was that to establish a readiness test’s reliability, we need to get statistical techniques involved to determine the true change in performance. That’s where the mathematical terms you haven’t heard since high school come into play: standard deviation (SD) and coefficient of variation (CV). And for a guy that lived by the “C’s get degrees” slogan throughout college, this absolutely blew my mind.

What the heck do those two terms even mean, though?

  • A standard deviation is a measure of how dispersed the data is in relation to the mean. A low standard deviation means data is clustered around the mean, and a high standard deviation indicates data is more spread out.
  • The coefficient of variation is the ratio of the standard deviation to the mean. The higher the coefficient of variation, the greater the level of dispersion around the mean. It is generally expressed as a percentage.

So, the kicker is that to find the CV, we must first find the SD because the equation is:

100 x (standard deviation/mean) = coefficient of variance (CV)

This is so crucial because if we use jump testing to determine an athlete’s readiness, we need to account for the subtle differences between even their healthiest, best, and most “ready” jumps.

If we use jump testing to determine an athlete’s readiness, we need to account for the subtle differences between even their healthiest, best, and most ‘ready’ jumps, says @JustinOchoa317. Share on X

If we go back to the example jumps I used above—29.73, 30.12, and 28.83—that’s a mean of 29.56, an SD of 0.54, and a CV of 1.83. That CV of 1.83 represents that any change in performance less than 1.83% is entirely normal for that athlete.

This data is powerful because it allows you to truly track meaningful change in performance and alter your programs, or not, based on that.

My general rule used to be that if an athlete’s readiness test drops by more than 10%, then we go on an autoregulation program to alter volume and intensity for the day. Not accounting for the CV, I probably stripped athletes of perfectly fine opportunities to train the program as initially planned.

Excel Daily Baseline
Figure 2. Baseline testing data and daily readiness results.

Keeping the same hypothetical athlete numbers used above, let’s say they jump a 26.5 on their readiness test. That’s more than 10% off their baseline mean (10.35%). But the true change in performance is only 8.52% because we know that they could have a 1.83% variance on their testing on any given day. The math there is the 10.35 deviation from the mean, minus the built-in CV of 1.83, to equal 8.52. So, instead of cutting them off from training that day, they’re green as long as no other red flags are apparent.

With the power of friends who actually paid attention in math class, Google Sheets, and YouTube, I created a template here that coaches can use to do all of the math shown above in less than three seconds. With that template, you can duplicate the sheets for each of your athletes and quickly input their daily readiness test results.

The sheet will show the true change in performance based on their baseline testing data and give you a red, yellow, or green cell to indicate how a coach should move forward with that athlete in the program.

I currently have it set up to stay green—meaning no intervention is needed—when the true change in performance is 0%–9.99%. It will display a yellow—meaning potential intervention is needed—when the true change in performance is between 10% and 14.99%. And finally, it will display red—meaning intervention is needed—when the true change in performance is a 15% drop-off or greater.

Readiness Testing Best Practices and Benefits

By now, I hope you’re all-in and excited about the concept of readiness jump testing, but if you need to be persuaded a little bit more, below is a quick overview of just a few of the many benefits that readiness testing can bring to your programming.

First, readiness jump testing enables coaches to establish an athlete’s baseline performance level—this is crucial for the daily readiness piece, but it also sets a baseline for performance metrics. By assessing the athlete’s jump height, power, and RSI, you can gain insights into their current physical capabilities and monitor those daily for readiness and long term for program results. This information serves as a foundation for setting realistic goals and designing personalized training programs tailored to the individual athlete’s needs.

Coaches can also gain valuable insights into an athlete’s specific strengths and weaknesses. Athletes with a high vertical and low RSI may be effective at using sheer force to produce athletic outputs and could benefit from gaining elasticity through training. Athletes who are very fast but have a low vertical jump may lack general force production qualities and could benefit from exposure to that in training. Testing vertical or RSI daily for readiness could double as extra reps at whatever end of the force-velocity curve an athlete may need.

Another key benefit is the ability to see real-time training progression and results without having to have a classic “testing day.” Regularly implementing readiness jump testing throughout an athlete’s training program allows coaches to monitor the progress that they’ve made day-to-day or week-to-week and share that feedback with the athletes. We can see small weekly increases in vertical jump or RSI simply by having that as a part of the athlete’s program. By comparing data from previous assessments, you can track improvements in power output, explosiveness, and reactive strength. This information allows for targeted adjustments to training protocols, ensuring continuous progression and preventing performance plateaus.

Another key benefit is the ability to see real-time training progression and results without having to have a classic ‘testing day,’ says @JustinOchoa317. Share on X

Last but not least, the main reason we would want to utilize this testing method is to ultimately improve an athlete’s performance. The test is designed to measure readiness to train, meaning we want to make sure that our athletes constantly get the optimal doses of training volume and recovery methods to support that. After all, we want them to train. We don’t want to search for reasons for them not to train but rather, program work that allows them to get results, feel good while doing so, and transfer those results to their sport.

It’s a major benefit to be able to show an athlete all of the things above and do so in as little as five minutes a day. The return is well worth the investment of both time and financial resources.

All of this is great in theory, but implementation is the name of the game. Here are some best practices that have helped me make readiness jump testing a valuable asset to our program over the years.

    1. Establish a clear objective for your system. What do you want to get out of the testing process? Define the purpose and objectives of daily readiness jump testing and how this will (or won’t) positively impact your program. What tests do you want to perform, and why? What devices and tools will you use? How will you store, track, and manage the results? This is different for every coach, but starting with a clear why is always a great move. If you ever get off-track or don’t like the way the testing process is going, you can turn back to that and see if you’re still in alignment with the reason you started in the first place.


    1. Standardize the testing and tracking procedures. This includes consistent warm-up routines, testing equipment, measurement techniques, data management, and instructions for athletes. This also includes retesting and re-establishing the baselines for each athlete. As athletes improve, there will come a time when they need to set a “new normal” to account for those gains. Standardization ensures reliability and minimizes variability in the testing process. All that being said, we work with humans in a gym and not robots in a lab. Don’t beat yourself up if you run into minor imperfections. It’s a marathon. Just try to keep it apples to apples as much as you can.


    1. Seek athlete feedback. It’s often said that athletes don’t care how much you know until they know how much you care. Ensure that athletes understand the purpose and benefits of readiness jump testing and that it is a function of maintaining their well-being. Educate them on how the testing results will be used to optimize their training and performance. Encourage athletes to actively engage in the process by providing feedback and sharing their observations regarding their readiness and recovery. Make it as interactive as possible. Monitor their compliance and address any barriers or challenges they may encounter.


    1. Remember that testing is just a tool. We can use these testing methods to make informed decisions regarding training adjustments, recovery strategies, or individualized interventions. But don’t become so over-reliant on the tests that you forget the human element of coaching. Consider contextual factors. Integrate the testing results with other assessment tools and subjective feedback from athletes to form a more comprehensive picture of readiness. Use this as a tool, but know that you, the coach, make the final decision.


  1. Have a plan. Build out your system of what actually happens based on an athlete’s readiness testing results. I have a stoplight system of red, yellow, and green (as discussed above). If green is the program as written, yellow and red would slightly modify exercise selection, volume, and intensity. Having a set plan in place will make life easy and keep the flow of the sessions really smooth. Coaching can be hectic and stressful, but when a system is set up, and a plan is in place, it truly helps us make practical decisions on the fly because the hard work was done upfront.

Since jump mats are becoming more and more accessible, affordable, and popular in all settings of sports performance, I truly believe that readiness testing is a great way to get a return on your investment for the equipment.

The daily jumps are ingrained in the culture of our gym. It’s not even written or posted anywhere on an athlete’s program, but they know it will happen every day, and they embrace it as a challenge—not only against their training partners but against themselves from their last session.

There is no perfect system, and jump testing doesn’t give us all the answers, but it checks many boxes and delivers immense value, says @JustinOchoa317. Share on X

I love to hear things like “Remind me what I got last time” or “What’s my all-time best? I’m about to beat it” before a rep of daily testing. It shows me the athlete truly cares, and not only about their results. They believe in the process it takes to get there, with daily jump testing being an ingredient in their recipe.

There is no perfect system, and jump testing doesn’t give us all the answers, but it checks many boxes and delivers immense value. By implementing some of these methods, coaches can gather important athlete data to help make better decisions, deliver better training programs, and ultimately help athletes maximize their athletic potential through more intelligent training.

Since you’re here…
…we have a small favor to ask. More people are reading SimpliFaster than ever, and each week we bring you compelling content from coaches, sport scientists, and physiotherapists who are devoted to building better athletes. Please take a moment to share the articles on social media, engage the authors with questions and comments below, and link to articles when appropriate if you have a blog or participate on forums of related topics. — SF

Long Jump Video

Practical Ways for High School Jump Coaches to Break Down Film on a Budget

Blog| ByKevin Consoles

Long Jump Video

Too often, I find myself watching cringe-worthy jumping at high school track meets. I see talented athletes not coming close to what they are capable of in the jump events due to dangerous or incorrect techniques and jump strategies.

Behind every poorly taught jumper is a track coach who has not studied the discipline or even done the bare minimum to teach the event safely. Unfortunately, in the state where I coach, the jumps are treated as second-class events compared to the sprints and distance events; this is further underscored when big competitions are held at tracks with damaged runways, unlevel boards, and neglected sand pits.

I encourage all coaches to start to film the jumpers on their team performing and later review the film with the athletes—I guarantee it will help you as much as it has helped with my team. Share on X

I have spent a lot of time researching and reading the writings of coaches and researchers who have put out information on the jumps, which has helped me immensely as a coach. More recently, I’ve been trying to figure out the next step in my career that would take my coaching abilities to a higher level. Reviewing films has been that next step. I encourage all coaches to start to film the jumpers on your team performing and later review the film with the athletes (or have the athletes film themselves)—I guarantee it will help you as much as it has helped with my team.

Improvements in Coaching

I do not have as good of a coaching eye as some other, more experienced coaches. I can typically focus on one, maybe two things on each jump…which leaves a lot more to be missed than to be seen. Filming practices and competition when appropriate has made me a much better coach. When you constantly watch film, you learn far more about each athlete’s strengths and weaknesses. I have also found errors in athletes’ techniques in places I would never have noticed had I not filmed and slowed the film down to watch it.

Watching jumping in slow motion or reverse opens the mind to how the athlete truly moves down the runway. I had the pleasure of coaching the long jump State Champion and New England Champion this past season. He started the season jumping 21’7” and ended up jumping 23’10¼” at the state championship, setting a state meet record. This improvement would never have happened if the athlete and I had not reviewed his film together.


Video 1. This was the first film session of our indoor season: the jump was 21’7”. A few weeks later, the athlete jumped 23’10”.

The best strategy for film review is to pick the most needed technical change that will give you the biggest return on investment. I thought the athlete above had a very solid approach run, but they over-lowered a bit on the penultimate step; however, this was not what was holding the athlete back from bigger jumps. The primary errors I identified that would give us the biggest ROI were the in-air and landing mechanics. The huge arch in the back is there to counter forward rotations (incorrectly), but it is so overdone that the athlete seems to create backward rotation. They then end up stabbing the sand with extended legs and crashing their thighs into the pit, which in my estimation, loses them at least 18 inches off their jump.

The best strategy for film review is to pick the most needed technical change that will give you the biggest return on investment, says KCPerformance_. Share on X

To improve the in-air and landing mechanics, we simply practiced jumping into the pit off of a short approach and ensuring that the head, spine, and hips were aligned in the air before landing. We also focused on cycling the arms and legs in a way that did not cause any loss of posture and set a rhythm for the athlete to prepare for the landing in time. Without fixing the posture as the athlete traveled through the air, we could not fix the landing. Most problems are caused by the part of the jump that preceded it.

We then moved on to the landing phase, timing the arm and leg action prior to landing and making sure the athlete was able to sweep his arms behind him as he extended his legs. Once the feet contacted the sand pit, the athlete was instructed to let his legs relax and bend into the landing. This allowed the athlete’s hips to pass over the feet, so there would be minimal loss of distance due to the landing. Not every jump will be perfect—sometimes old habits reemerge—but as the season progresses, these old habits should be seen less frequently and eventually totally eliminated.


Video 2. At Nike Nationals: When athletes are aware of their KPIs, sometimes you don’t even have to add notes—they already know what to look for.

Film Sessions

I always look to other track events and even team sports to see what programs and coaches are doing that make their teams successful. A recent idea I began using from American football was the idea of “film sessions,” aka breaking down game film. If you played football, at least at the high school level, this is nothing new or earth-shattering. Film sessions have always been a big part of many football programs and are usually held a day or two after a Friday night or Saturday morning game. There is usually film of the previous game, and coaches review or break down plays, formations, and the execution of game strategies.

This past season, I began filming our jumpers in practice and competition and later showing them the film of how they executed their jumps—filming the athletes jumping helped build buy-in and allowed athletes to become a part of the learning process. I discovered that if athletes can see what their jump looks like and are taught what they are doing well and what they need to improve, they understand the value of better technique.

If athletes can see what their jump looks like and are taught what they are doing well and what they need to improve, they understand the value of better technique, says KCPerformance_. Share on X
InShot
Image 1. InShot is a free and easy-to-use video editor.

Budget-Friendly Video Editing

I specifically chose my words carefully and called the prior section “Film Sessions” rather than “Film Analysis” because I believe film analysis has more metrics and data that go along with it. I also do film analysis, but when it comes to breaking down film for my athletes, I think that adding ground contact times, flight times, and take-off angles is very heavy for practice sessions with high school athletes. The athletes I work with are very intelligent and creative; I’m sure they are very capable of learning about these metrics, but as of now, I keep an eye on these metrics and usually keep them to myself unless it is absolutely necessary to bring them to the athlete’s attention.

When I do perform film analysis (I use DartFish Express), it is very helpful for collecting certain metrics, but I feel it is limited for breaking down film and getting creative. I am not a very art-inclined person, but using video editing apps has helped unleash my creative side and also given me a great appreciation for video editing and production.


Video 3. Dartfish has very useful options, like the overlay function.

I used InShot video editor this past indoor and outdoor season and have really grown to enjoy it. You can download it from the Apple and Android app stores for free. Most people have a smartphone already, so considering the app is free, there really is no financial barrier to using this method.

My favorite uses of InShot are to slow video down, freeze frame, zoom in, and add notes directly into the video. I typically slow videos down and freeze them on certain parts of the video where important technical components exist (approach, transition phase, penultimate step, take-off step, in-air mechanics and landing). As the season progresses and technique improves, our points of emphasis shift, and we are usually more focused on certain technical aspects that may be lagging or some key performance indicators that the athlete and I have targeted for improvement.

For example, if the coach and athlete agree that a point of emphasis should be the last four steps of the approach, you can edit the video to slow it down and freeze it on that part of the jump in order to give feedback. It is one thing to tell an athlete they are doing a better jump—but actually showing improvements visually is a game-changer.


Video 4. Athletes love seeing their improvement, usually because a better technical jump is more visually appealing on video, and a personal best performance usually accompanies it.

Athlete Buy-In

Athletes really do become part of the process when you start sharing videos with them. Early in my coaching career, I struggled with getting kids to fully understand what they were supposed to do when jumping. I was never precisely on the same page with athletes until we started breaking down film together. Now, the athletes know exactly what the goal is and what they are doing to to try to execute their jumps. The kids are excited to see themselves jump, and if I don’t upload their videos within 24 hours, I usually receive texts from eager athletes asking when those will be uploaded.

If you do this right, athletes will look forward to film sessions, and those who really buy in will end up becoming students of the event. I truly see some jumpers actively trying to master their craft. Several of my veteran athletes learned so much from our film sessions that they ended up helping coach our less-experienced jumpers, which was awesome to see. Film sessions are there to support the athlete and offer positive, constructive criticism—they are not meant to nitpick and put someone on blast. At the end of the day, these events are tough to succeed in, and the athletes are giving their best effort, which is all a coach can ask for.

Film sessions are there to support the athlete and offer positive, constructive criticism—they are not meant to nitpick and put someone on blast, says KCPerformance_. Share on X
Text
Image 2. A text I received from a jumper who just reviewed their film from their previous meet.

Sharing the Video Clips

The best way I’ve found to share videos with my team is by uploading the film to Google Drive. I organize films by creating folders for every meet, as well as certain practices. I share the film with each athlete and name each video so they know precisely what jump attempt from each meet the video contains. After one indoor and outdoor season, I have already built a decent database of jump videos. Watching the jumpers progress and compare their performances with the videos has been a game-changer for our program. Breaking down film has also been a great way to generate conversation about the meet in person or through text.

Google Drive
Image 3. Google Drive is an easy and free way to organize and share films with your team.

Film When It Makes the Most Sense

Inexperienced jumpers spend the better part of a season learning the event. I always tell my athletes not to worry about the distance they jump in practice. I work hard to create a learning environment because I want the athletes to focus on improving their technique in a way that feels natural and stress-free.

I do not immediately put a camera in the face of a newbie jumper and start showing them film of their every jump—beginners need more experience before I start breaking down film with them. For them, I greatly emphasize the fundamentals and not worrying about adding anything advanced. I believe forcing someone to watch themselves jump too early in their career can be very overwhelming.

For a new jumper, at first, I just want them to learn and have fun. Once they start developing a passion for the event, that’s when we can start breaking down film. The best way to introduce a film session with a new jumper is to let them ask you to film them and watch—if they initiate it, that means they are interested.


Video 5. This is a simple video with a lot of positive reinforcement early in the season.

Keep It Simple

I try not to overcomplicate the feedback I provide to jumpers—the best videos I create are the ones I keep simple, with minimal writing. Sometimes I struggle with giving too much feedback at certain points. It is something I am actively working on improving. I notice that the fewer words I use, the better and more understandable the feedback is.

I try not to overcomplicate the feedback I provide to jumpers—the best videos I create are the ones I keep simple, with minimal writing, says KCPerformance_. Share on X

At times, I’ve used a GoPro on a tripod stand with a remote to film—this is helpful, but I have also had a lot of success just filming on my phone. I sometimes film a jump and immediately show the athlete to give some instant feedback and let them see what happened. It’s important to know when it’s the right time to watch a film immediately with an athlete. I try my best not to be stuck behind my phone screen because I don’t like missing attempts.


Video 6. Breaking down film is helpful for even post-collegiate-level athletes.

Results to Back It Up

This past season I had five jumpers from our team qualify for the state championship in their respective jumping events. I also had three jumpers finish in the top 10 at the state championship, with one of them being the State Champion and New England Champion and state meet record-holder.

A big part of the success of our jumpers was because we broke down film, taught our jumpers to take ownership of their technique, and fostered an environment for people who wanted to master their craft. I hope this article has encouraged coaches to take the next step in their coaching journey and learn how to break down film. Use these tips to help guide you and watch your jumpers evolve!

Since you’re here…
…we have a small favor to ask. More people are reading SimpliFaster than ever, and each week we bring you compelling content from coaches, sport scientists, and physiotherapists who are devoted to building better athletes. Please take a moment to share the articles on social media, engage the authors with questions and comments below, and link to articles when appropriate if you have a blog or participate on forums of related topics. — SF


Hypertrophy

The Science Behind Building Muscle with All Levels of Athletes

Blog| BySteve Haggerty, ByAlex Roberts

Hypertrophy

As strength and conditioning coaches, our job is to help create the adaptations we want in our athletes. Our choices of which exercises to use, how much volume to prescribe, and how to properly intensify training sessions all play a part in whether our athletes will achieve the desired adaption. This can be a difficult task since:

  1. Many of the adaptations we train for require specific training parameters.
  2. Most athletic teams have a wide variety of fitness levels and training ages.

Whether improving muscle mass, strength, power, speed, aerobic conditioning, glycolytic conditioning, or the ATP-CP system, we need to know how to do this for athletes of all skill levels.

This article lays out research, experience, and practical applications for improving hypertrophy in beginner, intermediate, and advanced athletes. With all of the qualities listed above, there needs to be a stress and a period of recovery to elicit specific adaptations. We cover how to optimally create the stress needed to accomplish the goal of muscle hypertrophy:

  • What hypertrophy is.
  • How hypertrophy is measured.
  • How to improve hypertrophy in different levels of athletes (a beginner to building muscle, an intermediate, and an advanced athlete who already has a lot of muscle mass and just needs to find a way to add on a little more).

Mainly, in this article, we provide methods that coaches can implement with athletes at all different training ages.

What Is Hypertrophy?

Hypertrophy, as defined by Oxford, is the enlargement of tissue from the increase of the size of its cells. This is not to be confused with the ever-elusive hyperplasia, which is the enlargement of tissue from an increase in the number of cells. Muscle hyperplasia is a controversial topic in strength and conditioning (just like aerobic conditioning and back squats, for whatever reason), so we won’t touch on that topic today.

A free way to measure muscle growth is through girth/circumference measurements: wrap a tape measure around your flexed bicep, perform bicep curls for 8 weeks, remeasure & see if your arm is bigger. Share on X

The gold standard for measuring muscle hypertrophy is magnetic resonance imaging (MRI), but we are strength coaches and don’t work in a lab. Ultrasound machines have also proved to be effective, and DXA scans are excellent at measuring overall body composition changes—but, again, those need special, expensive equipment. A free way to measure muscle growth is through girth/circumference measurements: wrap a tape measure around your flexed bicep, perform bicep curls for eight weeks, remeasure, and see if your arm is bigger.

How Does Muscle Hypertrophy Occur?

There are two parts to any desired adaptation: stress and recovery. Let’s assume our athletes are recovering optimally—you know, getting adequate sleep, maintaining perfect macro and micronutrient ratios, and having lower stress levels. (We know it’s very unlikely, but let’s just assume.) So there needs to be a stressor, a signal to the system to tell the body to make the muscle bigger. The main process for this is through muscle protein synthesis, which is the body using proteins to build new muscle tissue. There seem to be three main ways to signal the body to increase muscle size:

  1. Mechanical tension
  2. Metabolic stress
  3. Muscular damage

Muscular damage has fallen off a bit as a driver of hypertrophy. Studies out there have found that muscle damage does lead to more protein synthesis, but most of that protein synthesis is used to repair the damaged muscles, not grow bigger fibers.

So that leaves two options—mechanical tension and metabolic stress. Mechanical tension is lifting progressively heavier weights through a full range of motion. Metabolic stress is the “pump” feeling people get from lifting weights, which is the tissue being full of metabolites (lactate, hydrogen ions, etc.). Both lead to muscle protein synthesis, and both methods stress the tissue in a way that signals to the body that this muscle needs to get bigger to keep up with this type of work.

Science is still changing on muscle hypertrophy as we continue to learn what actually leads to muscle growth and what does not: “Conclusively identifying major hypertrophy stimuli and their sensors is clearly one of the big remaining questions in exercise physiology.”5 How do we do this with different levels of athletes?

Hypertrophy Adaptations for a Beginner Athlete

Oh, the glorious days of the newbie gains, where you can walk into your local gym, do anything, and get bigger. We worked with a 14-year-old baseball player who had put on over 10 pounds of body weight in the off-season, just focusing on the basics. We focused on proper form, being consistent as far as showing up and working out, and progressive overload.

  1. Proper form. This is not new information to you coaches, but if an athlete does not lift with proper form, they won’t be an athlete very long. And, for hypertrophy purposes, they won’t be stressing the desired tissues you want to grow. We have all seen the back squat form that is growing bigger low back muscles than leg muscles. Hopefully, this is not a topic we must spend much time on.

  1. Being consistent. We all know athletes do not work out one time and magically look like Ronnie Coleman. This is a long process, and studies show over and over again that a bad workout program done consistently will lead to more improvements than a perfect program that athletes do once per month. Yes, that means the workout they do in the garage with their uncle done consistently over time will be more beneficial than the workout program that you, Louie Simmons, and Charles Poliquin design for them that they do seven times over the summer. Make them enjoy the weight room and want to come in and lift. That’s a whole other article.

  1. Progressive overload. This is really step one to building muscle, the story of Milo. Do an exercise for a certain number of sets and reps. The following week, do that same exercise for one more rep per set or with a little more weight. Do that for years, and you’ll have a freak on your hands.
    There is no need for special rep schemes yet; we should know by now that 8–12 reps are great, but really anything done for 5–30 reps within a set should lead to the same amount of muscle growth as long as athletes push the set reasonably close to failure. The beginner does not even need to be that close to failure; leaving 3–4 reps in the tank will still lead to growth, all while being safe and doing the movement correctly.

Although your athletes need to be consistent, a newbie does not need to be in the gym every day. People progress by lifting one day per week, believe it or not. Two lifts per week is also great.

Although your athletes need to be consistent, a newbie doesn’t need to be in the gym every day. People progress by lifting one day per week, believe it or not, says @steve20haggerty. Share on X

Your new lifter is like a new tube of toothpaste—you can press anywhere on the tube, and toothpaste comes out. Push on the front, back, side—you can even push away from the hole, and toothpaste will come out. It’s when you get more and more advanced athletes that you need to start pressing harder, pushing in a certain direction, or even twisting, folding, and rolling up the tube to get a smidge of toothpaste. (I stole this analogy from Keir Wenham-Flatt.)

Beginner Hypertrophy

Beginner Hypertrophy Progression
Figure 1. Sample beginner program (This program sticks to fundamental concepts of progressive overload.)

Hypertrophy Adaptations for an Intermediate Athlete

No more three sets of 10. Your athlete has been training consistently now for a year or so and maybe has even made a comment about not getting any bigger. They no longer just look at Muscle and Fitness Magazine and instantly grow.

With intermediates, it’s still essential to lift correctly, be consistent, and progressively overload—these things will never go away. But now it’s time to add in a little bit more specific work: focusing mainly on compound movements, progressing volume, pushing each set a little closer to failure, playing around with different rep ranges and lifting tempos, and starting to add in more lifting days.

  1. Compound lifts. The magic of compound lifts such as squats (front, back, goblet, safety squat bar…I’m not married to any of these; they all work), deadlifts, bench presses, pull-ups, etc. is that they stimulate the whole body. Yes, the squat will work the legs better than the bench press will, but both lifts utilize many different muscle groups and stimulate growth across the entire body. As noted earlier, mechanical tension (load) is a huge driving force of muscle growth. No exercises allow for more load across many muscle groups than compound lifts do.

  1. Progressing volume. As we see in the sample workout program, volume for a newbie can be relatively low, and they will still grow muscle. As a lifter gets more experience, they will need more volume to see the same level of growth. Bodybuilders may use four, five, or even 10 sets of 10 repetitions of an exercise. For the muscle to keep adapting, the stress needs to keep progressing.

    Adding weight to the bar is great; adding sets and repetitions to an exercise is also great. For the number of sets per body part per week, science points us to 10–20 sets being optimal for hypertrophy. If you start your athletes with 10 sets of chest or upper body pushes per week, this gives you room to progress up to 20 slowly.

  1. Closer to failure. While beginners can leave 3–4 reps in the tank per set and still see improvements in muscle size, your intermediate athletes will need to be pushed a little harder. Their body is used to lifting, and it’s not a big stressor anymore. The closer an athlete gets to failure, the more stressful it is on the body. Now they need to start pushing closer to 1–2 reps left in reserve per set. (As always, be safe with this. This should be done with experienced lifters, and failure should be technical failure—when their form starts to break down.)

  1. Rep ranges and lifting tempo. As we said earlier, any set that is within 5–30 repetitions and taken pretty close to failure has been shown to elicit the same amount of hypertrophy. With a beginner, we stayed within that 8–15 rep range, but now we can start applying new stress to the athletes. Twenty repetitions on squats or five heavy deadlifts will be a completely new stimulus to your athletes.

    “The body will not grow unless it has a reason to. And the way to do this is through progressive overload and changing the stimulus.” –Charles Poliquin.

    Workouts are allowed to consist of different rep ranges. Sets of five squats to start, then 10 reps of DB rows in the middle of the workout, and finish with 30 reps of push-ups, for example. Lower reps create more tension, and high rep ranges allow for more metabolic stress.

    Speaking of Charles Poliquin, lifting tempos within .5–8 seconds per repetition all seem to elicit the same amount of hypertrophic signal. Poliquin wrote about 40­–70 seconds per set, which I have not found any research on, but odds are, he was right as usual. So, if you have your beginners lift like an average person, where it’s about 1 second up and 1 second down per repetition, now is your chance to play around with slower eccentrics, slower concentrics (yes, your athletes are allowed to lift slow concentrically), and even isometric holds during a lifting repetition. This is a solid way to change up the stimulus and create more metabolic stress during a workout.
Play around with slower eccentrics, slower concentrics, and even isometric holds during a lifting rep. This is a solid way to change up the stimulus and create more metabolic stress during a workout. Share on X
  1. More lifting days. Research shows that lifting three days per week is more effective for muscle growth than one.6 Spreading out the same amount of volume over multiple days (2+) helps the athletes use heavier loads on exercises compared to doing all of the volume in one day. Increasing the number of weekly workouts to three or four days will help with this.

Intermediate First
Intermediate Second

Intermediate Third
Figure 2. Sample intermediate program. (This program utilizes a variety of rep ranges, different lifting tempos, a progression in volume, and an extra lifting day.)

Hypertrophy Adaptations for an Advanced Athlete

So now you have a few athletes who are advanced; they have several years of training at a high level and just need to put on a couple more pounds this off-season. This is a common occurrence with football players preparing for the NFL Combine—Tommy Tremble comes to mind. He arrived weighing 230 pounds and weighed in at pro day at 241 pounds. Along with all the performance goals that come with NFL Combine preparation, he also needed to gain weight to show he had the size of an NFL tight end.

With advanced athletes, you need to start adding in different angles and ranges of motion, utilizing mind-muscle connection and specialization training phases, and training to failure and beyond. Share on X

To accomplish this, all of the earlier rules still apply; those do not go away. With this level of athlete, you need to start adding different ranges of motion and angles, utilizing mind-muscle connection and specialization phases of training, and training to failure and beyond.

  1. Ranges of motion and angles. If you want the athlete to keep adapting, you must continue enhancing or changing the stimulus. You enhance it with load and volume and change it with new ranges of motion and angles. I know; I know—a full range of motion is the way to go for many different reasons, including hypertrophy. I’m not suggesting half-squat PRs for Instagram. Think of a standing DB bicep curl, now seated on a bench with a 45-degree incline, now chest down on a bench with a 45-degree incline. All of these are bicep curls, and as long as the elbow extends at the bottom and fully flexes at the top, it is a full range of motion.

    For all three exercise variations, the humerus is in a different position relative to the body, and the athlete would be in different degrees of shoulder flexion and extension. We all know that the biceps attach to the scapula; therefore, the more the humerus is behind the torso, the more the muscle is stretched, and the more the humerus is in front of the torso, the more the muscle is shortened. By altering the position, you change how stretched the muscle is throughout the range of motion of the biceps curl. This is a common way to change up the stimulus and increase the stress of the movement on specific muscle fibers.

    I do not view these as progressions, as one is not inherently harder than another. I view them instead as variations—ways to stress the muscle in a novel way. This is not just biceps curls either: think of humerus positioning with different triceps extensions or stretch on the hamstring when doing back extensions, 45-degree back extensions, and RDLs.

Biceps
Incline biceps

Bicpes prone
Figure 3. Illustrating the different angles an athlete can use for biceps curls.

  1. Mind-muscle connection. Those bro-science bodybuilders were right after all—it works. Science has caught up and found evidence that the mind-muscle connection is more effective for hypertrophy than not using it. Who would have guessed that when you involve the brain in being intentional with what you’re doing (feeling a muscle work), it enhances the effect? What a concept. (We will see more of this with building strength and power too.)
Science has caught up and found evidence that the mind-muscle connection is more effective for hypertrophy than not using it, says @steve20haggerty. Share on X
    In all seriousness, getting the athlete to feel a muscle working, getting the brain to—dare I say it—activate the muscle better, will help stimulate growth in that muscle. This mind-muscle connection is best with isolation exercises, but it can be used with compound movements as well.
  1. Specialization phase. The specialization phase is something we first heard of from Dr. Mike Israetel. Let’s say your workout program has a total of 100 working sets per week (four days per week, five exercises per day, five sets of each, for this example). In the specialization phase, you will allocate more of those sets to the body part you want to grow in your athletes and take some sets away from a muscle group you are okay with maintaining.

    If their bench press is strong and they have enough anterior chain upper body mass, but you have identified that they need more hamstring size, take a set or two from bench and put it toward RDLs—or even take away an upper body press from one of your workout days and allocate those five sets toward their current hamstring regimen. A muscle needs a lot less volume to maintain size compared to growing; simply maintain a muscle group that is at an optimal size and spend more time stressing a muscle group that needs more growth.

  1. To failure and beyond. Yes, I heard Buzz Lightyear’s voice when I typed this. We know for muscle growth that we need to be adequately close to failure. Newbies can have 3–4 reps left, intermediates can have 1–2 reps left, and for advanced trainees, we need to push them to failure more often. (Same caveats as always: be safe, not for every exercise, not for every set of every workout, etc.) If you want your athletes to continue growing muscle, you need to continue increasing their stress. Doing the last set of hamstring curls until they can no longer complete a full rep is a new and hard stress. As a coach, you can even push them beyond their limit with high-intensity techniques (a phrase stolen from John Meadows):
    • Drop sets. They do as many hamstring curls as possible at full range of motion, then drop the weight by 20% and perform more.
    • Partial reps. They do as many hamstring curls as possible at full range of motion, then continue doing repetitions at half reps.
    • Rest pause. They do three sets of 10 on hamstring curls. On the third set, have them do eight reps, then rest for 20 seconds. They do eight more reps, pause for 20 seconds, and then complete eight final reps. This last set consists of 24 reps at the same weight they used for 10.
    • Force reps. Have them do as many hamstring curls as possible at full range of motion, then assist them through a full range of motion for five more reps, giving as little help as possible to complete each rep.
    • Mechanical drop set. This one is easier to think of with a DB incline bench. Doing three sets of 10 reps, on the last set, have the athlete do eight reps. Then move the bench to flat and complete eight more reps with the same weight. Next, prop the bench up on two bumper plates so it’s at a declined angle and complete eight more reps. With each set of this drop set, you move the athlete into a more mechanically advantaged position.

Advanced Workout
Advanced Progression

Advanced Hypertrophy
Figure 4. Sample advanced program. (This program utilizes drop sets, different lifting tempos, and mechanical drop sets.)

These are methods we have used with athletes of all age ranges and experience levels to help them continue to grow muscle over time. Some of these methods can be used sporadically just to provide a new stressor and keep training fun for the athletes. Give them a drop set of biceps curls or hip bridges for their last workout of the week, and see how much fun they have with that.

We are aware that we work with athletes, not bodybuilders. These are tools you can use to stimulate muscle growth through the training career of your athletes, says @steve20haggerty. Share on X

We work with athletes. We are aware that the goal is not to create bodybuilders. These are tools you can use as a coach to stimulate muscle growth through the training career of your athletes.

Since you’re here…
…we have a small favor to ask. More people are reading SimpliFaster than ever, and each week we bring you compelling content from coaches, sport scientists, and physiotherapists who are devoted to building better athletes. Please take a moment to share the articles on social media, engage the authors with questions and comments below, and link to articles when appropriate if you have a blog or participate on forums of related topics. — SF


Alex RobertsAlex Roberts is the Strength and Conditioning Coach at R. Nelson Snider High School in Fort Wayne, Indiana. In this role, he’s responsible for the year-round athletic development of all student-athletes. Coach Roberts’ main responsibilities are teaching strength training classes during the school day, leading after-school training sessions, and running the summer strength and conditioning program. He holds a Master of Science in Kinesiology and is CSCS certified through the NSCA.

References

1. Krzysztofik M, Wilk M, Wojdała G, and Gołaś A. “Maximizing Muscle Hypertrophy: A Systematic Review of Advanced Resistance Training Techniques and Methods.” International Journal of Environmental Research and Public Health. 2019 Dec 4;16(24):4897. doi: 10.3390/ijerph16244897. PMID: 31817252; PMCID: PMC6950543.

2. Schoenfeld BJ. “The mechanisms of muscle hypertrophy and their application to resistance training.” Journal of Strength and Conditioning Research. 2010 Oct;24(10):2857–2872. doi: 10.1519/JSC.0b013e3181e840f3. PMID: 20847704.

3. de Freitas MC, Gerosa-Neto J, Zanchi NE, Lira FS, and Rossi FE. “Role of metabolic stress for enhancing muscle adaptations: Practical applications.” World Journal of Methodology. 2017 Jun 26;7(2):46–54. doi: 10.5662/wjm.v7.i2.46. PMID: 28706859; PMCID: PMC5489423.

4. Calatayud J, Vinstrup J, Jakobsen MD, et al. “Importance of mind-muscle connection during progressive resistance training.” European Journal of Applied Physiology. 2016 Mar;116(3):527–533. doi: 10.1007/s00421-015-3305-7. Epub 2015 Dec 23. PMID: 26700744.

5. Wackerhage H, Schoenfeld BJ, Hamilton DL, Lehti M, and Hulmi JJ. “Stimuli and sensors that initiate skeletal muscle hypertrophy following resistance exercise.” Journal of Applied Physiology (1985). 2019 Jan 1;126(1):30–43. doi: 10.1152/japplphysiol.00685.2018. Epub 2018 Oct 18. PMID: 30335577.

6. McLester JR Jr., Bishop E, and Guilliams ME. “Comparison of 1 Day and 3 Days Per Week of Equal-Volume Resistance Training in Experienced Subjects.” Journal of Strength and Conditioning Research. 2000 Aug;14(3): 273–281.

Mullins Gust

Summer School Session 6 with Coach Jessica Gust

Blog| ByDan Mullins

Mullins Gust

When you hear that S&C coaches are meeting up to share ideas and collaborate about implementing their programs, most would likely imagine a discussion on training methods, the value of the Olympic lifts, or sprint training techniques. While each of these are important—and, to an extent, were all discussed this week—Coach Jessica Gust from St. Louis Park, Minnesota, discussed arguably the most important aspect of program implementation and introduced us to the term environmental psychology.

Three of the most prominent takeaways from this week’s episode include:

  1. The intentional design of the weight room space.
  2. Using psychological practices to optimize our environment.
  3. Developing systems to create efficiency.

Purposeful Design & Environment

Coach Gust details her decision-making process when designing the room she now operates in and describes these considerations in a well-organized presentation spotlighting four spatial design considerations:

  • Open space.
  • Lots of light.
  • Stand-alone work spaces.
  • A garage door.
Intentional
Figure 1. Coach Gust explains four areas that she wanted to be intentional with regarding the building of SLP’s new weight room. She describes how each area plays a role in supporting the environment and systems that she prioritizes.

Coach Gust also explains the concept of environmental psychology, an inclusive branch of psychology that considers the athlete’s needs in providing an environment that allows them to flourish. As coaches, our program design and implementation account for so many variables, but if we do not account for the needs of the athletes, we may neglect portions of their emotional states that need to be addressed to support an optimal environmental stimulus.

Our program design and implementation account for so many variables, but if we do not account for the needs of the athletes, we may neglect portions of their emotional states that need to be addressed. Share on X
Environmental Psychology
Figure 2. “When our kids see our program, they see and participate in the output and the product. Other animals have amazing receptors in their eyes that allow them to see from another view. The bandwidth that an animal sees depicts the perception of what is viewed. In light of what we do, our athletes see a limited bandwidth. Our job is to take all the other factors affecting program implementation and create a picture of simplicity for our athletes to participate in the program. How do we optimize our environment for our athletes to participate in? Sport Coaches? Ourselves?“

This leads to the final key takeaway: the importance of systems. If we can account for the environmental needs of the athletes, our systems can empower them to experience the desired stimulus for development.

Stickers
Figure 3. Create recognition systems that are outside of “how much can you lift?”

Coach Gust describes several ways that she incentivizes attendance, effort, and progress:

  • Social media recognition.
  • Attendance: personal recognition/perfect attendance recognition.
  • 100+ Shirts—any kid who attends 100+ workouts in a year gets a shirt.
  • Beast award—1 male, 1 female, stays on the wall.
  • PR Rings—(date, lift, new PR number).

Video 1. This week’s full session with Coach Jessica Gust

Panel Q&A

This week’s panel included Missy Mitchell-McBeth and Elton Crochran.

Coach Mitchell-McBeth: “From the perspective of an introverted coach that wants to manage the session—aside from efficient systems allowing you to go build relationships and coach, are there any other strategies that you use to check your natural introverted tendencies?”

Coach Gust: “When a kid tells me an important event coming up or tells me why they can’t make a session, I write them in a notebook. Keeping a reminder of important dates and events in kids’ lives, such as, ‘Check with Mason on driver’s test,’ reminds me to follow up on the things that kids care about most. The notebook allows me to remind myself to have those interactions and build habits of relationship skills.”

Keeping a reminder of important dates and events in kids’ lives reminds me to follow up on the things that kids care about most, says @slplift. Share on X

Coach Croc: “When managing multiple teams, how do you get coaches to march to the beat of a single drum, your drum, rather than their own method?”

Coach Gust: “I’ve had a high turnover here because SLP can be a ‘stepping-stone job’ for many of our sport coaches. One thing I leverage is asking coaches to be very vocal about the positives of what they see when around other coaches. I ask the kids to talk to their coaches about the positives of our program and be very open about how often they want to be in the weight room. I aim to give our coaches extra time to have their staff meetings, do bus schedules, equipment etc…allow me to alleviate the stress of the to-do list. This allows coaches to find even more value in scheduling weight room time.”

Until Next Summer

Summer School has brought the opportunity to hear six weeks of insight into programs of different varieties and with different constraints. Organically, each session took divergent turns, highlighting what each coach holds valuable. Some common weekly themes included the importance of building relationships, simplicity in programming, and systems built for efficiency. However, each presenter layered the art of the profession, describing different methods and tactics to accomplish the same goal.

As the summer winds to an end, I hope that you found value in our presenter and panel conversations. As school starts back up, remember the importance of the art in what we do. Relationships with our coworkers, other S&C professionals, athletes, and parents matter. Prioritize the systems that we put in place, and work to build an inclusive environment for athletes to thrive.

Finally, thank you to Simplifaster for providing a platform for this series to be promoted. Simplifaster has proven to be the premier platform for education and technology for strength coaches, and there is no better partner for this series, thank you for your support.

I hope you all have a great school year. See you all next year!

Since you’re here…
…we have a small favor to ask. More people are reading SimpliFaster than ever, and each week we bring you compelling content from coaches, sport scientists, and physiotherapists who are devoted to building better athletes. Please take a moment to share the articles on social media, engage the authors with questions and comments below, and link to articles when appropriate if you have a blog or participate on forums of related topics. — SF


Gabriel Mvumvure

The Fast Times and Far Travels of Coach Gabriel Mvumvure

Freelap Friday Five| ByGabriel Mvumvure, ByKim Goss

Gabriel Mvumvure

Gabriel Mvumvure has experienced “the road less traveled” as a sprint and hurdle coach, coaching in the SEC, the Ivy League, and the PAC-10 conference. As an athlete, Mvumvure competed in five IAAF World Championships and the 2016 Olympics, representing Zimbabwe in the 100 meters. He is the Zimbabwe National Indoor Record Holder in the 60m with 6.6, and at the time, his 9.98 best ranked him as the seventh-fastest 100m in African history.

In 2008, Mvumvure earned an NCAA title on the 4x100m relay team for Louisiana State University, the SEC college where he began his coaching career as a volunteer assistant. He graduated from LSU in 2011 with a B.A. in International Relations and Political Science and raced professionally from 2012 to 2016. In 2019, he took the head coaching position for sprints and hurdles at Brown University, where his accomplishments included two school records (held for 63 and 32 years!), 33 Top 10 performances, and 109 personal bests. In 2022, he began coaching at Washington State University. In his first year, his sprinters and hurdlers collectively broke 108 personal bests (60 men, 48 women).

(Lead photo courtesy of Chris Paige, Washington State Athletics)

Freelap USA: What are the primary differences in athletic talent you’ve seen in the conferences you coached?

Gabriel Mvumvure: First, you need to understand that NCAA Division I is so competitive that no matter how fast you are as a high school athlete, you will face tough competition in college. I was in Austin this year for the Nationals. One of my 100-meter guys ran well but couldn’t make the finals because there were seven sub-10 finishers in that event!

If I’m to be frank, the most talent you’ll see in D1 in the sprints and hurdles is in the SEC—their meets are heavily contested, like mini-nationals. However, the West Coast colleges can make up some ground in team scoring because they excel in the distance events.

It’s a totally different experience in the Ivy League because everything is based on tradition rather than performance. For example, they score six positions instead of eight. That might be a little backward, and it affects the talent you can attract because you’re limited in your accomplishments as a team. In the PAC 12, it’s hard to finish in the Top 3, so being able to score points with those two additional placements is important.

On the plus side, an athlete who was passed up by major Division I colleges because of poor times or their injury history may find opportunities at an Ivy League college. My hurdler Bretram Rogers suffered a severe hamstring injury during his senior year in high school that ripped muscle from bone and severed nerves. In his senior year at Brown, he broke the indoor 60m hurdle record that stood for 63 years and the 100m outdoor record that stood for 15 years. Maddie Frey was a high school soccer player who tore her ACL. After a lengthy recovery, Maddie switched to track—she even ran cross country. During her senior year at Brown, Maddie broke the 200m outdoor record that stood for 32 years. Both athletes are headed to medical school.

Gabriel Mvumvure
Image 1. In 2008, Mvumvure won an NCAA National Championship title representing LSU and went on to represent Zimbabwe in the 2016 Olympics. (Photo courtesy LSU Sports Information)

Freelap USA: What have been your challenges in recruiting for each conference?

Gabriel Mvumvure: The Ivy League doesn’t offer scholarships, and their acceptance rate is only around 8%. In my experience, it’s more complicated from an administrative standpoint to sign an athlete at Brown than at other Ivy League schools such as Princeton or Harvard. I often lost athletes who committed to Brown but ended up going to another Ivy League school because we were going after the same athletes. Plus, it was tough at Brown to recruit international athletes.

With SEC and PAC 12 schools, the hardest part is that any good athlete will be recruited by other schools in the conference. Your success in getting those athletes is influenced by the recent success of your track and field team and your facilities. On this last point, consider the weather. Do you have a proper facility to train year-round? If you’re in a hot climate like Louisiana, do you have an indoor facility where you can dodge the heat?

A lot of your success in recruiting depends on how tenacious and honest you are. I say “honest” because it’s easy for athletes to transfer, so my approach is that I make it clear to athletes that I am recruiting them for four years.

Freelap USA: Would you explain what you mean when you say that high school athletes often make the mistake of trying to “run too fast?”

Gabriel Mvumvure: The term “too fast” is subjective because it’s obviously a good problem to have. But what creates sustainability in making progress in sprinting and hurdling is having good mechanics because no matter how strong you are, you’re going to get stronger.

Let me explain. I have a 15-month-old daughter. If I ask her to punch a wall, she’ll punch it, and it will probably sting a little because she doesn’t have enough power to punch through it. If I were to ask an 8-year-old to punch a wall as hard as they can, they might have cuts on their skin and bruises on their knuckles. But if I were to ask a 25-year-old to punch a wall as hard as they can, they’d break some bones. If a sprinter’s mechanics are not on point, they’ll struggle to stay healthy because it’s like that 25-year-old punching the wall.

One of the biggest mistakes I’ve seen with the high school athletes I’ve recruited is them thinking that the longer their stride, the faster they’ll run... That’s not sprinting, says @GabrielMvumvure. Share on X

When I recruit athletes, I certainly watch their home videos, but I like to go to track meets as often as possible to see them complete. I also need to know as much about their training as possible, such as how much volume they have done. This background lets me know what I have to change or adjust to make them better. So, it’s more than just getting my athletes to run faster, but to run faster with fewer injuries.

One of the biggest mistakes I’ve seen with the high school athletes I’ve recruited is them thinking that the longer their stride, the faster they’ll run because they’ll cover more ground. That’s not sprinting. Sprinting is all about how much force you apply into the ground and how fast you are doing it to get to the finish line. I tell my athletes to focus on striking down hard at center mass to create a short ground contact time and apply more force into the ground to propel them forward.

Mvumvure Frey
Image 2. Maddie Frey, a Brown graduate heading to medical school, tore her ACL in high school playing soccer. At Brown, she broke the 200m record that stood for 32 years. (Karim Ghonem photo)

Freelap USA: What is your experience with velocity-based training?

Gabriel Mvumvure: My experience has been very positive. With the events I coach, the sprints and the hurdles, the lifting has to have a purpose in terms of being able to move fast. What I like about velocity-based training is that science shows you all the things in nature, and as a coach, you have to kind of “copy” those things with your training. Consider the differences between the lion and the cheetah.

A lion is way stronger than a cheetah but heavier—that’s why the cheetah is faster. With velocity-based training, you get the strength and power of a lion but maintain the size of a cheetah. It’s also good for the athlete because of the feedback it gives you. At Washington State, we have a monitor on each lifting platform that shows the athlete the bar speed for each rep. When our athletes lift a weight, if they see two red bars on the monitor, they are moving too slowly and need to reduce the weight on their next set.

Why is this important?

A lion is way stronger than a cheetah but heavier—that’s why the cheetah is faster. With velocity-based training, you get the strength and power of a lion but maintain the size of a cheetah. Share on X

If an athlete cannot lift a weight at the speed we want, they will be training muscle fibers that will not contribute to performance and may increase body mass, which can hurt performance. At Brown, with our training, many of our athletes lost body weight while increasing their power, resulting in better times.

Freelap USA: What is your best advice for a high school athlete seeking a scholarship?

Gabriel Mvumvure: Recruiting services can help get an athlete noticed. One benefit I found working with these agencies is that they have been good at giving me all the information I need about an athlete early, such as their progress and achievements. They also respond quickly to my questions. Recruiting services are a plus, but the nice thing about track and field is that everything is based on your personal bests, and it doesn’t matter how you did it.

I’ve recruited athletes who didn’t use those recruiting services but instead sent me detailed emails telling me about themselves. These athletes must work hard to make a good impression. What can make a difference is telling the coach their goals, why they want to attend the school, and what they like about the track and field program. Every coach wants to recruit athletes who are passionate about being on their team!

Since you’re here…
…we have a small favor to ask. More people are reading SimpliFaster than ever, and each week we bring you compelling content from coaches, sport scientists, and physiotherapists who are devoted to building better athletes. Please take a moment to share the articles on social media, engage the authors with questions and comments below, and link to articles when appropriate if you have a blog or participate on forums of related topics. — SF


  • « Go to Previous Page
  • Page 1
  • Interim pages omitted …
  • Page 22
  • Page 23
  • Page 24
  • Page 25
  • Page 26
  • Interim pages omitted …
  • Page 164
  • Go to Next Page »

Primary Sidebar

Latest Posts

  • Building a Better High Jump: A Review of Stride Patterns
  • How We Got Our First Sprint Relays to State in Program History
  • Science, Dogma, and Effective Practice in S&C

Topics

  • Changing with the Game
  • Game On Series
  • Getting Started
  • high jump
  • Misconceptions Series
  • Out of My Lane Series
  • Rapid Fire
  • Summer School with Dan Mullins
  • The Croc Show
  • track and field
  • What I've Added/What I've Dropped Series

Categories

  • Blog
  • Buyer's Guide
  • Freelap Friday Five
  • Podcasts

COMPANY

  • Contact Us
  • Write for SimpliFaster
  • Affiliate Program
  • Terms of Use
  • SimpliFaster Privacy Policy
  • DMCA Policy
  • Return and Refund Policy
  • Disclaimer

Coaches Resources

  • Shop Online
  • SimpliFaster Blog
  • Buyer’s Guide
  • Freelap Friday Five
  • Coaches Job Listing

CONTACT INFORMATION

13100 Tech City Circle Suite 200

Alachua, FL 32615

(925) 461-5990 (office)

(925) 461-5991 (fax)

(800) 634-5990 (toll free in US)

Logo of BuyBoard Purchasing Cooperative. The word Buy is yellow and shaped like a shopping cart, while Board and Purchasing Cooperative are in blue text.
  • Facebook
  • Instagram
  • Twitter
  • YouTube

SIGNUP FOR NEWSLETTER

Loading

Copyright © 2025 SimpliFaster. All Rights Reserved.