

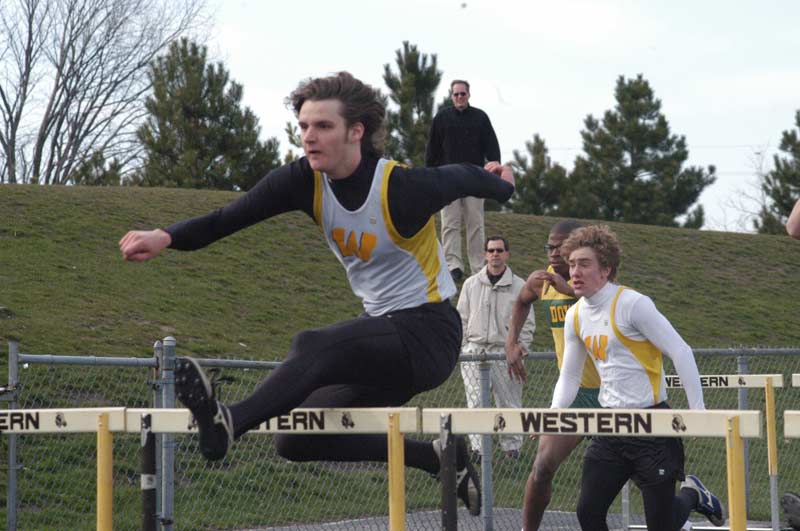
I’ve never been extraordinarily fast.
In high school, I ran a personal best of 15.7 in the 110 hurdles, which didn’t even make the finals in my conference meet. I ran 41.2 in the 300 hurdles, but I never quite figured out a plan for that race and probably didn’t train well enough to be as fast as I should have been. I ran the open 200 one time because I was dealing with a hip flexor issue and didn’t want to hurdle, and I ran 24 flat. I split 52 in the 4×400. I ran a 4.7 in the 40 on a stopwatch held by a notoriously quick-fingered coach. I was a solid athlete, but I wasn’t exactly setting the world on fire.
But I’ll tell you one thing: I was a lot faster then than I am now.
See, for the last 16 years I’ve done nothing to stay fast or get faster. In college, I took my broomstick physique into the weight room and tried to get bigger and stronger. That carried over into my early 20s, until one day I decided I was “out of shape.” From the ages of 24 to 34, I was a jogger. I say jogger—and not distance runner—because I never really pushed the pace all that hard. I ran some 5Ks, a few 40-mile relays with friends, and even a half marathon about a year ago. In May of this year, with COVID-19 suddenly leaving me with lots of time to run, I ran my fastest mile (6:54) and 5K (24:14) ever.
I’ve come to like running quite a lot. My mental and physical health both benefit tremendously from it. On a run, I can clear my head completely, listen to music, think about my next house project, or watch the sunset and listen to the birds. Running truly brings me joy.
But in July, I quit running. Instead, I started sprinting.
The Birth of #CoachSpeed
As a coach, I train sprinters and hurdlers. I’ve become obsessed with the pursuit of speed: tracking data, finding growth, and chasing new PRs. I believe that when we don’t prioritize speed and instead focus on endurance or fitness-based workouts, we neglect the pure speed development of our athletes. In track, there are no medals given for who is in the best shape. Fast athletes win meets, and I’ve become committed to turning as many kids as I can into fast athletes.
In track, there are no medals given for who is in the best shape, says @TrackCoachTG. Share on XI’ve been coaching for a while now, but I recently started to wonder if an old dog could learn new tricks. Or maybe more accurately, if an old dog could re-learn old tricks. Could a 34-year-old former sprinter who spent the last 16 years de-training speed teach his body how to move fast again? The more I saw the results my training methods had on my athletes, the more I wanted to know if those same methods would work for me as well. So, I decided to find out.
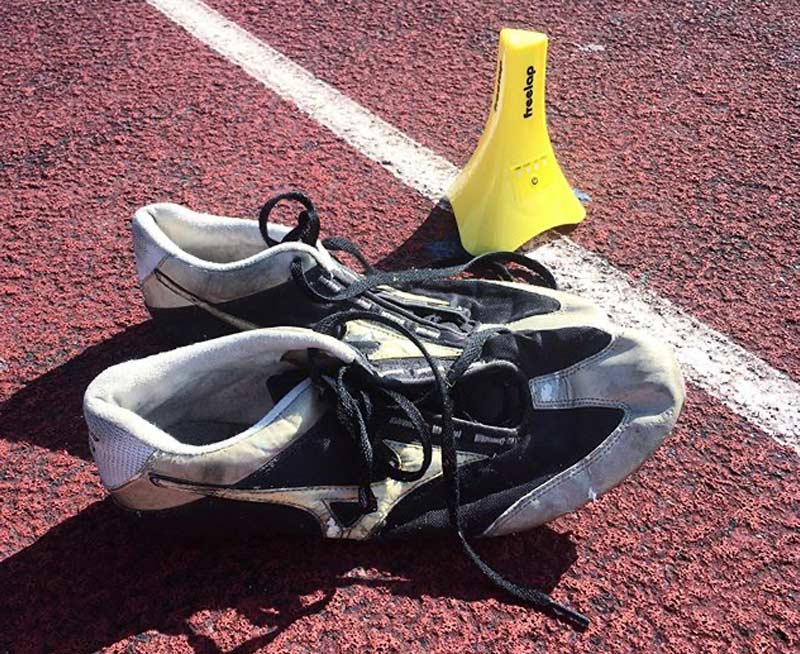
Once I got my hands on the Freelap timing system, it was game on. On July 13, I dug out my old spikes from high school and went out to the track to see what I was made of. Every day since then has been a learning experience, and today I’m here to share the nine lessons I’ve learned with all of you.
1. A Proper Warm-Up Matters More Than Ever
In high school, I warmed up like I’d just shown up fashionably late to a backyard barbecue: wander to the track after hanging out in the training room, go through the motions, and hop into the workout. On meet days, I’d sleep in my lawn chair until about 15 minutes before my event, do a few hurdle drills, then line up and go. I won or competed to win in a lot of the races I ran, so I never really bothered to change. Looking back, I probably wasn’t a lot of fun to coach.
I’ve found that it takes my body an insanely long time to be ready to sprint. I regularly run my fastest time of the day on my third or fourth attempt, says @TrackCoachTG. Share on XToday, I can’t imagine trying to sprint without getting my body ready. I perform an extensive list of high-intensity sprinting drills with maximal intent, a much more disciplined and focused approach than I ever took in my younger years. Even still, I’ve found that it takes my body an insanely long time to be ready to sprint. For example, even after a focused ignition series and some accelerations or buildups, my first timed sprint is almost always trash. Sometimes my second one, too. I regularly run my fastest time of the day on my third or fourth attempt.
A couple weeks ago I ran my slowest times ever in five reps of a 10-yard start, only to turn around and PR two times in a row on a 20-yard fly. There could be a number of reasons for this, but one thing is for sure: After 16 years off, it takes a long time to wake this body up for explosive movements.
2. Recovery Between Workouts Doesn’t Happen Quickly
After my first maximum-velocity sprint workout, I was sore for three days. That’s despite the fact that I was very cautious (or at least, so I thought) about not doing too much. I did a full menu of sprint drills, and timed three 40-yard dash attempts on the track, with a best time of 5.14 seconds. That’s not a lot of volume, but my body wasn’t used to such a high-demand activity, and it took me a long time to recover.
Now that I’ve been at it for six weeks or so, I’m not physically sore the next day, but it still takes me at least three days before my body can handle another maximum-velocity workout again. The proof is in the timing: If I try to sprint two days in a row, or even after only a day off, there’s no way I’m going fast again. In fact, if I don’t wait long enough, I’ll be quite a bit slower. That’s the thing about sprinting: 120 yards of total volume doesn’t seem like it should take that much out of a person, but if you’re truly sprinting with maximal intent, it does.
From a coaching perspective, that’s really important to keep in mind. High school kids are made of rubber. They bounce back more quickly than I do, and they may not feel tired or sore the day after a high-CNS-demand sprint day. But performance will most certainly suffer. If you’re not timing and tracking data, how can you know what athletes’ bodies can actually handle? Great competitors will almost always tell their coaches they’re ready to rock, no matter how their bodies are feeling. As coaches, we have to know what our workouts demand of kids and be sure not to overload them with so much sprint work and so little recovery that their bodies begin to break down.
3. Time Your Rest, Too
On a similar note, if I want my reps to be fast, I have to rest longer than I think I do. A classic rule of thumb for sprint coaches is that athletes should take about one minute of rest for every 10 meters they sprint. Forty meters of sprinting, four minutes of rest. That’s all well and good, but I am here to tell you two things: At age 34, I need more than the prescribed dosage of rest if I want to go fast on the next rep; and if you don’t time your rest, you will almost certainly get it wrong.
Let’s say you’ve decided you need five minutes’ rest between reps. Five minutes is a long time to stand around. And if you’re like me, and you were raised on the notion that standing around for too long somehow makes the workout less effective, you’ll find yourself going a little stir-crazy. I can’t tell you the number of times I’ve thought “that feels like about five minutes” only to check my stopwatch and learn that it had only been two and a half.
Don’t trust your internal clock during workouts. Time your rest, not to make sure you don’t take too much time, but to make sure you take enough, says @TrackCoachTG. Share on XDon’t trust your internal clock during workouts. Time your rest, not to make sure you don’t take too much time, but to make sure you take enough. I like to go for a walk, catch my breath, and do a few leg swings to pass the time. Fresher is always faster, and faster is the goal.
4. Improvements Happen Slowly, and Not All Aspects Improve Evenly
Tony Holler often says that speed grows like a tree, which is to say that the gains don’t come all at once. They can take years to develop, and they won’t come at all if we neglect speed. This is something I talk to my athletes about all the time, especially the ones who become obsessed with the idea of breaking their own personal records every single time we train.
Think about it: When you set a PR, that means you were faster than you’ve ever been in your life on that specific rep. How realistic is it to think that you’ll be faster than you ever were in your whole life every single time you lace up your shoes? But, as my good friend Josh McClure often says, the blessing is in the work. Every time we train speed, we’re improving—even if we don’t set a new PR. The tree might not have produced any new fruit that day, but we still watered it and gave it what it needed.
Arboreal analogies aside, I’ve become guilty at moments of feeling the same way my athletes often do. Chasing PRs is addictive, which is a big part of the reason why speed training can be so powerful for athletes. The motivation is built into the workout. Ultimately, I’ve had to stop myself from getting too results-oriented to focus on the process of building speed over time, and remind myself of three key things:
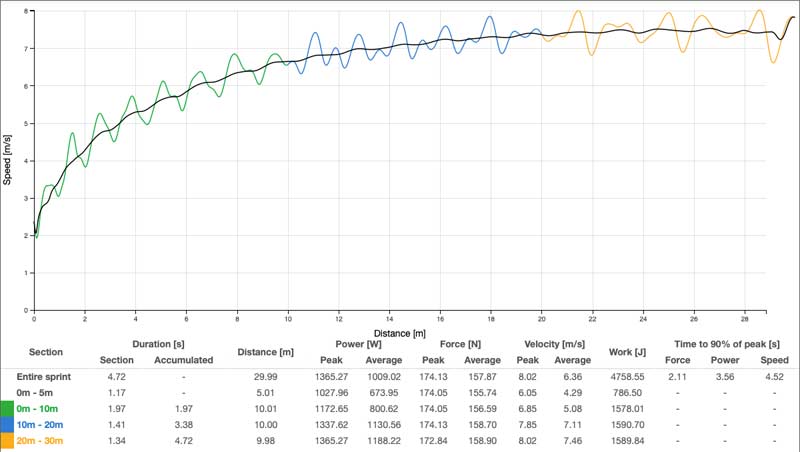
- Improvements take time. If you take a look at the chart below and examine the 20-yard fly, you can see that my first major breakthrough didn’t really happen until my seventh and eighth attempts.
- Not all improvement is linear. For example, in the 10-yard dash, I saw some improvement early on, followed by a plateau and even a slight regression on the 10th attempt.
- Not all aspects of sprinting improve evenly. To illustrate this, you’ll notice that I’ve seen huge gains in my 30-meter fly, but as of yet, I haven’t seen the breakthrough in the 40-yard dash.

There are a number of factors that go into a given performance on a given day. Some days you have it, some days you don’t. Some days you’re sore, or you were on vacation for a few days, or you ate a big dinner and decided to sprint in the evening, failing to learn the lessons pre-meet roast beef sandwiches tried to teach you way back in high school (or maybe that was me).
Recognizing this fact—and reminding myself constantly that the improvements will come with consistency—is what keeps me training. Sure, I haven’t had a major breakthrough in the 40-yard dash yet, but other performance indicators tell me it’s coming. Which brings me to my next point…
5. Tracking Data Is a Must
If you’re reading this article, the chances are good that you already know the importance of tracking data. If you want to improve something, you have to measure it. We must know and be able to quantify where we’re starting from and where we’ve been if we ever want to know how far we’ve come and where we’re headed. Without data, we have no tangible, concrete proof that our training is working. But I’ve also noticed some other things by tracking and analyzing my own data.
We must know and be able to quantify where we’re starting from and where we’ve been if we ever want to know how far we’ve come and where we’re headed, says @TrackCoachTG. Share on XFirst, keeping notes on every workout and every rep helps me see things I might otherwise miss. For example, the second time I did a 10-yard dash workout, I didn’t break any single-rep PRs, but I did run all my attempts within .02 seconds of one another, and all of those were close enough to my PR that my average time over the second workout was faster than my first workout. As a PR chaser, I could have been disappointed at not setting a new one-rep max, but seeing all the data helped me to notice my own improved consistency.
Second, my data tracking helps me notice trends in my own training—like the fact that I’m consistently fastest around my third maximum-intent rep of a workout. Next, as I alluded to previously, tracking data can help me see if a breakthrough could be on the horizon. For example, I’ve improved my 10 and 20 fly times by 7.14% and 9.57%, respectively, which tells me that my top speed is increasing. With that knowledge, I can be pretty sure that it’s just a matter of time before I set a new PR in the 40-yard dash, even if it hasn’t happened yet. Knowing that a PR will come the next time I put it all together is encouraging, and it makes me excited to see what the future holds.
Finally, having meticulous logs of data helps me validate my own times. For example, in the chart above, someone might look at my 1.04 time in the 10-yard fly as a questionable outlier. I did at first, too, until I followed it up with a 1.06 on the very next rep. I was also able to cross-check it with the fact that I ran 2.08 in the 20-yard fly on the same day (different rep) and confirm for myself that my 1.04 split (19.67 mph) was accurate, and not a technology fluke. That was a huge moment for me, and I celebrated it with myself and anyone else who would listen.
6. Celebrate Every Win, No Matter How Small
Speaking of celebrating, I’ve made it a point to give myself a high-five for every breakthrough, every PR, and every victory, no matter how small. Not to get too theoretical here, but if you’ve done any reading on positive psychology, you know that positive emotions have the power to increase performance. Sometimes those positive emotions occur sort of organically, or maybe they happen because we worked hard and met a goal we’d set. But what if we can cultivate positive emotions for ourselves? By finding something to celebrate in every workout, that’s exactly what I’m trying to do.

What if we can cultivate positive emotions for ourselves? By finding something to celebrate in every workout, that’s exactly what I’m trying to do, says @TrackCoachTG. Share on X
This is an area of growth for me. As much as I think I do a pretty good job of celebrating my students, my athletes, and my own children when they do something cool, I sometimes fall victim to negative self-talk. We are often our own worst critics, and we’re conditioned not to celebrate ourselves publicly so as not to come off as arrogant or self-centered. But feeling good about what I’m doing is what keeps me coming back, so I’ve cut back on self-criticism and replaced it with self-celebration. Sometimes it’s easier said than done, but increasing my ability to find the bright spots in my training, no matter what, fuels my progress and keeps me hungry.
7. Sprinting Is Fun
I can distinctly remember a moment all the way back during my junior year of high school, competing in an indoor meet at Saginaw Valley State University. I was on the 4×200 relay, and it was a 200-meter indoor track with tight curves. We all know that small, indoor tracks with tight curves don’t typically yield fast times, and I honestly couldn’t tell you what my split was. But I remember feeling fast. I remember how exhilarating it felt to blast a full lap at top speed, the energy of the exchanges, all of it. It was the first time I can specifically recall feeling how much fun it is to push the body to maximum velocity.
I didn’t think I’d ever go fast again, to be honest. I had basically resigned myself to the fact that, in my “old age,” I’d be a jogger—logging miles to stay in shape and lifting weights to stay strong—and that would be the extent of it. But I can tell you this—even at age 34, sprinting is still an awful lot of fun. I’m moving faster than I’ve moved since I was a teenager, and it feels great. It’s liberating to do something you thought you might never do again.
The timing element of speed training actually adds to the fun. The hardest part is knowing when to quit, says @TrackCoachTG. Share on XNot only that, but the timing element of speed training actually adds to the fun. With Freelap (or another such timing system), each workout has the potential to turn into a sort of beat-my-own-high-score game. I’m a huge believer in the gamification of training. By making the workout fun and using a “scoring” system that values ideal outputs, intent and effort from the athletes take care of themselves. The hardest part is knowing when to quit. I know that it’s not wise to overload my CNS too much on a given day, but I also know that when I’m close to a high score, I have the urge to try again. I’m like a kid in an arcade, except I never run out of tokens.
8. Having a Support Network Is a Game-Changer
One thing I take pride in as a teacher and a coach is my affinity for community-building. I know that it’s important in the classroom and in a team setting for people to feel like they have a support system around them, that they don’t need to be afraid to fail, and that we’re all giving 100% in order to get better together. I also know this to be true for myself—I need to have others around me who share my vision. I am not always the most motivated person, but I know if I have a team around me with the same goals, I become stronger.
For example, in March when COVID-19 derailed 2020, I knew I wanted to stay motivated to get outside and run. (Remember, this is before I started sprinting.) Recognizing that, I created a Socially Distant Running Club on Facebook that quickly grew to more than 160 people, many of whom I didn’t know. We cheered for each other from afar and kept one another motivated to pound the pavement in the darkest of seasons. It was great.
When I decided to reclaim my identity as a sprinter, I knew I’d need others around me for support, so I put out a call on Twitter.
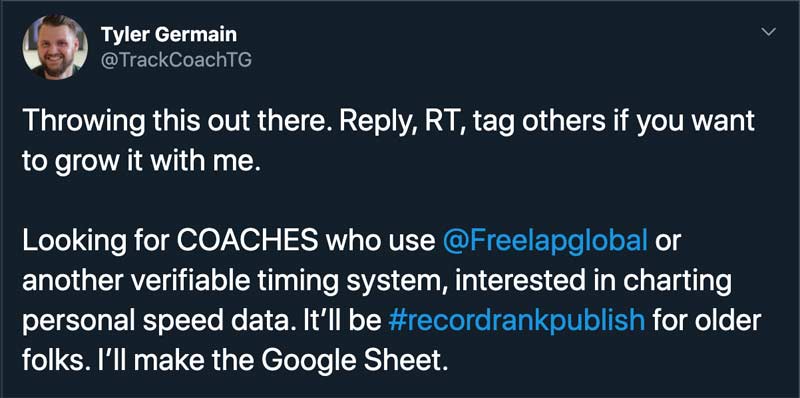
I had no idea what to expect in response to this tweet, but what I got has been an absolute game-changer. Some of my favorite coaches, whose work I have incredible respect for, reached out to me and wanted to join in. I also heard from people I didn’t know. But we all had one thing in common: We’re coaches and former athletes who still want to train fast. The result has been the formation of the #CoachSpeed Training Community.
The way this community has grown has been really inspiring. In addition to a spreadsheet where we track our individual training data, we’ve started a group chat that is incredibly active. We touch on everything from training philosophies to long-term goals to individual workouts and techniques, as well as plenty of other topics. Last week, one coach remarked that our group chat has been the best speed PD he’s ever received. No matter the degree, position, or years of experience, everyone in our community has something to offer, and the level of support has been incredible.
On a personal level, I’m always psyched to talk to my new friends after a great workout, and equally psyched to hear when one of them achieves a new milestone. Within our group, we’ve recreated the feeling of being part of a team, albeit in a digital, social-media-based way. I’ll take this moment to say, if you’re reading this and it sounds like your kind of thing, we’d love to have you join us.
Video 1. How the #CoachSpeed Record-Rank-Publish spreadsheet works.
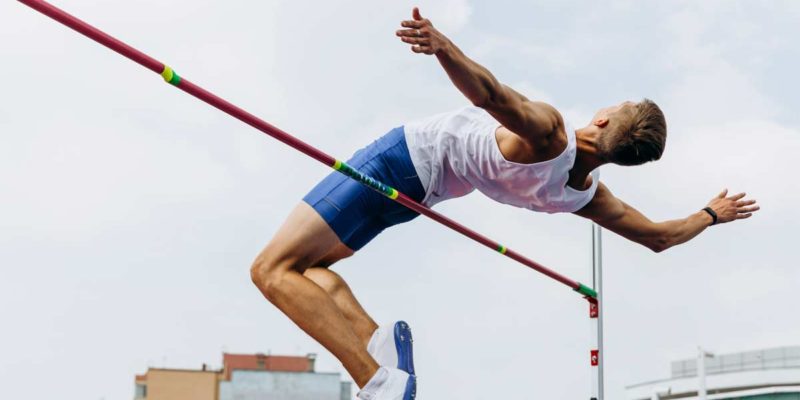
9. There Is No Other Exercise Like Sprinting
Near the beginning of this piece, I mentioned that after my first day of sprinting, I was pretty sore, despite having kept the volume very low. Keep in mind that I entered my speed training being in what most people would consider “good shape.” I ran several times a week, did bodyweight workouts, and lifted semi-regularly. But none of that mattered.
Sprinting is a total-body, high-intensity workout unlike anything else. It’s one of the most strenuous plyometric exercises there is. It requires tremendous force production and asks the body to coordinate movements that are much faster than anything that happens in the weight room. It demands strength and stability from the core to keep everything headed in the same direction and not flailing about. Simply put, even if you’re in “great shape,” if you’re not sprinting, you’re missing out on a high-demand exercise that requires little-to-no equipment or expensive gym membership.
Even if you’re in “great shape,” if you’re not sprinting, you’re missing out on a high-demand exercise that requires little-to-no equipment or expensive gym membership, says @TrackCoachTG. Share on XIf you take nothing else from my reflections, I hope you’ll take this: You need to start incorporating speed work into your workout routine right away. When done right, it works wonders. Give it a try; challenge yourself to do something you haven’t done in a while. You might not be very fast right now, but you’ll most certainly get faster. You might even get stronger. But one thing is for sure—you’ll learn some things about yourself and your training methods. I know I sure have.
Since you’re here…
…we have a small favor to ask. More people are reading SimpliFaster than ever, and each week we bring you compelling content from coaches, sport scientists, and physiotherapists who are devoted to building better athletes. Please take a moment to share the articles on social media, engage the authors with questions and comments below, and link to articles when appropriate if you have a blog or participate on forums of related topics. — SF


