Occasionally in life, the stars align. I was sitting on the couch when my husband received a phone call about the strength and conditioning position at Byron Nelson High School in Trophy Club, Texas. The idea of a school considering him for the job made smoke roll out of my ears since he isn’t a strength coach. My exact words: “Tell them if they want someone qualified, they can call me.” (If you’re wondering, my husband had the requisite diplomacy and tact to forward my sentiment along appropriately.)
They called. I took the job.
I left what five years earlier was my highest career aspiration: to be the strength and conditioning coach for a Power 5 volleyball program. Volleyball is kind of my thing. My obsession, actually.
You can imagine that it was with a considerable amount of trepidation that I checked my ego and left Division I athletics to work at the high school level. To my great delight, I walked into a volleyball program guided by strong leadership. We were young and talented, and the program culture was fantastic. Four years later, Byron Nelson Volleyball took home the UIL Texas 6A State Championship, a number one national ranking, and numerous individual accolades.
When you’re as successful as our girls are, people want to take an inside look at what you do. They want to see the magic recipe for success. In fact, there is a magic recipe. It’s quite simple:
Have the best players in the country and keep them on the court.
As the strength and conditioning coach, I’m unable to affect the first part of that sentence. I can only influence the latter half of that statement with careful programming. The following are my three primary considerations when writing training programs for our volleyball athletes at Byron Nelson.
1. Club Volleyball
“Shoes off, lay down for breathing,” I state on a Thursday in our off-season weight room. A groan emerges from the group as the athletes ease their way onto the floor. It takes me two questions to determine the cause of the soreness: club.
Our high school season begins in August and typically ends some time in November. Athletes begin club tryouts in October. Club practices start in December. Club tournaments are held January through June.
On top of their playing schedule, many clubs offer (require) an on-site strength and conditioning program. The volume to which these strength and conditioning sessions subject athletes is often concerning. Imagine, for a moment, low training age athletes performing five sets of 10 back squats after a three-hour practice. It’s probably not a pretty picture. My guess is it looks like job security for an orthopedic surgeon.
The high school volleyball off-season isn’t really an off-season at all. It’s just one phase of a year-round competitive schedule. If your expectation is a football-style off-season with few interruptions and linear progress, you will probably be severely disappointed.
More isn’t always better—sometimes it’s just more. To use a baking analogy, I can use the right ingredients, but if the oven is too hot, the results will be a disaster, says @missEmitche11. Share on XMore importantly, if you take the “this is a true off-season” approach with your athlete’s training program, you will likely do more harm than good. Even if what you’re doing in your off-season is great, more isn’t always better—sometimes it’s just more. To use a baking analogy, I can use the right ingredients, but if the oven is too hot, the results will be a disaster.
A moment of appreciation for bootleggy cakes
— Bootleg Stuff (@Bootleg_Stuff) November 4, 2016
Failure to accommodate for an athlete’s overall training load can lead to disastrous consequences. So, how do we make any form of progress given these parameters? Very slowly and very carefully.
A lot of it comes down to individual conversations with your “indicator” kids. Those are the athletes who you have established a relationship with and who you can trust to give an accurate depiction of their training load. Based on these conversations and ones with our volleyball staff, I may alter the plan for the day. This could be a reduction in volume or intensity, or entirely restructuring the session into one focused on mobility and recovery.
It also might not be the same for every athlete in the room. Qualifier tournaments are divided by age groups. On any given weekend, half of your athletes may play 6-10 matches, while others may not play at all. Those two groups of athletes walk in the door on Monday with completely different needs. The kids who played over the weekend may need a reduction in training load, while those who didn’t play are better prepared to take on more strain.
Modifications to the training process ensure the appropriate amount of stress is applied. They also create buy-in to the weight room. Instead of giving the impression as a strength coach that your only priority is lifting, you demonstrate through action that your goals align with theirs: success on the volleyball court.
It is critical to discuss these training modifications with your athletes so they understand why they might be working harder than a teammate during a given training session. The need-based training approach should not lead to a feeling of unfairness in the room. I’ve never found that to create a positive environment in any team setting or workplace.
The overall impact of club participation and a year-round competitive schedule is a reduction in what we would be able to do in a “traditional” off-season. This applies to all areas, including volleyball’s most sacred cow: plyometrics.
2. Plyometrics
To reiterate, our volleyball players don’t have an off-season. The positive here is that their sport affords them the opportunity to make hundreds of ground contacts a week! With limited available training time, it’s so neat to have someone else filling that bucket to the brim, often to the point of overflow. Really takes a load off my personal plate. Who wants to write an all-encompassing strength and conditioning program and control all parameters for the best possible training effect anyway? What a silly idea.
My take on plyometrics in high volumes for our volleyball athletes? It’s like bringing sand to the beach, says @missEmitche11. Share on XIn all seriousness, my take on plyometrics in high volumes for our volleyball athletes? It’s like bringing sand to the beach. Instead, our plyometric volume is very low, and any that we do will check one of two boxes:
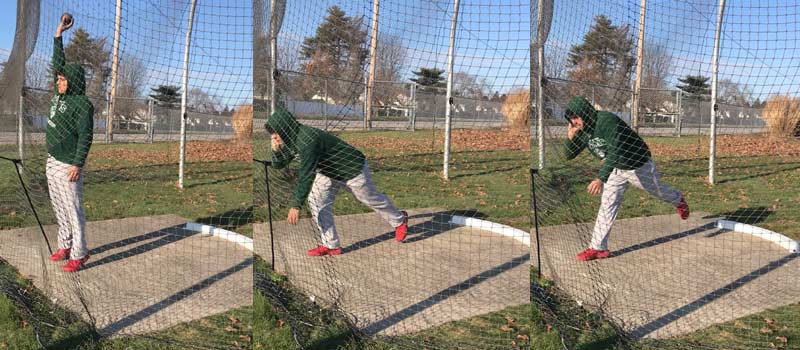
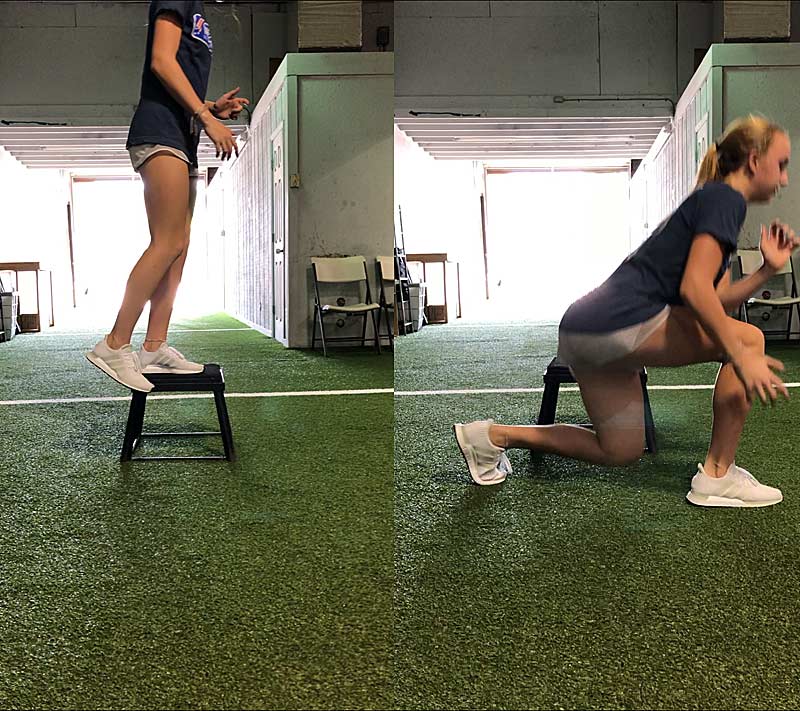
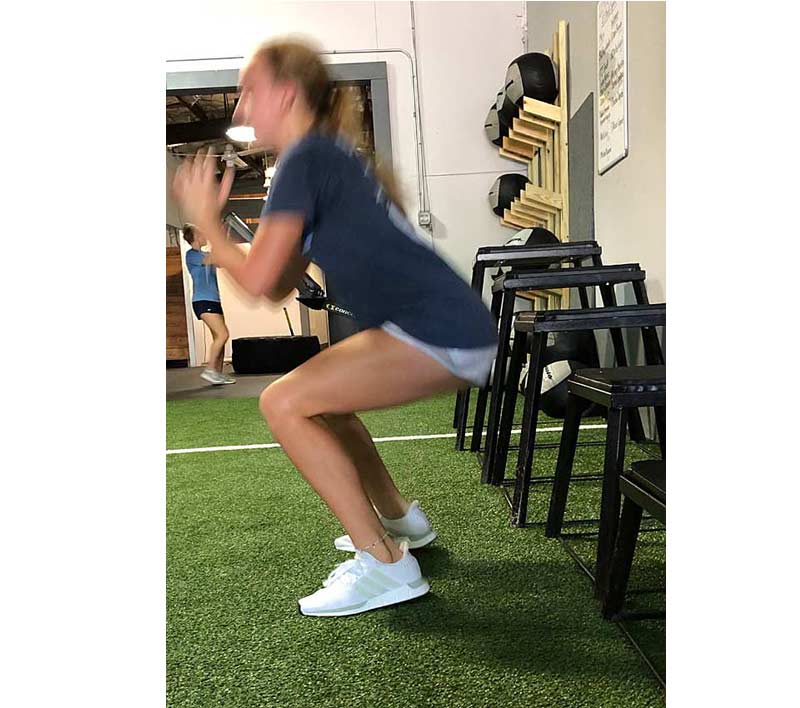
- Improve force absorption.
- Target stiffness/reactivity to prepare for higher-level impacts.
A sample day in the weight room might include 3-5 maximum height countermovement jumps where they stick and hold their landing in the universal athletic position. We incorporate these between sets of hang cleans or front squats. Part of the reason for the inclusion between sets of major lifts is PAP. The other is that we operate on a time budget of 30-40 minutes including warm-up.
This idea of low-volume plyometrics tends to get volleyball coaches into quite a lather. “But max height vertical jump is so important in volleyball! We have to allocate almost our entire program to improving this KPI!”
I have several thoughts here. First, we have seen some tremendous gains in our athlete’s vertical jumps by simply focusing on improving strength and power production in basic strength training exercises. Remember, the training age of a high school athlete is typically low. Programming doesn’t need to be complicated to have the desired effect.
Second, I love Tony Holler’s concept of arriving at the starting line “80% in shape and 100% healthy.” This is just a way of saying minimum effective dose. A few aspirin will remedy a headache. A thousand aspirin may kill. Our training should never harm an athlete’s opportunity for success.
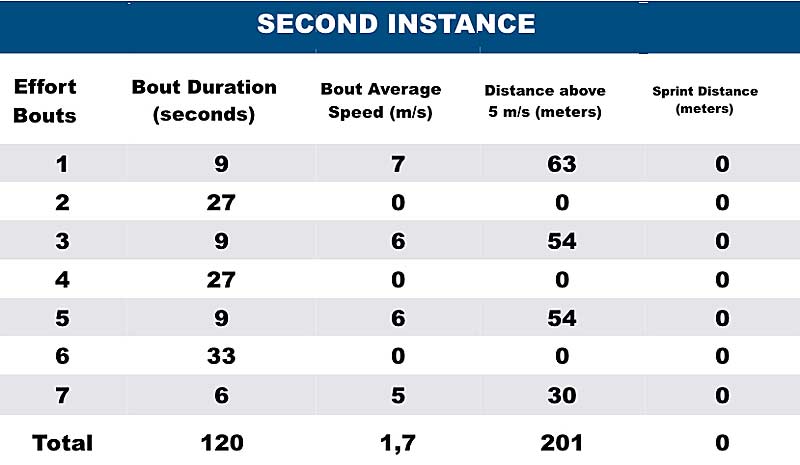
Finally, athletes use a variety of jump amplitudes in the sport of volleyball. Check out “An Alternative Way to Think About Plyometric Training for Women’s Volleyball” by Tyler Friedrich. Across two seasons of play and practice, here were his findings:
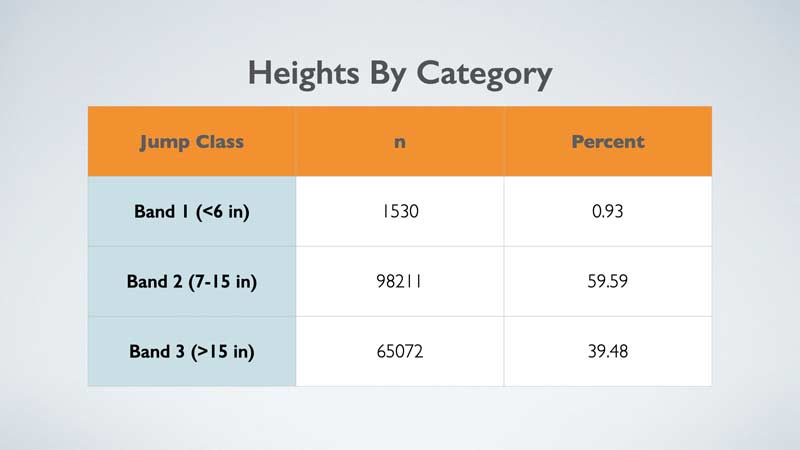
As it turns out, only about 40% of jumps in volleyball are greater than 15 inches. In fact, only 9% of the measured jumps were more than 20 inches. Am I saying increasing an athlete’s vertical isn’t important? Of course not. The vertical jump has clear value in the sport of volleyball. My point is it shouldn’t be the sole focus of our training program. So it isn’t.
3. The Weight Room
If not in the almighty vertical, where does our treasure lie in the weight room? In the same place it should lie in most athletes: the squat, hinge, push, pull, and brace. We use progressions of each of these categories to develop basic strength and movement competency.
More specifically, in each category, the core of our program is:
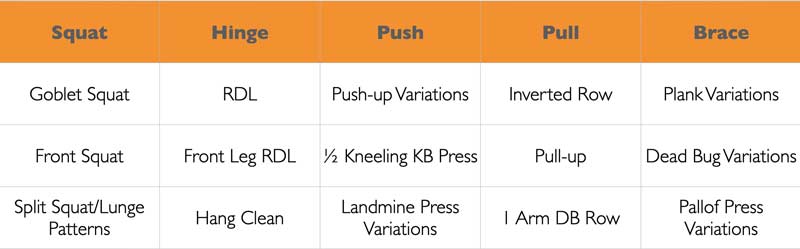
While this list is far from comprehensive, it gives you a picture of our primary focus: increasing the load-bearing capacity of the tissue in the safest possible environment. Gone are the days of putting athletes under a bar on day one. Instead, our athletes learn basic athletic movement patterns through a series of progressions.
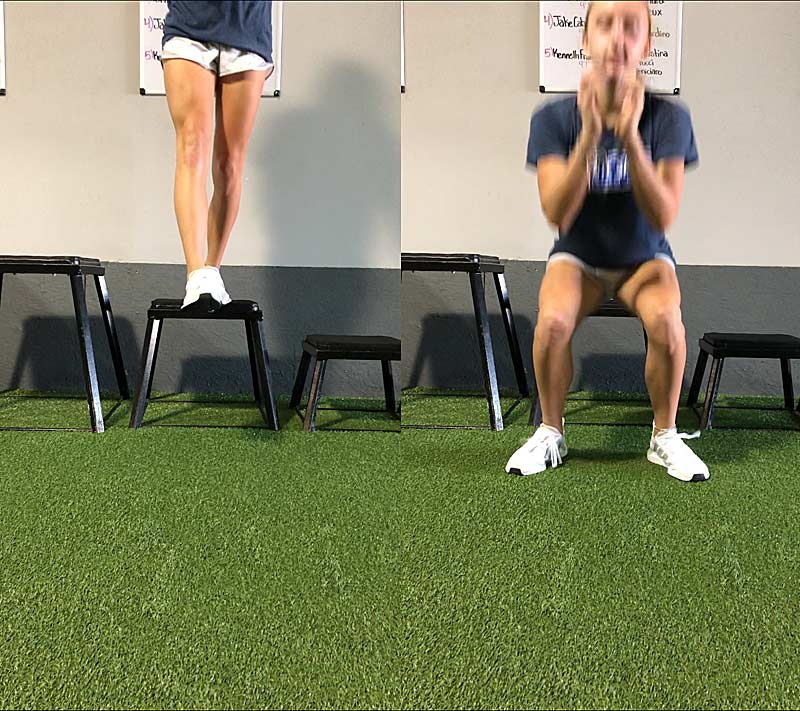
A sample progression used to learn the squat is:
Countermovement Squat > Goblet Squat > Hands-Free Barbell Front Squat > Barbell Front Squat
Not only does this allow a safe increase in strength, it also allows for the adjustment of the training program on the fly when athletes come in obliterated from the weekend. The team might be working up to a single at 90% on front squat, but if our outside hitter played 12 matches this weekend and her knees and back are sore, we can quickly adjust her percentages or have her switch to a goblet squat instead. Everyone is still squatting; we’ve just modified the program to accommodate individual readiness.
Back to Our SpongeBob Cake – Doing the Best We Can
There will be training sessions that don’t go according to plan because of the factors mentioned above. The high school setting is never perfect. Rarely is it even optimal. Instead, we set our sights on consistency, since full-time consistency beats part-time intensity. Twice weekly, we enter the weight room, and we bake the very best cake we can given the time an ingredient is available. I think it looks pretty good. Wouldn’t you agree?
The high school setting is never perfect. Rarely is it even optimal. Instead, we set our sights on consistency, since full-time consistency beats part-time intensity, says @missEmitche11. Share on XIn case you didn’t know: #KirayCelis is a big fan of Spongebob Squarepants 💛 Check out her awesome cake! Belated Happy Birthday again, Kiray!September 23, 2016
It may not be perfect, but it’s the best fit for our circumstances.
Since you’re here…
…we have a small favor to ask. More people are reading SimpliFaster than ever, and each week we bring you compelling content from coaches, sport scientists, and physiotherapists who are devoted to building better athletes. Please take a moment to share the articles on social media, engage the authors with questions and comments below, and link to articles when appropriate if you have a blog or participate on forums of related topics. — SF