Coaching high school track and field in the winter can pose a challenge in and of itself. But then, add a pandemic into the mix, affecting weight room time, practice time, and the bodies of the athletes. Finally, include some winter track meets held OUTDOORS (no, this is not the norm).
Over the past year, we track and field coaches have had to make some serious pivots in our training and how we coach the events in general. Specifically, this past winter season, preparation and communication with our athletes was our objective. Since the cold weather really limited our practice time, we stressed the importance of quality versus quantity and to trust the process.
I coach the field events: jumps and throws. This is a challenge in the cold Northeast, as I can’t have the athletes standing around waiting to throw or jump. As coaches, optimizing performance and injury prevention is our goal, and in this article, I explain what we have done with those athletes that resulted in absolute success.
Starting with a Plan
First, all of our athletes warm up as a team—when it’s freezing out, if you don’t have your athletes warm up properly, that’s a mistake. The goals of the warm-up are:
- Mimic the actions of the movements they will perform in practice.
- Activate the central nervous system.
- Injury prevention.
- Create routine.
This system we have developed over time has significantly decreased injury (to none at all, actually), enhanced performance, and created a routine for the athletes to prepare them for their meet day.
Next, I have designed a training plan for the shot putters on specific days (of course, depending on those variables mentioned above): shot put drills and technique, strength training, short sprints, and plyometrics. This season, I usually had 6-8 male throwers and 8 female throwers and alternated these training days as well; again, because I can’t have my athletes standing around in the cold waiting to throw. You must have a plan, but also know you always need to be able to pivot. My female throwers had thrown before, but all but one male thrower was a novice, so in some ways I was starting from scratch in teaching winter shot put.
Although training in the cold is a challenge, I believe it makes the athlete’s capabilities that much better—they’re prepared for anything…, says @bpfitcoaching. Share on XOur success rate was high following this training plan: no injuries, no athletes ever fouled, all of my throwers qualified in the top 6 rankings, all hit PRs, and two would have qualified for the CHSAA State Meet if we had one. Although training in the cold was a challenge, I believe it makes the athletes’ capabilities that much better—they were prepared for anything and developed a routine that they now can take with them into spring season and/or other sports they play. I have broken down the basics of the first steps to know as a coach for teaching winter shot put, where to start (especially with novice throwers), and our training plan, all to help you get throwers stronger and prepared to throw in the cold.
Basics of Shot Put
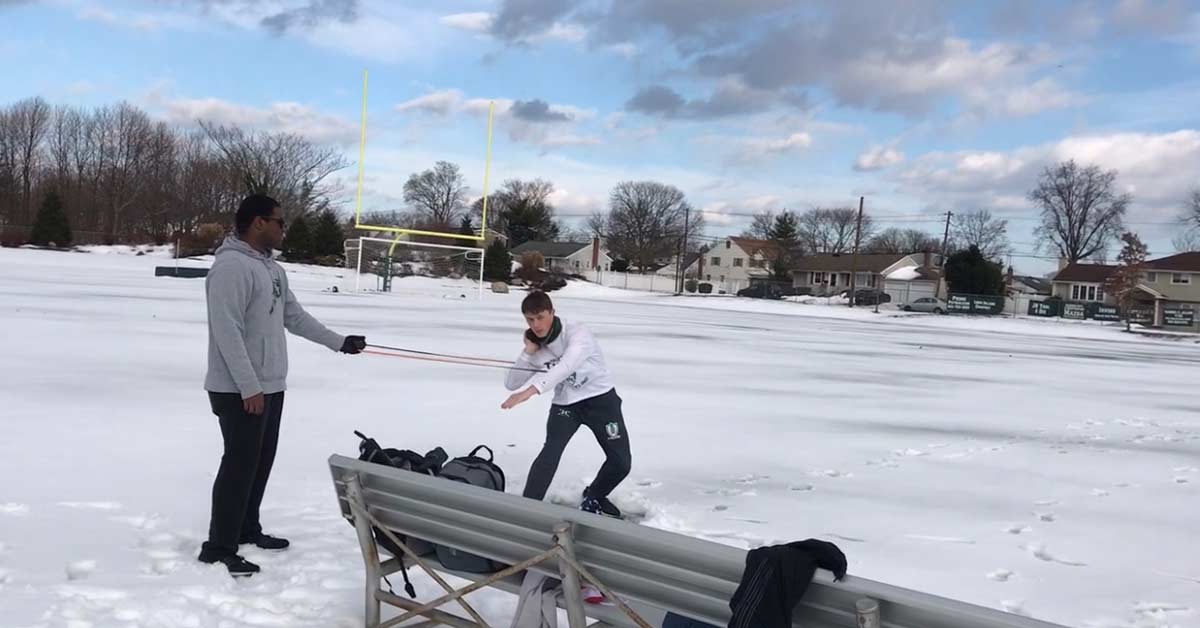
During winter season in high school, throwing is mostly all done outdoors. We train in the snow and freezing weather, with the ring (circle) covered in snow the majority of the time. As stated previously, this develops athletic capabilities and gets your athletes prepared for anything, especially competition. Still, as a coach, it is imperative to make sure your athletes understand effective preparation: dressing appropriately for the cold, wearing proper throwing shoes and gloves, and—most importantly—showing up regularly. Consistency is KEY.
The shot put requires TLC. This means they are stored away properly, and towels are available to clean them off—there’s no fooling around with these objects. NO athletes are allowed near or in the circle while another thrower is in the circle! All spectators must be at least a foot away from the circle/netting. Throwing implements are, in fact, deadly and dangerous. Make this clear to your athletes. The circle also needs some love—make sure it is cleaned off. (I use a broom or a shovel to sweep off the snow and keep it on hand for athletes to use.)
Normally, I have a co-ed group: As a coach, you need to know that each athlete is different, so coach accordingly. My female athletes need a bit more of a push to be aggressive, because, well…. throwing requires power! With my male athletes, I tend to have to scale back, so they don’t throw out an arm. Not only that, but when we are out in the cold, my female athletes can only handle so much. Do not have them outside for too long if they can’t handle the weather—this is where poor mechanics come in and that can lead to injury.
Do not have athletes outside for too long if they can’t handle the weather—this is where poor mechanics come in and that can lead to injury, says @bpfitcoaching. Share on XTechnique and Mechanics
The goal for every shot putter is to eventually utilize the glide mechanics (this is for experienced throwers). During winter season, we usually piece together how to do this whole movement, and then it all comes together during spring season. Feel out your athletes: If they have the capabilities, then they may be able to learn this and throw utilizing the glide during winter season.
The fundamental pattern of the glide has not changed since the 1950s (Fundamentals of Track and Field, Carr, p. 199). Personally, I like to start backward, teaching the mechanics of the standing throw (where the athlete would end their throw) and then incorporating the shuffle/rotary throw and lastly the full glide. Each of these throws require different drills and cueing. (We will get to that.)
I start out by having my throwers feel and get a good grip for the shot put, which will also feel differently when their hands are cold or when they wear gloves. You must have a range of shot puts available: 1.1 pounds, 6 pounds, 8 pounds, 12 pounds, 16 pounds. (High school and college are completely different, so know the rules and requirements.) Each athlete is vastly different as well, and you should choose sizes accordingly, based on strength and capabilities.
The ring size (circle) is smaller and more confined than the discus ring, so you need to make sure your school is aware of that or use a marker for your athletes. Each circle has a toe board (stop board): Make it clear that if the athlete goes over the board, it is considered a foul, and the throw does not count. When practicing, make it a habit that the athlete leaves the circle from the BACK. In competition, if the athlete throws and exits from the front over the board it is a FOUL.
In our CHSAA League, high school boys throw with an 8- to 12-pound shot put, depending on the year. The girls throw with a 6- to 8-pound shot put, also depending on the year. Freshmen and sophomores throw with the lighter shot put; juniors and seniors throw with the heavier shot put. I like to have them get a feel and practice with both—preparedness.
For example, in our first winter track and field meet this past season (which was outdoors), initially the coaches were told the freshman and sophomore boys would throw with the 8-pounder. Well, things changed, and when we got to the meet, we were told right before that only the freshman boys would throw with an 8-pound shot put, and everyone else would use the 12-pounder. Good thing we practiced with it!
Do not let any athletes sit down or stand around in the cold. It will be detrimental to their performance and even worse—contribute to potential injury, says @bpfitcoaching. Share on XRemember also that point about creating a routine for meet days? Well, since we had our meet outdoors in the cold, our athletes knew the importance of remaining warm. I do not allow them to take off their layers of clothing until right before they throw. Again, mentioning our warm-up, our athletes know what they must do at the meet. Do not let any athletes sit down or stand around in the cold. It will be detrimental to their performance and even worse—contribute to potential injury.
Steps and Drills to Work Toward the Glide
Here is the progression I utilize with my shot put athletes to work toward the glide.
1. Standing Throw
I like to begin here so they understand the basic technique and cueing. You can utilize any tool—a soccer ball, light medicine ball, basketball—whatever you have available. Grip and hold on the shot put is one of the most overlooked coaching cues. The athlete must cradle the shot put with their fingers, palm rotated up and pushing into their neck (right below the chin).
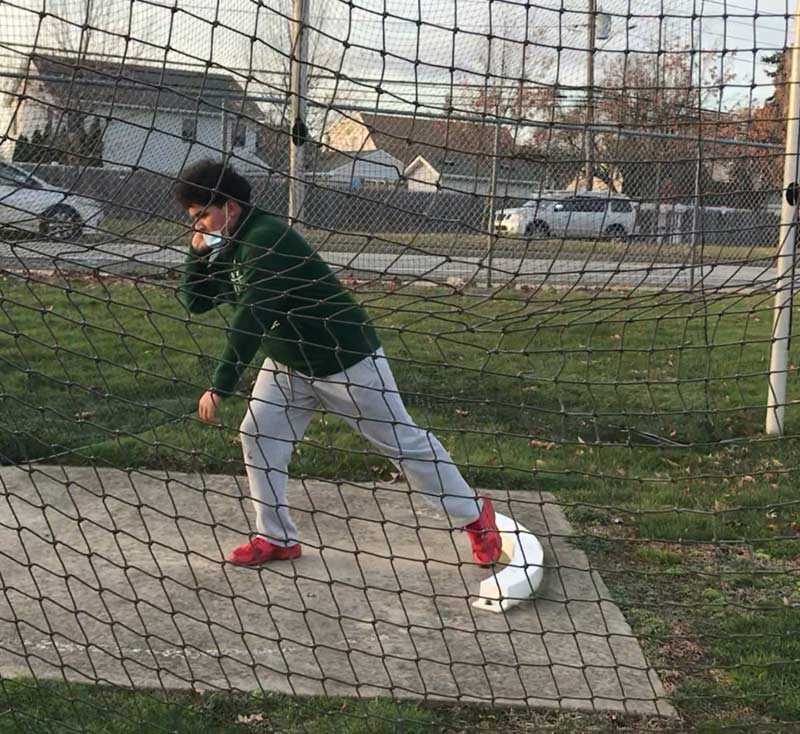
Next, their elbow is up (just above the shoulder), and I explain to the athlete it is a pushing action NOT a throwing action: push up and out. Power and strength are key; the initial movement is facilitated by momentum, applying force into the ground. The sequence follows legs, hips, chest, and finally the throwing arm (Fundamentals of Track and Field, Carr, p. 200).
The athlete begins about a foot away from the toe board, facing the direction of the throw. They cradle the shot put under their chin, flex the back leg, and reach with the other leg into a putting stance, rotating the upper body about 30 degrees and flexing at the hips. Shoulders square, the athlete pushes upward and rotates toward the direction of the throw; the legs extend, and the hips and chest thrust forward. The arm pushes up and out, the opposite arm—which is the blocking arm—acts as a slingshot, before finally snaping the fingers to complete the putting action (Fundamentals of Track and Field, Carr, p. 205).
2. Shuffle and Rotary Throw
Once the athlete understands how to utilize power and the transfer from lower body to upper body, we move on to the shuffle (middle action of the full glide). I actually use a combination of the rotary throw and the shuffle. My goal is to help the athlete understand the middle action of the feet during the glide. The athlete faces the opposite direction of the throw, starting nice and tall, lifts the shot put above their head, and then places it into position. On the way down, they lower their center of mass and get into their putting stance.
The back leg supports the athlete (usually the right leg), and the free leg (usually the left leg) is a foot away from the supporting leg. I teach the athlete to hop and push with the supporting leg, keeping their hips square for as long as possible until it is time to throw, and that left leg now plants as their hips and chest thrust forward powerfully. The throwing arm fully extends, pushing up and out, and they snap their fingers to finish the throw. Again, keep in mind, since we are in the cold, some athletes will choose to use gloves, and this can affect how they release the shot put.
Keep in mind, since we are in the cold, some athletes will choose to use gloves, and this can affect how they release the shot put, says @bpfitcoaching. Share on X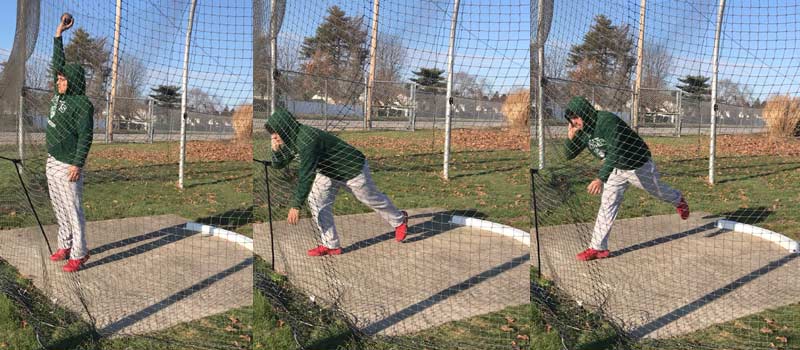
3. Partner Glide and Full Glide
Finally, once they have mastered the basics, it’s time to put it all together and teach the glide! Applying what we learned above, I explain to my throwers this takes time and there must be synchronization of the lower and upper body to create power. Based on my teachings, I had about half of my throwers utilizing the glide mechanics in our first winter meet of the season.
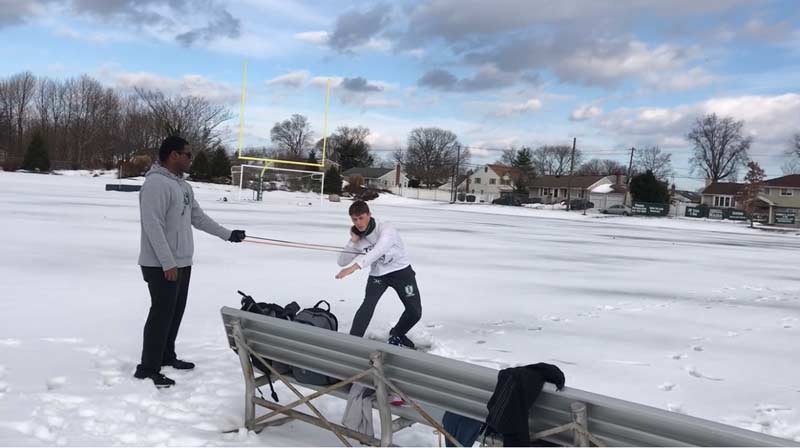
First, I use partner drills with a band, rope, or towels, to help the athlete understand the force production. The athlete holds the opposite end of the equipment and must be LOW. Their shoulders are horizontal and facing directly to the rear; as the athlete glides backward, the partner moves in the same direction. Make sure the athlete’s upper body stays low. For a right-handed athlete (Fundamentals of Track and Field, Carr, p. 207):
- The left leg makes a low, backward thrust to propel the glide action.
- The left leg lands offset of where the right foot lands.
- The right leg extends and makes a STRONG backward push and pulls directly under the body’s center of mass.
- The right and left leg should perform both actions almost simultaneously. (This is the most challenging part for novice throwers to perform.)
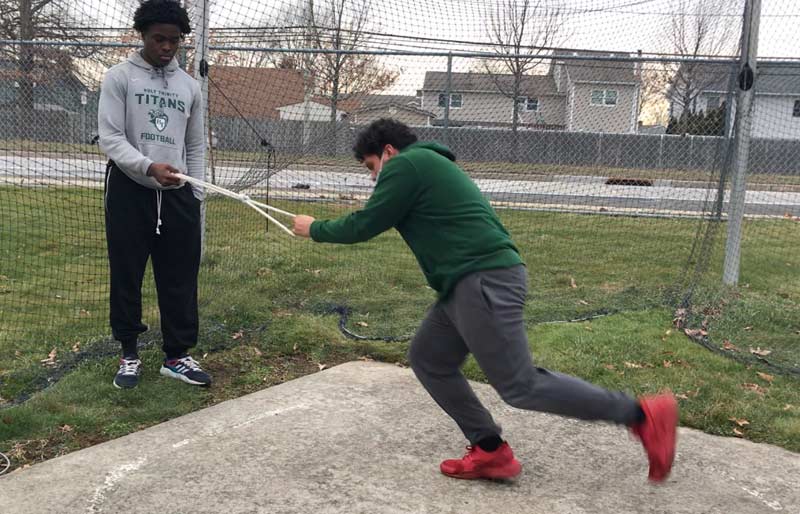
Once they have done their partner drills, then I have the athlete do this action alone. I like to explain to them that all the power comes from the hips: It is an action/reaction, and the amount of force you put into the ground is what you get back. Add speed to that and the shot put will gain distance. Projectile motion includes height, angle, and distance. Pay attention to where the athlete releases the shot:
- Do their hips open too early?
- Do they move slow?
- Do they throw instead of push?
- Is their chest facing down?
- Are they gripping the shot put properly?
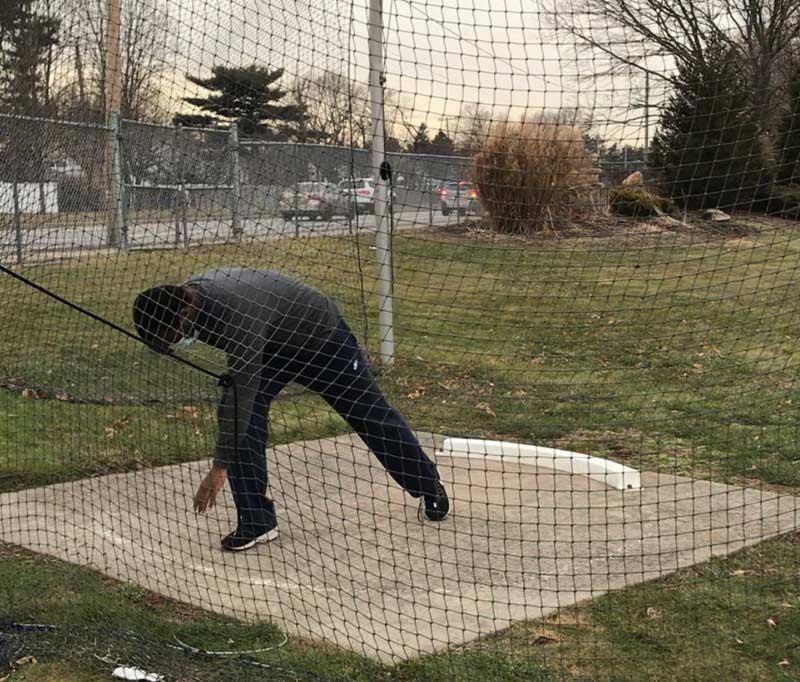
I know this is a lot to work through as a coach but imagine being the athlete. Keep it simple, don’t over-cue, and let the athlete feel it out. Make sure they have a game plan and routine for meet days that includes warm-up, mindset, visualization, and what to eat—all of these variables play a huge role in performance.
I know this is a lot to work through as a coach but imagine being the athlete. Keep it simple, don’t over-cue, and let the athlete feel it out, says @bpfitcoaching. Share on XTraining Model
My initial plan heading into this past winter season:
- Throwing days 3x/week (drills, quality throws, technique)
- Lift days 2-3x/week (power and strength training)
- Speed and plyometrics training 3x/week (short sprints, jumping, hopping, skipping)
As I stated earlier, our training model relies on the availability of the weight room, the weather, attendance, and now remote schooling. We have developed a system and model for our warm-up that optimizes performance and enhances the central nervous system. I can’t stress this enough—when it is cold out, your athletes must be warm! Injury prevention is KEY, especially when athletes are more sedentary now than ever.
Example of Training Week:
Warm-up:
Foam roll, mobility, activation, dynamic drills
Monday:
Warm-up and drills with team
Plyometrics (broad jumps, SL hops, bounding)
Lift circuit (3×8):
Part A: Lateral medball toss, elevated push-ups, dynamic lifts
Part B: Iso split squat, pull-ups, shoulder taps, and t spine rotation
Cool down, mobility, and stretch
Tuesday:
Warm-up and drills with team
Standing throws, overhead throws, partner drills (technical work)
Short sprints (4x10m sprints 80%, 4x10m backpedal)
Cool down, mobility, and stretch
Wednesday:
Warm-up and drills with team
Lift circuit (3×6-8):
Part A: SL hops, OH medball slam, lateral bear crawl
Part B: Front or goblet squat, farmer’s carry, reverse plank
Cool down, mobility, and stretch
Thursday:
Warm-up and drills with team
Standing throws, shuffle, and rotary throws (drills)
Short sprints (medball throw to 20m sprint x 5)
Cool down, mobility, and stretch
Friday:
Warm-up and drills with team
1 standing throw, 1 partner glide, and 2 glides (focus as if you were in competition, work on the kinks)
Pre-meet feel
Cool down, mobility, and stretch
Saturday:
Usually Meet Day
K.I.S.S.
As a high school coach, your job is to cater to your athletes, teach them, guide them, and help them grow as athletes and human beings. We are in a new world; a lot feels like it’s happening at random, and here we are having practice and track and field meets in the cold.
Just because you saw a world-class thrower do it, doesn’t mean it is appropriate for your athletes or group. Some reminders I find helpful:
- Utilize video analysis.
- Minimal cueing.
- Keep it simple, stupid.
Visual and kinesthetic learning are the best ways to develop and grow. Do your diligence as a coach and understand the mechanics of the throws and your why for your program, and it will help your athletes develop and optimize in performance.
Since you’re here…
…we have a small favor to ask. More people are reading SimpliFaster than ever, and each week we bring you compelling content from coaches, sport scientists, and physiotherapists who are devoted to building better athletes. Please take a moment to share the articles on social media, engage the authors with questions and comments below, and link to articles when appropriate if you have a blog or participate on forums of related topics. — SF
Reference
Carr, Gerry. Fundamentals of Track and Field. Human Kinetics. Second Edition. 1999.

