
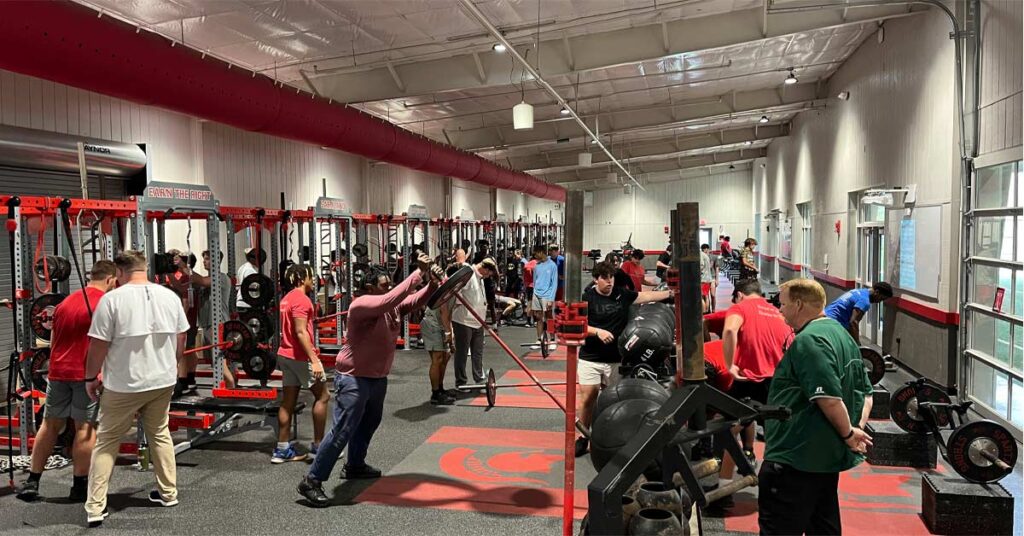
Today we visit the Saraland High School 10,000-square-foot mega facility, located just outside of Mobile, which houses an incredible indoor turf area and an even better weight room facility. Coach Jon Hersel, in his sixth year at Saraland High School, leads the Sports Performance department and this incredible multipurpose facility! Coach Hersel, the 2019 NHSSCA Alabama Coach of the Year, brings over 20 years of experience in the field, including previous stints at LSU, York Comprehensive School, and IMG Academy.

Design
Coach Hersel trains up to 120 athletes at a time in this weight room, which he is able to do because of the setup of the facility. Saraland has 10 full rack/half-combination racks—meaning that on the side closest to the wall is a full cage rack, and the side closest to the platforms are only the half racks with spotter arms.
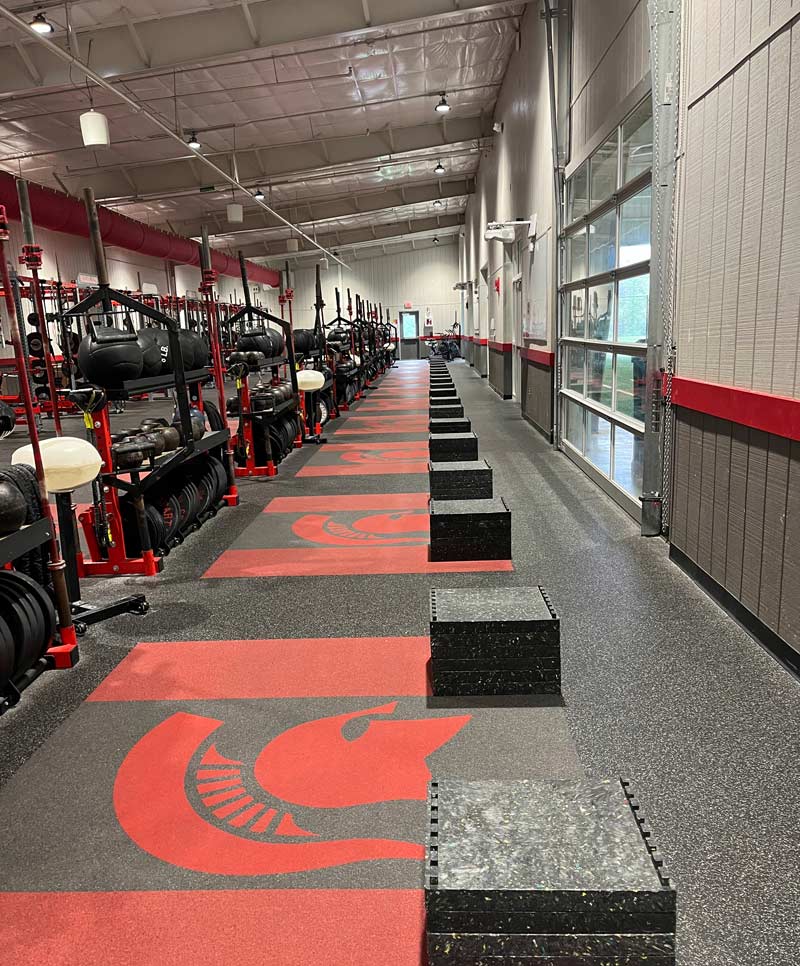
PLAE installed 20 platforms that are seamless in the ground; it’s a choice I love for the ability to still have flat flooring to space all of those athletes out safely, says @johndelf99. Share on XPLAE was hired to handle all of the flooring, and they installed 20 platforms that are seamless in the ground; it’s a choice I love for the ability to still have flat flooring to space all of those athletes out safely. Coach Hersel programs the room in four sections: his athletes start from the far left of the room and work to the right of the room, which allows the flow of the space to handle the large groups of athletes that pour in.
This facility is the optimal way to plan a space: the 5,000-square-foot turf facility can be used for warm-ups, speed work, and also as a backup practice area. The 5,000-square-foot weight room is designed similarly to a galley kitchen, where the four stations are set up in a straight line instead of moving all over the weight room. A bonus of having the double racks (from Wright Equipment) is that Saraland saved money and space for 20 rack stations, which typically take up a lot of square footage in the weight room.
“I wanted the room to be able to flow well and take advantage of having access to our covered turf to incorporate sprints, jumps, and medicine ball throws,” Coach Hersel said, “which is the reason why we have the full/half rack combos as well as the platforms.”
Purchasing
This project was a district plan to help improve their athletics as well as offer a tornado protection shelter (being in Alabama, that’s important). Wright Equipment was selected at the state bid level, which is what coaches deal with sometimes with a weight room project. This process means that companies bid to be able to outfit the space (and then are typically chosen by the district and not by the strength coach who is the professional working in that space). These decisions can often come purely down to cost, but fortunately, in this case with Coach Hersel, Wright won the bid, and they are an excellent option for weight rooms, offering the ability to customize.
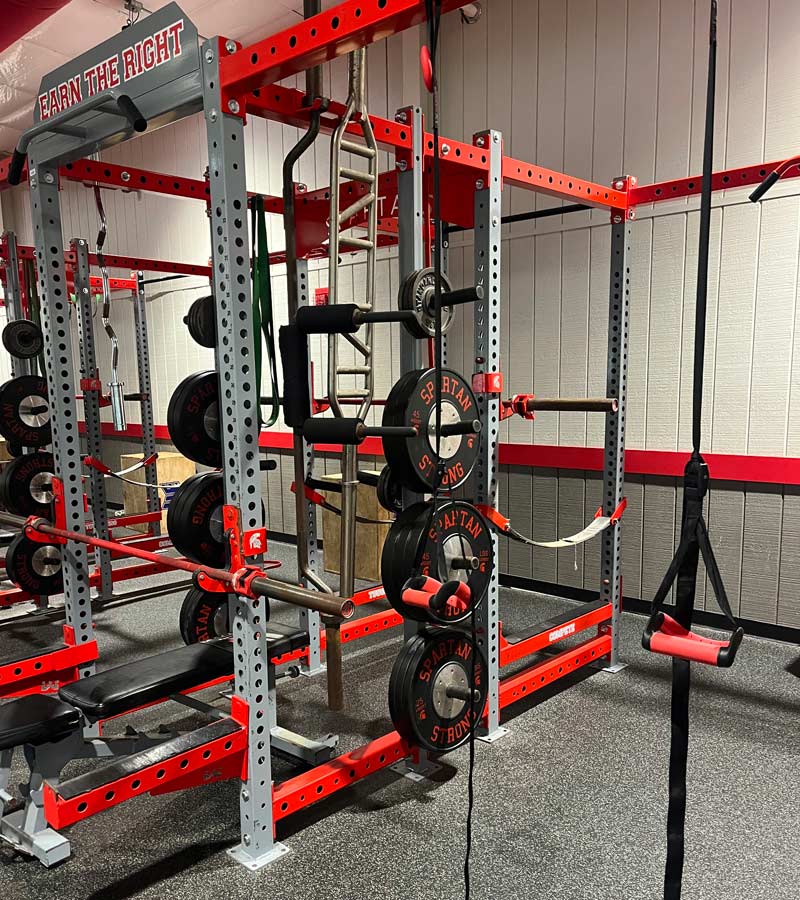
I don’t see many racks that feature full branding on the rack—you always see the shields on the backs of the racks—but the racks at Saraland have their “pillars of success” on the sides of their base and their fronts. Wright also follows the new industry norm of 3×3 steel racks with 1-inch holes, so if there is a specialty attachment that Coach Hersel wants from many of the bigger companies that make those tools, they will work on these racks. Because he works with so many different teams and athletes, it is important to have extra bars, multi-grip bars, and safety bars on every rack.
“All of our full/half rack combos have two standard Olympic bars,” said Coach Hersel. “In addition, they also have a multi-grip and safety squat bar, while our storage units have our open-ended hex bars, Thompson Fatbells, landmine attachment, and DC blocks.”
Specialty Equipment
Safety bars, trap bars, and multi-grip bars are still considered specialty bars because of the wide range of options available, but they are becoming a more standard addition in new facilities.
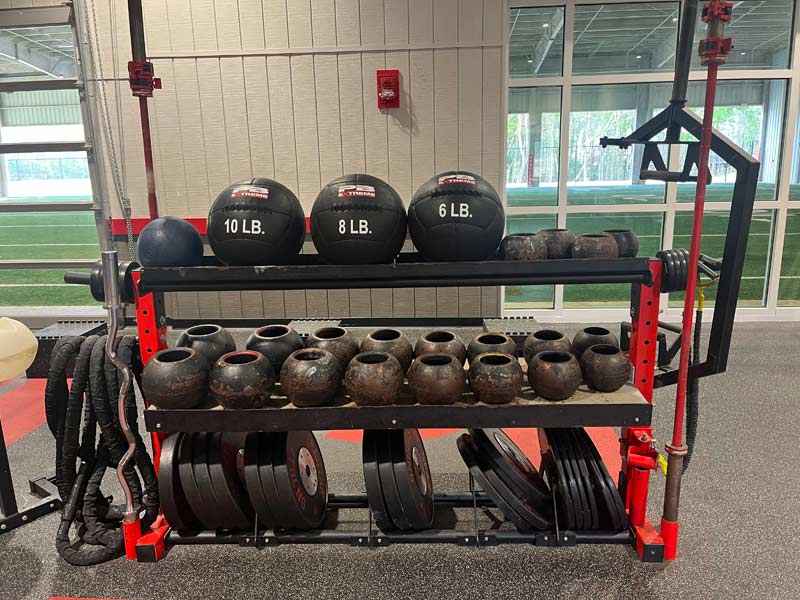
One newer and more revolutionary type of equipment that Saraland has invested in is the Thompson Fatbells. If you have never heard of these (pictured in image 3 under the med balls), they are essentially hollowed-out kettlebells with which you can do any exercise you can perform with a dumbbell. The weight encases your hand instead of being above/below your hand like traditional dumbbells.
With this being a high school, it’s also only fitting to see a smart education board/TV in the weight room—which I think is an elite way to deliver the programming with some of the iPads Coach Hersel uses. This piece of technology is a rarity, and the ability to interact with athletes and the program can be beneficial.
Finally, the turf field joined with this facility can also be used as a specialty piece of equipment, with the ability to do sled work, med ball throw work, and integrated speed work with training. Y’all, I am jealous.
Coach’s Tips
The district had been planning this facility for a while. Although Coach Hersel was not involved in every decision—which is more normal than we would all like to admit—the space is really special. I know many performance coaches outwardly make it look like their department is the frontman and decision-maker for projects like this, but the reality is that budgets, dimensions, and outside relationships have more of an influence than the fact that we are the experts in this area for our schools.
The reality is that budgets, dimensions, and outside relationships (often) have more of an influence than the fact that we’re the experts in this area for our schools, says @johndelf99. Share on XSometimes, all we can really do is offer our advice, hope to help the decision-makers make the best choice, and then hope to get the equipment we need to run the program that the individual coach wants to run.
“Space and multi-use equipment are, in my opinion, the two most important things that you need when designing a facility,” Coach Hersel said. “Those as well as equipment, because you don’t usually get the opportunity to renovate or rebuild multiple times.”
Since you’re here…
…we have a small favor to ask. More people are reading SimpliFaster than ever, and each week we bring you compelling content from coaches, sport scientists, and physiotherapists who are devoted to building better athletes. Please take a moment to share the articles on social media, engage the authors with questions and comments below, and link to articles when appropriate if you have a blog or participate on forums of related topics. — SF


