Athletes at the collegiate, professional, and Olympic levels are training harder than ever before to gain a competitive advantage over their opponents. Even at the youth level, if you visit any large or small town, you’ll witness athletes dedicated to improving their physical abilities in pursuit of reaching the next level. This is great for the world of sports, as it cultivates a higher level of competition.
The increased attention to physical preparation, however, brings with it a greater need to recognize that there should remain a balance for optimizing athlete recovery. It is imperative to remain conscious of this concept; otherwise, the expression of the physiological and biological systems will not meet the demands of an athlete’s environment.
Generally speaking, a physical preparation coach’s ultimate goal is to reduce the potential for injury by prioritizing fundamentals and enhancing the development of biomotor qualities (strength, power, and speed), which will simultaneously aid performance. One of the main goals for a sports physical therapist, on the other hand, is to facilitate the mitigation of pain while improving comprehensive capacity.
Ultimately, the objective of both professions is similar: to increase the longevity of each athlete’s capacity to express their highest potential while remaining durable. To accomplish these goals, we need to have a basic understanding of stress, so we can develop resilience and prepare players for the physical demands of competition.
This article highlights three practical methods to facilitate a shift to recovery and promote the positive adaptation to training loads. With this information, all parties involved in the athletic development process, especially physical preparation coaches and practitioners, can further assist athletes in displaying high physical capacities while mitigating their susceptibility to injury.
I don’t intend to create a narrative that training load, which is indeed a stressor, is the injury instigator and performance detractor in and of itself. Instead, quite the opposite is true. We should view physical training as a prophylactic and antidote to injury, which occurs only if we establish an accumulation of training load, or steady-chronic exposure, as opposed to sudden and abrupt, acute exposures.
For this to occur, an athlete must be prepared to accept their next bout of training. Athletes acquire this readiness from inter-session recovery, which discourages maladaptive disturbances in the system and encourages adaptive responses.
Recovery Strategies
The purpose of stress recovery adaptation is to place the nervous system in a state that’s ready to act and react efficiently within an ever-changing environment, both physiologically and psychologically.
1. Positional Breathing
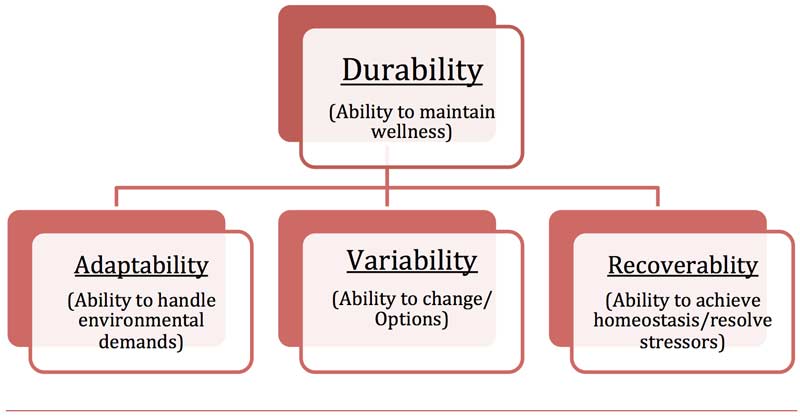
First it’s important to understand that when we endure stress, especially from training (dependent on exercise selection, of course), our system typically results in rigidity or extension bias. This position is beneficial for force production and performance, but if it’s sustained during low-level daily activities, it can result in decreased variability, adaptability, and consequently recoverability.

When a stressor is introduced, your body undergoes primitive reactive patterns that limit degrees of freedom, or available options. If you think about it, your position is a subconscious physical manifestation of your emotions and the state of your autonomic nervous system, or simply put—dynamic outputs reflecting dynamic inputs. This can self-perpetuate and increase sympathetic drive that creates a vicious CNS dysregulation cycle and alters sensory feedback to the brain.
In simpler terms, the perception of fatigue and threat is more readily activated with higher threshold exercise so you never get a real opportunity to recover.
Many athletes experience a heightened perception of soreness and tightness from this position and will hammer away at a joint by doing aggressive mobility and stretching techniques. Sometimes those mobility restrictions and areas of tension are present simply because their brain does not deem it safe to allow the body to access certain positions. Controlled breathing, especially while reaching and pushing, can mitigate these sensations and set athletes up to recover.
To drive your system into recovery mode, perform two rounds of five exhalations in a circuit. Share on XWe can access these tough and restricted positions by performing diaphragmatic breathing with long slow exhales. The breathing encourages better input and creates awareness to reference the position consistently while also establishing time under tension. Conscious breathing stimulates vagal tone so that the parasympathetic nervous system is more pronounced and also provides an opportunity to be at ease with the earlier unpleasant sensations. Performing two rounds of five exhalations, completed as a circuit, can be a great way to drive your system into recovery mode.
Video 1. The athlete demonstrates the All Fours Bear Hold with proper breathing technique.
Video 2. The athlete performs a lat hang with a strong exhale followed by a five-second held breath and then a soft inhale.
Video 3. The athlete shows how to do downward dog toe reaches and when to inhale and exhale.
Video 4. The athlete performs a 90-90 hip lift with a shift while breathing deeply.
2. Aerobic
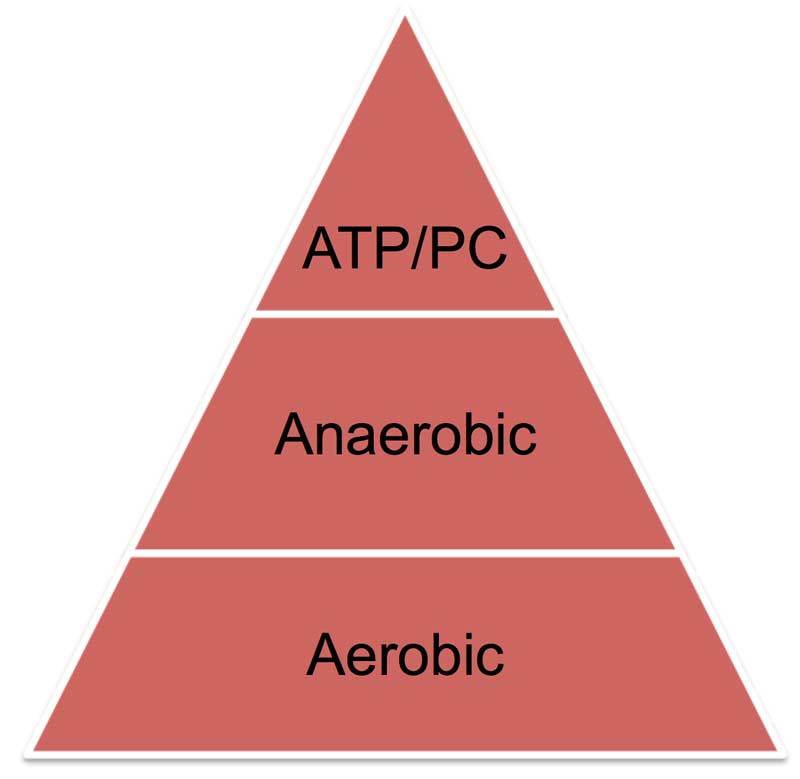
The aerobic system is another area where we can optimize recovery. Why? It is the most largely adaptable energy system and can mitigate the perception of fatigue and threat. Remember, when we encounter a stressor, we become more sympathetic and rely less on the aerobic system and more on the alactic and lactic systems. When running from a bear, we need immediate energy that promotes high biological and mechanical output, and the aerobic system doesn’t cut it.
The aerobic system instead prioritizes a long-term supply of energy during low-level intensity outputs and ensures that movement variability remains high. With low variability comes a decreased capacity to adapt as we lack the options necessary to meet the environmental conditions.
Targeting the aerobic system will promote not only post-session recovery but also intra-session recovery during intense training days by resynthesizing energy currencies and delaying the onset of fatigue-encouraging energy systems.
The Aerobic System is the Most Largely Adaptable Energy System:
- Increases mitochondrial density (more ATP)
- Improves capillary density and circulation
- Increases aerobic enzymes
- Decreases resting HR
- Decreases sympathetic dominance
- Increases left ventricle/stroke volume
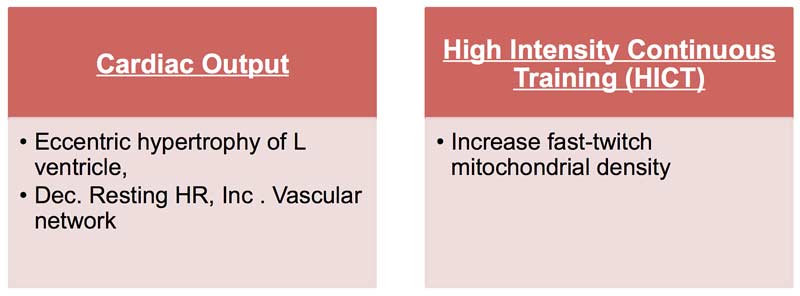
Two methods for aerobic recovery that I’ve found helpful (with credit to Joel Jamieson of Ultimate MMA Conditioning) are cardiac output and high-intensity continuous training.
- For cardiac output, the mode and load should be HR 120-150, 30-90 minutes of continuous activity (biking, swimming, jump rope).
- For high-intensity continuous training: max resistance, HR 130-150, 10-20 minutes, low speed (spin bike, lunges uphill, step-ups), potentially performing two rounds.
I prefer these strategies because they are low impact and reduce the stress and strain on contractile and non-contractile tissues, especially tendons. Performing this 1-2x per week—dependent on exercise load, exercise selection, and athlete level—can be very impactful.
3. Soft Tissue
Contrary to popular belief, no amount of pressure you apply to soft tissue will break up any scar tissue nor will it break through adhesions and lengthen tissues. It’s important to understand that you cannot rub yourself flexible. That does not mean that foam rolling is not a valuable part of the recovery process. Foam rolling is a great way to modulate unpleasant symptoms (soreness) and decrease the sensitivity of heightened tissues.
It's counterproductive for athletes to beat themselves up by foam rolling aggressively. Share on XIt’s counterproductive to have your athletes beat themselves up by foam rolling aggressively to the point of tears, grimacing, and breath-holding. This strategy will simply increase sympathetic tone throughout the body. As a result, they’ll feel like they need to roll even harder next time, continuing the cycle.
Instead, breathe to decrease tension and tone and give a relaxation effect via the parasympathetic nervous system. Although this is a more subjective than objective strategy, it is just as critical. Remember that our perception highly influences a stress reaction, and we must take into consideration the internal load of training.
Internal loading provides insight into the athlete’s perception of effort-fatigue and psychological reflection. Integrating soft tissue can alter this internal loading, specifically the psychological response to the external loading or work completed.
Video 5. The athlete demonstrates foam rolling for the hip flexor.
Video 6. The athlete performs the two-step process for glute foam rolling.
Video 7. The athlete shows us how to foam roll the mid- to upper back.
To further grasp the reasoning and rationale of these strategies, it is imperative to establish a basic understanding of stress, from its ramifications to its manifestations.
General Adaptation Syndrome
One of the first to give a scientific explanation for biological stress was Hungarian endocrinologist Dr. Hans Selye. He called his stress model, based on physiology and psychobiology, the General Adaptation Syndrome (GAS). The model states that any event, real or perceived, that threatens an organism’s well-being (a stressor) leads to a three-stage bodily response.
Stage 1: Alarm
- Fight-or-flight response and sympathetic nervous system are activated
- Resources are mobilized
Stage 2: Resistance
- The parasympathetic nervous system returns functions to normal
- Resources are focused against the stressor
- HR, BP, RR increase, and body remains on red alert
Stage 3: Exhaustion
- Continued stress exhausts resources and causes fatigue and system failure
We must understand that physical training is a stressor, though controlled, that initiates this cascade of events. The goal is to remain outside of exhaustion, commonly referred to as overtraining in the performance world. Exhaustion may lead to performance decrements and can have serious physical ramifications systemically. One may ask, how is training a stressor if I don’t feel stressed afterward?
Physical training is a stressor, causing a cascade of neuroendocrine and physiological events. Share on XEssentially, stress is stress is stress and is created equal. However, it may not appear to be at first. Whether we’re running from a lion, watching a horror movie, or facing upcoming deadlines, our system typically results in the same general neuroendocrine and physiological cascade of events initiated at the hypothalamic-pituitary axis. But we may have varying levels of subjective perceptions of stress (physical, biological, psychological, emotional, etc.) because our cognitive appraisal varies, which alters our perception of the stressor.
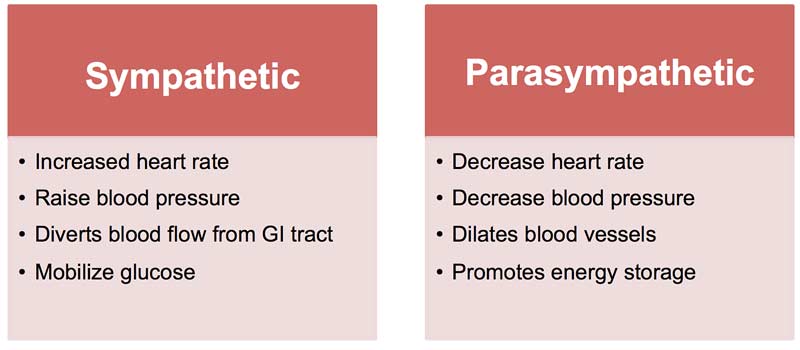
The stress response triggers the sympathetic nervous system, which is not innately bad. Issues arise if we remain in this sympathetic state during everyday low-threshold activities and don’t shift to our parasympathetic branch to promote recovery, regulation, and regeneration.
Stress Is a Necessity
Realize that stress is not a synonym for bad. Stress is vital and necessary for life, and without it, our evolutionary advantages would not exist. The diagram below depicts why stress is necessary. With controlled stress, we can manipulate variables to suit our current capacity and future requirements. The ultimate outcome is maintaining resiliency and health as long as possible.
The only way to create durability is to refine the system, and the only way to refine the system is to disrupt homeostasis temporarily, instigating change. This yields adaptation and a system that is neither underdeveloped nor overdeveloped but robustly efficient.
With constant, repetitive, high-input stressors—specifically rigorous training for this article—an athlete may be posed with a threat. The threat itself is not an issue since we subject ourselves to threat (a stressor) each time we train. Regarding physical and physiological qualities that a person wishes to obtain, there has to be a stressor applied. If you want to be bigger, faster, or to lift heavier, the system has to experience a stimulus strong enough to warrant a shift.
Issues occur when you continue to have withdrawals (stressors) without making deposits (recovery). That’s called an overdraft. No one wants an overdraft. To up your deposit game, you must shift your system to a state where recovery can occur and not focus on speeding up recovery. When we emphasize speeding up recovery, we impede the body’s three natural processes.
Think of it this way: we have to acquire money before we purchase material things. We have to do the same with the body and focus on recovery, restoration, and energy resources before attempting to purchase physical and physiological assets.
Contrary to common belief, physical training—whether running and conditioning or strength-oriented—does not promote homeostasis. It disrupts homeostasis. Essentially, this means that at the moment you are training, you are not getting stronger, bigger, or faster. Instead you are (or should be) challenging the tissues of all your systems.
For this adaptation to be positive, we need to promote adequate recovery. Without recovery—which includes nutrition, hydration, sleep, and often forgotten sympathetic mitigation—we may have poor outcomes leading to maladaptation. This leads many athletes to train even harder or run even farther, the complete opposite of what their system needs.
If you train to recover like you train to adapt, you improve your ability to restore homeostasis. Share on XIf you train to recover like you train to adapt, you can improve your ability to restore homeostasis. Your body does not care about making you stronger or faster if you are constantly in a recovery deficit. Instead, all resources and energy are used to handle daily hassle stressors and the demands of excessive intense physical activity on the body. We want to ensure there are enough resources and energy available for tissue repair and stress recovery adaptation.
Stress Overload
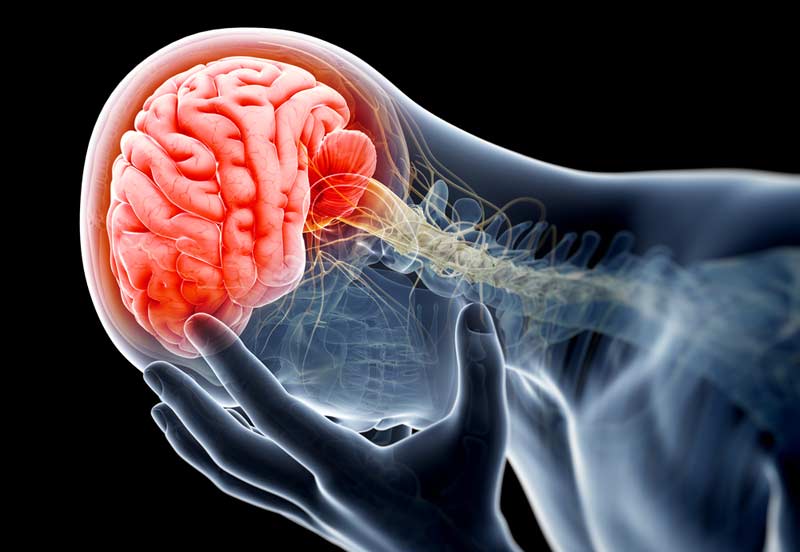
As we know, neurological, physiological, and biological processes, which yield performance, are all outputs from the brain—it is the governor. Every time an athlete steps into the weight room, let alone the field of play, there are endless inputs (afferent information) and outputs (efferent information) that attempt to elicit the most efficient reflexes and reactions. As a result, the brain, which is the central nervous system, has to recover to function at its highest capabilities otherwise acquisition is impacted negatively.
The body’s limited resources and energy for coping with stressful situations mean that GAS has evolved to be only useful for short-term animal survival. The harder we train without recovery, the less variable this system becomes as the sympathetic state dominates, leading to difficulty with down-regulation and adaptation to environmental demands. This accumulates to cause poor adaptation, disrupted sleep patterns, fatigue, and ultimately poor performance.
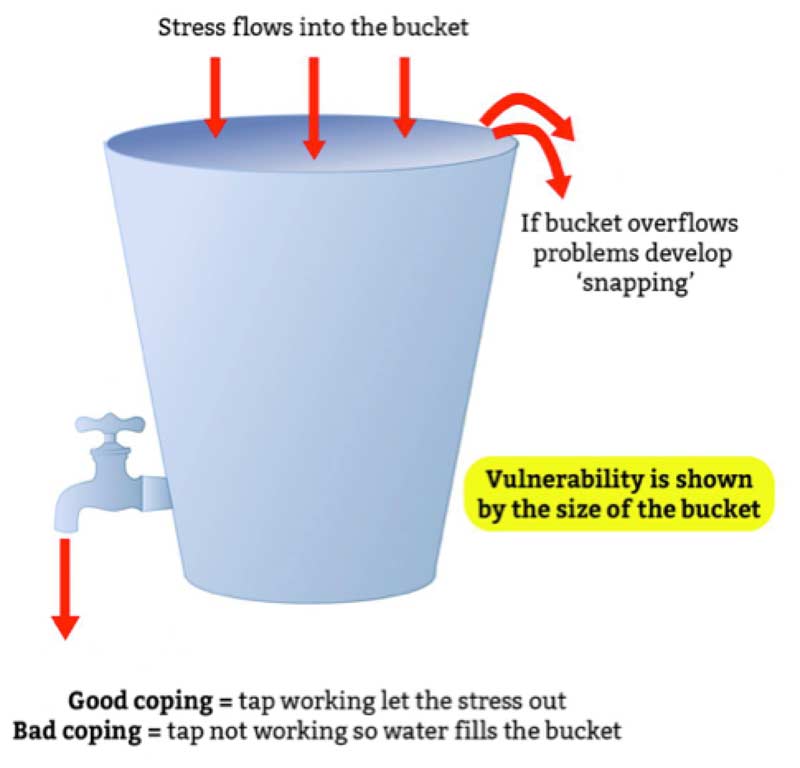
The stress bucket is a great depiction of how we all have a certain degree of propensity to endure stressors, including:
- Significant life change: marriage, children
- Catastrophic: unpredictable large-scale events
- Daily hassles: seemingly minor negative events—long store lines, losing car keys
- Ambient: globally integrated into the background of the environment—noise, crowding
- Physical: exercise, physical activity, and training
If we fail to allocate time to recover from training, which is a very controllable input, then we run the risk of overflow and performance decrements. While there is a myriad of strategies to encourage recovery, the three suggestions provided earlier in the article are all effective and efficient methods to use in an athlete’s programming.
Assessment Strategies
Determining when we need to prioritize recovery strategies throughout the athletic preparation and competition continuum requires consistent monitoring of key indicators. Although measurements from biochemical, hormonal, and immunological perspectives do exist, they are not easy to implement since they’re typically more invasive and require more time allocation.
Ideally, load monitoring involves measuring both external and internal loads, where measurement tools range from general to sports-specific and are either objective or subjective. Measuring the external load typically involves quantifying an athlete’s training or competition load, such as hours of training, distance ran, weight lifted, or the number of games played. Other external factors, however, such as life events, daily hassles, or travel may be equally important.
We can measure internal load by assessing the internal biological, physiological, and psychological responses to the external load such as heart rate (physiological/objective) and rating of perceived exertion (psychological/subjective).
It’s critical to implement mixed methods when monitoring an athlete’s response to training load. There is no unanimous method to determine the overall effect of stress from training load on performance, fatigue, and injury because there are numerous factors that influence an athlete’s actual response to load. Take, for example, an overweight middle-aged male who will have very different physiological and perceptual responses (internal load) to an 800m run than a trained runner. Although the external training load is identical, the internal training load will be much higher in the older unfit individual.
We can gain an understanding of an athlete’s perception of load by consistently providing subjective questionnaires. Several researchers have investigated the use of subjective monitoring and found it to be a sensitive and consistent way to determine acute and chronic changes in an athlete’s well-being in relation to load.
Subjective Assessments
Subjective assessment measures include the Recovery Stress Questionnaire for Athletes (REST-Q-Sport), Daily Analysis of Life Demands for Athletes (DALDA), and Profile of Mood States (POMS). Rather than administering the entire questionnaire, it may be more time efficient to review questions that elicit tangible responses. Simple inquiries before training can be extremely valuable for detecting unplanned fatigue.
Heart Rate Variability and Rating of Perceived Exertion
There’s been hype recently over assessing heart rate variability (HRV), which is the measure of variation in time intervals between heartbeats. Essentially, by assessing HRV, we can gain a physiological indication of the autonomic nervous system’s (ANS) state. The ANS, which regulates heart rate, blood pressure, breathing, digestion, etc., will reveal less variation during higher sympathetic activity. The problem is that measuring HRV is not always feasible. Instead, session rating of perceived exertion (RPE) can be a quick and easy way to measure an athlete’s internal response to the training session’s intensity.
Range of Motion and Flexibility
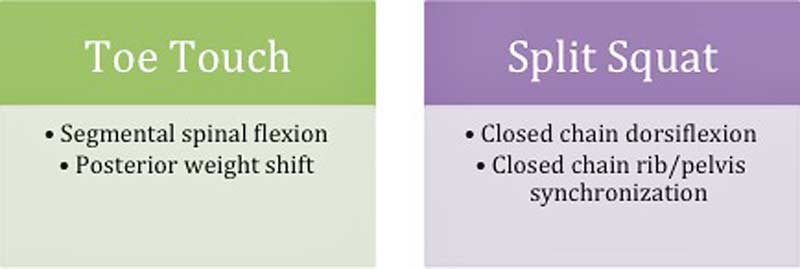
Joint range of motion and flexibility also provide insight into stress and load accumulation. In team sports, a strength coach may not be able to assess athletes individually. An efficient approach I’ve found effective is gauging the toe touch and split squat. By assessing these two movements, we have a glimpse of the outward reflection of the autonomic nervous system’s variability.
Both movements will reveal the ability to offset the extension bias. Each movement may indicate potential structural fatigue to contractile tissue (toe touch) and sensorimotor fatigue due to the coordination required between upper and lower extremities in an asymmetrical pattern. We should not use these as a stand-alone, and and we should establish a baseline quality (split squat) and quantity (toe touch) before future assessments.
No matter which assessments you choose, the ultimate goal is to answer two basic questions: How is the athlete tolerating and adapting to the physical stressors, and is the athlete prepared for the next exposure?
Conclusion
Remember the primary goal of training is to create controlled stress that will stimulate a change in the efficiency and effectiveness of each system throughout the body. Before this stress adaptation can occur, however, an athlete must be in a recovery state. It should not be the intention of a performance coach, skill coach, or therapist to speed up recovery and limit the body’s natural processes. Instead, our goal is to ensure athletes are in a state ready to recover.
“If you train too hard on your easy days, soon you will be training too easy on your hard days.”—Keijo Hakkinen
Since you’re here…
…we have a small favor to ask. More people are reading SimpliFaster than ever, and each week we bring you compelling content from coaches, sport scientists, and physiotherapists who are devoted to building better athletes. Please take a moment to share the articles on social media, engage the authors with questions and comments below, and link to articles when appropriate if you have a blog or participate on forums of related topics. — SF
Relevant Reading and Resources
Sapolsky, Robert M. Why Zebras Don’t Get Ulcers: An Updated Guide to Stress, Stress-Related Diseases, and Coping. W.H. Freeman, 2001.
Wingo, Mary K. The Impact of the Human Stress Response: The Biologic Origins of Human Stress. Roxwell Waterhouse, 2016.
Schulkin, Jay. Allostasis, Homeostasis and the Costs of Physiological Adaptation. Cambridge Univ. Press, 2012.
Halson, Shona L. “Monitoring Training Load to Understand Fatigue in Athletes.” Sports Medicine, 2014; 44(2): 139-147.
Budgett, R. “Fatigue and Underperformance in Athletes: The Overtraining Syndrome.” British Journal of Sports Medicine, 1998; 32(2): 107-110.
Thorpe, R. T. (Robin), et al. “Monitoring Fatigue Status in Elite Team SportAthletes: Implications for Practice.” International Journal of Sports Physiology and Performance, 2017; 12(2): S2-27-S2-S35.
Everly, George S., and Jeffrey M. Lating. “The Anatomy and Physiology of the Human Stress Response.” In: A Clinical Guide to the Treatment of the Human Stress Response. Springer, New York, 1970.
Taylor, et al. “Fatigue Monitoring in High PerformanceSport: A Survey of Current Trends.”Journal of Australian Strength and Conditioning, 2012; 20(1): 12-23.
Schwellnus M., Soligard, T., Alonso J., et al. “How much is too much? (Part 2) International Olympic Committee consensus statement on load in sport and risk of illness.” British Journal of Sports Medicine, 2016; 50(17): 1043-1052.
Gabbett, T.J. “The training-injury prevention paradox: should athletes be training smarter and harder?”British Journal of Sports Medicine,2016; 50(5): 273-280.