For a strength coach wishing to establish a winning culture, there is nothing more important than creating buy-in from all the athletes and coaches in the program. When athletes and coaches buy in, they are buying into you and your training program. They believe that following your program will give them the platform for enhancing performance and overall success in their sport. There are several factors a strength coach must address, including having an established training system. Many different systems can work, but it is imperative to use a system that fits your specific situation.
Unified vs. Specific Training
The most basic decision a strength coach will make is utilizing either a unified or specific training system. A unified strength training system is one in which all teams/individuals—regardless of sport—perform the same training. Utilizing a unified system for strength training has several advantages for the strength coach working with a large volume of athletes. Some of the advantages include:
- Utilizing the same cues.
- Narrowing down the exercise pool.
- Training multiple sports simultaneously.
This can make the strength coach’s life much easier in terms of overall management.
At the opposite end of the spectrum is a specific training system, which utilizes a strength training program that is specific to an individual athlete and/or a specific sport. Some of the advantages of a specific training system include:
- More skill-centered programs working toward a specific sport.
- Individual attention to address specific needs.
- Easier buy-in.
A bird’s-eye view of these two options would lead most of us to believe that the specific training system is the better option. But what if the strength coach is in a position where specific training programs are not the right choice? What if the strength coach has no additional staff and must train large volume of athletes from a variety of sports with limited time and resources? Well, in that case, maybe a unified system is the better option.
But what about the individual sports coach who seeks more specific adaptations for their athletes? How about the athletes themselves, who may see unified programming as “watered down”? A strength coach using a unified system needs to have answers for these questions if they want to have athletes and coaches who are 100% bought-in to their training system.
How can a strength coach offer a unified training program that can still provide specificity? By making the unified program specific. Share on XSo, how can a strength coach offer a unified training program that can still provide specificity? The answer: You make the unified program specific.
Why Make Unified Programming Specific?
A unified training program that’s made specific can seem like the best of both worlds.
Buy-in
When utilizing a unified program, it is important to create a vision for the athletes that your program is “specifically designed” to enhance athletic performance, regardless of sport. Making sure the athletes and coaches (and parents) understand that virtually all athletes need to accelerate, decelerate, jump, and change direction. In a weight room, all athletes need to squat, hinge, push, and pull. All athletes need a strong and stable core.
In addition, many of the movements in sport are similar and therefore share specificity. This will help create that vision for the athletes and coaches that your program offers specifically what they need.
Performance
As an athlete develops more strength, there will be a need for sport-specific exercises that translate that strength to enhanced performance. In most cases, it is futile to work on specific strength without a solid base of strength created from both relative and general strength exercises.
How to Make Unified Programming Specific
So, how can you add specificity to unified programming?
1. Link the Exercise to the Sport
When designing a program, strength coaches need to understand the movements and energy systems utilized by the athletes. It is also advantageous for the strength coach to highlight how the exercises within the program are already sport-specific.
Let’s say I have one of my “mixed” S&C classes with athletes from a variety of sports, and I am introducing the training for the session. I will explain the value of the exercise, demonstrate proper technique, discuss the cues for the exercise, and then describe how the given exercise is similar to the movements used in a variety of sports.
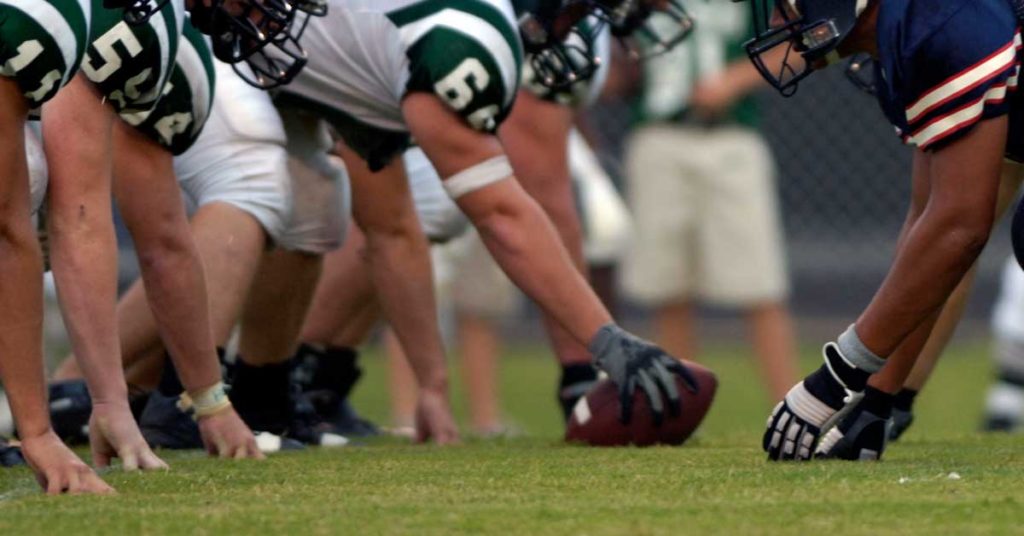
That conversation would go something like this. “Our second-tier exercise today is the step-up. This is an important exercise to develop single-leg strength and balance. Step up onto the 18-inch box, punching the foot down while driving the opposite knee up… PUNCH and DRIVE. This movement can be seen in a variety of sports settings, such as a basketball player driving to the basket during a layup, a long jumper jumping off the toe board, or any number of different athletes jumping to catch a ball (outfielder robbing a hitter of a homer over the fence, soccer player getting their head on the ball first, or a receiver/defensive back getting the football at its high point).”
How about a landmine lateral lunge? What specific sports movements are found there? I like to pick specific athletes from different sports and have them perform a sport-specific movement.
So, I’ll pick a volleyball player in the class and say, “Show me the position you’d get into when getting ready to dig out a spike from the opposing team.” Then I’ll pick a baseball player and say, “Show me the position you’d be in to field a grounder.” Then I’ll pick a tennis player and say, “Show me the position you’d get in while hitting a forehand volley.”
At this point, the athletes have seen three different sports and ONE common position. Then I have them demonstrate the exercise with a light implement to show the athletes the correlation between the specific sport movement and the specific sport exercise.
How about a medicine ball side throw? What sport-specific movements are found here?
- A baseball or softball player swinging a bat.
- A lacrosse player taking a shot on goal.
- A track and field athlete throwing the discus.
During the training session, I often add a specific cue for the athlete based on their preferred sport. For example, while a baseball player is performing a side medicine ball throw, I’d say “swing for the fence!” or for a shot/discus thrower I’d say “let it fly,” or for a lacrosse player I’d say, “shoot!” Bottom line, the exercises within the unified training system are applicable across a variety of sports, making them all “specifically” similar.
2. Provide Exercise Selection Options
Options enable the athlete to have some autonomy within the unified program. Athletes have the ability to select an option that still meets the goal of the main exercise but provides a more specific adaptation or gives the athlete an individual choice based on individual needs.
For example, if barbell bench press is the main exercise, an athlete may opt to do dumbbell alternating bench press instead. This may be the case for an overhead athlete who wants to focus on more shoulder stabilization and/or a freely moving scapula. Another example could be a basketball player choosing to replace a clean with a hex bar jump due to recovering from a sprained wrist.
Another option for athletes is not to choose a completely different exercise but to make a simple “tweak” to it. For example, if the main exercise is a hex bar deadlift, a swimmer or track and field sprinter may choose to use a staggered stance for a more specific adaptation to mimic the start from the blocks. Another example is for athletes to do medicine ball rotational throws that best mimic their sport. This could be a baseball pitcher doing a punch throw or a golfer doing a scoop throw.
The way I provide the exercise selection options and tweaks to the athletes is threefold:
- I list and demonstrate the options while going through the pre-training explanation.
- The options are listed for athletes to view in the workout. (I use a program design software that enables me to write all the options in the “Exercise Instructions” area.)
- We have a video library our student-athletes can preview and review prior to a new phase of training.
During the in-season, our athletes utilize more complex and contrast training. This is the perfect time to utilize the options and tweaks. As an example, during the in-season, one of the exercise pairings we “complex” is a split squat with a jump or med ball toss. Our track and field sprinters do a landmine split squat paired with med ball “start” toss. The throwers do a banded split squat from the pins paired with a med ball punch throw.
3. Set Phases of Training Based on Sport Season
The final method for making unified programming specific is to set up the weight room in sections to allow fall, winter, and spring sports to follow the unified system at different phases. I set our athletes into two groups:
- Fall-Spring
- Winter
I only have these two groups because my programming repeats itself every six months. That is, I use 6–7 different phases of training, it takes six months to complete, and then we start over. Therefore, fall and spring athletes do the same training phases throughout the year, whereas winter athletes train in a different phase. To clarify even further, in the month of January, fall and spring sports train in phase 1 (volume) of our programming; however, winter sport athletes train in phase 4 (speed-power).
The final method for making unified programming specific is to set up the weight room in sections to allow fall, winter, and spring sports to follow the unified system at different phases. Share on XHaving the training set up based on sport with fall-spring and winter groups is an important piece to my program design. It goes back to buy-in and performance. First, for buy-in, athletes appreciate the fact that during the latter part of the in-season, there is some autonomy, less volume, more recovery, and more focus on “specific” exercises. Second, everything boils down to performance. It allows the athletes to “peak” during their competitive season.
Level Up Your Programming
Linking the exercises to a variety of sports movements, enabling some athlete autonomy, and ensuring there is focus on specific sport performance has given our programming a big boost in terms of buy-in. We’ve added more S&C classes to our curriculum to meet the demand, and the majority of our sports continue to train over the summer months.
Athletes, coaches, and parents are becoming more and more aware of the advantages of a high-quality training program. Being able to describe a training program that takes into consideration the specific demands of individual sports is an attractive quality for most informed parents and coaches. Making a unified program with some specific exercises, options, and proper scheduling can bring your training program to a whole new level.
Since you’re here…
…we have a small favor to ask. More people are reading SimpliFaster than ever, and each week we bring you compelling content from coaches, sport scientists, and physiotherapists who are devoted to building better athletes. Please take a moment to share the articles on social media, engage the authors with questions and comments below, and link to articles when appropriate if you have a blog or participate on forums of related topics. — SF