Over the years, we typically change our minds constantly. What was once important loses its significance, and what was once useless becomes the center of our universe. The purpose of this article is to explain why I changed my mind about the seated calf raise and now feel that it is a vital and often overlooked exercise for training.
At one point in my career, I felt that training the calves was pointless. I viewed them as useful but not crucial, sort of like an appendix, says @jbryanmann. Share on XAt one point in my career, I felt that training the calf was pointless—the hip and knee joints were where it was at for sprinting and running, and the calves were just there. I felt that they were useful but not crucial, sort of like an appendix. Since they weren’t a big deal, I wouldn’t waste my time training them. Looking back on this, I see how laughable this thought was.
My Eureka Moment with Athletic Performance
I started to question myself, as well as the intelligence of others, when I read an article about Natalia Verkhoshansky and then asked her about it myself in person. She made a statement that the exercise in the weight room most related to change of direction for her athletes was the seated calf raise. I thought there was an issue with the translation or some other language barrier and refused to believe it.
I was still very skeptical when I talked to her in person at a hotel bar in New Orleans. She told me that it was indeed the seated calf raise that had the biggest relationship to improved change of direction ability in her athletes. Then I started teaching anatomy and kinesiology in the same semester, and her statement completely made sense as to the how and why.
Examining the biomechanical modeling literature, when gait is studied at walking speeds, 80% of the propulsive forces come from the ankle and 20% come from the hip.1 Some of you may gawk and ask, “That’s 100%, what about the knee?” The knee takes care of 100% of the negative forces, which are braking forces. These are what stops the momentum downward to allow for the other joints to utilize propulsive forces.
When gait is studied at maximal sprinting speeds, 80% of the propulsive forces come from the hip and 20% come from the ankle, with the knee again providing the braking forces. The gastrocnemius, soleus, and plantaris muscles are what account for those propulsive forces. I never in my wildest dreams thought this was possible, and it wasn’t until I further examined the gait cycle and realized how it worked that everything clicked. When the foot touches down directly underneath the body, the hip works as a hip extensor to propel the body forward after the thigh passes the imaginary perpendicular line drawn from the center of mass to the ground. It is actually the calf that causes those propulsive forces, rather than the hip.
When looking at the line of pull of the muscles on the joint, this becomes more apparent. The hips would have to rotate anteriorly and have a fairly significant accompanying lumbar extension to be able to continue being the primary driver. This is obviously inefficient, and it wouldn’t be done unless there were several factors necessitating its use. Instead, it is the calf pulling on the calcaneus that drives the forces at the ankle to cause plantar flexion for this further drive.
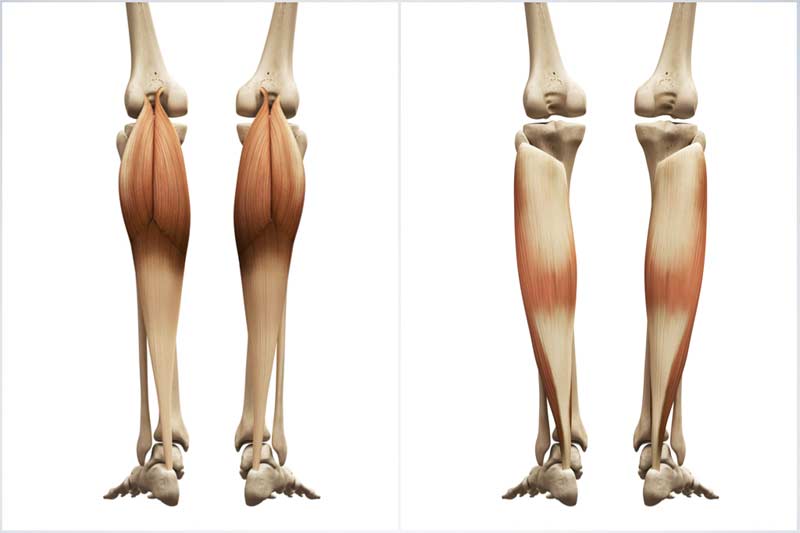
You may read this and think, “Okay, I get the calf raise now, but why is this kook talking about the seated calf raise?” I’m glad you asked. If we go back to our anatomy, we need to examine the origin and insertion. For most actions, the origin of the gastrocnemius is on the medial and lateral epicondyles of the femur, with the insertion being at the calcaneal tuberosity via the Achilles tendon.2
When explained more simply: The gastrocnemius crosses both the knee joint and the ankle joint and can serve as a knee flexor and a plantar flexor. For most actions of the soleus, the origin of the soleus is on the fibular head and lateral plateau of the tibia, with the insertion being at the calcaneal tuberosity via the Achilles tendon. To put this simply: The soleus only crosses the ankle joint. This is a very important distinction to make.
Muscular restrictions occur when a muscle is too tight to allow for a greater range of motion. Once the knee bends (provided that the gastrocnemius wasn’t so tight that the knee couldn’t extend), the gastrocnemius is now no longer at a stretch, and its tightness can no longer be the limiting factor if there is a dorsiflexion restriction, as there is slack in the muscle. If the restriction is one of the triceps surae group, it must be the soleus, since that is the only muscle now at maximal length.
This is not to say that the only thing impacting dorsiflexion is the soleus; of course, it could be muscles impacting arch control like the tibialis posterior, an issue such as a bone spur, or another reason for locking one of the many joints of the foot distal to (and including) the talocrural joint. I will say that most strength and conditioning and personal training professionals will lack the training to determine the other issues. For me, if the soleus intervention does not work, I punt and refer the athlete out to an individual whose scope of practice includes the areas that are the issue.
If we examine the deep squat movement of the functional movement screen (FMS), we should remember that the first attempt to get a 2 rather than a 3 is to elevate the heels. By elevating the heels, you start out in plantar flexion and allow a greater number of degrees of dorsiflexion before hitting the end range of motion. In other words, it allows an individual to get around the dorsiflexion restriction. Often, simply elevating the heel by an inch and a half will allow the person to do well on the deep squat.
For some reason, when this cleans up the pattern, many people tend to want to go stand on slant boards to try and stretch out the calf (which is not a bad idea). However, most end up doing them on a straight leg. This stretches out the gastrocnemius, which couldn’t be the issue during the deep squat—it is either the soleus or something else that isn’t the triceps surae group. The likelihood increases when bending the knee and allowing the stretch to be placed on the soleus.
More Mounting Evidence for Training the Soleus Muscle
One other interesting thing about the soleus is that it can actually posteriorly translate the tibia. While most people refer to the origin as the part closest to the joint off of the torso and insertion as the point most distal to the joint off of the torso, that’s not completely correct. The origin is simply the least movable bone, and the insertion is the most movable bone. Hence the term, “the insertion is drawn to the origin.”
The origin is simply the least movable bone, and the insertion is the most movable bone. Hence the term, “the insertion is drawn to the origin,” says @jbryanmann. Share on XThis is important because when the foot is planted (the heel is down and stays down) and the soleus turns on, plantar flexion can actually occur by the tibia moving backward. This allows the soleus to aid in the hamstring muscle group to posteriorly translate the tibia during activity.3-5 This is important due to the ankle and its role in ACL injuries. Research has shown that the mechanism of the non-contact ACL tear is an internal rotation and adduction force of the hip, as well as an anterior translation of the tibia in relation to the femur.6
A major point to this, especially as it relates to ACL tears, is that the studies by Elias et al., Fleming et al., and Mokhtarzadeh et al. found that while the soleus was an agonist to the ACL, the gastrocnemius was an antagonist—meaning that it worked against the ACL. It does so by working as a knee flexor, but from below the knee joint rather than above, as the hamstrings do. This distinction is important as it indicates that the line of pull is different even though the end result is the same (knee flexion). Yet they have different impacts as far as how the muscle works with the ACL (the hamstrings are agonists and the gastrocnemius is an antagonist).
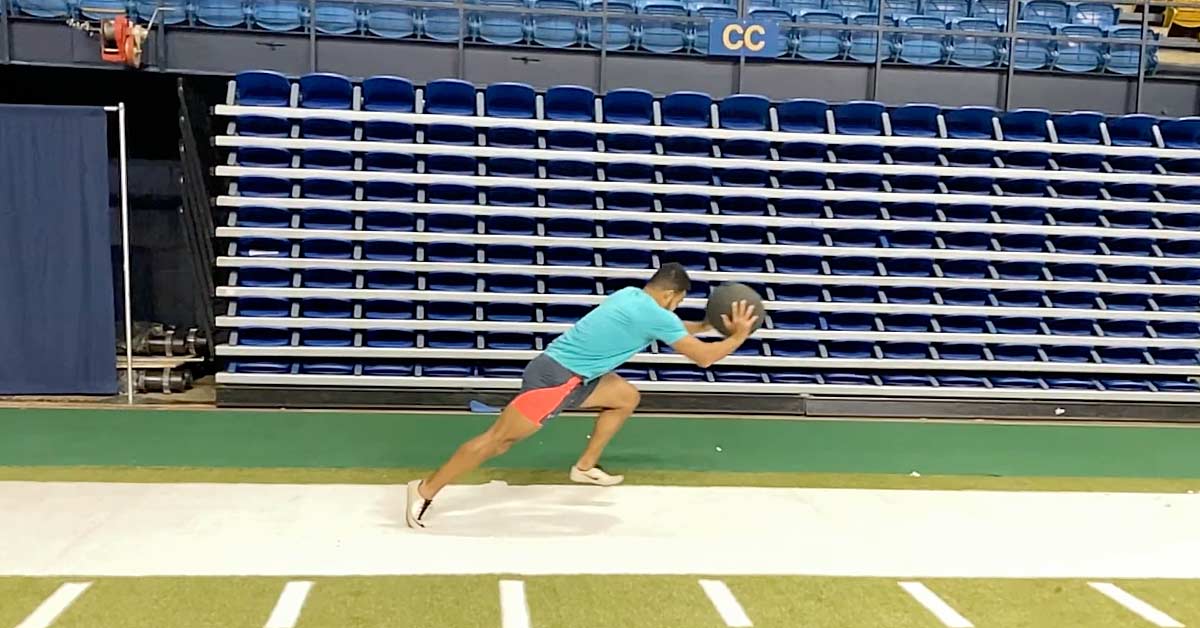
When changing direction, which is how the non-contact ACL tear occurs, the body understands that it needs to drop the center of mass. Movement forces (moment) are reduced at that point in time and required to stop and redirect the body properly. To accomplish this lowering of the center of mass, there is a “triple flexion” (as opposed to triple extension) that occurs: dorsiflexion of the ankle joint, flexion of the knee, and a flexion of the hip.2 If there is a range of motion (ROM) issue at any of those joints, the other two will increase their flexion to compensate for it.
As the ankle tends to be dorsiflexion-restricted in many athletes, the additional flexion comes from the hip and the knee, and the heel tends to lift up to compensate for this lack of dorsiflexion in accommodation of the additional flexion of the other two joints. This results in an anterior translation of the tibia, which is one of the major mechanisms of the ACL tear and may be one of the reasons that those with dorsiflexion are at a greater risk of tearing their ACL. Now, increasing the soleus length (again, if it is in fact the muscle that is restrictive) will decrease the likelihood of a dorsiflexion restriction and thus reduce the likelihood of anterior tibial translation. The strengthening of the soleus will increase its ability to posteriorly translate the tibia.
Connecting the Scientific Dots by Implementing the Exercise
I have talked a great deal about anatomy, biomechanical modeling, and kinematics. How does this relate back to the seated calf raise and the reason I like it? It targets the soleus like no other exercise can.
Since the knee is bent, when the athlete goes from full stretch to full contraction, not only does it improve the ability to dorsiflex (in terms of ROM), but it also improves the force that will be provided by ground reaction forces during sprints and jumps. It will also increase the ability to posteriorly translate the tibia to help prevent injuries. This is especially important if athletes already do standing calf raises, as this targets the gastrocnemius, which is an antagonist to the ACL.3-5 If you don’t develop the muscles in balance, it increases the likelihood of issues.
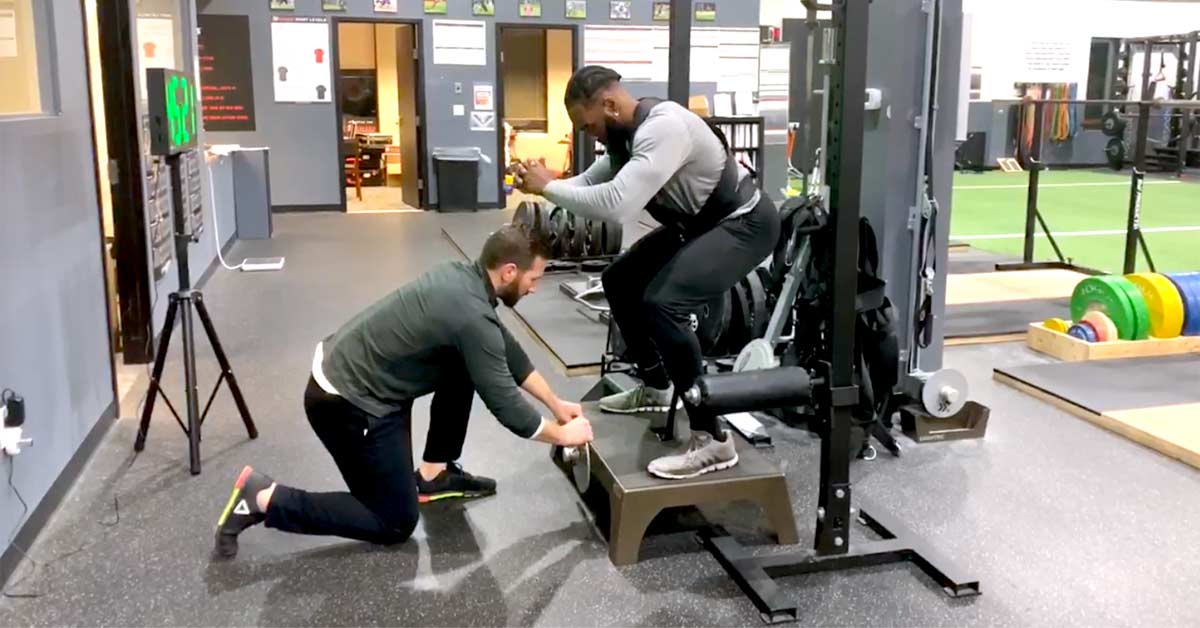
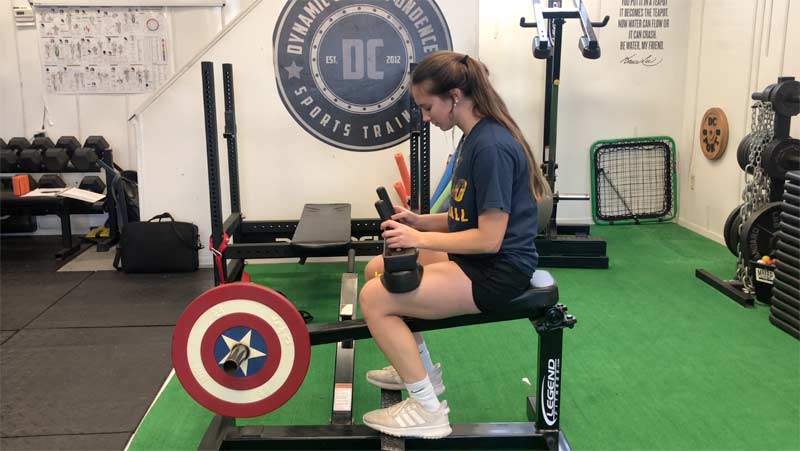
Video 1. Exotic rep schemes are not required for programming seated calf raises, just make sure you are committed to adding them into your training. All it takes is a few minutes a week to reap benefits, so it’s one of the best bang-for-your-buck exercises even if it is an isolation movement.
When performing this movement, I used to think of it as an accessory exercise to do at the end of the workout, if at all. I found out, much by happenstance, that it is actually quite effective when done before squats and other major exercises. I have always had tight calves and an impatient disposition.
I used to treat the seated calf raise as an accessory exercise to do at the end of a workout, but I found that it’s quite effective done before squats and other major exercises, says @jbryanmann. Share on XI have been training at a commercial gym, due to childcare needs, and often have to wait for someone to do their dancing combined with curls and ab wheel rollouts in the squat rack before I can squat. Being impatient, I thought I’d do some exercises that wouldn’t affect my squat but would still let me finish my workout in time to shower and get my kids. I started doing the seated calf raise while waiting because no one was ever using that machine.
Lo and behold! My squats felt much more comfortable and looked better, and I squatted deeper than when I didn’t do seated calf raises before squats. There is a marked difference on the days when I’ve tried to not do them before squatting and the days I have done them. For me, anecdotally, this has led to reduced knee pain and feeling more solid under the barbell. This may be an enhancement of motor control through the sequencing of the exercises, but I possess no actual data to corroborate this statement.
Make the Accessory a Priority in Your Programming
As a strength and conditioning coach, I used to think that some things were unnecessary, and I know many other S&C coaches who think the same way. I remember saying earlier in my career that the biceps brachii were also like the appendix, great to have but unnecessary, as you have other things that flex the elbow. I now know the error of that statement.
I think that, all too often, we want to make statements or decisions to show how smart we are—how we are smart enough to buck conventionality and show we know more than the architects of the human body. Unfortunately, I think that we often find this to not be the case.
Through teaching anatomy and kinesiology, I have made myself reevaluate my views on how the human body functions. It almost seems to me that we should go through another round of teaching these classes once our viewpoint evolves after spending time as professionals. We would have a greater context, and we could change the way we program based on good information rather than the rhetoric thrown around at the bar (both the weight room and the pub).
Since you’re here…
…we have a small favor to ask. More people are reading SimpliFaster than ever, and each week we bring you compelling content from coaches, sport scientists, and physiotherapists who are devoted to building better athletes. Please take a moment to share the articles on social media, engage the authors with questions and comments below, and link to articles when appropriate if you have a blog or participate on forums of related topics. — SF
References
1. Dorn, T.W., Schache, A. G., and Pandy, M.G. “Muscular strategy shift in human running: dependence of running speed on hip and ankle muscle performance.” The Journal of Experimental Biology. 2012; 215(11); 1944–1956.
2. Neumann, D.A. (2010). Kinesiology of the Musculoskeletal System: Foundations for Rehabilitation. Mosby/Elsevier.
3. Elias, J.J., Faust, A.F., Chu, Y.-H., Chao, E.Y., and Cosgarea, A.J. “The Soleus Muscle Acts as an Agonist for the Anterior Cruciate Ligament: An in Vitro Experimental Study.” The American Journal of Sports Medicine. 2003; 31(2): 241–246.
4. Fleming, B.C., Renstrom, P.A., Ohlen,G., Johnson, R.J., Peura, G.D., Beynnon, B.D., and Badger, G.J. “The gastrocnemius muscle is an antagonist of the anterior cruciate ligament.” Journal of Orthopaedic Research. 2001; 19(6): 1178–1184.
5. Mokhtarzadeh, H., Yeow, C.H., Hong Goh, J.C., Oetomo, D., Malekipour, F., and Lee, P.V. “Contributions of the Soleus and Gastrocnemius muscles to the anterior cruciate ligament loading during single-leg landing.” Journal of Biomechanics. 2013; 46(11): 1913–1920.
6. Myer, G.D., Ford, K.R., Khoury, J., Succop, P., and Hewett, T.E. “Development and Validation of a Clinic-Based Prediction Tool to Identify Female Athletes at High Risk for Anterior Cruciate Ligament Injury.” The American Journal of Sports Medicine. 2010; 38(10): 2025–2033.


 Kim Goss was a strength coach for the U.S. Air Force Academy and has a master’s degree in human movement.