I’ve shared my squat progression at clinics and on social media many times. Inevitably, there is always a coach in the crowd who wants to debate the validity of my exercise selection or correct my ignorance with a more efficient teaching method.
Awesome. Question everything and be as pragmatic as possible. But never forget that athletes are complex organisms in a complex environment; they are not math problems with definitive solutions. There is no such thing as a perfect exercise selection or an infallible training progression. As coaches, all we can do is use our previous experiences to guide our decision-making.
Never forget that athletes are complex organisms in a complex environment, not math problems with definitive solutions, says @CoachAlanBishop. Share on XMy squat progression is the result of years of shaving away the things that don’t work (for me), expanding upon the things that do work (for me), and taking great pride in technical proficiency.
The progression is simple, and every newcomer in my program goes through it.*
- Hands-Free Cyclist Squat
- Hands-Free Front Squat
- Front Squat
- Back Squat
*An athlete’s injury history or structural limitations may dictate a regression, but there is not enough ink on the planet to cover every hypothetical scenario in this article. For the sake of argument, this article assumes a healthy athlete actively trying to master the exercises.
Essential Context on This Progression
To offer insights into this progression, consider three variables in my decision-making:
The first is that I work with team sport athletes. I do not work with strength specialists such as weightlifters or powerlifters. Team sport athletes can be classified as strength generalists, relying on resistance training as a means to saturate athletic attributes necessary for sport.
Because my athletes are strength generalists, many exercises are completely novel to them. In order to progress these exercises, we must address three components:
- Mobility to get into positions
- Skill to perform exercise
- Stability to add load
The second thing to consider is that, in my opinion, “full range” training is more ideal than partial rep training for long-term athletic development. A mistake I see with strength coaches is progressing beginner and intermediate lifters to partial rep training too soon. Newbie gains are rarely anything more than improvements in neuromuscular coordination. Intermediate gains are best achieved by applying progressive overload to proficient movement patterns. Many strength generalist athletes never advance beyond being classified as intermediate level.
So, yes, research absolutely supports restricting range of motion to increase joint angle specific strength adaptations, but research also suggests that crucial architectural and mechanical muscle adaptations are dependent on the range of motion used in training. For the strength generalist, I believe partial ROM training should be reserved for later stages in training. We should not deprive beginner and intermediate lifters of long-term progress by putting them on advanced training protocols too quickly.
We shouldn’t deprive beginner and intermediate lifters of long-term progress by putting them on advanced training protocols too quickly, says @CoachAlanBishop. Share on XOne final thing to consider in the partial-range versus full-range training debate:
Any athlete capable of full squatting 400 pounds will possess the capacity to quarter squat 500 pounds. Not every athlete capable of quarter squatting 500 pounds will possess the capacity to full squat 400 pounds.
Chase your rabbits wisely.
The third variable is that I utilize an Olympic-style squatting technique with my athletes. The full spectrum of reasons for this style of squatting would require a separate article, but the Cliff Notes version of why I prefer this style of squatting is that:
- Many athletes compensate for long limbs, or ankle immobility, by becoming low back dominant squatters. This puts the low back in a compromised position. Full squats can correct chronic compensations.
- Olympic-style squatting requires the knees to drive out over the toes in the bottom position with the hamstrings covering the calves and the torso in a vertically upright posture. The legs, not the low back, get the most work.
- This style of squatting engages all heads of the quadriceps to varying degrees through the entirety of the range of motion. This prevents the structural imbalance of overdevelopment of any head relative to the others.
- Because it is a “full range” exercise, it acts as a natural safeguard for the weight selected.
- I believe the proprioceptive qualities on display during this style of squatting are second to none.
Coach’s Notes:
The NCAA allows us eight weeks of training in the summer to work with our athletes. This is the first chance I get to work with my newcomers, and the progression I utilize takes this into account.
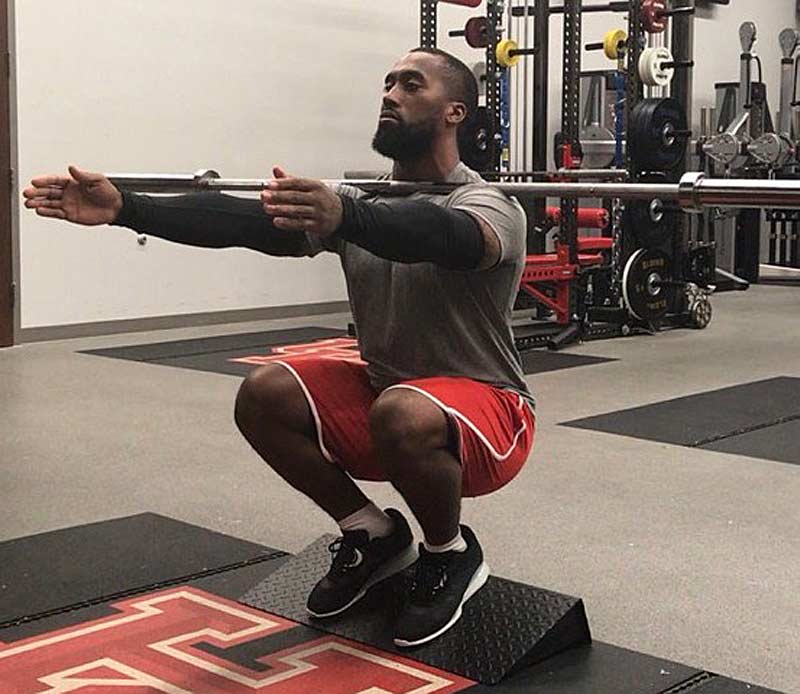
Hands-Free Cyclist Squat
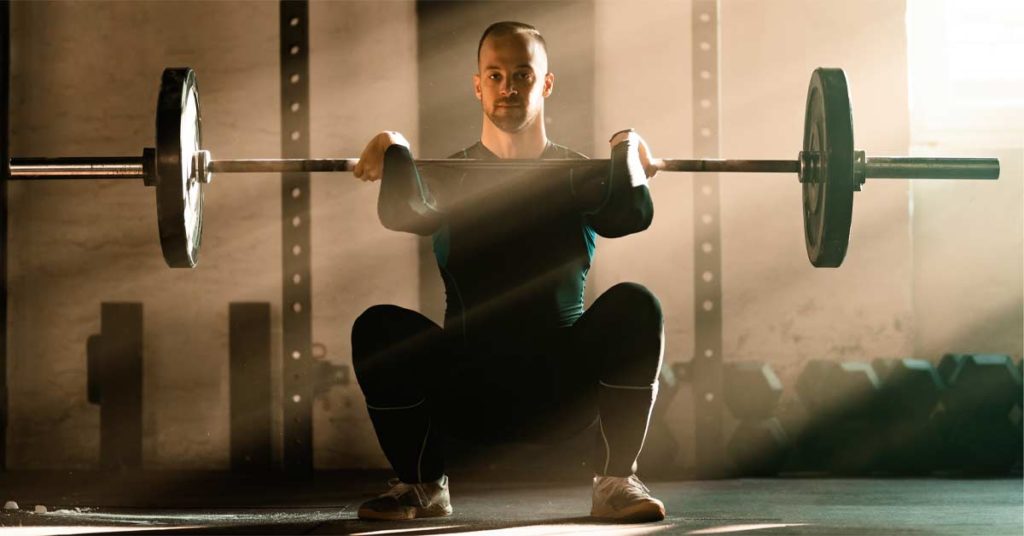
The hands-free cyclist squat (HFCS) is a narrow-stance squat variation with the heels 4-6 inches off the ground, maintaining 4-5 inches of space between the insides of the shoes. It is initiated by driving the knees forward and hips straight down while maintaining a vertical torso position. The goal is to completely close off the knee joint until the hamstrings are covering the calves.
I start with the hands-free cyclist squat for two reasons. The first is that I believe it is the best exercise for learning the skill of deep knee bending with a leg-dominant (not low back-dominant) squat. The second is that a hands-free bar position provides immediate feedback with the bar dropping as soon as the torso begins to lean forward.
I’ve worked with many Division 1 players over the years, and a common issue I continually see is that the lack of mobility to get into the bottom position is due to a lack of skill at deep knee bending, not structural damages. Essentially, athletes don’t have the mobility to get into position because they’ve never been asked to display or develop it, not because of injuries that need to be worked around. This lack of mobility and skill inhibits the ability to develop the stability necessary to add load through a full range.
Nevertheless, many coaches still opt to work around these mobility limitations and find exercises to start loading immediately. However, in my experience taking a few weeks to teach the skill of squatting will elicit greater long-term results, especially as the athletes move into an intermediate-level training age.
I typically allot two weeks to achieve proficiency in the HFCS. During these two weeks we train the HFCS twice a week for 4-6 sets of 6-8 reps on a 4111 tempo. Neuromuscular coordination and exercise competency are the training effects I am chasing during these two weeks.
Very Important Side Note: It is critical to have the right equipment. You will need a squat wedge to properly do cyclist squats. There are many variations of squat wedges on the market, but I have had the best success with the 20 Degree Prime Fitness Squat Wedge. It is built to last with a lifetime warranty, but it is also versatile. If not using it for cyclist squats, athletes can move their heel to the bottom 1 inch of the wedge to mimic an Olympic weightlifting shoe during other squat variations.
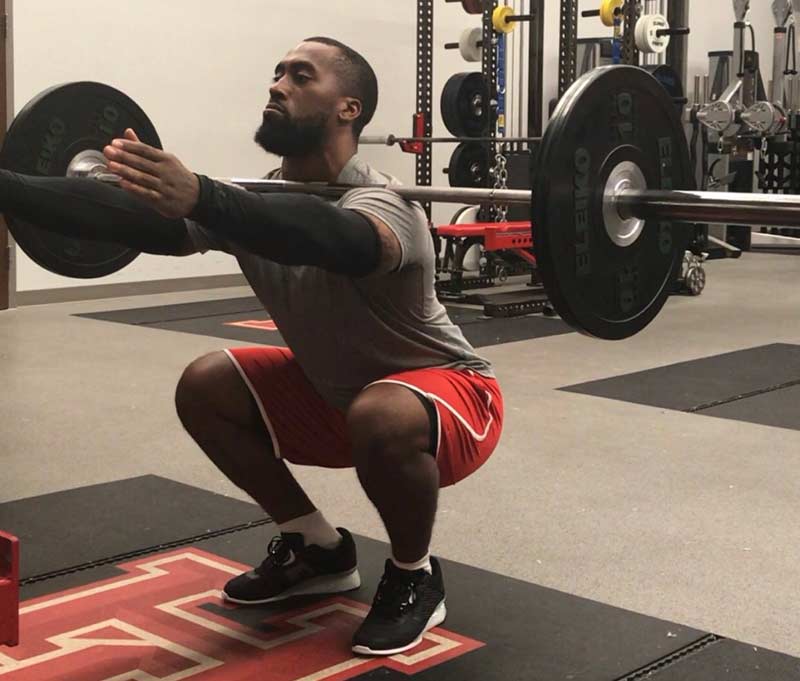
Hands-Free Front Squat
The next exercise in the progression is the hands-free front squat (HFFS). This exercise again serves as a teaching tool where the desired adaptation is neuromuscular coordination and exercise competency.
If the HFCS did its job, the athlete should understand the vertical torso position and using the legs, not the low back, to load and drive out of the bottom of the squat. The HFFS further reinforces this technique, but with the feet flat on the floor. This is important because it sets us up to add load to the exercise in the front squat phase of the progression.
Spending a few more weeks teaching a hands-free position usually solves the problems of athletes trying to support the bar with their hands, and instead reinforces the technique of supporting the bar on the shoulders while maintaining the elbows above the bar.
An important note during this progression is that I am an advocate of squatting in Olympic weightlifting shoes. If these shoes are available to the athletes, we typically forego squat wedges after HFCS and begin using the Olympic shoes only at the HFFS point of the progression. If the shoes are not available to the athletes, I give the athletes the option of placing their heels 1 inch up the 20-degree squat wedge to mimic the effect of an Olympic weightlifting shoe. There is not a winner in the “wedge vs. shoe” debate for squatting—both work great. I’ve had athletes go entire collegiate careers using the heel on the wedge with great results.
Like the HFCS, I typically allot two weeks of twice-a-week squatting to the HFFS portion of the teaching progression. Sets, reps, and tempos remain unchanged, but I allow the athlete to add a little bit of weight during these two weeks if technique allows it. Rarely will we go above 40-50 kgs during this time.
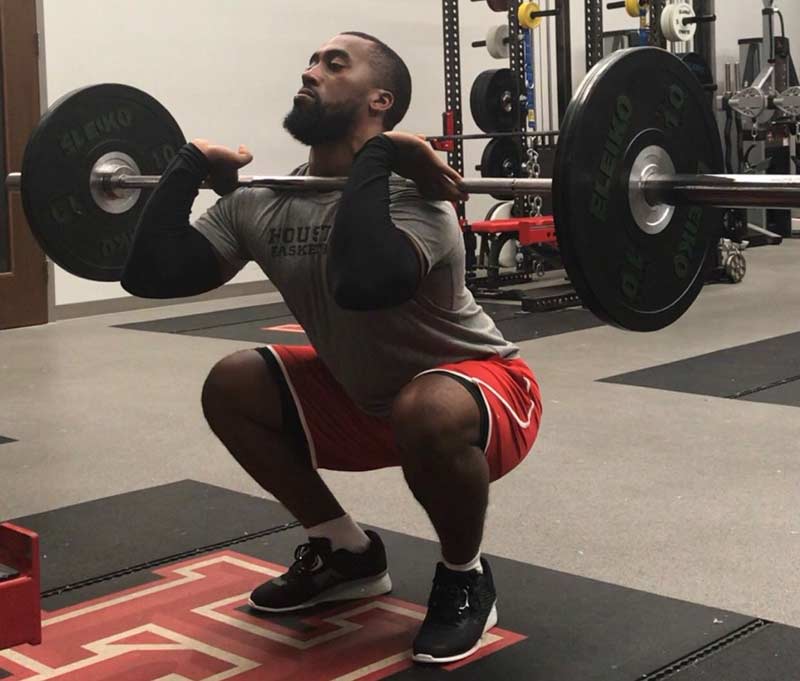
Front Squats
This is the phase of the progression where we truly begin to load the squat. Four weeks of teaching movement efficiency and neuromuscular coordination of a novel squatting style will begin to pay off. However, with only four weeks of true “full range” squatting completed, there are still safeguards that you must take to protect the athlete. Nobody cares about setting PRs in week 5. The goal is to master the movement so we can continue progressive overload at weeks 35, 105, and 205.
Many consider the front squat to be safer than the back squat, myself included. A reason for this is that the bar can be dumped at any time when technical failure occurs. Another reason is that, due to the biomechanics of the lift, significantly more weight can be used during the back squat than the front squat. This acts as a natural regulator of load and allows us to apply enough stimulus to elicit results with lighter loads in the front squat than we can get in the back squat.
Anecdotally, another reason I prefer the front squat is that improvements in front squat numbers have corresponded really well with improvements in standing vertical jump numbers with my athletes over the years. As an athlete’s training age gets more advanced, other techniques may help peak jumping power, but front squats are a very efficient exercise you can implement for a long time and keep getting results.
Progressive overload methods will start becoming more important during this phase of training, but the goal is still to maintain rep integrity with range of motion and technical proficiency. When those two things are accounted for, increased load will always follow. When excessive load is emphasized too early, range of motion and technique become compromised. At this point, weight room injuries become inevitable.
The front squat is a great exercise to introduce progressive overload because cheating technique is really difficult to do, says @CoachAlanBishop. Share on XI believe it was Christian Thibaudeau who said, “show me a man who constantly cheats technique, and I will show you a man with joint problems.” The front squat is a great exercise to introduce progressive overload because cheating technique is really difficult to do.
This part of the progression can last anywhere from 4-12 weeks or longer, depending on how the calendar looks for the teams you’re training. I’ve found that straight sets and ascending sets work really well here, and there isn’t really a need to get too zesty with set and rep protocols.
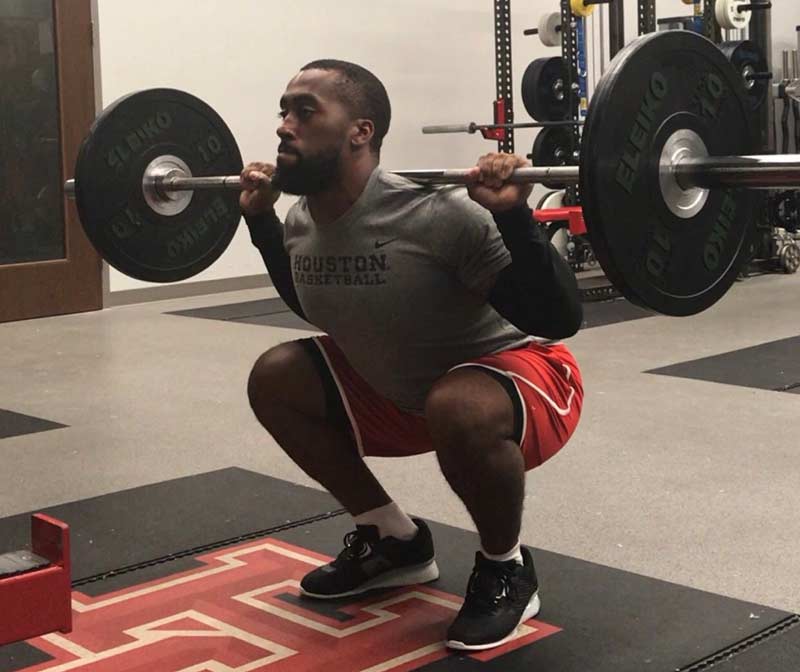
Back Squats
Properly progressed and strategically overloaded, back squats are a great tool for building robust athletes. More weight can be utilized in the back squat than the front squat, making it an excellent tool for manipulating stress to saturate attributes such as strength, speed, and power.
There are many styles of back squatting, but I teach a high bar Olympic-style squat. I want my athletes to maintain the same depth on a back squat as they do on a front squat. Remember, the goal is still covering the calves with the hamstrings, not getting three white lights in a powerlifting competition by getting to parallel. Parallel is an arbitrary standard, and a partial range of motion exercise, whereas closing off the knee joint maintains the same benefits written about earlier in the front squat.
Much like the front squat phase of the progression, rep integrity and range of motion remain critical, but progressive overload is the name of the game for back squatting. This is the phase of the progression where we can start getting a little zestier with our set and rep schemes.
A few of my favorite loading schemes are wave loading and clusters. In fact, I really like using three-week blocks of wave loading to establish the rep maxes I will be using during the next three-week block of clusters. While you can obviously do this with front squats, remember that we are working with strength generalists. Changing the modality of stress application serves as a good way to prevent plateau.
A final contextual piece of why I use back squats at this point in the progression is that there are still other squat modalities I will implement during the year, including the Hatfield squat. Back squats serve as a good segue into Hatfield squats, which can be loaded supramaximally relative to the back squat due to the hand placement helping guide the athlete through sticking points.
Closing Thoughts on Squat Progressions and the Craft
This progression is not an exact script for you to follow, but instead it provides insights into what another coach has used with success. The biggest key to my squat progression is an unwavering refusal to deviate from my standard. Many roads lead to Rome, and my Rome is a full-depth Olympic-style squat. If that isn’t your goal, this isn’t the right progression for you, and that’s okay.
The biggest key to my squat progression is an unwavering refusal to deviate from my standard. Many roads lead to Rome, and my Rome is a full-depth Olympic-style squat, says @CoachAlanBishop. Share on XLike I said earlier, there isn’t a perfect way to select exercises or an infallible progression to use. Squatting isn’t a zero-sum game, but this progression has worked really well for me. Whether you choose to implement it or not, be the best in the world at what you choose to do, hold your athletes to a high standard, and coach your face off every rep.
Since you’re here…
…we have a small favor to ask. More people are reading SimpliFaster than ever, and each week we bring you compelling content from coaches, sport scientists, and physiotherapists who are devoted to building better athletes. Please take a moment to share the articles on social media, engage the authors with questions and comments below, and link to articles when appropriate if you have a blog or participate on forums of related topics. — SF