• Skip to content
  • Skip to primary sidebar
SimpliFaster

SimpliFaster

cart

Top Header Element

  • Facebook
  • Instagram
  • Twitter
  • YouTube
  • Login
  • cartCart
  • (925) 461-5990
  • Shop
  • Request a Quote
  • Blog
  • Buyer’s Guide
  • Freelap Friday Five
  • Podcast
  • Job Board
    • Candidate
    • Employer
    • Facebook
    • Instagram
    • Twitter
    • YouTube
You are here: Home / Blog

Blog

Sprint Coach Regrets

Regrets of a Sprint Coach (and 3 Things I’m Doing to Fix Them)

Blog| ByGraham Eaton

Sprint Coach Regrets

Years ago, I took on the role of sprint coach at Triton Regional High in the small town of Byfield, Massachusetts. I had volunteered sparingly the year before and enjoyed it enough to give it a real try. Four years removed from competing collegiately in the 400m, I came in armed and ready to go. Unbeknownst to me, my grasp on training and athletic development concepts was tenuous at best—true “unconscious incompetence.”

It’s funny how inheriting a fairly talent-laden squad can disguise the truth: My athletes were succeeding in spite of me. However, I’d like to think that my heart was in the right place and I tried my best to maintain good relationships with the athletes during these “new days.” At the end of the day, some school records were set and some individual championships were won, but I can now say that I was standing still as a coach.

I read sparingly on issues related to training and my use of speed work was something to be desired. I was giving workouts, but not developing athletes. These are two very different things. Soon, the athletes with some talent who I had inherited were seniors and the thought crept in that, while I was doing okay, these kids deserved even better. Looking back on it now, I often have a severe case of the “what-might-have-beens.” They say that you coach what you know, and what I knew was not always applicable to 14- to 18-year-olds.

I was giving workouts, but not developing athletes. These are two very different things, says @grahamsprints. Share on X

There was soon a dearth of raw talent, and for whatever reason, a mass exodus of male multi-sport athletes. The “cats” had, in effect, gone away. Every once in a while, I heard a voice in my head asking, “Did you have something to do with that?” If I am honest with myself, I don’t know. Maybe. That “maybe” is all I need.

I know that training could have been more fun and I could have gotten out of the way more. So I did what I had done throughout my entire childhood—I read. I tried to understand energy systems at play in the sprinting events. I purchased programs from coaches who had forgotten more than I knew. I stumbled across blogs and read the musings of other coaches who seemed far more honest with themselves than I had ever been. I got back into doing sprint drills and plyometrics myself.

Since then, I have been slowly adding pieces to our sprints program in a way that makes sense without overwhelming myself or the athletes. Four years into my own paradigm shift, I think I have read enough to move the stage-of-learning needle to “conscious incompetence.” I know that I know nothing and years from now I’ll hopefully know something. Author Pam Allyn says: “Reading is like breathing. Writing is like breathing out.” After lots of reading, it is time to breathe out. Here are three changes that I am currently working through.

The Warm-Up

I post a lot of our warm-up drills on our Triton Sprints Twitter page. I want the kids to be proud of their athletic development. I am hard on them, but the reality is that they move better than I did at their age. One of my college coaches once referred to me as a “biomechanical nightmare,” and he wasn’t wrong.

My thinking used to be that the warm-up was just that: A chance to increase body temperature before we got to the real meat and potatoes—the workout. But the thing with “biomechanical nightmares” is that they can still be fast. Their limbs may fly all over the place, their arms may cross the midline, and they may exhibit knock-knees with every jump, but they are still fast. Accepting this fact presents as lazy.

Speed in the presence of this dysfunction is something that makes me nervous because I don’t think it is sustainable over time and it leaves seconds on the track. I never want to assume that puberty and maturation will fix the issues. Our warm-ups typically start with 90/90 or alligator breathing—roughly two minutes for athletes to pause and hit reset on their day. I don’t always know everything that went on in their day, but I do hope that track practice is a chance for them to deal with it in at least one way.

We usually go into dynamic stretches/drills after that and then sprint drills. I am blessed yearly with terrific captains and this year is no different. They take charge and, for the most part, move extremely well. We have five different warm-ups employed for different types of workouts. It seems excessive, but I work under the assumption that they forget everything once the next week comes along.

I treat warm-ups like an audition. Who is focused? Tired? Who does something they couldn’t before? says @grahamsprints Share on X

Acceleration days feature sprint drills that focus on pushing; max velocity days have a cycling- and posture-centered theme with small ground contact times. Lactate days focus on more of a technical buildup. On circuit days, I try to back off and let the captains decide. I treat the warm-ups like an audition. Who seems focused? Who looks tired and like they have regressed? Who can do something that they previously couldn’t? I think we try to keep the intent on everything high. Some days our warm-ups are longer than the speed workout itself. At this age, skill acquisition matters more than working out.

Triton Warm Up
Image 1. Warming up for sprinting sometimes means drills or teaching movement or the ability to control various conditions or tasks. Coaches should think about what works for their own circumstances and not just stick to tradition or copying others without brainstorming the purpose.


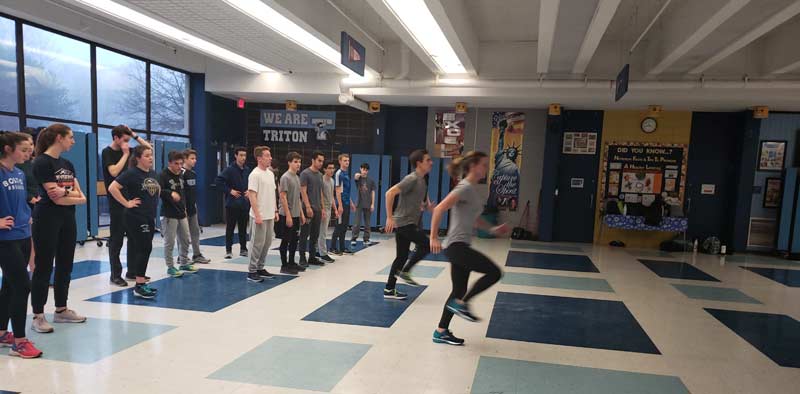
We have two lines, one behind another. I have a captain demonstrate everything and the group gives them a round of applause because athletic development is a cause for celebration. I typically follow up with an incorrect demonstration. Another captain is then called out and demonstrates it again. It can be high pressure, but they always rise to the occasion—this transcends the sport, and matters in real life.

Line one goes. I offer my critique of line one to line two, which is usually comprised of underclassmen. Sometimes they get it and sometimes they don’t, and I can live with that because it’s part of the process. There isn’t time to do this on every drill, but deciding which ones are important to you as a coach and then coaching the heck out of them is a good place to start.

Decide which drills are important to you as a coach, and then coach the heck out of them, says @grahamsprints. Share on X

The group warm-ups serve as a chance for everyone to work together on drills to promote the movements that pertain to the context of the day’s theme. The general strength created through these warm-ups is underrated, especially for the athletes who have never done a sport before. If they couldn’t A-march in December and they can in February, they got stronger. As Dr. Ken Clark says, “If you can’t hold this position isometrically, you can’t do it dynamically.”

The warm-up is also a chance for me to hit reset after completing my day at the elementary school just 15 minutes away. I get to practice the cues and language, and shine up the figurative language that will no doubt be abundant in the workout of the day. The use of specific language and cues makes the athletes more coachable over time. Give them options. I usually end with a challenging drill predicated on a bit of “violence” to see who is connecting the dots between everything.

After nine years, I can say that I am finally developing athletes. I take pride when a freshman improves from 8.0 to 7.5 in the 55m in two months, and looks exponentially better doing it. With consistent training, there will be a place for him one day on our team to compete in some event.

Timing Speed Training

People say speed is the hardest biomotor quality to train and they aren’t lying. I used to believe that speed was largely either something you had or something you didn’t. A few years ago, I stumbled across Tony Holler and the “Feed the Cats” mentality. I was intrigued instantly, but didn’t dive in entirely. I didn’t have a timing system, so I was running flys and accelerations for years without feedback. They were flys alright, but they lacked purpose and competitiveness.

#Feedback ensures that improvements are quantifiable long before meet day approaches, says @grahamsprints. Share on X

People talk down about today’s kids, but most of them like being timed and they like knowing they are getting better even more. Improvements are now quantifiable long before meet day approaches. Having to perform in practice almost daily is (slowly) making meets somewhat commonplace. We often use hallways (still no shin splint bug) and have only sneakers on, but the intent is there until we are graced by sunny weather. They are used to competing long before the starter’s gun fires.

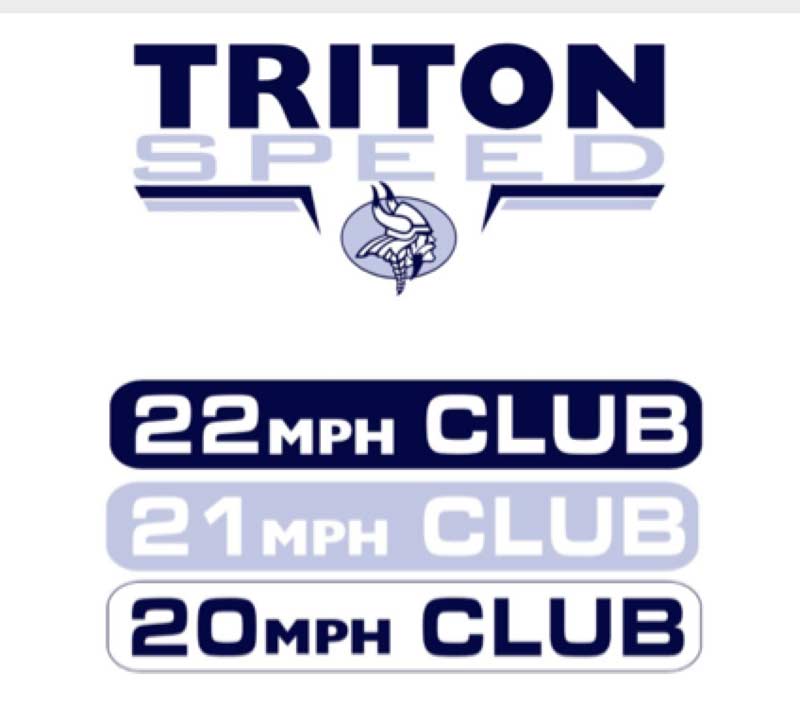
I wish I had done more of this when I started. I think most of the athletes I coach now know roughly what 10m time they need to enter or move up from their current “mph club.” T-shirts have been ordered (thanks to The Medina Bees Track and Field Twitter page for the great idea). I hope they continue to strive and feel a sense of pride as they earn their shirts. I don’t care what anyone says: Being fast is cool, and the rest of the student body needs to know about their hard work. Moreover, speed is the greatest indicator of success in any track and field event, and in all sports.

Triton Speed Club
Image 2. Converting splits or times into velocity motivates athletes and also markets the team program externally. Time athletes each year and get shirts printed to help sell speed. (Thanks to the Medina Bees Track and Field Twitter page for the idea.)


I have become intrigued with the math behind the speed. Take a look at the data below.

Avg. Speed
22 second 200m= 20.33 mph
23 second 200m= 19.45 mph
26 second 200m= 17.21 mph
27 second 200m= 16.57 mph
50 second 400m= 17.9 mph
55 second 400m= 16.3 mph
60 second 400m= 14.9 mph

These are the average speeds needed to hit certain times in the 200m and 400m dashes. Just take the race length in meters and divide by the time. Then multiply that number (meters per second) by 2.237 (1 m/s = 2.237). I am recording each athlete’s personal bests in their events this year and comparing them to see if there is a range of how many mph you need to be above your event goal time to actually hit that time.

For example, our best 55m female this year has run 7.54 seconds (16.32 mph average) but has hit 19.28. This is a difference of almost 3 mph from her 55m race average. Our best 300m male has run 36.45 (18.41 mph) in the 300m dash. He has a peak mph of 21.10 mph in practice (granted, sneakers in a hallway isn’t the best testing condition). That leaves a speed reserve of about 2.5 mph.

Regardless, the speed has raised their respective ceilings. Exploring this further could help identify obvious deficiencies in certain training blocks. If there is a female who can run 19 mph but struggles to break 60 seconds (14.9 mph) in a 400m outdoors, that is something to be reflected upon. Why can’t she do it? Fear? (Not everyone can take themselves to the dark place.) Poor race model? Subpar performance on lactate workouts (again, fear)? Is it possible a minimal amount of aerobic work can help her? Or maybe the 400m was never a goal for her, and deviating from the current training takes her away from becoming great in other events.

If you’re last to the ball, how strong you are or what sport-specific skill you have doesn’t matter, says @grahamsprints. Share on X

I know I will never regret prioritizing speed, especially in the early stages of their career. I hope, in the fall, that the field sport coaches notice their athletes are moving just a bit better and more swiftly. If you are last to the ball, it doesn’t matter how strong you are and what sport-specific skills you have. When it comes to high school athletes and speed training, intent takes the cake over the volume that they do. They have to get there before they can go anywhere.

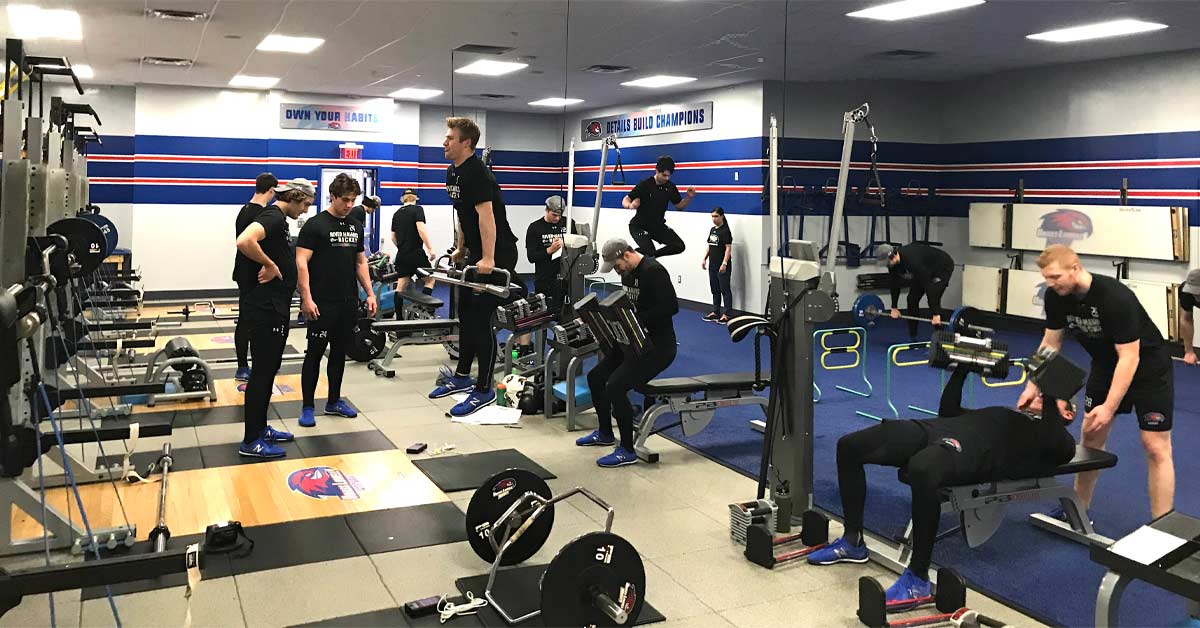
Changing the Weight Room

In college, I lifted like a “bro.” So, for the first several years of my coaching career, I let athletes chase numbers, as football players often like to do. I failed to get them to check their egos and most prescribed exercises were in the hypertrophy rep range. Everyone lifted and it was chaos. I am sure some of them doubled up at their morning lifts.

Things are greatly simplified these days. We do not have many kids capable of lifting huge amounts of weight and that’s fine. Strength is a skill that needs to be developed. If the technique is there, with consistency they will get stronger. At their age, lifting helps posture and speed. After a certain point, I am not sure it continues to do so.

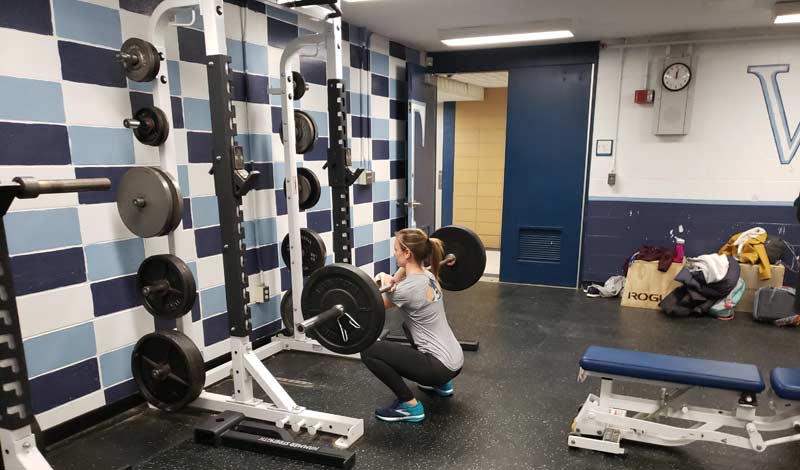
Most freshman don’t lift. First, because we don’t want to add any more to their plate. Second, they are getting stronger through bodyweight and general strength circuits. The weight room coach is actually our throws coach, Katelin Invernizzi. I may be a little biased because she is my fiancée, but she gets them moving better quickly. I read somewhere that sprinters don’t need to have too much mobility. I get that, I really do. We don’t need pliable ballerinas, but in my experience if a kid has a poor front squat technique, his block start is a mess as well. Strength lifting is done on acceleration days. Squat mobility is a focus. Again, the focus is the movement patterns, not the weight.

Strength Training Triton
Image 3. High school strength training shouldn’t be a repeat of what was done on the track, but an extension and reinforcement of the day. Coaches must focus on polishing the basics of getting stronger and maintaining athleticism.


If athletes check their ego and look like they are engaged, I will post them on Twitter. Prep is usually done with Katelin in the middle, cueing them through each drill and fixing technical errors. They are done in 15-20 minutes. On lactate days, they do a giant hypertrophy set, in and out with good technique. Hypertrophy is great for tendons and joints. It’s a slower, less technical day, so the kids can look stronger and listen to music.

The third day of lifting is an introduction to Olympic lifting on max velocity day. It is broken down well and again in a circle, while they are cued through each drill. The last thing we want is to end up on the wrong side of Twitter because a video of one of our athletes doing a back-breaking clean went viral. It is our job to protect them and to develop them.

Let me be clear: Olympic lifting doesn’t supplant sprinting. Our message to our athletes is that the weight room is a support but not the answer. At the end of the day, being able to accelerate and decelerate under a bar is an athletic movement. Improvements here are often best expressed as the athlete being more receptive to cues outside the weight room, and being coachable is a good thing. Plus, it is fun and sometimes fun is a goal. We want our kids to leave Triton knowing how to work out, because working out feels good. Some of them will never run a step again, but options are a wonderful thing to have.

Moving On

Making mistakes is a natural part of the coaching experience. At some point, the things you have always done no longer work. The “adapt or die” mentality is very real. Facing that fact head on is often not an easy task. It’s 2019, and there is a plethora of information available. I can’t imagine not taking advantage of that.

I am a product of every coach I have ever met, says @grahamsprints. Share on X

I am thankful for the programs I have purchased over the years that allowed me to enhance my coaching knowledge. Spending money is a necessary thing to become better at your craft. Connecting with all of the amazing coaches on social media has allowed me to continue to strive to be better for my athletes. I have learned from sprint coaches, distance coaches, sports coaches, CrossFit coaches, bodybuilders, and powerlifters. I am a product of every coach I have ever met.

“Stealing” ideas and making them your own in a way that makes sense to you is what learning is all about. With this variety, I think our program has gotten better even if we don’t set records every week. With consistency, more records will fall soon—I am sure of it—and that cats will come home. After a track practice, I am exhausted and take comfort in knowing that I am slowly rectifying some of my earlier gaffes. Movement quality is king and speed always kills.

Since you’re here…
…we have a small favor to ask. More people are reading SimpliFaster than ever, and each week we bring you compelling content from coaches, sport scientists, and physiotherapists who are devoted to building better athletes. Please take a moment to share the articles on social media, engage the authors with questions and comments below, and link to articles when appropriate if you have a blog or participate on forums of related topics. — SF


Swimmer

Jump Testing, Strength Standards, and Assessment for University Athletes

Freelap Friday Five| ByCraig Turner

Swimmer

Freelap USA: What types of jump testing do you utilize with your athlete populations?

Craig Turner and Nate Brookreson: A staple test utilized between our sports is the countermovement vertical jump assessment. This is performed on a dual force platform using the ForceDecks software (from Vald Performance) and is our primary go-to for jump assessment within our athlete groups. This form of jump has an abundance of supporting research demonstrating good validity and reliability for athlete populations. We utilize this test most frequently with our athletes, due to its ability to analyze different phases in the jump (i.e., eccentric and concentric phase, duration and forces produced). This allows for the identification of several key variables (discussed later) that help us understand both the movement strategy and the performance of maximal jumping efforts in a time-efficient manner (~1 minute per athlete).

We use the countermovement vertical jump assessment the most, as it analyzes different jump phases. Share on X

Most recently we have begun to evaluate the force-velocity characteristics of our athletes in more detail. This method was inspired by the research of Jimenez-Reyes et al (2016). We utilize the countermovement jump test even further by performing additional CMJ repetitions (2 reps) at differing absolute loads (e.g., 20kg, 40kg, and 60kg for a male soccer player; 15kg, 25kg, and 40kg for a female soccer player). This allows us to evaluate the force-velocity relationship with increased external load (i.e., higher force output and lowered velocity).

The choice of absolute loads versus relative loads is due to the linear relationship of force-velocity that we see as these loads increase (see the work of JB Morin or Pierre Samozino for more detail on this topic). One rule is that the athlete must jump >4 inches for that load to be included within the analysis. We can then compare the athlete’s profile to a “predicted optimal profile” to assess which end of the force-velocity curve the athlete needs to work on to further improve jump height.

Differences in jump assessment tools also exist between our sports, which help us delve further into specific qualities that may be relevant for that specific sport. For example, with women’s basketball we assess an approach vertical jump, and a lateral bound and stick. Another example would be within soccer, where we utilize a broad jump and single leg broad jump, given the suggested associations with horizontal force production mechanisms and other athletic qualities such as acceleration. Such tests further represent qualities that are utilized within the sports themselves and provide more specificity to inform our training approach.

Freelap USA: How specifically does working with a wide range of jump types (such as seen in swimming athletes) impact how you view jumping in sport?

Craig Turner and Nate Brookreson: A close examination of the sports we work with currently would be all that’s necessary to formulate an approach to jump training. Therefore, a detailed needs analysis is performed within each of our sports to direct the decision-making process around what jumps are appropriate to monitor these athletes.

For example, notational analysis of basketball reveals that between 40 and 60 maximal jumps occur during competition. So, from the perspective of specific preparation, jump training is necessary and therefore should be formally assessed in the testing setting. Additionally, many injuries associated with women’s basketball, primarily of the ankle and knee variety, require the athlete to land optimally and effectively attenuate force.

When designing the testing battery for women’s basketball, we examine several jump strategies to determine the underlying physical qualities needed for success in the sport. The countermovement jump on the force plates allows us to reliably measure lower body explosive power, as well as determine the force-velocity relationship of the athletes. One-step vertical jump testing is an examination of the transfer of horizontal to vertical force, which is a characteristic of many discrete activities on the basketball court (such as rebounding from the perimeter, jump shooting off the dribble, helping defense, and a one-step layup). The lateral bound and stick looks at the generation of power of the frontal plane and reflects the ability to cover distance in shuffling actions, which make up around a quarter of the movement happening on the court. These jumps all represent unique, discrete actions that occur on the court and are reliable from a test-retest perspective.

While swimming is a sport that has unique physical and kinematic properties, testing still needs to be reliable and sensitive to change (explained below). The goal of any testing is to inform the athlete and coach about actual changes in performance. Therefore, we utilize squat and countermovement jump testing with our swim population.

The goal of any testing is to inform the athlete and coach about actual changes in performance. Share on X

The start and walls represent a greater relative proportion of the race at the collegiate level due to swimming in a short course yards (SCY) pool rather than the long course meters (LCM) events seen in the Olympics. Additionally, research has examined the relationship between countermovement jump variables and sprint performance, with several reporting a correlation between lower body explosive power in a CMJ and start performance (Carvahlo et al., 2017; Maglischo et al., 2003). While some argue that the kinetics of the start are more complex than a CM or squat jump (Benjanuvatra et al., 2007), CM and squat jumps have similar loading strategies and lower limb contribution characteristics. In the future, it would be beneficial to examine the transfer of jump monitoring to specific event performance, particularly in the collegiate SCY population.

Freelap USA: What daily, weekly, or monthly markers do you assess in your sports to measure progress?

Craig Turner and Nate Brookreson: A brief overview of some of the variables we utilize in our feedback approach are outlined below:

Daily/Weekly:

The CMJ test is typically utilized 1-2 times weekly within most of our sports. This test not only gives us a measure for jump performance improvement, but also a representation of athlete readiness (i.e., is the athletes performance declining or are movement strategies changing due to fatigue, etc.). Table 1 shows a breakdown of some of the key performance indicators and how we use them.

Table 1. Overview of Countermovement Jump Testing Measures and Assessment Strategies Utilized.
Variable How It’s Measured How We Use It
Jump Height (cm/inches) Estimated from flight time. Provides insight into overall physical jump performance. Primary feedback mechanism for athletes (due to ease of understanding).
Relative Peak Power (N/kg) Highest power achieved during the jump relative to body weight. To assess overall power improvements, individualized to the athlete’s weight. Secondary feedback mechanism for athletes (to compare with peers).
Concentric Impulse (Ns) Total force exerted in the concentric phase multiplied by time taken. Provides information to assess the concentric phase of the jump and how this influences jump performance.
Force @ Zero Velocity (N) Force exerted at concentric phase onset (i.e., velocity is at zero). Lowered force output may represent diminished neuromuscular function (a means of monitoring fatigue). Targeted strength training may also look to improve force generating qualities, reflected in higher F@0 output.
Eccentric Duration (s) Duration of the eccentric phase in seconds. May represent a change in movement mechanics (i.e., a longer eccentric/ concentric phase), which may provide insights into fatigue and jump strategy utilized.
Concentric Duration (s) Duration of the concentric phase in seconds.

Table 1. A breakdown of some of the key performance indicators the countermovement jump test measures for, and how we use them.

Monthly/Seasonal:

We use our other jump-based tests more periodically as part of the sports testing battery to assess the outcomes of different time points during the collegiate-athlete calendar. Typically, we observe a pre-season start and pre-season end measure, as well as a mid-season and post-season measure (when appropriate). For certain athletes (i.e., those on specific development programs), these measures are used more routinely in relation to the periodized strategy (e.g., pre-mid-post six-week training block within off-season). Additionally, these measures are utilized routinely within our return to sport protocols when an athlete is progressing back from injury. These tests shape some of the athlete criteria needed to inform progressions to more speed- and conditioning-based (specific to the sport) tests.

We utilize the analytical approach described below to assess each athlete’s progressions within these specific tests. This approach is a framework to monitor our athletes.

Step 1: Familiarization

First, we look to understand the specific measurement within the population. When first testing, we look to conduct a series of repetitions (generally 3-6) for the given test. We then look to evaluate the athlete’s coefficient of variation (standard deviation/mean = CV%) for the given test measure. This gives us a quick representation of how that athlete varies within the test. We can also assess whether they are getting better at the test as a result of a “warm-up effect” (e.g., jump height increases with the number of repetitions completed), or if their strategy has large variations, potentially indicating a lack of familiarity or some external factors influencing the test (e.g., fatigue/motivation).

Generally speaking, it is typically the former with our athlete populations, as jump tests (such as the CMJ and broad jump) are commonly used in the training process and learning effects are typically small. In the case that we see a “warm-up effect” and the athlete keeps getting better across the repetitions and hits their highest jump on the final rep (within our performance testing battery we generally cap it at three repetitions due to time constraints), we then either:

1)   Add reps until jump height plateaus; or

2)   Look to modify this athlete’s warm-up strategy so that peak jump height is hit within the desired three-repetition range.

Step 2: Understanding Noise

Think of “noise” as the measurement error of the test. When things become noisier, it becomes increasingly difficult to hear what is going on. So, as the word implies, more noise = more error, and more error makes our lives more difficult when interpreting testing data—especially when we are attempting to judge if an athlete has improved or not (i.e., understanding a real change by separating that change from the test error). Therefore, it is important to try and understand what the “noise” of the test we are employing is. This means we need to understand where noise comes from and then quantify it.

A test’s measurement error is ‘noise.’ We need to understand where noise comes from and quantify it. Share on X

One way of understanding the test noise is to measure an athlete multiple times over a period of time when we don’t expect this athlete’s performance to change. For this, we typically use 4-6 testing occasions within the first 14 days of a training program (though others have suggested using more test occasions), as this is what is practical for us to complete. Then we calculate the within-subject standard deviation (this can be easily calculated in programs like Excel). This value would represent the noise.

We may not always get the opportunity to perform multiple tests, so therefore we also have another way of calculating the test noise. Here we look to conduct a “reliability” type study with our athletes. Ideally, you want to conduct the reliability study over the time length that you’re going to be utilizing, though this may not always be feasible for tests performed several weeks apart. Therefore, we typically conduct two tests separated by a period of seven days (conducted the same time of day within the training week following an off day).

We use such a selection because no major performance improvements should be shown within this period and other influences (e.g., fatigue) should be limited due to the preceding off day. This allows us to begin to understand potential “noise” associated with the test metrics. This begins to examine the reliability associated with these measures, which becomes a useful source of information for our further monitoring in subsequent tests.

Example:

We conducted a baseline jump test (CMJ) at the start of the pre-season with a group of athletes utilizing a force plate. We then conducted the same test seven days later following a day off. From this data, we can calculate the jump height and then the difference between these two test scores. In a perfect world, there would be no difference between these tests as athletes shouldn’t have had any performance improvements.

However, when it comes to athlete testing, perfect is a rare commodity. Unfortunately, there will likely be variation in the measurement. This typically comes from two sources:

1)   Technical error of the measurement device (i.e., the calculations used to estimate jump height from the force plate and software).

2)   Biological variation induced by the athlete (causing natural day-to-day fluctuations in the measurement).

Luckily, we can use programs like Microsoft Excel and helpful statistical spreadsheets to calculate the amount of this variation (see Will Hopkins’ Sportsci.org for resources). Simply, we can calculate the difference score for each athlete (Day 2 minus Day 1), then the standard deviation (SD) of these difference scores (known as the between-subject SD of differences), then divide this number by the square root of 2 (as we have two testing days). This calculation then provides us with our “standard error of measurement,” which can also be referred to as “typical error” (i.e., the typical error we would likely expect from the test).

Equation 1: Typical error = standard deviation of difference scores / √(2)

Standard Error Measurement
Figure 1. Calculating the “standard error of measurement,” or “typical error.” Because this error shows as approximately 1 cm, if an athlete improves by 0.5 cm we can’t be sure that any real improvement has occurred.


Within our example for jump height, we calculated this error as approximately 1 cm (0.96 rounded up) in raw units. So, if one of the athlete improves by 0.5 cm (a value that is less than the test noise), we are less confident that a real improvement has occurred. This is because of the measurement error. This allows us to accept the uncertainty around some of our measures and it can be performed on any of the variables collected. Simply put, not every performance change is a real change.

Simply put, not every performance change is a real improvement. Share on X

Step 3: Understanding a Practical Important Change

Within all our tests, what we are really interested in is the smallest improvement that influences performance. There are two main methods that we can utilize to calculate thresholds that represent this practically important change. One method is referred to as the “minimal clinically important difference.” For this, we can typically look at the research and find when our measure has been used to predict performance outcomes and utilize this value or conduct our own analysis.

However, for most of our tests we have looked to use a method based on the Cohen’s effect size principle. For this, we look at how our athletes’ performances vary compared to one another (between subject SD) and apply a factor to determine the change required to move their position within the distribution. For the most part, we utilize testing batteries that are physical surrogates to actual competitive performance. Therefore, we use the following equation to calculate our smallest worthwhile change (SWC):

Equation 2: SWC = between subject standard deviation * 0.2

(Where the between subject SD is taken from the baseline scores of all the athletes from Test Day 1.)

The SWC can often be thought of as the “signal” within our test (the smallest practical change). In an ideal world, this signal would be greater than our test noise. However, in physical performance tests the noise is generally greater than the signal. This doesn’t necessarily mean that the test isn’t useable (though if the noise is four times greater than SWC, you should perhaps consider finding a better test).

For our earlier example of jump height, we had a noise of 1 cm. Using the above smallest worthwhile change equation on Test Day 1, we calculated the SWC as 0.68 cm. You quickly realize that the SWC < NOISE (0.68 cm < 1 cm). As these values are pretty close (greater than ½ rhw noise), we can still use this test.

Luckily, there are resources out there that can help us interpret these changes. A very simple rule of thumb is the signal + noise = greater likelihood the change is meaningful. Additionally, if we want to calculate higher boundaries (e.g., a moderate or large change), we can multiply the standard deviation by a higher value (0.6 for moderate, 1.2 for large).

Step 4: Analysis and Feedback

Now that we have our values of test noise and signal, we are in a position to monitor and analyze our data efficiently, enabling us to make fast decisions within our feedback approaches to athletes and coaches. Figure 2 below is a visual for taking our jump height example above and applying it to 20 female soccer athletes tested at the beginning and end of pre-season.

Jump Height
Figure 2. The jump height (cm) of 20 female soccer athletes. The dots represent the average jump height across three recorded trials and have been color coordinated to represent a reduction (red); unclear (yellow); improved (green). The grey shaded area represents the smallest worthwhile change (SWC = between subject SD Test 1 *0.2). The black shaded bars represent the 90% confidence intervals calculated from our test typical error, the range of true values these athletes may display (athlete mean ± 90% CI). The right-hand side provides a magnitude-based inference (MBI) corresponding to the change.


Deconstructing Figure 2, we have a grey shaded area that represents our SWC (0.68 cm). We have each athlete’s value and we have a range of true values that each of the athletes could have performed, known as the confidence interval (black shaded bars). The confidence interval was calculated using the Excel TINV function. For a 90% CI, the equation was as follows:

Equation: = TINV(0.1,16) *(sqrt(2)*1) = 2.47 cm

(0.1 represents 90% probability; 16 = degrees of freedom; sqrt(2)*1 is the adjusted typical error)

We can now start to provide a magnitude-based inference around our data utilizing the work of Hopkins et al. We see Athletes 1-4 have a reduced jump height (red dots), suggesting a negative response to pre-season. Athletes 5-16 were “unclear” (yellow dots). As their boundary of true values crosses both the increased and reduced sides of change, we cannot be sure “statistically” whether these athletes have changed. Athletes 17-20 increased (green dots), suggesting an improvement following the pre-season training period.

From the analytical approach outlined above, we now have a method that informs our feedback of physical performance to our athletes and coaches. Additionally, we now have a means to communicate what small changes are required to improve performance.

Freelap USA: In the process of “getting athletes stronger” what key factors are you really looking for?

Craig Turner and Nate Brookreson: The foremost criteria within the process of getting an athlete stronger is whether the athlete moves effectively within the movement pattern. This is primarily informed through our movement assessment procedures (discussed within the section below). When we are satisfied the athlete “moves well,” then we are more comfortable loading that pattern in an attempt to optimize characteristics such as force and velocity.

We won’t load a movement pattern until we are satisfied the athlete ‘moves well’ within it. Share on X

From a programming perspective, we have developed a graded exercise progression chart where an athlete must achieve minimum demonstrable standards before progressing to more advanced programming methods. An example of this is shown in Figure 3.

Loading Chart
Figure 3. We are more comfortable loading a pattern after we determine that an athlete “moves well.” This graded exercise progression chart shows where an athlete must achieve minimum demonstrable standards before progressing to more advanced programming methods.


This provides us with a structure of operational standards to guide athlete progressions. This also allows us to communicate to the athlete and help them understand the programming journey across their collegiate career.

Lastly, the sport in which the athlete participates is also a guiding factor to the “getting stronger” notion. There is likely a point of diminishing returns for some of our sports when it comes to strength training (e.g., track sprinters, for whom the improvement of velocity qualities is the primary factor). Therefore, an appraisal of the sport is also highly important as we look to improve strength qualities without inhibiting the sport’s primary factors.

In addition, the aforementioned jump testing (and other testing protocols such as force velocity profiling within MySprint) also serves as another source of information to help guide the direction of programming for the individual athlete. For example, some athletes may benefit from developing force qualities (e.g., low eccentric and concentric average force in jump). Others may lack qualities such as high peak velocities at takeoff or low concentric peak velocity, which may therefore require more velocity-based exercise selection. Therefore, an appropriate appraisal of these qualities, in addition to the sport, helps serve as a guide to the direction of programming.

Freelap USA: What is your approach in terms of movement and mobility screening and assessment in athletes?

Craig Turner and Nate Brookreson: Assessment is a crucial part of the performance process in order to evaluate current physiological capabilities, identify limiters to resiliency, and serve as a prerequisite to the creation of the training plan. An assessment is intended to be convenient, quick, and actionable, but in the collegiate environment, the most important element of the assessment is that multiple practitioners—namely the S&C and sport medicine staff—rate and quantify the assessment similarly. This allows both professionals to utilize the assessment as an audit when an intervention is applied in training or rehabilitation.

In the collegiate setting, it’s vital that S&C and sport medicine staff rate assessments similarly. Share on X

In our environment, we tend to screen first for pain, then fundamental mobility of the ankle in a closed-chain position, a supine leg-raising, and reciprocal upper extremity reaching pattern; motor control in a high-threshold stabilization pattern; and finally, a functional pattern representing a commonly seen athletic position in sport. Additionally, we utilize the anterior reach of the Y-Balance Lower Quarter assessment and the superolateral reach of the Y-Balance Upper Quarter assessment. The rationale for each assessment is listed in Table 2.

Table 2. Overview of the Assessment Process
Assessment Rationale
Closed chain dorsiflexion Evaluation of ankle mobility; looking for 35-45° with <4° difference with no pain or pinching in front of ankle.
FABER/FADIR First screen of hip mobility; FABER = parallel to ground, FADIR = 35° with no pain or pinching in the front of the hip.
FMS active straight-leg raise Fundamental mobility during a leg-raising pattern; necessary for hip hinging.
FMS shoulder mobility Fundamental mobility of shoulder in reciprocal reaching; necessary for overhead pressing.
FMS overhead squat Functional pattern demonstrating optimal positioning for athletic maneuvers.
YBT-LQ anterior reach Assessment of dynamic postural control; reach >70% leg length with <4 cm asymmetry.
YBT-UQ superolateral reach Identify upper extremity and trunk mobility in the open kinetic chain in the reaching limb as well as mid-range limitations and asymmetries of upper extremity and core stability in the closed kinetic chain in the stabilizing arm; reach >70% arm length with <4 cm asymmetry.

Table 2. Assessment is a crucial part of the performance process in order to evaluate current physiological capabilities, identify limiters to resiliency, and serve as a prerequisite to the creation of the training plan. This is an overview of our assessment process.

Since you’re here…
…we have a small favor to ask. More people are reading SimpliFaster than ever, and each week we bring you compelling content from coaches, sport scientists, and physiotherapists who are devoted to building better athletes. Please take a moment to share the articles on social media, engage the authors with questions and comments below, and link to articles when appropriate if you have a blog or participate on forums of related topics. — SF


Nate BrookresonNate Brookreson was named Director of Strength & Conditioning for Olympic Sports at NC State in June 2015. His primary training duties are with women’s basketball, swimming, and diving, and men and women’s golf, while supervising the implementation of training for over 500 student-athletes.

Prior to NC State, Brookreson was the Director of Athletic Performance for Olympic Sports at the University of Memphis from August 2013 until June 2015. While at Memphis, Brookreson worked primarily with men and women’s soccer, men and women’s golf, and track & field sprinters, while supervising training for the Olympic sports department. Before heading to Memphis, Brookreson was the Director of Athletic Performance at Eastern Washington University from October 2010 until August 2013, working primarily with football and volleyball while supervising the training of all EWU student-athletes. He also served as an assistant at the same institution from August 2008 until his appointment to director. Additionally, he served as a student strength and conditioning coach at the University of Georgia, assisting with baseball, softball, swimming and diving, and women’s tennis.

A native of Lacey, Washington, Brookreson earned his bachelor’s degree from Central Washington University and master’s degree from Eastern Washington University in exercise science. He is certified through the National Strength and Conditioning Association (CSCS) and the Collegiate Strength and Conditioning Coaches Association (SCCC).

Nate is married to Kelsey Brookreson and has two sons, Blaise and Brock.

Female Athletes Rowing

Principles for the Periodization of Volume and Intensity with Autoregulation

Blog| ByCody Roberts

Female Athletes Rowing

As high-performance practitioners, it is our responsibility to think logically about the programming and implementation of training as it relates to the actual daily environment of our athletes. In many cases, those athletes are adjusting to an academic load and ever-evolving range of social stresses (from friends, family, and life), as well as a multitude of lifestyle factors that can and should be guided along with training prescription (i.e., nutrition, sleep, mindfulness, and behavior).

Recognizing that athletes are in a situation with countless spontaneous distractions and interactions, we must ultimately put pen to paper and make decisions on where to start, and from there, create a plan for where to go. The plan is to help our athletes progress: Moving forward, evolving, growing, and developing into better and stronger versions of who they were before. This means stressing and adapting, pushing through overload or overreach, and allowing response, recovery, and growth to occur. There are countless ways to achieve progress, and the numerous variables to manipulate (volume, intensity, effort, tempo, rest periods, frequency, etc.) can be overwhelming.

Planning lets coaches and athletes focus on other tangible concerns in training, sport, and life, says @Cody__Roberts. Share on X

Eventually, some organization must come through the chaos, as the practitioner thinks critically about the adaptive process of the athlete(s) and the training effect pursued by the coach and athlete. With planning comes purpose and clarity for both parties (coach and athlete), and it enables them to focus more attention on other tangible concerns throughout training, sport, and life. The lifting (or weight room) piece is understood, and there is a shared road map for what to do and in which direction to go.

Adapting to Variety – Dose and Response?

The linear periodization model takes the all-important progress-based approach and starts with high volumes and low intensities, continuing the inverse relationship across time. Intensity (weight on the bar) continues to increase as volume (total reps and reps per set) continues to decrease. This definitely works, especially for beginners, but like all things it only works for a certain amount of time. The practitioner must nurture, monitor, and control the adaptive process—and ultimately the training effect. This is because the planning and principles are only the starting point. The day-to-day adjustments are what make the training effective, coupled with the education along the way on how to improve the readiness of the athlete throughout the microcycle.

It is through this model that block periodization has evolved as a superior alternative, being potentially more effective and impactful within a given period of training. Rather than a linear approach across time, this model takes blocks of 2-6 weeks to undulate or concentrate training. Charles Poliquin, a proponent and forefather who we recently lost, wrote about this in 1988, in a classic NSCA Journal article: “Five Steps to Increasing the Effectiveness of Your Strength Training Program.” (May you rest in peace and thank you, Charles, for the legacy you left and the knowledge and experience you shared throughout your lifetime).

Block periodization is a superior choice; potentially more effective in a given training period, says @Cody__Roberts. Share on X

With everything that has changed in the last 30 years, it is amazing to consider how so much remains the same. In a time when things were potentially simpler than they are today, due to the lack of technology in the weight room, Poliquin shared the concept of undulating periods of volume and intensity (“Accumulation & Intensification”), mentioning the adaptive process and ways to promote and encourage maximum benefits with variety1. But let us not get too caught up in terms, definitions, and labels. Instead, let’s focus on the dosage of training, and the response of the athlete across time (most importantly, when strength is the goal and in the weight room setting through the off-season, while preparing the athlete for competition). In the end, the ideal is to develop an athlete who is able to generate more force, with potentially greater coordination as well.

Strength Training in Cyclic Sports – Muscles to Movements

In sports like track & field and rowing, there is not much variety to the competitive event (or, for that matter, the training for that event). Athletes perform the same technical, structured movement with fluidity and rhythm, and the more efficient these repetitive actions are over and over, the better the athlete will be. There is a massive aerobic component and ability to endure with these events, as it is the average velocity across the race that determines the winner.

Whether you understand the law of averages or the law of large numbers, we know that with a greater maximum comes a greater average. This means that improving strength and power output in these athletes will ultimately improve their average velocity and, in turn, their performance. With this goal in mind, the picture and purpose become clearer on how to plan and program training in the weight room for athletes in a cyclic sport.

This leads us to consider the relationship of movements and muscles, and the understanding that, ultimately, we want to achieve movement-related adaptations, so we may shy away from the “bodybuilding mentality” that focuses on individual muscles. But it is actually the muscle-related adaptations that increase force production. As Chris Beardsley recently shared:

“…it is the adaptations in the muscles (or motor units) that allow us to increase force production in sporting movements, and thereby increase athletic performance.”

— Chris Beardsley (@SandCResearch) Dec 5, 2018

The ability to generate maximal force comes from increased4:

  • Motor unit recruitment
  • Lateral force transmission
  • Muscle fiber diameter
  • Tendon stiffness

GAINZ

Strength can be improved through an increase in cross-sectional area (hypertrophy), as well as the improved motor unit recruitment of an athlete’s given muscle fibers (neuromuscular efficiency/adaptation). Techniques utilized in the bodybuilding and powerlifting community (now supported through scientific research and understanding) indicate that hypertrophy occurs from:

  • Metabolic stress
  • Mechanical tension
  • Muscle damage

These stimuli occur at, through, and of the muscle. But when training for longer periods than an 8- to 12-week research study, there needs to be balance and variety across time, as training all qualities simultaneously or frequently can lead to overtraining and maladaptation because of mixed or inconsistent signaling.

In Poliquin’s 1988 article, he shared information from the Alberta Weightlifting Association on their methods of planning training for weightlifters, stating that “in order to force the neuromuscular system to adapt to the training load, it is of the utmost importance to plan variations in both volume and intensity of load.”2 He further stated that “linear overloading is hardly advisable,” and in order to maximize potential, athletes should begin with a hypertrophic-centered approach through a “Hypertrophy Phase” characterized by:

  • Higher volumes (total reps)
  • More muscle damage
  • Greater time under tension (reps per set)
  • Greater metabolic stress

This would be followed by neuromuscular engagement and recruitment, increasing the use of higher threshold fibers and motor units through a “Neuromuscular Phase” of:

  • Greater intensity (weight on the bar)
  • Maximizing mechanical tension through the tissues

It is this undulation of phases that can be incredibly beneficial, providing necessary progress and increased strength that impacts performance on the track or in the water. I have found this concept to be beneficial in a number of ways, with some important aspects I would like to highlight regarding its execution and effectiveness.

This undulation of phases can be very valuable, providing necessary progress and increased strength, says @Cody__Roberts. Share on X

Starting Point to Strength

As always, it is not about what you do, but how you do it that makes it effective. This process starts with a shared goal of strength development, within the minds of both the coaches and athletes involved. The majority of the work outside of the weight room is meant to develop capacity and energy system function, as well as the mental fortitude to endure paces and volumes that create adaptations within the cardiorespiratory system. Unlike the acyclic team sports that involve numerous qualities, skills, abilities, and reactionary components, these cyclic sports have a narrower focus when it comes to the nuts and bolts of development. As long as coaches place strength training correctly and plan the volumes and intensities of endurance work appropriately, strength development can concurrently occur with the development of aerobic capabilities.

Establish Movement Efficiency

With our shared strength development goal in mind, there is then the introduction of the movements and exercises that we will use to develop strength. Obviously, the exercises are designed to promote strength in the musculature utilized in competition. Knowing that we will work into a phase of training where we promote weight on the bar and maximizing mechanical tension, we want to prepare the athlete for the barbell exercises (squat, deadlift, press, pull) that will be used later in the “Neuromuscular Phase.”

Movement efficiency is a product of:

  1. Mobility – the ability to move through an unrestricted full range of motion.
  2. Stability – the ability to create tension and control through bracing and foot pressure.
  3. Posture – the ability to engage core musculature and support orthopedic positions of the spine and joints.
  4. Balance – the ability to work with symmetry and control throughout movement.
Movement efficiency—a product of mobility, stability, posture, and balance—supports strength work, says @Cody__Roberts. Share on X

These are the ancillary—but foundational—pieces that must be in place to properly prescribe, implement, and develop strength through our primary movements and exercises. This is the bedrock of any work in the weight room, as technique is always the primary focus, and should never be sacrificed for weight on the bar.

Technique first, ALWAYS.

Mind Muscle Connection: Internal AND External

Studies can argue which approach is more effective: internal (focusing on the muscle contracting) or external (focusing on moving an object), but both are important for individuals and exercises, and both are time and place dependent. Targeting the muscle through an internal focus is an excellent starting point, as the goals of the Hypertrophy Phase are to promote greater time under tension (metabolic stress and muscular damage), pushing sets upwards of 8-20 reps for 30-60 seconds. Developing a mind-muscle connection and promoting a sense of feel and usage (ability to contract/engage) within that will stimulate and maximize growth and strength, as well as give an athlete the sense they are working the muscles used to improve performance.

This also relates to the metabolic component (accumulation and usage/removal of lactate and hydrogen ions during extended intense bouts) that these cyclic/endurance athletes are accustomed to experiencing systemically throughout training for their event (running/rowing) and can be a feeling they can benefit from more quickly than if we promoted more weight on the bar. Depending on the athlete’s experience and knowledge of RPE (rate of perceived exertion), I often simply prescribe the sets as “Burn/Fatigue” with RPEs of 7-8 with great effectiveness, and the rep range of 8-12 or 15-20 as a secondary component.

This enables many things to occur:

  • Loads are controlled with a higher rep range. (Potentially safer? Limiting the too-much, too-soon issue.)
  • Sets are more effective as athletes extend sets into necessary exertions, fatiguing tissues and allowing impactful stress based on metabolic response.
  • Athletes develop better motor patterns through increased repetitions, gaining necessary experience and sensation of the muscles working as they understand how to work and fight through fatiguing sets.
  • Volume is effectively our driver and purpose, promoting great technique and more reps at a given load across the weeks.

This allows for the transition towards focusing on external load and moving that, as well as contracting the targeted muscles. All in all, during this Accumulation/Hypertrophy Phase, we target muscles through movements.

The Swinging Pendulum

Nothing lasts forever, and too much of a good thing can turn bad. This is where the coach must intervene, as overreaching can have a negative impact on the development of the athlete, leaving them at risk for injury. As Poliquin shared, “your body is well equipped to protect itself against intensity of work, but not against volume of work.”1 Therefore, there can be a point when volume must be reduced and more is not better. Depending on the athlete, this could take anywhere from 2-6 weeks. When working in a team setting, it is always best to lean towards the minimal effective dose of 2-3 weeks, because of all the other training and life stressors that are simultaneously accumulating.

There can be a point when volume must be reduced and more is not better, says @Cody__Roberts. Share on X

Fatigue accumulates and the newness of the training begins to fade, staleness and monotony begin to rear their ugly heads, and the law of diminishing return ensues.

Shifting Our Focus

As we shift into a Neuromuscular Phase of training, our goal of strength development remains, but our means and methods shift to encouraging greater loads on the bar. We shift into a 3-6 rep range initially, promoting RPEs of 8-9 with the goal of mechanical tension. We can play with variations and prescriptions of tempo to help drive this, as well as controlling/encouraging greater loads. But this is where we become technicians, focusing on the movement itself, and the athletes begin to develop a routine as we address the bar physically and mentally (applying the same appreciation for a few repetitions as we do for the skill of repetitive actions in running and rowing). The same mindful and technical approach is taken to lifting heavy loads, as this allows for the most beneficial result.

These are not “max out” sets and we do not work from percentages. A percentage is an ever-changing number based on the time of day and readiness/recovery rates, and percentages can either limit or hurt an individual with too little or too much load for a given time and day. We continue to rely on technique, and focus on the prescribed RPEs, progressing loads over the block and gaining confidence and experience along the way. Following a percentage-based model can be disheartening, as we are in the middle of off-season training and the opportunity to improve can be limited based on everything at play.

We no longer focus internally or look for the muscular burn/fatigue, but rather begin to understand the nervous system’s impact on muscular contraction and movement of an external load. Developing and establishing proper and efficient recruitment of the musculature being used is of vital importance to the athlete and their strength development, as well as exposure to both techniques of internal and external foci.

This phase should also only last 2-3 weeks for the same reasons as the Hypertrophy Phase: staleness, adaptation, and monotony.

Always Better the Second Time Around

Henry Ford is credited with saying that: “It is always possible to do a thing better the second time.”

This quote and concept have encouraged and guided our alternation of shorter blocks (2-3 weeks) of higher volumes with higher intensity for strength improvements. Each block has similarities and differences, both are necessary, and the complement of the two helps to make performance (and ultimately strength development) as effective as possible. Within the annual plan there exists a roughly four-month period that is designated for “general” preparation, or off-season training. Competition and performance within the given sport/event is not the primary focus and there are more resources (time, energy, and effort) dedicated to building performance qualities such as strength.

It is very simple to work with athletes whose primary goal in the weight room is strength, but in order to make the most productive progress possible, undulation is important. Experience is a great measure of an athlete’s ability, and having already experienced an initial hypertrophy block, their mental and physical preparedness is definitely better the second time around. They know what is expected and what they are capable of, and can compare the initial Hypertrophy Phase to Hypertrophy Round 2.

In this, there’s a similar prescription of 6-15 reps as intensity will likely go up naturally, but we still prescribe sets of “Burn/Fatigue” with the rep range goal and 7-8 RPE goal in mind, allowing the athlete to have focus and purpose. The athlete may now be more prepared and ready to understand the internal versus external focus during the set itself, as the technique and motor pattern are well understood at this point. Volume is high again, intensity is reduced, and even though it is difficult and uncomfortable, the athletes know it is only for a short time.

Again, 2-3 weeks allows for productivity and progress, but limits overreaching. Some athletes enjoy this type of training and it allows them to embrace this side of their strength development, while those who despise higher reps per set know it is a necessary stimulus for their event.

But there is light at the end of the tunnel, and the plan across the off-season transitions yet again to Neuromuscular Phase 2.

Promoting Weight on the Bar with a Twist

As we transition between these phases there may be breaks and unloading along the way if needed, but sometimes the transitions flow seamlessly into one another as the shift in training allows for an unloading of either volume or intensity. As it relates to the academic calendar, this period of time can coincide with end of semester exams and the culmination and accumulation of fatigue and stress from school, life, and the holiday season. An effective approach that I have found here is to prescribe total reps (8-12), and accomplish those reps across 2-5 sets with 2-5 reps per set. By encouraging loads as opposed to reps, if the athlete gets five repetitions in a set and doesn’t achieve the 8-9 RPE necessary for maximum neuromuscular recruitment, then the load on the bar is increased.

There is also a built-in safety component here as opposed to straight sets: The athlete may choose to descend the reps per set across the sets (performing four reps the first set, three reps the second set, and two reps for the third and fourth sets). This also allows an individualized approach to how the volume is achieved, keeps focus the same, and ultimately puts the athlete in the safest position possible to achieve effective results.

Sets w/a total repetition goal allow intensity to increase, but adapt workload to athlete #readiness, says @Cody__Roberts. Share on X

Approaching the sets through a total repetition goal can also allow intensity (weight on the bar) to increase, but adapt the workload to the readiness of the individual, where they are able to perform singles or doubles at a given load and not feel discouraged that they’ve lost strength because a session fell on a day/time where their readiness was challenged.

‘Nothing New in S&C Except You!’

In the last 10-20 years, the research and sharing of training methods have grown exponentially. The scientific side is finally catching up to the practical application, relative to what is happening and what should happen with exercise prescription, periodization, and programming. Those who’ve been working in the field during this time have a unique perspective—if you ever have the opportunity to hear Al Vermeil speak, you will surely never forget it. He is one of my absolute favorite people, strength coach or not, and another forefather of our profession. (The subtitle above is a Vermeil quote.)

A choice line of Vermeil’s is one he shares from Bob Alejo, which often arises as different training modalities and techniques continue to come in and out of practice; “Show me what it is, and I’ll tell you what we used to call it.” The point is that many of the training methods and techniques being promoted today were already being implemented at least a generation ago.

What Poliquin termed “Accumulation and Intensification,” I classify as “Hypertrophy and Neuromuscular.” Synonyms or not, labels do not matter. What matters is the athlete’s understanding, purpose, and progress. After a period when the scientific research side was segregated from the practical side, we are now coming full circle to supporting the methods behind the madness, so to speak. Coaches and practitioners like Vermeil, Alejo, and Poliquin have established training methodologies, schemes, and principles that all of us should revisit and appreciate.

Training is difficult to generalize, as there is so much context to the environment and individual to appreciate. But the practitioner must embrace the gray areas, expose the athlete to variety, and manage the swinging pendulum of load and recovery to promote adaption. This is not new, but through the marriage of science and traditional practices, training systems have grown more concrete.

An undulation of volume and intensity allows for the necessary flexibility in training prescription, says @Cody__Roberts. Share on X

The undulation of volume and intensity allows for the necessary flexibility in training prescription and enables the athlete to have ownership and fluidity in the process. It is an approach that I have found effective for applying the principles of our forefathers, as well as adapting to the individual to make training productive and enjoyable. New is good, but can quickly fade, and with experience comes knowledge. Thirty years ago, Poliquin made the reference that “Variety is the spice of life,”1 and through life we know that we live and learn, specifically in that order.

Variation of a stressor creates a more durable and adaptable athlete, creating a bigger cup to fill and stronger foundation to build upon. The timing and exposure should fluidly evolve and flow in a progressive curriculum that allows for learning and development. Everything works, but nothing works forever. Why not get the best of both worlds, and allow variety and experience to flourish?

Since you’re here…
…we have a small favor to ask. More people are reading SimpliFaster than ever, and each week we bring you compelling content from coaches, sport scientists, and physiotherapists who are devoted to building better athletes. Please take a moment to share the articles on social media, engage the authors with questions and comments below, and link to articles when appropriate if you have a blog or participate on forums of related topics. — SF


References

  1. Poliquin, C. “Football: Five steps to increasing the effectiveness of your strength training program,” National Strength and Conditioning Association Journal.10(3):34-39, June 1988. https://journals.lww.com/nsca-scj/Citation/1988/06000/FOOTBALL__Five_steps_to_increasing_the.5.aspx
  2. Cherviak, A. 1983. “Methods of Planning Training for Weightlifters,” Alberta Weightlifting Association, Edmonton.
  3. Weineck, J. 1983. Optimales Training. Perimed, Erlangen.
  4. Chris Beardsley, S&C Research, Movements & Muscles

Elastic Strength

What Sprinters Must Know About Elastic Strength

Blog| ByKim Goss

Elastic Strength

There are seemingly countless athletic qualities that enable sprinters to run fast, but one that is often not considered is the contribution of elastic strength.

Before getting into what elastic strength is, what it can do to help sprinters run faster, and how to improve it, let’s break down three basic components of sprinting: stride frequency, stride length, and ground contact time.

Stride Frequency

Stride frequency refers to how quickly an athlete changes their ground support from one foot to the other. Ben Tabachnik, Ph.D., is the Russian sprint coach who popularized the use of parachutes for sprint training in the U.S. In the book he co-authored with Rick Brunner, Soviet Training and Recovery Methods, Tabachnik says that the most important time to develop speed and quickness is between the ages of 8 and 13. Neurologist Harold L. Klawans, M.D., would agree with him.

The most important time to develop speed and quickness is between the ages of 8 and 13. Share on X

In his book, Why Michael Couldn’t Hit, Klawans said that to master athletic activities with a high skill component, those activities must be performed while the brain is maturing. Regarding his book title, Klawans explained that because Michael Jordan didn’t focus on baseball during his early years, he was not able to achieve a high level of skill (at least, compared to basketball) when he took up the sport professionally in 1994.

Citing research on violinists, Klawans said scientists “…found that those fiddlers who started playing early in life (age thirteen or younger) activated larger and more complex circuits in their brains than those who started learning to play their instrument later in life. Those who hadn’t started by thirteen never caught up. The circuits they activated were smaller, less complex, and more restricted. The time frame during which their brains could be guided to select those circuits had come and gone and left them forever without that ability.”

The lesson here is that if parents want their kids to be able to run fast, they should encourage them at an early age to participate in sports that require them to sprint.

Stride Length

Stride length refers to how much distance is covered with two steps. In 1991, track and field legend Carl Lewis needed to take 43 steps to establish his world record of 9.86 seconds in the 100 meters. At the 2008 Olympic Games, Usain Bolt needed just 41.4 steps to cover that distance, and as a result, shattered the world record with a time of 9.69. The following year the World’s Fastest Man covered the 100m in 40.92 steps and crossed the finish line with a world record time of 9.58.

A bigger muscle is generally a more powerful muscle, and as such, one of the keys to increasing stride length is to get stronger so that the athlete can apply more force into the ground to propel their body forward. Support for this idea comes from a study on the physical qualities of high-level track athletes that was published in the Journal of Experimental Biology in 2005. The researchers found that runners who excelled in the shorter events possessed considerably more muscle mass than those in the longer events.

One of the keys to increasing stride length is to get stronger. Share on X

Vertical and horizontal jumps are practical tests to determine an athlete’s leg power. If you test the vertical and horizontal jumps of discus throwers and shot putters on a typical track team, you’ll find their results often exceed those of the high jumpers—this is despite their considerably larger muscle mass. Case in point: 1988 Olympic shot put champion Ulf Timmermann of East Germany.

Timmermann recorded the second-longest distance of all time with a put of 75.65 feet (23.06 meters). Timmermann was powerful and brutally strong, reportedly being able to clean 485 pounds and squat 805 pounds. At a bodyweight of 262 pounds, he vertical jumped 36 inches and did a standing long jump of 11 feet, 2 inches. There are many more examples.

Patera Press 1970
Image 1. Ken Patera, a thrower from the U.S., was the first American to clean and jerk 500 pounds. Despite weighing 335 pounds, he could do a standing long jump of 11 feet. (Photo by Bruce Klemens)

Former U.S. shot putter and discus thrower Ken Patera was the first American to clean and jerk 500 pounds. He did a standing long jump of 11 feet at a bodyweight of 335 pounds—talk about your Incredible Hulk!

Then there’s Adam Nelson, a U.S. shot putter who won gold in the 2004 Olympics. At a bodyweight of 260 pounds, Nelson had a vertical jump of 39.5 inches and could standing long jump over 11 feet. Nelson said that at a training camp before the 2004 Olympics, he got into a standing long jump contest with Dwight Phillips, a long jumper from the U.S. who won Olympic gold that year. In an interview that appeared on the Juggernaut Training Systems website, Nelson said they “…finished pretty much dead even.”

As for lighter power athletes, Yuri Vardanyan, a Russian Olympic champion in weightlifting who clean and jerked 494 at a bodyweight of 181, reportedly high jumped 7 feet using a three-step approach and a forward takeoff. Romania’s Nicu Vlad, the 1984 Olympic champion who snatched 442 at a bodyweight of 220, did a 43-inch vertical jump. Just type in “Olympic lifters jumping” on YouTube and you’ll find many videos of weightlifters performing impressive jumps.

Vardanian 1978
Image 2. Russia’s Yuri Vardanyan, an Olympia champion in weightlifting, clean and jerked 494 pounds at a bodyweight of 181. He reportedly high jumped 7 feet using a three-step approach. (Photo by Bruce Klemens)

In addition to being able to apply force into the ground to propel a body upward and horizontally, strength is especially important to the start of a sprint. Brian Oldfield was a 280-pound shot putter who put the shot 75 feet. In the 1976 “Superstars” invitational competition, he ran the 100-yard dash against Superbowl X MVP wide receiver Lynn Swann; Oldfield was stride-for-stride for the first 20 yards. Likewise, Vardanyan’s comrade David Rigert, an Olympic champion who broke 65 world records, reportedly ran the 100 meters in 10.4 seconds. Again, these athletes are not sprinters, but heavily muscled power athletes.

Rigert psych 1981
Image 3. Russian weightlifter David Rigert is an Olympic champion who broke 65 world records. Rigert was so explosive he reportedly ran the 100 meters in 10.4 seconds. (Photo by Bruce Klemens)

Before going any further, I need to address the relationship between power and muscle mass—a strength coach does not want to turn their sprinters into bodybuilders. Bodybuilding protocols use relatively higher repetitions and medium weights, and these methods do not create the highest levels of muscle tension needed to produce force quickly. Let me explain.

Bodybuilding makes athletes stronger, but power methods enable them to display that strength faster. Share on X

A study was published in Experimental Physiology in 2015 that looked at muscle fiber biopsies of bodybuilders and power athletes such as weightlifters. The researchers found that the training methods of power athletes increased muscle fiber quality and the ability to produce high levels of tension, whereas bodybuilding methods were found to be detrimental in enabling athletes to create maximal muscle tension. Yes, bodybuilding methods will make athletes stronger, but they will not be able to display that strength as quickly as if they used power methods. As Iron Game athletes are fond of saying, “Bodybuilders try to look good and weightlifters try to do good!” Now let’s explore ground contact time and the concept of elastic strength.

Ground Contact Time

Ground contact time refers to the ability of an athlete to exert forces to stop the descent (leg flexion/absorption) and project the body into the air (leg extension/reversal of efforts). The shorter the ground contact time, the quicker sprinters leave the ground, thus decreasing the time it takes to complete a sprint and helping to ensure optimal running mechanics.

Ralph Mann, Ph.D., and Amber Murphy, MS, wrote the classic textbook on sprinting, The Mechanics of Sprinting and Hurdling. Here is what they said about the importance of ground contact time, “Since the Ground Phase of the Sprint is the only time when the athlete can apply force to alter the Body’s Velocity, it is not surprising that this is where great Sprint results are produced.”

If you analyze leg motion prior to touchdown, the better sprinters minimize flexion at touchdown and switch immediately into leg extension. Consider that at the 2009 World Championships, Bolt ran 9.58 and Dwain Chambers finished sixth with 10.00. I understand that during this race Bolt had nearly half the degree of leg flexion as Chambers, and his total ground contact time was significantly faster than Chambers’ time. One reason for the difference was Bolt’s superior elastic strength.

Elastic Strength

Elastic strength is the ability of tissues to absorb, store, and release energy. The more energy these tissues release, the faster and more powerful the movement. But instead of just looking at the actions of muscles, consider that high levels of elastic strength can be produced by connective tissues, especially tendons.

Tendons should not be thought of as simply rigid cables that connect muscle to bone. Tendons have elastic qualities that can assist the muscles in producing power by acting as “biological springs” that compress and elongate. In fact, kangaroos have long tendons on their hind legs that can store up to 10 times more energy than their muscles. These animals are especially efficient at producing movement because tendons do not need oxygen to work and do not fatigue. Now let’s consider activities that can reduce elastic strength.

Tendons have elastic qualities that can assist the muscles in producing power. Share on X

According to sports scientist Bud Charniga, the use of athletic tape may interfere with the tendon’s ability to absorb and redirect force, and thus may be a direct cause of ankle and knee injuries. Writing in the Sep-Dec 2017 issue of the European Weightlifting Federation Scientific Magazine, Charniga said during the first week of the 2011 NFL season, 13 players suffered Achilles ruptures. How can this be, as this should be the time when a football player’s body should be the healthiest? Athletic tape is often used as a preventative measure in football—perhaps there’s a connection? Another concern is the extensive use of foam rolling, which may reduce the elastic qualities of connective tissues such as tendons and fascia.

In addition to questionable sports medicine practices, Charniga believes that focusing on partial-range exercises, such as parallel squats rather than full squats and power cleans rather than full cleans, may cause tendons to lose their elasticity and thus make them more susceptible to injury. The same can be said of isometrics. Russian sports scientist A. I. Falameyev in 1986 said that workouts using this type of muscle contraction could exert “…a negative influence on joint mobility, muscle and tendon elasticity.”

Getting back to sprinting, there are many weight training exercises that can improve elastic strength. To avoid excess knee flexion after the foot touches the ground, squats and lunges are good because they emphasize eccentric (i.e., braking) strength. To decrease the time between leg flexion and leg extension, barbell and hex bar squat jumps are effective. There is much more to be said on this subject, but these exercises are a good place to start.

Classic Olympic lifts like the clean and jerk best develop the strength qualities of sprinting. Share on X

As for the exercises that give you the most “bang for your buck” in developing all the strength qualities of sprinting, the classic Olympic lifts (snatch and clean and jerk) top the list. Note that I didn’t say partial Olympic lifting exercises, such as hang power cleans and pulls. There are also special flywheel-type resistance training machines that are ideal for developing elastic strength. Some of these machines provide the optimal amount of eccentric load at high velocity during dynamic movements. My strength coaching colleague, Paul Gagné from Canada, used these machines for eight years with over 100 elite athletes representing 15 sports and achieved remarkable results.

It’s often true that talent prevails and many outstanding sprinters do not lift weights, and we will never know if they were successful “because of this approach or in spite of it.” But the preponderance of research and real-world observation suggests that strength training programs, especially those that emphasize elastic strength, can help sprinters achieve physical superiority.

Header image by Bruce Klemens.

Since you’re here…
…we have a small favor to ask. More people are reading SimpliFaster than ever, and each week we bring you compelling content from coaches, sport scientists, and physiotherapists who are devoted to building better athletes. Please take a moment to share the articles on social media, engage the authors with questions and comments below, and link to articles when appropriate if you have a blog or participate on forums of related topics. — SF


Practical Sports Science

Instilling Practical Sport Science in a Team Setting

Blog| ByDevan McConnell

Practical Sports Science

The idea of sport science conjures many different images: Grainy black-and-white film of Eastern Bloc Soviet coaches and athletes performing various exercises and tests, sure to be included in the next yet-to-be-deciphered text. Physiologists in lab coats, clipboard in hand, watching someone attached to a Met-Cart run to exhaustion. Nerds in glasses, pouring over streams of data, assured that the “secret” is just one proprietary algorithm away. Coaches also believe (some) in the latest and greatest technology, the next “great black box” sure to hold the answer inside it…if only you can afford it.

All of these images and many more are common fodder for internet debate regarding what a sport scientist is, what they do, what their value is, and everything that goes along with that dispute. However, my version of sport science is a little different, or at least a combination of all of the above…and then some.

Adding Sport Science Without Losing the Coaching Identity

To me, applied sport science is about using various tools and technologies, along with intelligent expert intuition, to better understand the “what” and “why” behind what is actually happening with my athletes. The system that I have organically developed is really about answering these inquiries, and in the process, coming up with new and deeper questions. (I say organically because I never set out to develop a “sport science” system or program…I was just curious and kept asking questions.) It’s like the proverbial “rabbit hole”—as I begin to understand and answer one question, another two or three emerge, sucking me deeper and deeper down the hole, spinning and spinning until everything is a blur and then suddenly…AHA! Something makes sense! Or at least it creates another question.

All Blacks UML
Image 1. Culture is easy to talk about, and buying into a program means you need to evaluate athletes fairly. Sport science is essential to the art, just as the applied craft is essential to the research.

To break down why I believe sport science in general, and my program in particular, are so important within the process of player development, I want to outline some of these topics a bit further. The first one is the idea of understanding the “what” and the “why” behind training, and really behind competition. At the root of my sport science program, the goal is to better understand the actual physical demands of my athletes and be able to quantify as much of that as possible, so that we can make more informed decisions regarding training, practice, competition, and recovery.

One of the philosophical tenets I hold as a professional is to never do “work for work’s sake.” I don’t ever want to do things just because they are hard, or because they look cool, or because some other coach is doing them, or whatever. I need to have a reason for why we are doing what we are doing every day. I tell my athletes all the time to question me—if they don’t understand why I’m asking them to perform a certain exercise, use a certain tool, fill out a certain questionnaire, etc., I want them to ask.

This is for a couple of reasons. First, because the more they know and understand, the more likely they are to buy in. And we all know that buy-in is one of the most, if not THE most, important components to a training program. An average program performed exceptionally beats a great program performed poorly. If we can perform a great program exceptionally, we are going to be in a great place.

An average program performed exceptionally beats a great program performed poorly, says @DMcConnell29. Share on X

I firmly believe that education and communication are key to athlete buy-in. I send out anonymous surveys once or twice a year to my athletes, to gather feedback about my program—what they like, what they dislike, what they want more of, etc. Every single time, I get responses back that they want to know more about X, Y, and Z. Why this exercise, why those force plates, why that post workout drink, etc. Today’s players want to know “why,” and not in a bad way. They are curious, informed, and hungry for knowledge. And, without a doubt, the more they understand about what it is I’m asking them to do, and how it will affect them and their goals, the more they are going to buy in.

Accountability in Modern Sport

The second reason is accountability. I’ll tell you a short story that illustrates how I feel about this point.

Brett Hull was one of the greatest pure goal scorers in the history of the NHL. If you aren’t a hockey person and aren’t familiar, Brett was the son of one of the other greatest players in NHL history, Bobby Hull. Towards the end of Brett’s career, he signed with the Detroit Red Wings. At the time, the Red Wings were one of the most dominant and successful teams to ever play the game.

Brett Hull had no need to do anything more than camp out on the left wing and fire one-timers into the net—his spot in the Hall of Fame was already locked up, his Stanley Cup success was all but assured, and his place in history was a foregone conclusion. It just so happened that one of his last seasons was one of the first “behind the scenes” documentaries that was filmed and it went on to be the wildly successful “NHL 24/7” series. This was one of the first times that players were mic’d up during practices and games, camera crews were allowed in the locker room, and fans got to see and hear what really went on with their favorite teams and players.

Heart Rate Data UML
Image 2. Transparency with effort isn’t easy, but heart rate data can help everyone get on the same page. With the right interpretation and a good culture, heart rate adds value when the athletes are honest in training.

A moment stood out, and still stands out in my mind, from that first series. It was a scene from a Red Wings practice, where Brett Hull (who was always known to have a sharp wit and equally sharp tongue) was mic’d up and homed in on. He was talking trash to one of the young up-and-coming stars in line waiting for a drill to start, calling him out for not backchecking hard enough during a simple 3-on-2 drill.

After the practice, the producers asked Brett why he was giving this player such a hard time about such a seemingly insignificant detail of a routine drill in practice. He said something to the effect of, “Because if I get on his ass for being lazy, I sure as hell better not make the same mistake and act like a dog out there.” Here is one of the greatest players to ever play the game, a player who was literally being paid just to post up and rip slapshots into the goal—not for his two-way play, not for his leadership, not for his defensive abilities—and he was holding himself accountable by getting on the heels of one of the next superstars of the game.

I tell you that story to tell you this: Sport science is as much about holding myself accountable to never fall into the trap of “doing things because it’s the way we have always done them” as anything else. The system I’ve developed and the tools and technology I utilize are my way of ensuring that I always try to progress and never get too comfortable. You know what they say—if you’re not getting better, you’re getting worse.

I want to keep an eye on long-term development, but I also need to respect short-term preparation, says @DMcConnell29. Share on X

This is certainly not the only reason I’ve gone in the direction that I’ve gone, but it is a central one. The idea of doing work for work’s sake is one that eats at me. My job is to do what is necessary to keep my athletes as healthy as possible first, and then to improve their performance. Both of these goals should be done with the proverbial “minimum effective dose,” because at the end of the day, readiness to play trumps all else. I want to keep an eye on long-term development, but I also need to respect short-term preparation. Applied sport science helps me walk that tightrope.

Why the ‘Little Things’ Matter in Sport

The next reason I have embraced applied sport science within my performance program has to do with chasing the 1%. This is an idea that I talk about with my athletes and I feel is crucial in an environment where everyone is doing everything they can think of to gain a competitive advantage. The idea comes from something called the “aggregation of marginal gains.” I won’t bore you with the details, but it originated in the business world and was adapted to high-performance sport. There is plenty of debate on the topic, but the simple premise is this: Every action or detail matters. It might only matter 1 or 2%, but it matters.

The example I often give is that of sleep. We can all agree that most people need about eight hours of sleep per night to be at their best. If I only get seven hours of sleep tonight, it’s not a big deal, just a small difference. I’ll be fine tomorrow. But if I do that seven nights in a row, I’m suddenly seven hours into sleep debt. Extend that out a month, a year. Suddenly, that small change in my sleep habit has grown into a major problem for me. That is the power of marginal gains—that is the 1%.

Sport science is about finding as many small changes as possible to develop a program over time, says @DMcConnell29. Share on X

The opposite of this example is just as true, and just as easy to implement. A few extra minutes of sleep per night is pretty easy to get, and over time it can have major positive implications on my health and my performance. Sport science is about finding as many of these small, 1% changes as we can for training and developing a program over time.


Video 1. Coaches in an applied setting need to find a way to get the job done in their specific situation. Don’t wait for someone to figure it out—go find a way to get the information you need.

The last big reason why I believe applied sport science is so important in a high-performance environment is the end result of always coming up with another question. Here’s another short story.

One of my first forays into technology was the acquisition and use of a team heart rate monitoring system. I was able to procure this system with the goal of “figuring out the energy system demands of hockey.” Can you believe that? I was going to figure it all out and devise the perfect ESD (energy system development) program. What. An. Idiot!!!

Well, what ended up happening was this: I surely gained a much deeper and more nuanced understanding of the energy system demands of my players both in games and in practice…and I was able to devise more intelligent training strategies around these newfound insights…and then I started to formulate other questions…and other questions…and questions upon questions upon questions.

Sports science keeps me honest, keeps me asking questions, and keeps me getting better, says @DMcConnell29. Share on X

In my view, this was and is a great thing. This is what keeps me honest. This is largely what keeps me, 15 years into this journey, hungry for more each and every day. I don’t know much. I know even less then when I started. And at this point, I’m pretty sure that at the end of my career, I won’t know a thing. That can be a scary proposition for some people, but for me it’s exciting. Sport science keeps me honest, keeps me asking questions, and keeps me getting better. Or at least not worse.

So, that is some of the “why.” Now how about the “what” and the “how.”

What I do is pretty simple: I train athletes. Specifically, collegiate ice hockey players. At the end of the day, what matters most and hopefully what I do best with my athletes are the basics. We warm up well; we sprint and jump with intent; we push, pull, hinge, and squat heavy. We do intelligent core work, mobility work, and recovery work. Without any of the tools I currently have access to, we would still do largely the same stuff, and get largely the same outcome. Remember, applied sport science is about the 1%, not the 99%.

It is crucial to build assessments, data collection & technology into a training process seamlessly, says @DMcConnell29. Share on X

That being said, we build in our technology, tools, and assessments so they are camouflaged as part of the process. A really important part of implementing sport science practices in an applied setting (read: real-world team training) is the ability to perform these various tasks with whatever the technology, with minimal extra “touch” to the athlete. They have enough on their plate; they shouldn’t feel like they are constantly being poked and prodded. They shouldn’t even know that what they are doing is “more” than just training. In fact, I think this is where many practitioners go wrong—as soon as the athlete feels like they are a lab rat, they will be all done with whatever it is that you are doing. It is absolutely crucial to build assessments, data collection, and technology into the training process seamlessly and effortlessly.

Technology: Tools That Work for Coaches

From a technology standpoint, this is what I currently use and/or do with my team.

  • Athlete Management System: CoachMePlus
  • Wellness/sRPE/Weigh In/Out: CoachMePlus
  • Data Collection: Excel
  • Data Visualization: Tableau
  • Internal/External Load Monitoring: Polar Team Pro
  • Velocity Based Training: GymAware and Perch
  • Jump Profiling: Hawkin Dynamics Force plates, Just Jump contact mats
  • Speed Profiling: Brower Timing System
  • Video Capture: Coach’s Eye
  • Eccentric Power: kBox kMeter

That may seem like a lot, but the ability to build these tools into a holistic system is key to the ability to seamlessly and efficiently utilize each one of them, with smooth transitions between each.

One point of note: Pieces of technology are just tools, just like a barbell is a tool, a dumbbell is a tool, and a kettlebell is a tool. Each has its strengths and weaknesses. Each has a proper application and an improper application. Not one of them is the be-all and end-all. They are just tools in the toolbox. And there is always another tool.

This is how our system is laid out:

CM+ Wellness Questionnaire and Weigh In: Performed on the way to the arena prior to practice/games (weigh in when the players get to the rink).

Coaching Point: This is the first layer of athlete monitoring. It allows me to see where our players are at from a physical and psychological perspective. It identifies any red flags that I need to be alerted to. It highlights any athletes who I need to bump into and prioritize a conversation with in the 2-3 minutes I might have before we get going.

Monitoring CMP
Image 3. The day starts with real-time data from physiological or subjective monitoring. Having a dashboard that shows insight for each athlete requires a solution that is powerful and connected to the mobile devices of athletes.

VBT: Main lifts (often our loaded power and lower body push exercises) are performed via velocity.

Coaching Point: This allows us to autoregulate loads based on individual readiness/fatigue, individualize speed zones within the team setting based on needs (five players on the same rack, performing the same exercise, can load the movement differently specific to their needs), and provide an opportunity for intrinsic motivation and competition, which drives intent by utilizing the leaderboard function.

GymAware
Image 4. Team data for training in the weight room is a great starting point. Testing is important, but plenty of data can be found from day-to-day sessions with barbell work.

Jump Profiling: Contact mats are used within lifts to create intent in jumping exercises, track development over time, autoregulate certain exercises, and create a jump profile for each athlete.

Coaching Point: We utilize a Just Jump mat at each of our six racks. This allows us to perform a number of different vertical jump variations, namely the drop jump (to establish RSI and elasticity), the countermovement jump (to establish global power output), and the non-countermovement jump (to establish concentric force application). We build these into our lifts as part of a tri or quad set, so athletes perform and record their jump outputs as part of training, each and every week.

*Jump Profiling: Force plates are used on a weekly/monthly basis to create a more in-depth analysis of our jump and force application profile. Currently, we are performing CMJ and an isometric mid rear foot elevated push test. The use of force plates is in its early stages for us, so I don’t have a tremendous amount to talk about at this point.

Force Plate UML
Image 5. A combination of jump testing and monitoring is great for teams that want to use contact mats or grids frequently and profile with force plates. Know the limits and benefits of both systems before investing in any equipment.

Speed Profiling: Performed 1-2 times per week in a 10-yard and flying 10 (10 build up, 10 record) sprint.

Coaching Point: These assessments are performed weekly. Acceleration and speed are absolutely the name of the game in ice hockey, where elite level athletes routinely skate >25mph. We utilize a laser timing system to monitor and drive intent behind our speed and acceleration work. Thanks to Tony Holler, I have become a “Record, Rank, and Publish” fanatic.

Video Capture: Used on a case-by-case basis.

Coaching Point: The use of Coach’s Eye is instrumental in multiple areas, from sprint mechanics to Olympic lifting, to mobility assessments.

Eccentric Power: Used with our “Eccentric Bucket” group via the kBox kMeter.

Coaching Point: This allows us to track and monitor eccentric overload and other important metrics in our “Eccentric Bucket” group to see who needs more work in this area.

Athlete Management System: Utilized on the front and back ends, as a direct contact tool for recording wellness, sRPE, and weigh in and out, as well as central data storage, reporting, and communication.

Coaching Point: Our AMS serves multiple roles and is instrumental in our process. It is the “hub” for all our data, testing, recording, reporting, and basic visualizations.

Data Collection: An important but not very sexy tool for any and all performance coaches and sport scientists is simply Excel.

Coaching Point: We use Excel to warehouse all of our data, which allows me to run statistical analysis, compare simple or more complex metrics and relationships, export to visualization tools, and last but not least, develop and design training programs.

Data Visualization: Used to illustrate data, take away messages, and create reports.

Coaching Point: Tableau has become an invaluable tool (along with basic statistical analysis tools such as SPSS) for creating creative and effective visualizations, so that I can easily and effectively explain data in terms and pictures that resonate with the decision-makers within our program.

The Final Word on Sports Science in the Real World

Each of our tools is built into our process, so that important data can be collected where applicable, displayed in real time, and quickly and efficiently disseminated on the back end to better understand the “what” and the “why.” For example, our jump and sprint “testing” is built into our training program, so within the context of a tri or quad set, one of the “exercises” the athletes perform is a vertical jump or sprint variation. Internal load monitoring is just part of the process. Athletes put on their heart rate straps before training, they see their heart rate response on the TV or iPad during lifts, and they get to see their data after practice or games. Transparency is key.

Allowing athletes to see their #data is crucial to the buy-in process—transparency is key, says @DMcConnell29. Share on X

I wholeheartedly believe that allowing my athletes to see their data is crucial in the buy-in process. It goes back to having a “why” behind everything that we do. Some of the players don’t care, but a lot of them want to see what their HR response was during a game, and then have a conversation about it. Was this good? Bad? What do they need to work on? What does this mean? Why was mine different from his? These are all teachable moments and important “a-ha” moments for the players and myself.

Since you’re here…
…we have a small favor to ask. More people are reading SimpliFaster than ever, and each week we bring you compelling content from coaches, sport scientists, and physiotherapists who are devoted to building better athletes. Please take a moment to share the articles on social media, engage the authors with questions and comments below, and link to articles when appropriate if you have a blog or participate on forums of related topics. — SF


Exogen Treadmill

The Future of Fast Is Light: Wearable Resistance Load and Placement

Blog| ByJohn Cronin

Exogen Treadmill

One of our primary challenges as strength and conditioning coaches and technical coaches is that a great deal of gym-based strength increases are non-specific, and transference to speed for sporting performance is less than optimal. I maintain that it is easy to develop a better athlete—as, by definition, if you make them stronger, fitter, or more agile, you have improved athleticism. However, and more importantly, do these increases translate to being a better player, with improved on-field or on-court performance? In many circumstances, the answer is, sadly, no.

Therefore, our challenge is to find training methods that improve strength and power specific to each of our unique training and performance situations. This is called “optimizing transference,” and in terms of speed development, a new training tool that optimizes transference is wearable resistance (WR), also known as light variable resistance training (LVRT). To be honest, this new kid on the block is not in fact that new—click on Google and you can see plenty of different ideas around what wearable resistance looks like, with research dating back to the 1980s.

An Exogen suit with fusiform weights lets us overload speed and constituent parts like nothing else. Share on X

There are, however, a couple of new additions to this area, including the figure-hugging Exogen suits with fusiform weights (50-300 gm/1.7-10.6 oz) that you can affix to the body anywhere there is a compressive garment—i.e., vest, shorts, arm and leg sleeves (see Image 1). As such, in terms of high-velocity movement-specific strength and metabolic training, I haven’t come across anything better—and I have been in the game a long time and had my head across a lot of different ideas and technologies to improve speed. This technology has enabled us to overload speed and the constituent parts (e.g., arm mechanics, step length, step frequency, etc.) like no other tool.

Exogen Suit Athlete Demo
Image 1. Wearable resistance garments on the left, and athlete demo in action.

Why Is Optimizing Transference Important?

Let’s take as an example the squat, since it is a foundational movement of most strength training programs. There is a lot of research out there showing that the squat transfers really well to squat-like performance; the transfer to jumping and sprint performance, however, is not that convincing. Big increases are needed in squat strength before we see small improvements in sprint performance—if any occur at all.

When you compare squatting and sprinting (see Image 2), is it any wonder there is minimal transference, given the characteristics of the exercises? We rack our brains about how we can make training more specific so the likelihood of transference of training adaptation to athletic performance is more likely. We search for those exercises that have similar posture or force vector specificity. It is important to simulate the type and duration of the contractions that the athlete produces (i.e., contraction and metabolic specificity). We know we want to train fast because we know about velocity-specific adaptation. And so on and so forth.

As I look back, I think we have overcomplicated it all to show how smart we are, and as I get older, I want to simplify things. Therefore, my advice is to slap on an Exogen suit with 200-600 gm/7-21 ounces affixed to your lower limbs and start sprint training, as your strength and metabolic training are not separate from what you do but rather part of it. And guess what? You are most likely ticking a lot of those “specificities” that optimize transference of strength gains to sprint performance.

Squat Sprint
Image 2: A comparison of squat to sprint performance (SSC = stretch-shorten cycle).


Now, I am guessing that you are likely thinking, “How can you seriously think that moving 200 grams/7 ounces is a strength stimulus, and moreover, that it can be a strength stimulus that can improve sprinting performance?” This is when we need to take a first principles physics approach (established science and not assumptions) to understanding WR: By understanding a few biomechanical formulas, the value of WR becomes much clearer, and in turn it becomes difficult to argue with the benefits of this type of training. What we bang our heads upon all the time is the “lift heavy” mindset, and the perception of moving 200-600 grams/7-21 ounces would offer very little to no overload to the muscular system.

Those who think like that couldn’t be more wrong. By taking a first principles approach, the naysayers will hopefully see that the future of fast is light. By this I mean that moving lighter loads—but at higher velocities during sport-specific movements—is where we need to direct much of our training. I am not saying to stop lifting heavy, as heavy resistance strength training is important for many team sports, but that LVRT offers a bonafide resisted overload depending on the magnitude, placement, and orientation of load, as well as the velocity of movement.

We need to train moving lighter loads, but at higher velocities during sport-specific movements. Share on X

More about these key loading parameters and the physics behind them later: The only reason LVRT won’t work is because the coach or user doesn’t know how to apply it properly. So, the aim of this series is to make sure this doesn’t happen, by embedding foundational knowledge about the physics of this technology and sharing the learnings of near-on five years of using WR.

First Principles Physics

Most of us are very interested in increasing the force capability of our athletes, as we intuitively and mechanistically understand that the amount of force an athlete can produce per unit time (impulse), coupled with the correct force orientation, is a major determinant of how fast they move. Therefore, improving force capability is a focus of some of our training. The typical way we go about this is to lift moderate to heavy loads in an explosive manner.

But let’s unpack this in a first principles type of way. The formula for force is: force = mass x acceleration. Now if we look at the example given above, the formula looks like this:

F = M X a
That is, if we want to develop force capability in an athlete, we typically place large external loads (mass = kilograms) on a bar, which requires large internal muscular forces to overcome or lift. But guess what? When we use that approach, the subsequent movement velocities and accelerations are small/low/slow. Now this is potentially not a problem if we are combining some slow-velocity gym training with a whole lot of on-field or on-track high-velocity training. However, I don’t want to discuss the merits of this, but rather bring attention to the fact that there is another way to develop high force capability in athletes according to first principles physics, which is often not understood and/or used. What say we flip the emphasis to the formula below, where load is light (mass = grams) but movement velocities and accelerations are high?
F=mxA
So, mechanically speaking, there are two ways to develop force capability: the first is a more traditional resistance strength training approach, where moving heavy masses is the emphasis; the second is the premise that wearable resistance is based on, in which movement velocity is the emphasis. Attaching a light load to the thigh or calf, and moving the loads at high velocities/accelerations, is another way to develop force capability, and most likely in a movement-specific context.

Now let’s take that concept of force orientation and optimizing transference. Without getting too complex and talking about the applications of three-dimensional forces and vectors I mentioned previously, I am pretty sure most of you can see that force capability developed during running/sprinting with WR (i.e., sprint-specific strength training as part of your sprint training with micro-loading) is more likely to transfer to sprint performance than non-specific strength training in the gym. We all know that gym-based, non-specific strength serves a function; however, if you need special strength or specific strength for sprinting, I hope you have seen the light—that LVRT is an innovative and targeted training tool for movement-specific speed development.

Obviously, from the formula I note, there are two methods to overload the muscular system to produce force, by either adding mass to the bar or limb or moving that bar or limb quickly. These are two really important loading concepts to understand if you want to optimize WR overloading. First, and potentially easiest to understand, is that as soon as we add mass to a limb, force output increases as long as the associated movement velocities and accelerations don’t decrease. With WR, however, the addition of mass can get a little more complicated when you look at the loading options you have.

Loading Patterns
Image 3: Image of central vs. peripheral – then thigh vs. shank loading.


In Image 3, you can see different examples of loading: a) central or vest loading; b) peripheral or limb loading; c) proximal medial loading; d) distal lateral loading; e) distal medial loading; and f) medial loading. Obviously, each of these configurations places a different overload on the muscles around the hip, not only in terms of medial-lateral loading, but also in terms of loading close to the hip (proximal) versus away from the hip (distal).

The same load/mass can have varying resistive overload/forces based on its placement on the body. Share on X

For example, let’s take a 400-gram/14-ounce loading on a vest, thigh, or shank. What you would feel if you had a suit and sprinted with 400 grams/14 ounces is: vest – didn’t notice it; thigh – yep noticed that; shank – that was hard. In summary, the same load/mass can have very different resistive overload/forces depending on where you place that load on the body. To understand this second concept of LVRT further, we need to jump back into first principles physics and discuss inertia.

Momentum and Torque

Inertia is the resistance of a body to change in motion, and is a function of mass. For example, we have a 90-kg (~200 pounds) collegiate volleyball player who’s about to perform a vertical jump. Theoretically, they have to produce more than 90 kg or ~900 N (90 kg x acceleration due to gravity = 9.81 m/s2) of force into the ground to get airborne. If we put a vest on them and place 10% of their body mass (9 kilograms/20 pounds) on the vest, then they would have to produce more than 99 kg or 990 N of force into the ground to get airborne.

What we have done here is increased the volleyball player’s inertia—their resistance to change in motion—as it is taking more force to produce motion. With vest loading, that is easy to understand. With lower limb loading, however, we have an additional complexity in that the thigh and shank rotate around the hip and knee, so WR provides a rotational overload.

Many people will read this and not think much of it; however, this is what makes WR pretty unique. Meaning, it provides a direct rotational overload of the muscles. Even though a 100-meter sprint is a linear activity, getting to the finish line is the product of rotation at the legs and arms, so rotationally overloading the limbs used for sprinting makes a lot of sense. It goes back to maximizing specificity to optimize transference.

What makes WR pretty unique is that it provides a direct rotational overload of the muscles. Share on X

So instead of inertia, rotational inertia is what we are really interested in when talking about limb-loaded WR, and it is a biggie to understand for you to overload with WR safely and effectively. The formula for rotational inertia is I = mr2, where I = rotational inertia, m = mass, and, r = distance from axis of rotation. So, let’s take the thigh as an example: We know the thigh has mass and therefore requires rotational force (torque) to move it. The larger the thigh mass, the more muscular effort required by the hip flexors and extensors.

By simply adding more WR to the thigh, we increase the rotational inertia of the thigh, which means more muscular effort or turning forces/torques are required. But let’s not forget the second part of the rotational inertia formula (r2), which indicates that where we put the mass is really important. In fact, this has more of an influence on rotational inertia (muscular effort), as any distance change is squared.

As an example, we add 400 grams/14 ounces to the thigh mid-femur as shown in Image 4a. Let’s put some numbers into this so you can see the effect of placement on rotational inertia, and therefore muscular effort/torque requirements from the hip. I have modelled the rotational inertia associated with the thigh of an 86-kilogram/190-pound lacrosse player. In Image 5, you can see the rotational inertia associated with a variety of loads when the loads are positioned mid-thigh and distal thigh.

Mid Thigh Distal Thigh
Image 4: A 400-gram/14-ounce load attached at mid-thigh (A) and distal thigh (B).


Let’s have a look at 400-gram/14-ounce neutral loading as shown in Image 4. By shifting the same load 20 centimeters down the leg (Images 4A and 4B), we increased the rotational inertia of the lacrosse player from 4.7% to 12.1% because the load is further away from the axis of rotation (hip). We call this distal loading, and it is one of the most important loading parameters to understand with WR, because for every cm/inch you move from the axis of rotation, the distance is squared. Hence, it has a substantial effect on rotational inertia, and therefore muscular effort at the hip.

Mid-Distal Loading Chart
Image 5. The rotational inertia associated with a range of loads positioned mid-thigh and distal thigh.


An important consideration here is that we only influence the muscles at the hip if we thigh load; if we load with the calf sleeve, however, then we influence the muscles across the knee as well as the hip. Also, it is important to understand that calf loading places the load a great distance from the hip joint and, as such, there are significant muscular work requirements to move a light load so far away from the hip’s axis of rotation. As a rule of thumb, we use a 1:3 ratio in that we believe the equivalent loading at the calf is one-third of the thigh: For example, a 600-gram/21-ounce load at the thigh has about the same rotational inertia at the hip joint as a 200-gram/7-ounce load at the calf. Finally, remember the same principles apply across the arm.

Wearable resistance micro-loads to make sprint-specific resistance training part of sprint training. Share on X

The future of fast is light, as wearable resistance uses micro-loading to provide sprint-specific resistance training as part of your sprint training, not separate from it. As such, any strength gains are more likely to transfer to sprint performance than other more traditional resistance strength training methods. In this article, we provided the rationale and guiding principles around using load and placement (distance from the axis of rotation) for LVRT. In a future article, I will discuss in detail the effects of orientation and velocity of movement as methods to overload the athlete interested in improving speed.

Here, I took a first principles physics approach to show you why WR works. However, you don’t need to talk forces, torque, inertia, or rotational inertia with your athletes or clients—these concepts are for you to understand so you can use WR in a safe and effective manner. As I said earlier, WR offers a bonafide method of resistance training based on first principles physics, so it is difficult to argue its efficacy. Ultimately, the effectiveness of this technology in changing speed capability is based on your knowledge and its application.

Since you’re here…
…we have a small favor to ask. More people are reading SimpliFaster than ever, and each week we bring you compelling content from coaches, sport scientists, and physiotherapists who are devoted to building better athletes. Please take a moment to share the articles on social media, engage the authors with questions and comments below, and link to articles when appropriate if you have a blog or participate on forums of related topics. — SF


Female Athlete Jumping

3 Sports Science Tests Any Coach Can Use (and Stay on Budget)

Blog| ByCarmen Pata

Female Athlete Jumping

For me, 2018 ended on a surprising note: One of the sports coaches I work with came down to my office and asked how I utilize sports science while working with his team. To help you appreciate how stunned I was by this inquiry, this coach really doesn’t like using technology. As a matter of fact, each fall I still get passed the team roster with positions, hometowns, and school ID numbers in a handwritten note. When I’d previously suggested the coach could use the same Excel document all the other teams use, I was essentially told that Excel was too difficult to figure out. Now, don’t get me wrong, this coach runs a successful program; still, the mindset is very “old school,” so being asked about how I use sport science was a major happening.

As happy as I am to have deeper conversations with sports coaches about what we do with our athletes, to have a person who struggles with basic computer programs like Excel turn around and ask about sport science left me with more questions than answers. What inspired the coach to suddenly ask about sports science? What sort of answer was he expecting from me? Was this conversation based in some sort of trivial curiosity, or was there a genuine interest in discovering better information?

When I think of sports science, there is a very specific scene from Rocky 4 that pops into my head: Russian boxer Ivan Drago strapped into machines that measure all sorts of kinematic data from his movements, under the watchful eye of scientists in white lab coats. Maybe this is what the sports coach had in mind when he asked about how we use sports science.

At its core, sports science is collecting information and objectively coming up with decisions. Share on X

I think the reality of what sports science is would have really come as a surprise, since at its core sports science is just collecting information and objectively coming up with decisions. This is what we’ve been doing for over a decade, all while wearing gym attire. You can spend some serious money on sports science tools, falling into the same trap I have: You see a piece of equipment that is super fancy, has a highly interactive display, and can measure a result very accurately. After budgeting for this piece of equipment, you eventually make the purchase…but when you begin to use it, you are totally disappointed. It’s not that the equipment doesn’t work; it’s just that it’s too complicated, takes too long to set up or test people, or the worst-case scenario: A $5,000 piece of equipment gives you $0.50 worth of information.

Most of the sports science data we collect is from athletes performing simple jumps. For my program, we capture all of this information on a Probotics Just Jump Mat, which costs about $600. All the athletes must do is stand on the pad, jump, and land. The handheld computer takes in a bunch of information, then delivers jump height and hang time, or whatever function you are looking for. I will say this—as with every test, there are ways to cheat this (like pulling the knees up while jumping). But as long as you have people do the same thing every time you use it, then you can compare RELATIVE data, not ABSOLUTE data. I’m okay with that.

Eventually, there is a time when we need to look at the absolute jump height of our athletes, and then we bring them down the hall to our Exercise Science program and use the program’s motion capture system to look at hip height displacement. Since that is hard to coordinate and it takes significantly longer to test the athletes, I’m okay with using the relative data we get from the Just Jump Mat. If you aren’t in a position to spend money on a Just Jump Mat, you can make an adjustment and change the following tests from a vertical jump into a horizontal jump. Then, the only piece of equipment you’ll need is a 100-foot tape measure.

One

Static Jumps and Counter-Movement Jumps to Assess Strength vs. Power

At some point in your career, you will run into someone truly exceptional and then you may scratch your head, trying to figure out what to do with them. Should you spend time training them at low velocities, working heavy movements like the traditional eccentrically loaded powerlifting events? Or, should you spend training time working the high-velocity movements like plyometric drop jumps or reactive-style (otherwise known as dynamic effort) back squats?

It would sure be nice to have someone or something tell you what areas you should spend time working on. The good news is there is just that sort of thing out there, and it is really easy to add to your testing battery. All you need to do is have people perform two different types of jumps and compare the results. Okay, okay—admittedly, there is a little more involved in the tests than that.

If you are using a jump pad, begin by having the athlete do their jumps with their hands on their hips to isolate the lower body as much as possible and eliminate the significant contribution generated by the upper body arm swing. From that position, athletes will perform the more difficult of the two jumps: the static (or isometric) jump.


Video 1. A demonstration of the static (or isometric) jump done correctly. The athlete holds their jump stance position for 3-5 seconds to eliminate any stretch-shortening cycle benefit.


Video 2. A demonstration of the static (or isometric) jump done incorrectly. Watch out for athletes who perform a counter-movement hip drop to get a higher jump on their test.

For the static jump, the athlete assumes their jump stance, but then holds that position for 3-5 seconds to eliminate any stretch-shortening cycle benefit (more on this in a few paragraphs). The difficult part of the static jump is that the athlete has to have one single “push” that causes them to jump. Most people perform a little counter-movement hip drop in order to get a higher jump from their static jump test, which is something you need to coach them out of.

The next style of jump for the test does take full advantage of that counter-movement hip action: One that is, as you likely already know, called a counter-movement jump. As in the static jump, the athlete again prepares to jump with their hands on their hips—but in this jump, it is all about a rapid drop to their jump stance and immediately jumping from there. If you are thinking that the counter-movement jump sure sounds like the athlete is tapping into their stretch-shortening cycle, congratulations, you are correct! If the stretch-shortening cycle is something new for you, let me give you a brief overview.


Video 3. With the counter-movement jump, the athlete taps into their stretch-shortening cycle. After preparing to jump with their hands on their hips, they rapidly drop their jump stance and immediately jump from there.

Stretch-Shortening Cycle

When you stretch a muscle (called an eccentric load), the stretch can store up some of the mechanical energy in the tendon and ligament that interact with the muscle. This is not only something discussed in exercise physiology, but is also one of the laws of thermodynamics in physics, known as the conservation of energy. The catch is, in the human body we cannot store this energy indefinitely, which means you will lose this energy in less than a second.

Let’s say, however, you quickly stretch a muscle and act quickly. Then you can use this stored energy AND tap into a nerve that causes your muscle to contract even harder and faster than it could without the stretch. Think of a squat: You can lift more weight going down (the stretch) and up than you could if you started with the bar on the safety rails and only brought the bar up. This is what the stretch-shortening cycle can do for you. Not bad, huh?

Where the Data Comes in

By comparing the two types of jumps (counter-movement and static), you can create a rough idea of what Dr. Zatsiorsky refers to as the “explosive strength deficit” in Science and Practice of Strength Training. The explosive strength deficit (ESD) is a comparison of how much force can be produced with (counter-movement jump) and without (static jump) tapping into the stretch-shortening cycle’s benefits. This is something that you have to check on a regular basis, because the ESD is a ratio and it always responds to how you program workouts. At some point, the athlete is overpowered for their strength level and needs to get stronger at low-velocity, heavy strength work. At another point, they’re too strong for the power they can produce and need to spend time working on high-velocity exercises.

The relationship between the CM and static jumps helps me figure out what qualities to program for. Share on X

The relationship between the CM jump and the static jump is a part of how I figure out what qualities to program for. When you know the CM jump and static jump scores, you have to run a really simple equation:

ESD = 100 X (CMJ-SJ)/CMJ

That’s it. When you run this equation for the explosive strength deficit, you’ll get one of two possible results:

  1. If an athlete scores in the 0-10 range, that should be an indicator that you need to spend more time developing near explosive strength—specifically, strength that involves rapid counter-movements like plyometric jumps. People who fall into this group include athletes who are really strong, but can’t translate their strength to their sport.
  2. If an athlete scores greater than 11, it’s an indicator of being overpowered; they likely need to spend time doing some old-fashioned strength work. I understand that being overpowered and underdeveloped sounds like a contradiction in terms (since strength is a component of power), but remember we are trying to figure out which style of training can improve the athlete’s weakest attribute. In this case, there will be a much greater return on time spent focused on developing strength at lower velocities like deadlifts and squats.
Table 1: Explosive Strength Deficit (ESD) scores and suggested programming.
CM Jump Static Jump Equation ESD Suggested Training
Athlete 1 30” 25” 100x ((30-25)/30) 16.6 Low-velocity strength
Athlete 2 20” 19” 100x ((20-19)/20) 5.3 High-velocity plyometrics
Athlete 3 25” 22.5” 100x ((25-22.5)/25) 10.0 High-velocity plyometrics

Two

Repeated Jumps Test for Return to Play Protocol

I’ve been fortunate enough to work with college athletes for almost two decades now, and in that time, I’ve seen a lot of injuries. Some were due to freak accidents, like a broken leg from sliding into the boards in hockey. Others were from overuse, seen in muscle strains resulting from bad compensation patterns. Others still, like a sprained ankle, were injuries written off as simply part of the game. It never gets easier, seeing people you work with get hurt, and it’s even worse when they reinjure themselves largely because they tried coming back to the sport they love before they were ready.

We can get into a much larger discussion of why athletes come back too soon (and the reasons why they get injured in the first place), but for now I’m going to focus on the practical and pragmatic side. When there has been an injury that resulted in a loss of game time, professionals in our field should have a say in whether that athlete is ready to return to play. Correction: When I said should, I meant that people in our profession need to have a say about the athlete’s return to play status.

Coaches in the strength and conditioning field have the ability, education, and tools to measure how well athletes create, absorb, and redirect force. And, if you truly look out for the best interests of the athlete, reviewing their ability to create, absorb, and redirect force is the best indicator for not only return to play, but for identifying athletes with a high injury risk in the first place.

An athlete’s ability to create, absorb, and redirect force reveals their return to play readiness. Share on X

To determine this, you’ll need to find a way to test people’s ability to handle repeated acceleration and deceleration. In my experience, when people are getting close to returning from an injury, they can usually compensate well enough during bilateral or even some unilateral tests. However, when the injured athlete attempts to jump and land repeatedly—now THAT is a revealing test. You’ll know simply by watching if the injured leg can safely handle the transfer of energy from landing to jumping as fast as they can.

If the athlete can handle the stresses of jumping, then they should be able to handle the stress of practice and competition without any increased risk. Basically, if I watch an athlete who looks like a superball bouncing when they do their repeated jumps, I am comfortable with them continuing their normal work. On the other hand, if the athlete bounces more like a tomato, well that’s an indicator that something is wrong and the next step is a conversation with the athlete to find out more.

Again, the athlete starts on the jump pad with hands on their hips, and jumps repeatedly as high and as fast as possible for four jumps. If you do this as a broad jump, the setup is the same, but they are trying to jump forward as far as they can, sticking their final landing. This will either give you a ratio number on the Just Jump Mat of their jump heights and ground contact times, or if using the broad jumps, a total distance. In both cases, the larger the number, the better the athlete did and the more “springy” they are.

To dig further into the data, you can have the athletes repeat the same test unilaterally. I must admit, it is fun to watch some of the football linemen attempt this single-leg quartet of jumps, but I do this for more than my own amusement. The comparison of right leg and left leg results very quickly shows any disparities and can help you focus on whether you should prescribe unilateral or bilateral training. My cutoff has traditionally been 10%: If the athlete is within that range, I feel comfortable with them spending more time doing standard bilateral work, since their dominant leg isn’t overshadowing their other leg, which is normal for that person. This is what it looks like in real life.


Video 4. If the athlete can handle the stresses of jumping, then they should be able to handle the stress of practice and competition without any increased risk. Here, an injured athlete performs single leg repeated jumps on her uninjured leg.


Video 5. This athlete is coming back from an injury to her left leg, and is yet unable to correctly perform the jump test with her injured leg. We adjusted her workout to include only unilateral leg training, giving the injured leg more volume than the uninjured one.

Table 2. Four-jump data for an athlete I work with who is coming back from an injury to her left leg.
4 Jump Left Leg 4 Jump Right Leg 4 Jump % Difference
Pre Injury 1.72 1.28 1.24 3.12%
Post Injury 1.68 0.82 1.26 34.92%

In this example, you see an athlete I work with who is coming back from an injury to her left leg. Before the injury, she didn’t have any training restrictions due to the difference between her right and left legs. Basketball players typically have their left leg as their dominant leg if they are right-handed, and in this case, she had one of the lowest differences between legs.

Now she is getting ready to return from an injury to her left leg, and as you can see from the video and the four-jump data, she is far from being able to perform the test correctly. Not only are there practice limitations, but we have also adjusted her workout to include only unilateral leg training, with the injured leg getting more volume than the uninjured leg. The literature suggests that the greatest risk factor for sustaining a new injury is a prior injury. Therefore, if you have an injured athlete, you’d better make sure they are close to their pre-injury ability before putting them back in for competition.

Three

Standing Long Jump for Athlete Monitoring

Over the past few years, I’ve become increasingly interested in ways to predict athletic success and create profiles for athletes (if you haven’t read any of those articles on the subject, you can find them here). During my trials of trying to design a universal way to objectively compare athletes, I looked at all sorts of variables, but I kept coming back to two things that any comparison needed to consider: There needs to be some expression of strength, and it has to be relative to body weight.

Any comparison of athletes needs to consider an expression of strength, relative to body weight. Share on X

Trying to come up with a way to compare strength might seem easy. At first it was, and I was set to use my go-to exercise: the squat. It seemed like a good choice, since the majority of my programming is centered around that exercise and the transfer of training it provides to speed or power. Plus, you can quickly come up with a relative comparison based off of body weight.

But, then I ran into a roadblock.

One of the fastest athletes we had at the school couldn’t squat. It wasn’t that they were weak, either physically or mentally, but they had a chronic injury we had to train around (a spondylolisthesis, also called a spondy). Basically, this athlete had some sort of trauma when they were younger, which caused a fracture in one of the bones of their low back. This college athlete’s broken bone would sometimes shift—which, from what I witnessed, was very painful—and that would severely hamper their movements. The No. 1 thing that triggered their spondy was squatting. High bar, low bar, or front squat: It didn’t matter what bar position we tried, anytime there was a bar putting pressure through their spine, it caused a flare-up and the athlete was in debilitating pain for the next few days.

How could I make a comparison when one of the fastest athletes at the school couldn’t even be included?

Obviously, this was a problem. If we had one athlete who couldn’t be accounted for in a squat test, how many more would be underrepresented because they are unable to perform a skill like squatting—not to mention an even more complex skill, like a clean? But a simple skill like a jump—everyone should be able to perform that if they are able to participate in competitive sports, right?

Right.

While I was at an NSCA clinic, long-time coach and colleague Dennis Kline from Wisconsin-LaCrosse was presenting, and it was like he was reading my thoughts. He talked about how he monitors his athletes simply by having them do a standing long jump. Here is the equation that Dennis shared:

Power Rank = (square root of body weight in pounds) x (square root of length of jump in inches)

Well, there was the answer I was looking for. Everyone should be able to jump without much coaching. This power rank also takes into account their body weight, so now we can tell an athlete if the weight they added (or lost) is helping them perform at their best. After playing around some with Dennis’s first equation, here are the adjustments I use for the variety of jumps introduced in this article.

Power Rank (Vertical Jump) = (SQRT Body Weight) x (SQRT Vertical Jump Height)

Power Rank (Broad Jump) = (SQRT Body Weight) x (SQRT Broad Jump Distance)

Power Rank (4 Broad Jump) = (SQRT Body Weight) x (SQRT (Broad Jump Distance/4))

These results have no units, they are simply a number—and the higher the number, the better the athlete is doing. The nice thing about this monitoring system is that you can predict a performance simply by seeing how the athletes change over time.

This monitoring system lets you predict performance by seeing how an athlete changes over time. Share on X

Below are two of the football players I’ve worked with this past fall. They are in the same position group, and both are starters. The first attempt was when football reported for pre-season camp, and attempts were done every other week during the season. Looking at the results some more, the second attempt was the first game week, and the sixth attempt was the second to the last game. When you look at these results, you can perhaps see that we had concerns about one of the athletes. See if you can come up with the same conclusions.

Table 3: Power Rank for football players measured by standing long jump.
1st PR 2nd PR 3rd PR 4th PR 5th PR 6th PR
Athlete 1 80.2 78.9 76.2 75.6 74.8 72.9
Athlete 2 78.1 78.0 74.3 75.1 76.8 77.5

It can be difficult to have a conversation with athletes and their head coaches about their diminishing performance. This is especially true when the athlete is one of the more talented people on the team. But, as you can see in the example above, there was a constant decline in the Power Rank for Athlete 1. We were in-season, and the player had a constant problem: low effort during workouts, chronic dehydration, and he gained about 10 pounds (mostly body fat) by the end of the season.

It’s embarrassing for me to publicly talk about this decrease in performance, but part of this profession is asking the right questions when things aren’t working correctly. So, that’s what I did. I checked the results from others doing the same programs and they weren’t having the same decreases in their scores. The next step was to talk to the athlete. He freely admitted that his focus was on playing football, not lifting hard: “that’s what the off-season is for.”

It’s hard to do much for people who accept this type of mindset. Athlete 2 was mostly consistent with their Power Rank, with a dip in the middle of the season due to a leg injury. It’s funny though—during the post-season review with the football coaches, they did say how disappointing of a season Athlete 1 had had, and how happy they were about Athlete 2’s consistent level of play.

From Data to Decisions

If 2018 ended with such a surprise, I can only imagine what 2019 will bring. After all, if an old-school coach wanted to talk about how we use sports science with his team, who knows what will happen next? I do think this coach walked away with more questions than answers, but that is part of our wonderful profession. All coaches use their own creativity to dig deeper and hunt for the information that is important for their success. The take-home message with all three of these ideas is that there is a world of information available for you and you don’t need to be in a sterile lab wearing a white lab coat to find it.

You don’t need a white coat and a sterile lab to discover all of the information available to you. Share on X

What you want to do next is completely up to you. I’ve shown you examples for how to figure out what areas to focus on for the next stage of a program, how to figure out if an athlete is ready to return to full competition, and how to monitor athletes over time, because these are the things that are important to my program. You’ve seen two ways to test everything that I talked about, simply because I wanted to introduce something that you can immediately put into your program without making any sort of purchase. If you’re creative enough and passionate enough, you should be able to come up with a solution to any challenge you’re facing.

Right? Now go out there and figure out the best way to help the people who are counting on you.

Since you’re here…
…we have a small favor to ask. More people are reading SimpliFaster than ever, and each week we bring you compelling content from coaches, sport scientists, and physiotherapists who are devoted to building better athletes. Please take a moment to share the articles on social media, engage the authors with questions and comments below, and link to articles when appropriate if you have a blog or participate on forums of related topics. — SF


Flywheel vertical jump

How Flywheel Training Can Help Vertical Jump Performance

Blog| BySean Smith

Flywheel vertical jump

Everyone is looking for the best workouts and methods to improve vertical jump performance, and at Exceed Sports Performance and Fitness, we’ve found that the kBox is a great tool to help with eccentric strength for serious hops. With the use of our own testing and training protocols, we implemented some additional methods that helped improve our athletes’ jump performances, and in doing so found some benefits to horizontal power as well.

Shane Davenport and I previously talked about different training methods and the best exercises for the kBox and kPulley, and now this article will focus on the flywheel’s role in vertical jump training and vertical jump exercises. It’s hard to narrow your focus and aim towards improving one specific quality without interfering with other qualities along the way. However, if your goal is to get your athletes more explosive and jumping higher, this piece is for you.

The verdict on #flywheels is in: A kBox or other isoinertial equipment can help athletes jump higher, says @SPSmith11. Share on X

The verdict for using flywheels is in: A kBox or other isoinertial equipment can help your athletes jump higher. This article is not about convincing you to use flywheels for jumping—the science will do that—but to assist you in maximizing the benefits of flywheels through smart programming. It will help you make better athletes, as well as better jumpers.

The Science of Jump Performance and Isoinertial Training

An earlier review on flywheel science briefly covered jump performance, and old research on the Vertimax. This section will not be detective work, but more like an extended list of what the scientific studies have shown works. My facility uses both the kBox and kPulley, but only as a fraction of our programming. Our athletes lift, jump, sprint, and do whatever else we think will give them their best chances on the field, so don’t think this article will only cover flywheel use.

We’ve had a great deal of success with our jumping protocols, and have seen athletes at the highest level improve their jumps and outperform the vast majority of their peers. In unison with our standard training programming, we use flywheel training to help our athletes absorb force, stop and cut aggressively, and be more efficient in their sport movements.

Flywheel Jump Performance
Image 1. Coaches who invest money into jump training need to be wise on what works. Flywheels are likely superior to other pieces of equipment when jumping and leg power are the goals.


We had to figure out what happens when you add flywheel training to a program, not replace what you do. We use both the kMeter and force analysis when determining who needs extra “tutoring” and who may just need a taste of flywheel-specific jump work. At this point, it seems any incorporation of flywheel training into an athlete’s program will yield a positive outcome. Of course, the how, where, and why play a large role in how effective that outcome is, but if the trend is positive, keep doing what works.

Any incorporation of #flywheel training into an athlete’s program seems to yield a positive outcome, says @SPSmith11. Share on X

Although there isn’t a lot of research on flywheel training specifically for jump performance that I know of, several studies have hypothesized that faster inertia may make a difference. Our conclusions are the following:

  • Movement specificity matters, so if you want to be better on one leg or two legs, training on a flywheel should mirror that need.
  • General power development matters as well. Train for overall strength and power and don’t get lost in specificity only.
  • Keep in mind that movement variability is still important to avoid mismanaging stresses and risking those potential wear-and-tear overuse injuries.

The most interesting study in all of the research on jump performance is the handball paper published a few years ago. We like it because the machine was less specific to jumping, as well as the Polish study, which experimented with different loads of inertia and jump performance. Both enhanced vertical jump performance; specifically, the countermovement jump where a lot of us make our money. There was also some unique research on patients who were forced to be in bed for extended periods of time and their rate of jump improvement compared to the control group. Anyone dealing with post-surgical clients who need to “catch up” might be interested in the results.

Profiling Good Candidates for Flywheel Sessions

A bad jumper with a poor training background will get better doing nearly anything, but well-trained athletes who are good at a few things are the main population coaches care about. How do we make the good great, and how do we make the great the best? Getting athletes better is easy when they are new to training, but how do you give your athletes an advantage if everyone else is training hard and smart? Information dissemination is arguably easier and more widespread than ever, so it’s becoming more important to keep experimenting, testing, evaluating, and adjusting.

From testing jumps with force plates we found that athletes with poor jump performances tend to have problems storing and releasing energy. If an athlete is unable to handle the eccentric forces of the descent (pre-jump), they will have a difficult time braking, reversing direction, and applying force with any appreciable effort. Traditional methods of improving these abilities still make up the majority of our training, but incorporating a tool that is almost perfectly designed to improve these qualities simply makes sense to us.


Video 1. Testing athletes using force plates with dumbbell jump exercises has a lot of value. A main goal with our jump testing is to profile who may be a great responder to loaded jumps with flywheels.

If you want to profile clients, you must spend a little time and invest in proper equipment. Eye tests are a thing of the past and some simple equipment can get the job done, but some of the tech out there now is a game changer. The addition of quality force plates this past year has made a huge difference in our ability to profile a client. We can compare static (squat jump) and dynamic (countermovement jump) jumping to categorize athletes using the Eccentric Utilization Ratio. Using advanced or simply more metrics does add a little bit of work for coaches at first, but in the long run, analysis improves results because the way an athlete jumps dictates how a training program will help, or not.

In terms of simplistic categorization, we generally see athletes who need basic training, advanced training, or highly specific training. Understanding when and what methods to use on which population isn’t all that straightforward; however, here are some simple guidelines on the approach.

  • Beginner Trainees: General exposure to standard training and potentially adding flywheel training using common movements is recommended for this level.
  • Advanced Trainees: At this level, you can incorporate more advanced flywheel training that focuses on intensive loading and maximal power development.
  • Specific Training: Although best reserved for high-level athletes, specific flywheel training, using both low and high inertia, will help athletes achieve specific results. This could be jumping higher or returning to competition.

Beginner athletes who need to develop a sound foundation can jump into flywheel training after a few months of learning movement patterns in the weight room. After an athlete advances from new to experienced, we can help them hone in on specific outcomes based on a better indication of their ability and their response to training. Advanced athletes, those with 2-3 years of real training, tend to respond to demanding and intense training without much need for fancy workouts. They are similar to beginners in their need to polish the fundamentals, but they can no longer get better by just showing up. Specific training can be used at any level, such as rehabilitation programs or elite sprinters, but customized training helps advanced athletes who are now entering the realm of hard gains.

How to Make a Difference

The simple answer to what is the best exercise for jumping is easy: anything that resembles jumping. You’ll have slow, deep countermovements and short, fast, stiff jumpers, and it’s important to focus on what people do well and either bring up the lagging movements or fine-tune their strengths. How you train will dictate how you jump. Attention to detail and specificity are often the name of the game in this world, and it’s no different when it comes to the flywheel.

  • Train Speed-Specific Patterns for the Desired Outcome: Fast or slow, heavy or light.
  • Use Appropriate Depths: This may require more than just one depth.
  • Use Appropriate Vectors: Are vertical patterns enough?
  • Expect and Monitor for High Efforts and Quality Output: You can’t expect exceptional results from mediocre efforts.

Some single leg training has helped vertical jumping with poorly developed athletes who just need something, but jumping with two legs with a flywheel works better than split squatting at higher levels. Especially when we want fast movements, the squat pattern is just more appropriate and more effective than split stance patterns.

Lateral squatting has some research behind it in regard to jumping, but we tend to use that a lot less than bilateral patterns. Why? The research shows that unilateral movements help, but more so for change of direction. So, if you’re seeking raw horsepower, bilateral movements are better. Flywheel squatting improves jumping, sprinting, change of direction, and even muscle thickness in only six weeks with athletes.

Like variable resistance training, #flywheel training can be used at a multitude of depths, says @SPSmith11. Share on X

Another point of contention with coaches and athletes is the depth that squatting is effective to. As I mentioned above, we use force plates to determine what qualities we need to focus on, but we can also experiment with countermovement depth to better determine how an athlete should approach the test. If an athlete performs better at shallow depths than they do at deep squat jumps, that may dictate a slight change to the programming, but it often just gives us a quantifiable reason to work on jumping at the appropriate countermovement depth. Like variable resistance training, flywheel training can be used at a multitude of depths. While most people prefer to squat shallower and lighter, we also use deep ranges of motion for people who have difficulty achieving similar depths with bar-loaded variations.


Video 2. Deep and heavy flywheel squatting is simple, but yields great results. Focusing on the basics will work immediately and help prepare for advanced exercises later.

Because we are often asked about horizontal exercises in regard to vector training, we find that barbell and band training (supine movements mainly) work best. There has been research from Sophia Nimphus and her colleagues that exposed the limitations of horizontal training in jump performance, and suggested that the barbell was superior to the cable. It’s worth mentioning that most clients who are interested in jump height are also interested in acceleration and speed.

In the study, barbell work improved sprint performance for a much greater distance than forward-stepping cable work, and we’ve found it trickier to train the horizontal vector with the flywheel anyway. Movements that require a long learning process should be worth the time spent, so based on experience and the research findings, we don’t waste a lot of time on it. We spend a considerable amount of time directly on sprint performance and utilize enough movement variation in our training to give us confidence in our programming overall.

Currently, we only have one kBox and one kPulley in our gym, as we feel flywheel training should be monitored for most athletes and not treated like an accessory movement. If, and when, we have more units, we may use the kBox for more general use and accessory patterns, but as of now our kBox training is like Olympic weight training or heavy barbell work— you can’t look the other way and hope it’s done well.

A PR doesn’t happen every day, but a standard should be set when using certain equipment, says @SPSmith11. Share on X

The kMeter is our compliance solution and creates a fail-safe way to ensure effort. Not only do we expect the efforts to look a certain way, but the output must resemble the athletes’ capabilities. If they reach a certain peak output on a good day, we should expect them to be working around or above that number to hope for anything meaningful to result. A PR doesn’t happen every day, and that is acceptable, but a standard should be set when using certain equipment. Let them know they need to earn the right to use it through hard work.

Can You Jump Too Much?

We used a lot of jumps and plyo work in our programming already, so it only made sense to see where we could include or modify what we were doing and take advantage of the tools we had. We are happy with our jumping progressions, but were initially concerned with the potential problems that could pop up if we added to what we were already doing. Due to the mechanics of the exercises, we assumed there would be a noticeable increase in patella- or Achilles-related complaints, but we have found the opposite is true.

We have used the kBox and kPulley quite successfully in reducing knee and Achilles pain in many athletes, and the incorporation of long, moderately loaded sets have seemed to help the most. There’s a reason they call the injury “jumper’s knee,” and what we learned this year is that decreasing jump training or reducing volume isn’t as effective as preparing an athlete to withstand the stressors they will face. In the winter months, when running in the grass isn’t possible for most athletes in the Northeast, a strong set of tendons pays off big time.

We have used the #kBox and #kPulley successfully to reduce knee and Achilles pain in many athletes, says @SPSmith11. Share on X

For the rehab or prehab side of flywheel use, in regard to jumping and avoiding knee issues, we move between starting off with flywheels and finishing with them. Some clients see better results when they “activate,” for lack of a better term, prior to jumping, and some do well with simply adding a good amount of volume to wrap up a leg day. When injuries, whether lower body or even upper body (collarbone or shoulder surgery), require removing jumps altogether, it is possible to replace them with lighter, faster flywheel work. It’s not even close to the velocity you’ll get with jumping, but the improvements you can gain in eccentric strength and propulsion are worth the inclusion.


Video 3. Athletes can use high velocity and various depths to elicit the training adaptations needed to make improvements in squatting and jumping. A light inertial load is great for athletes who are fresh but find plyometrics a little too demanding for the day.

Lastly, the flywheel can be used in complex or contrast training along with jumping to bring the programming to the next level. This, as I’ll discuss in more depth below, is a great tool for performance, but also as a means of reducing the number of actual jumps an athlete needs to do. By using the flywheel for the heavier portion and jumping for the faster portion of the contrast or complex, you can achieve the desired result without additional foot contacts or impacts. Some athletes will do both flywheel training and plyometrics with no signs of wear and tear, because the potentially hazardous loading of the knee and ankle is lessened without reducing the amount of necessary stress on the tendons as a whole.

Contrast and Complex Training for Jump Performance

There is probably a more “cerebral” method of breaking down the programming, but we’ve simplified and refined the process with a basic decision-making tree. This is just an option of ours, but it’s likely the most useful one for other coaches.

  • If an athlete lacks general strength, we don’t worry too much about complexes or flywheel programming. We can use both tactics, but not much beyond ensuring they are doing the exercises right and can perform other movements without any equipment.
  • Athletes who can lift well with traditional barbells, but have poor eccentric abilities, will have a healthy dose of flywheel patterns. We typically see poor eccentric abilities in people who used to deadlift often and spent less time using squats, Nordics, or jumping in their training.
  • Injured athletes who need to jump to compete are perfect candidates for complex or contrast work with flywheel training. Nothing beats a return to play program that actually improves an athlete’s performance, and isoinertial resistance can be a huge help in this process.
  • Advanced athletes sometimes need to move beyond what got them to that point. Adding contrast/complex training is a normal addition to these programs, but at times it’s not enough. Flywheels can sometimes replace the majority of traditional movements when that small fraction of an improvement might make all the difference in an elite athlete’s training.

In terms of the actual training, there are many ways to skin a cat (what an odd expression). We try to use our testing and profiling protocols to determine what methods work best for each client. We often program the different methods in a block periodization scheme and use the appropriate tool for the current block.

During accumulation or heavy stress phases, we may use high inertia with low inertia contrast work, and during speed or peaking phases, we will probably program heavy fast work with jumps, as it applies more directly to our desired outcome. Here are the combinations we see as most useful in terms of general training and flywheel jump programming:

  • High-Inertia Flywheel followed by Low-Inertia Fast Flywheel
  • Heavy Work (Traditional Barbell or High-Inertia Flywheel) followed by Jumps
  • Heavy Fast Work (Olympics or Loaded Jumps) followed by Light Fast Work (Jumps or Low-Inertia Fast Flywheel)
  • RFD (Barbell/Strength or Squat Jump) followed by Rebound (Jumps or Low-Inertia Fast Flywheel)

All of these options are effective when programmed appropriately. We have experimented with clustering barbell RFD work with flywheel for advanced athletes, which seems promising. For now, the primary goal is just ensuring the flywheel training that is in a program is done well and consistently enough for our athletes. It’s easy to get caught into the minutiae of training, but you’ll never know when something works really well unless you experiment a little, and the experiments should last longer than a day (unless safety is the issue).

What About Other Exercises?

Nobody cares about training differently—they really just want to train better. The first question I had with flywheels is what did they offer that dumbbells could not? That point was already covered earlier in the science side, but with all of the other options, such as band assistance and eccentric drop jumps, why use flywheels to jump better and not true jump exercises? The answer is we will always use a mix of methods to get results, but we must decide what is a priority and what is nice to do in theory.

Nobody cares about training differently—they really just want to train better, says @SPSmith11. Share on X

If an athlete has good eccentric abilities but poor vertical velocity and poor capacity to generate a very rapid rate in force, we will spend more time training faster and less time on the ground with exercises that express speed. In our experience, the time frames for a kBox squat are too long to improve reactivity, but they do shape a large capacity to train reactivity more. To make things simple for a new coach, we just tell them the kBox bridges the gap well and it trains the redirection of momentum better.


Video 4. Contrast training is popular, but you’ll only know if it’s appropriate if you measure. Testing athletes after a set of flywheel squats on a force plate helps identify which trainees may respond better or could benefit from conventional training.

Regular plyometrics is a priority supplement to isoinertial training. The principle of specificity holds true with rapid sporting actions and flywheels won’t stand up to the test completely. It’s not that flywheel training doesn’t work if performed alone, it’s that it works best by tying other means of training together.

#Flywheel training works if performed alone, but works best when tied with other training means, says @SPSmith11. Share on X

Loaded jumps are similar to fast kBox squats, but they are not the same. Regular plyometrics are much faster, and barbell movements may look similar, but they are not even close to the same when you look at the line plots of the force plate. Anyone can load a jump—making the load work for them better is what matters. Jumping is a skill, but just performing vertical jump testing may not make you jump higher like rehearsing sprinting does. Jump training, not jump testing, is the key to improvement. We jump. We jump unloaded, loaded, reactively, from a dead stop, paired with heavy work, and paired with flywheels. But the bottom line is, we jump.

One thing we don’t do is jump with elastic bands. It’s not that it doesn’t have some value or science backing it, it’s just not currently worth the investment, when it can easily be replaced by dumbbells/barbells/flywheels and some creativity.

Jump Higher, Farther, and Safer

Many of our athletes made great gains in their jump performance before we had flywheels or any fancy equipment. We know that athletes everywhere are making improvements without any tools, but it’s not just about improving. Athletes invest so much time and effort into training that it’s our job as the professionals to seek out the best possible outcome, not just acceptable progress. With only so much training time after school for athletes, or in the off-seasons with our pro guys, we want to make sure they are explosive and reactive when they land.

It’s our job as the professionals to seek out best possible outcomes, not just acceptable progress, says @SPSmith11. Share on X

Don’t just add kBox training and expect it to do all of the work for you. We think screening eccentric abilities with jump profiling and training hard with the basics can make a big difference, but pairing exercises that have high speeds and unique qualities can be a huge benefit to an athlete’s program. We recommend using the kBox or a flywheel system for anyone seeking jump improvements and anyone who could use some quality strength gains (hint: that’s just about everyone).

Since you’re here…
…we have a small favor to ask. More people are reading SimpliFaster than ever, and each week we bring you compelling content from coaches, sport scientists, and physiotherapists who are devoted to building better athletes. Please take a moment to share the articles on social media, engage the authors with questions and comments below, and link to articles when appropriate if you have a blog or participate on forums of related topics. — SF


Hockey Player on the Ice

Skating Speed and Rotational Power Development with Kevin Neeld

Freelap Friday Five| ByKevin Neeld

Hockey Player on the Ice

Kevin Neeld is the Head Performance Coach for the Boston Bruins, where he oversees all aspects of designing and implementing the team’s performance training program, as well as monitoring the players’ performance, workload, and recovery. Prior to Boston, Kevin spent two years as an Assistant Strength and Conditioning Coach for the San Jose Sharks, and before that he was the director of a private sports performance facility in New Jersey for seven years, working with pro, college, junior, and elite level youth hockey players. He has also served as a strength and conditioning coach with the U.S. Women’s National Ice Hockey Team for the last five years.

Freelap USA: What are the key strength and functional qualities that tend to make an athlete fast on the ice, and how does this contrast to sprinting on land?

Kevin Neeld: In the interest of simplicity, there are two key elements that determine a player’s skating speed—skating efficiency and the ability to produce high amounts of force, quickly. Skating efficiency is dictated by the athlete’s ability to get into and control optimal skating positions and patterns. From a training perspective, this can be addressed by ensuring the athlete has foundational capacities like ankle dorsiflexion; hip range of motion in flexion, abduction/adduction, and rotation; and control, strength, and endurance in single-leg stance. If a player possesses these capacities and still isn’t a good skater, they likely need more time with a skating coach.

The propulsive phase of the skating stride is concentric dominant and characterized by a much longer “ground” contact time than sprinting. For example, ice skating contact times typically hover around .35s for linear and crossover skating patterns, while the longest ground contact times in early acceleration phases of sprinting are only around .17s. This propulsive phase is also initiated at relatively deep angles of hip and knee flexion, whereas the foot hits the ground in only slight hip and knee flexion in sprinting.

While the stride pattern looks like a ~45-degree angle backward push, the reality is that as the player accelerates, the push is much more horizontal, but forward momentum results in the stride lag moving behind the player toward the 45-degree position. In other words, the push is more lateral, even if the end position is more diagonal. With these things in mind, exercises with longer ground contact times that are initiated from deep hip and knee flexion angles and integrate lateral and diagonal pushing patterns will likely have the best transfer to skating, while exercises designed to improve stiffness in the support phases of sprinting can be under-emphasized (but not completely neglected) in hockey.

Freelap USA: How do you divide specific joint actions in skating in the weight room (if they can even be replicated) versus showing someone the opposite action? What is the rationale and timing of either mode?

Kevin Neeld: Generally, the first phase or two of the off-season is designed to help address some of the undesirable adaptations. Skating throughout the season creates extremely high volumes of rapid hip motions, often at or approaching end range. These movements are layered on top of a lifestyle that involves a lot of sitting—on the bench, in the locker room, in the car, on the plane/bus, playing Xbox, etc. It’s not uncommon for a player to lose 10-15 degrees of hip rotation throughout a season.

It’s common for an ice hockey player to lose 10-15 degrees of hip rotation throughout a season, says @KevinNeeld. Share on X

The goal of the early off-season phases is to unload the structures that are highly stressed throughout the season, while also restoring optimal movement capacity at specific joints throughout the body. From a metabolic standpoint, hockey practices and games rely heavily on both alactic and lactic energy systems, whereas the aerobic system is minimally emphasized. Improving aerobic qualities concurrently with the aforementioned “movement” aims is consistent with the overarching goal of restoration. In a lot of ways, this is “anti-sport-specific training.”

Around the middle of the off-season, I start to integrate more lateral and rotational movement patterns, progressing toward higher velocities as the off-season progresses. The goal during this time is to sequentially progress from exposure to improving maximal capacity to sport transfer. As players start to ramp up their on-ice work, I decrease the amount of off-ice work we do in similar patterns, particularly at the very end of the off-season and pre-season.

Freelap USA: What do the greatest training needs and issues for hockey players tend to be?

Kevin Neeld: In a word—individualization. Players succeed and fail for different reasons. Some players succeed on high-level skill but fail (or don’t succeed to their potential) because of insufficient speed, strength, conditioning, or durability. It’s rare that a player with any training background is lacking in all of these areas, so it’s important to have a diagnostic system to better understand how training can best help the player. In general, I think most players can be placed into one of four buckets:

  1. Good speed/power, but poor repeatability;
  2. Good strength, but insufficient speed/power;
  3. Aerobically gifted, but lacking speed/power/strength; or
  4. Physically prepared, but major movement quality/durability concerns.
The greatest training need and issue for hockey players is #individualization. Share on X

Of these, I think the athletes in Category 2 may be the most overlooked, especially in hockey, because identifying these players is complicated by skating proficiency. Typically, these players have invested a lot of time and energy into strength training, but not as much in lower-load, higher-velocity strategies to access high-threshold motor units. As a result, their ability to produce force quickly isn’t commensurate with their capacity to produce force.

Freelap USA: How has your process on movement screens changed over the years with your athletes?

Kevin Neeld: I’ve been fortunate to be exposed to many different movement assessment systems and I think they all have value. With that said, the more I’ve learned, the more apparent two things have become:

  1. Logistically, it’s not feasible to run every system’s screen on each athlete, and
  2. Almost every athlete is going to fail one of these system’s tests.

Movement screening can be used to help provide insight into potential injury risk, but the relationship between movement and injury risk is complicated by a number of other factors. As a result, most movement assessment methods produce a lot of “false positives” if viewed purely from an injury incidence perspective. However, movement screening can also be used to help “clear” athletes for certain movements within a training program and, when limitations are addressed, potentially to improve performance within sport by allowing the athlete to access and control more desirable positions.

Most movement assessment methods yield many ‘false positives’ if viewed only for injury incidence, says @KevinNeeld. Share on X

Over the last 10 years, I have expanded and trimmed my personal assessment process based on the needs of the athletes and the logistical constraints of the environment, but I’m really developing the process to answer three key questions:

  1. Are there any notable limitations that would prevent the athlete from performing specific exercises with optimal form?
  2. Integrating feedback from the athlete, coaches, etc. with population norms, does the athlete present with limitations that may prevent them from accessing optimal positions and producing optimal patterns for their sport?
  3. Are there any major red flags that are known or likely to contribute to future injury risk potential?

Freelap USA: How do you approach rotational training off-ice for hockey players?

Kevin Neeld: I think of rotational training in a few different contexts:

  1. Does the athlete have the foundational capacity to effectively perform rotational patterns (i.e., do they have optimal hip and thoracic spine rotation)?
  2. Can the athlete separate/dissociate lower/upper body rotation?
  3. Can the athlete produce power in rotational patterns?

Foundational rotational capacity is assessed through the movement screening process. Limitations can be addressed through specific mobility/stability exercises or, in the case of purely structural limitations, the athlete can be taught to move around the barrier coincident with ensuring that all non-structural limitations are addressed to provide the cleanest possible movement opportunities. In hockey, as in most sports, there are times when the hips need to rotate under a relatively stable upper body (e.g., shoulders stay square), and times when the upper body needs to rotate under a relatively stable lower body.

I program rotational power primarily through different #plyometrics and med ball exercises, says @KevinNeeld. Share on X

Assuming mobility is cleared, specific exercises like chops and lifts, hip turns, and an exercise I call a “2-way skater” can be used to help teach the athlete to dissociate between lower and upper body rotation. Lastly, I program rotational power primarily through different plyometrics and med ball exercises. Med ball throws can be performed from front-facing and side-facing positions, which changes the lower body contribution and transfer of energy, as well as from more dynamic lead-ins. During certain phases, these exercises may be performed as “primary exercises,” whereas in others they’re performed after a strength exercise to elicit a potentiation effect.

Since you’re here…
…we have a small favor to ask. More people are reading SimpliFaster than ever, and each week we bring you compelling content from coaches, sport scientists, and physiotherapists who are devoted to building better athletes. Please take a moment to share the articles on social media, engage the authors with questions and comments below, and link to articles when appropriate if you have a blog or participate on forums of related topics. — SF


A soccer player in mid-air, wearing a jersey and shorts, skillfully kicking a ball against a dark background. The image has a monochromatic sepia tone, highlighting the athletes dynamic movement.

ThermoHuman – Applied Science for Sports Medicine and Performance

Blog| ByJavier Arnaiz Lastras

The use of thermography is not new to sport, but more teams and clinics are adopting the technology because of our recent advancements in improving outcomes. Historically, thermography was seen as a promising technique and not a best practice. I have used thermography for years and understand its limitations, but also its potential. Injury reduction and athletic performance improvements in sport are sometimes seen as mirages, but when combined with clinical evaluation, thermography is practical and effective.

ThermoHuman, the company that I am a founder of, is the leader in sports thermography. We have serviced teams and federations for years, and now have clients in the MLB, NBA, and MLS, and individual athletes in the NFL and NHL. The goal of our company, and this article, is to show why thermography is effective, and explain the opportunity to coaches and medical professionals.

What Is Sports Thermography?

Thermography has many names outside of sport, such as infrared thermography and thermal imaging. Professionals have likely seen thermography used in surveillance or other fields like emergency response. Those in sports performance have used thermography to conduct research and help with monitoring athletes though thermal imaging. Sports thermography is an indirect measurement; meaning the camera detects radiation emitted by a body or structure. Human beings are warm-blooded animals, so they are easily monitored with thermogenic images or videos. A recording with thermography is called a thermogram.

We believe that thermograms, combined with clinical evaluation, can help reduce injuries. Share on X

Sports have used thermography to monitor change with athletes, ranging from exercise responses to injury prevention methods. ThermoHuman believes that, combined with clinical evaluation, thermograms can be used to help reduce injuries before they become problematic. Thermography is not able to predict with certainty that an injury is going to occur, but it can be used in conjunction with other approaches to improve the outcomes of a monitoring program.


Video 1. (In Spanish) Thermography uses infrared cameras to collect athlete data, and then analyzes the information with customized software. Based on the changes in temperature, and on the interpretation, teams can measure patterns of change and make more confident decisions. For non-Spanish speakers, watch the system in action as the information shared on the video is explained in this article.

The human body is a very intricate collection of networks and systems that emit heat, and those temperature changes and fluctuations are clues to possible physiological changes. The radiation of heat can be interpreted with the training to hint at possible issues with function and health status, specifically chronic injury or possible injury risk. A change in skin temperature could just be a normal variance of the human body, or if the pattern matches clinical findings, a possible injury. Most of the research with thermography in sports attempted to connect core temperature with skin temperature and athlete work rates, but over the last few years thermography has seen an increase in medical uses.

What Does ThermoHuman Do?

ThermoHuman is both a software and an education company, not a camera manufacturer. We do use FLIR technology for our customers, but we are interested in figuring out how to interpret the data better and what to do with the data post analysis. Our software is about quantitative change, not interpreting information like sonography or magnetic resonance imaging.

Technically speaking, thickness and sizing information can be found with those technologies, but those imaging techniques are usually preferred to help diagnose an injury using qualitative approaches. ThermoHuman assists professionals by automating the process as much as possible, and educates practitioners on capturing technique along with proper analysis.

ThermoHuman
Image 1. ThermoHuman is a consulting group and software provider. Each of our users needs to lease our camera and subscribe to our software program. Those interested in extra education can access additional offerings from our thought leaders.

ThermoHuman is a tool for clinicians or very educated support staff, not interns or coaches without education. A thermogram from a camera with our software asks better questions—it doesn’t give comprehensive answers. A thermogram is a representation and summary of heat radiating from an athlete’s body; it’s not a solution that can alert of an injury or weakness directly. Acute pathologies, chronic injuries, and pain perception require clinical evaluation by medical staff, but athlete injuries that are not symptomatic or showing up in functional evaluations are worth exploring with ThermoHuman software and education.

How ThermoHuman Can Help Sports Professionals

ThermoHuman has four effective ways to support player health and performance, and we have seen great success with monitoring and medical divisions of teams. Thermography in sport is still evolving, but it is strongly suited to help the fast-paced environment of world-class sports. Medical staff are mainly concerned with reducing injuries, but when injuries do occur, they want the rehabilitation process to be more effective so re-injury or cascading injury doesn’t strike later.

Thermography is strongly suited to help the fast-paced environment of world-class sports. Share on X

Initial assessments are the first step faced by all teams and clinicians. Screening, specifically orthopedic assessment, is useful for documentation but is not always effective for identifying injuries or specific injury risks. Baseline information using ThermoHuman is important for vascular responses, creating an important profile that every professional should have. Vascular defects are complicated matters and should be added to the discussion of player health and wellness.

Monitoring ThermoHuman
Image 2. The reporting of trend patterns and seasonal changes is popular with our users. Repeated testing improves the results with sports thermography, and our software speeds up the process so more data is collected in a year.

The second area that ThermoHuman excels in is injury management. If an injury does occur, monitoring the advancements in rehabilitation requires a way to track change without even more overloading of the injury site. We do appreciate that muscle performance with strength testing has value in sport clinics, but in combination with thermography the information is even more insightful, such as return from ACL surgery. Tracking a complex injury with an athlete making millions of euros is a very stressful process that requires as much additional information as possible.

Load assimilation is an exciting metric that ThermoHuman specializes in. Player workload is usually very arbitrary, meaning the measurements are not specific to areas of the body. Using the software to add anatomical landmarks enables coaches and medical staff to observe the time course of heavy training and competition during the season. When areas appear to be overloaded, very clear adjustments to sport training or resistance training become easy with our reporting. In combination with GPS tracking and load calculations, we believe that ThermoHuman adds more possibilities to keep athletes training without resorting to resting unnecessarily.

Injury prevention is the final area in which we are seeing growth and success. ThermoHuman is an additional layer that can increase the success rate of injury prevention if used consistently. Asymmetry is a very contextual measure with thermography, since an imbalance requires more than just a comparison between limbs or sides. Having injury history, training information, and other data can explain if an asymmetry is acceptable or if a true concern requires a physiotherapist’s attention. Athletes are able to compensate and manage asymmetries, but over time fatigue and heavy loads result in compromised states that leave an athlete prone to muscle tears or joint injuries.

These four approaches to athlete performance and health improve every year. ThermoHuman is a new company and we are rapidly updating the software as the hardware improves. New research and new methods of athlete support will also shape our software and education, so expect us to continue to refine our technology. 

ThermoHuman’s Advantages and Limitations

Sports thermography has a lot of advantages and, of course, limitations. Starting with the drawbacks, you must have training in order to collect the data, and even more training to properly use the information once you collect it from the cameras. The software helps improve the process for organizing the thermographic readings with reporting, but it requires medical expertise to know what to look for. Right now, we only recommend the product’s use in sports medicine and the applied sciences. High-performance coaches should be aware of our system, but the responsibilities of using it will likely be in the hands of the medical division of a team or university.

Its speed in collecting data makes thermography very useful and powerful in sport. Share on X

The speed of data collection is why thermography is so useful and powerful in sport. Within seconds, an image is captured and digitally saved for further analysis. An entire body can be measured in a few minutes and analyzed just as quickly. In addition to the speed of data capture and analysis, the use of sports thermography has further benefits to the user:

  • The process is completely non-invasive and painless.
  • Thermography is passive—the athlete requires no active effort to collect data.
  • Information can be merged with other data streams for cross-validation.
  • Data is longitudinal, so trends and patterns can be extracted from the recordings.

Of course, these customer demands are just the tip of the iceberg, but to me they are the foundational directions that lead to the right answers. Like all data and clinical evaluations, cross-referencing other data is suggested to get to the bottom of the problems faced by professionals.

ThermoHuman Screenshot
Image 3. A strength of ThermoHuman is the reporting feature of our software. An athlete’s body has dozens of risk areas that must be quickly scanned daily. Our software streamlines the process and enables support staff to drill down to local muscle groups efficiently.

There are limitations with thermography, as it’s not only an indirect measure of body heat, but many of the possible interpretations are indirect as well. Thus, without careful analysis, the use of thermography is extremely limited. If they don’t have the training and clinical skills, practitioners can’t use sports thermography alone.

Other limitations are also environmental, meaning a protocol must adhere to the requirements of proper data collection. Each athlete must remain still and follow instructions or possible artifacts and interference could occur from outside variables. Cameras are more sensitive than a decade ago, but with technical advancements, the process does increase the demand on compliance with end users. Overall, the challenges of thermography should not be an issue for those who adopt the technology, but it’s only fair to warn you that while the benefits are convenience and speed, the method also comes with responsibilities.

Scientific Evidence for Thermography in Sport

A thorough look at the research on thermography does show problems with the interpretation of skin temperature when used as a summary of an athlete’s health status. I want to embrace those limitations again here, with explanations for why the research is sometimes conflicting and difficult to understand. The first step for new users is to understand the science of heat biologically, and then we advance to sports performance and sports medicine.

The first step for new thermography users is to understand the science of heat biologically. Share on X

Biologically radiating heat is a natural process that constantly adjusts for internal physiological factors that occur in everyday life. An athlete drinking a cold beverage will change their core temperature, and this may or may not change skin temperature. An athlete with poor circulation of the legs may feel cold, while an athlete of similar build and ability may be sweating. Thermoregulation and physical responses are all unique and each athlete should be seen as an individual being with patterns that are unique.

The validity and reliability of skin temperature with healthy athletes is a question that usually comes up early in conversation. My colleagues and I researched this question and we agree that sometimes readings are problematic, and that’s why our software was designed to manage those conditions. It’s not perfect, but with the mortality risks premature infants face, hospitals are investigating FLIR thermographic cameras as a trustworthy approach to real-time monitoring.

Post training or competition requires a different approach to interpretation, as workload and the response to the strains of exercise add more analysis to the process. Highly trained and untrained athletes respond differently to exercise, and subjective monitoring seems to have a relationship with thermography data as well. Case studies on soccer athletes were useful in explaining the recovery time from practice loads, and repeated monitoring may be a great solution for those that play sports where tracking running isn’t as effective, such as baseball and cricket.

Structural differences in athletes can change work rates and overload patterns, such as the equinus and non-equinus conditions of the foot. A current study with soccer athletes demonstrated how thermography can be used with groups of players to monitor the stress on the gastrocnemius and Achilles tendon. Foot eversion was researched as well with runners, but the relationships were too weak to use as a monitoring solution.

Asymmetry Avatars
Image 4. As machine learning and other automated techniques improve, so will the workflow with ThermoHuman. Expect the science and practice to become further refined in both the research and in the physio room.

Monitoring chronic and acute injury with thermography is where education transforms the technology into a practical and effective strategy. Pre-scanning athletes when limitations are known is useful, especially when measurements are combined with structural modalities such as traditional medical imaging. ThermoHuman’s goal is to make sports thermography a part of every athlete’s routine. I realize it’s a very small part of the picture, but it’s a real opportunity for teams to reduce injuries. Proper training, comprehensive monitoring, and highly educated staff help a successful team win games and reduce injuries, and thermography fits into the methodology. Each year, sports thermography evolves and improves so that it’s faster, more accurate, and less expensive.

In addition to the above scientific references, I recommend reading these declarations by my colleagues in sports thermography.

How Teams Use ThermoHuman

Teams are implementing ThermoHuman to manage complex situations and administer athlete monitoring with greater precision and speed. The best way to apply ThermoHuman is to have it compliment what your team does and not force it to take over the monitoring process.

A medical device is a tool for practitioners, so the process should only expand with the addition of thermal imaging and not really change much. The right way of using ThermoHuman is to integrate it proactively and commit to the system you find is manageable in the long run. A few teams utilize ThermoHuman to handle very complex injuries, such as athletes who have gone through multiple surgeries, but it’s also powerful for large teams that are young and are relatively healthy. Success with ThermoHuman relies on being organized and having a plan.

Sports thermography is most powerful when it’s used continuously. Share on X

The clinical process of integrating sports thermography benefits teams, as it ensures the performance of a best practice with conventional care, and adds in a second round of athlete examination. An initial assessment is useful, as explained earlier, but sports thermography is most powerful when it’s used continuously. Due to the fact it is visual, it may seem to be in the same category as medical imaging, but that is not the case.

Thermography is, again, quantification of physiological responses, and it’s up to the practitioners to determine if false negatives and false positives are due to confounding variables or the limitations of emitted radiation. A thermogram captured over time reveals how injuries and possible pathologies are trending; it doesn’t diagnose the injury or directly predict risk without interpretation and other information.

Team Roster
Image 5. Our software is very user friendly. Medical staff and coaches do not have time to “learn” new software, so we kept the process very simple and easy. Over the last two years, we have invested a lot of capital into advancing the software, and it’s so intuitive we spend our time teaching how to use thermography rather than hours on how to use the software.

Sport science is using sports thermography to manage workload responses with more resolution for athletes. We support the concept that player tracking and other technologies are excellent for monitoring load. In addition to the collection of data, statistical evaluation of the workload is also proven to be effective in managing risk. Our issue with those methods is that they are very general and non-specific, making them limited in practice.

For example, a body may fatigue in a pattern that can tell us how a program can be altered so an athlete can practice without increasing risk. Another point is that some athletes who are not load-tolerant are usually held back by an injury or past surgery that’s slow to heal. Therefore, summary models of workload are not useful for veteran athletes, or those who are fit overall but managing a small painful condition.

A few users are privately experimenting with ThermoHuman to assist in recovery approaches. While we educate our users, a strength of ThermoHuman is that we also learn from our users, especially those who are successful and finding original ways to use our service. The collective intelligence enables us to expand our reach and refine the process each year.

How to Work with ThermoHuman

We at ThermoHuman welcome questions and discussion about thermography in sport. We also realize that ThermoHuman is not a great fit for everyone, but do believe that every team can benefit from the power and convenience of thermographic imaging on a routine basis. ThermoHuman won’t do the work for you, but it will streamline and improve the process so that precious time and energy can go toward better support of athletes.

My hope is that the biological sciences help improve the capability of thermography in sport. Share on X

For years, we have seen successful outcomes by working with teams that are proactive and patient with our technology. If you are interested in demonstrations, I recommend watching the videos of our system in practice to understand how convenient our solution is. If you are skeptical about the effectiveness, I welcome you to look at the best available science to become familiar with the potential and limitations of thermography. My hope is that the biological sciences help improve the capability of thermography in sport, and ThermoHuman will be ready for those advancements.

Since you’re here…
…we have a small favor to ask. More people are reading SimpliFaster than ever, and each week we bring you compelling content from coaches, sport scientists, and physiotherapists who are devoted to building better athletes. Please take a moment to share the articles on social media, engage the authors with questions and comments below, and link to articles when appropriate if you have a blog or participate on forums of related topics. — SF


Man Preparing For Handshake

10 Tips to Guide Young Strength Coaches Through the Interview Process

Blog| ByGeorge Greene

Man Preparing For Handshake

Regardless of where you are in your career, the interview process is extremely important. While a lot of colleges offer a career center or similar services to help you organize your resume, there is no blueprint for how to interview for a college strength and conditioning position. In this article, I list ten ways to navigate the interview process professionally and provide examples from my experiences with phone and in-person interviews that will you help you stand out from the pack.

One

Know What Position You Applied For & Who You Are Talking To

I completely understand and respect that young coaches are applying for 10, 20, or even 30 jobs at a time when trying to land an opportunity. That, however, is not an excuse to avoid doing your homework when you land a phone interview. Without fail, two of the interview questions will be: What do you know about this school, and why are you interested in coming here? I’m always impressed with someone who digs into our athletics mission and vision or did some research on the teams and their success, and I’m equally unimpressed when I get a generic or lazy response.

Here are some recent examples that I’ve heard during phone interviews: “To be completely honest with you, coach, I don’t even know where the school is. Where is it again?” “I have applied to so many jobs, it’s hard for me to keep track.” These can disqualify you immediately. You do not need to recite word for word the department philosophy and the head strength coach’s bio, but try to educate yourself on the school if you want to give yourself a chance.

Research the sport programs' current records, the school location, and conference they compete in, says @GreeneStrength. Share on X

Tip: Research things like the current records of the sport programs, the school location, and the conference they compete in. Also do a Google search to see if the school has received any national attention. It will take you no more than 10-20 minutes and will give you the information necessary to ask the right questions and come off prepared for the interview.

Two

Answer the Phone When Your Time is Scheduled

Answering the phone is the easiest part of the interview, yet some still struggle to do this. I’ve had one candidate ignore the call, then text and say, “can we talk in 20 minutes?” I had another forget the time zone difference when I specified it in the email. Again, this can be an immediate disqualification. If you can’t stick to the time and be punctual for a phone meeting, how can I trust you to do so in the weight room? Keep in mind, coaches may be interviewing 10-20 candidates so it’s easy to eliminate a person if they can’t keep to their time.

Tip: Treat the phone interview as if you were doing an in-person interview. Throw on a suit and take the phone call in a quiet place where you can concentrate. Leave notes out and have a pen and pad ready so you can write down important information. Most importantly, be ready 15 minutes before the interview starts, turn your phone on, and be prepared for the phone call.

Three

Avoid Swearing

It is always a turn off to me when a candidate starts to swear, whether in-person or on the phone. In an interview, you need to act like a professional. If you swear in one of our first conversations, I’ll believe you might do the same in front of a coach or administrator.

Tip: Treat an interview the same way you would if you were meeting your girlfriend’s or boyfriend’s parents for the first time. Even if you felt comfortable in the first 10-15 minutes, you probably wouldn’t start dropping F-bombs at the dinner table. Be sharp.

Four

Have Questions Ready

Having questions ready shows that you did your homework and are interested in learning more about the school, program, and philosophy. Although some of your questions might get answered during the flow of the discussion,spend the time and ask well-thought-out questions that separate you from other candidates.

Questions about the school, program, and philosophy will separate you from other candidates, says @GreeneStrength. Share on X

Tip: Ask questions that show you did your homework. For example, if you see in the bio that the coach running the interview started as a GA and worked their way up to the head position at the same school, ask what their journey was like and how the program has grown during that time. Questions like this will set you apart.

Five

Have a Strategy for When to Ask About Pay

If the first question you ask during a phone or in-person interview is “how much does the position pay?” you run the risk of rubbing the hiring committee the wrong way. This occurs in other professions as well, and it sends the wrong message. If it is a phone interview or in the early stages, your focus should be on learning more about the university and the athletic department; the payment details will come later if you’re fortunate enough to move forward in the process.

Tip: Generally, compensation does not come up during the interview process until you receive an offer. Be patient and research comparable positions and the cost of living in the area so you can professionally and confidently negotiate the salary when you receive an offer.

Six

Dress the Part; When in Doubt, Overdress

Everyone talks about making a great first impression. The first opportunity you’ll have to do so is when you walk into the room for your interview. Whether you’re applying for an internship, GA position, assistant, or director role, dress as if you’re attempting to land your dream job.

Dress well and bring along workout clothes in case you're asked to demonstrate exercises, says @GreeneStrength. Share on X

Tip: Bring a pair of sneakers, shorts, and a t-shirt in a bag. On some interviews, the committee may ask you to demonstrate exercises or invite you to join the staff for a workout, which is a fantastic way to get to know the staff. On one interview I was asked to lead a group on the fly from start to finish, so be prepared for anything.

Seven

Do Not Lie on Your Resume

Everyone makes themselves sound a little better on their resumes—I get that. Outright lying, however, will expose you and eliminate you not only from the job you’re applying for, but also for future positions with anyone in that particular coach’s network.

I had a GA candidate list a school as their current job on their resume and went into specific detail on the phone about their experience there, even going so far as to tell me a specific story to make a point about a question I had asked. Little did this candidate know that I had a contact at the school in question, and I immediately picked up the phone to follow up for more information. Come to find out, this candidate had never stepped foot on the campus and was scheduled to start employment there a few weeks later.

I had another candidate take it upon themselves to change their title on their resume. They listed they were the assistant director of strength and conditioning when they were a graduate assistant per their supervisor. Assume the place you are applying is going to call everyone you’ve ever worked for or with during your career—because they will!

Tip: Plain and simple—be honest. Coaches who are hiring across the country are looking for intangibles: hardworking, motivated, and hungry individuals who are passionate and care about the athletes they work with and the job that they do. A slight title adjustment to spice up your internship experience isn’t going to land you the job, but it can prevent you from getting it if the coach does their homework.

Focus your attention on making a huge impact wherever you are, and the staff you work with will go above and beyond to help you. If I have an intern or GA that does a great job for us, I will do everything in my power to help them land their next opportunity. A strong recommendation from your boss or sport coaches is 100 times more valuable than words on a piece of paper.

Eight

Come Prepared for Your On-Campus Interview

Find the facility. The opportunity to land an on-campus interview is special. Hundreds and hundreds of resumes are read, and 20-30 phone calls are made before an on-campus interview takes place. Whether you get the job or not, you have a tremendous opportunity to leave a lasting impression. The first step toward making a great first impression is finding the facility!

You’ll likely receive directions to the location—however, most weight rooms on campus don’t come with an address you can throw into the GPS. The last thing you want to do is call the hiring manager while you circle campus trying to find the building. Drive to campus the day before if possible and take your time navigating around so you can find the correct building and avoid any chaos the morning of your visit.

Give a Good Handshake. Another important factor when trying to make a good first impression is how you shake hands. Do not give the “wet noodle” handshake and stare at the floor. Make eye contact and give a firm handshake.

Address the Committee Appropriately. Remembering names is also important during the interview process. Before the interview, look at the agenda for the day and put a face to the names of the people you will meet by reviewing the staff directory on the school’s website. Sometimes you’ll be introduced to someone quickly in the morning before a more formal sit-down with that same person in the afternoon. Keep in mind, this is an interview. If you’re dealing with coaches, always refer to them as “Coach____” and call administrators “Mr._____” or “Ms.____.” Unless someone insists you call them by their first name, stick to these guidelines.

Tailor to the School. Tailor your programs to the school and its sports. I find many people do a nice job of preparing packets or booklets for committee members on the hiring process, and it helps separate you from those who do not. However, take the time to add in the school’s current logos and colors.

When we host candidates for on-campus interviews, I’ll ask them to provide sample programs, and many bring copies of their current school’s programs without adjusting for our school. Additionally, write your sample programs with the sports you might be working with or the coaches that might be on the committee in mind.

For example, if the soccer coach, softball coach, and hockey coach are all on the committee, it would be wise to provide a sample program for each. Something simple like a 4-week off-season plan for soccer, a 4-week in-season plan for softball, and a 4-week speed program for hockey will cover your bases and allow the coaches to see that you can adjust your program based on the demands of the sport and account for different times of the year.

Nine

Follow-Ups

Follow-ups go hand-in-hand with first impressions, but they deserve their own section. I have not met another coach or administrator who does not value a follow-up note or an email. Whether it’s a phone call or in-person interview, take a few minutes to follow up with the people you met or spoke with.

I have not met a coach or administrator who does not value a follow-up note or email, says @GreeneStrength. Share on X

I also find the timing is important. It’s best to follow-up the night of the interview or the following day, as you don’t want to wait too long. I also recommend sending a thank you note in the mail to the person running the search and possibly their supervisor in addition to the email (i.e., the head strength coach and the athletic director). It could take a few business days, and a lot of schools have an old-school mail room so it may be even longer. Therefore, the email is critical to send ASAP. Another thing to keep in mind is to personalize each email. Below is an example:

Dear Mr. G,

I want to thank you for taking the time out of your day to meet with me and talk to me about the position at _____ University. It was great to meet you and hear your perspective after 17 years at ________ University. I really enjoyed learning about your mission to transform the life of each student-athlete and your plans to build a brand new indoor facility. It would be an honor to join your team, and I appreciate you considering me for this position. I look forward to hearing from you soon.

Sincerely,

___________

It’s concise and highlights 1-2 things that you spoke about in the interview. Keep in mind many of these people share office space and will talk about the follow-up note you sent to them. If it is a “copy and paste” message sent to each person, it will carry less weight.

Ten

You Are Always On an Interview

Whenever I go to a conference or clinic, I make it a point to talk to as many young coaches as possible. When I meet someone who impresses me, I make a note, and when I have a position open or someone in my network does, I may contact them. At the same time, I make a note of those who I feel would not be good candidates for future positions.

Two of the questions I usually ask young coaches at conferences is: Where are you currently and what are some things that you and the staff are doing? It’s disappointing how many young coaches will start talking poorly about their current employer without blinking an eye.

Here are two recent responses:

  • “We do a lot of old-school training, but that is because my boss is a dinosaur. I am hoping he retires or leaves.”
  • “We do my boss’s program because he is a micromanager. I don’t get to write things the way I want so I am on the hunt for another job. Do you know of anything open?”

These responses came within ten minutes of meeting me and with disregard for the fact that I could have known their supervisor. Loyalty is very important in this business, and every head coach wants to hire loyal staff members.

Loyalty is very important, and every head coach wants to hire loyal staff members, says @GreeneStrength. Share on X

It is the exact reason young coaches get so upset when they apply for 100 jobs and don’t receive a single response. Wrong or right, your two years of experience, ten certifications, and a master’s degree are thrown out the window if the other candidate comes from a trusted colleague or happens to be former athlete or intern.

One day you'll get your shot, you'll have your staff, and you'll want that staff to have your back, says @GreeneStrength. Share on X

The term loyalty is thrown around a lot, but many do not understand how important it is. Keep in mind: one day you will get your shot, one day you will have your staff, and one day you will want that staff to have your back.

Regardless of where you are as an assistant or GA, chances are good you will have things you will want to do differently than your boss does and that’s okay. Make notes of the good things your current supervisor does while also making notes on the things you would do differently. During your work as a GA or assistant start to develop a manual that you would use to manage your department if you were to get the opportunity to be a director.

Starting this process early will build your confidence and prepare you for the future without dwelling on the things you don’t like about your current job. Preparing for what you shouldn’t do is equally as important as preparing for what you should do.

Recap

I listed these examples to share some of the things to avoid during the interview process. The strength and conditioning field is more competitive than ever, with more and more professionals competing for the same jobs around the country. We have all heard the phrase “control what you can control” and that could not be truer for the interview process. If it comes down to you and one other person, don’t let the lack of attention to detail be the reason you don’t land your next job. Final review:

  • Know what you are applying for and who you are talking to
  • Answer the phone when your time is scheduled
  • Avoid swearing and be professional
  • Have well-thought-out questions prepared
  • Have a strategy for when to ask about pay
  • Dress the part
  • Do not lie!
  • Come prepared for your on-campus interview
  • Follow-up
  • Loyalty is very important—you are always on an interview

Since you’re here…
…we have a small favor to ask. More people are reading SimpliFaster than ever, and each week we bring you compelling content from coaches, sport scientists, and physiotherapists who are devoted to building better athletes. Please take a moment to share the articles on social media, engage the authors with questions and comments below, and link to articles when appropriate if you have a blog or participate on forums of related topics. — SF


How To Create Freelap Groups

Uncategorized| ByChristopher Glaeser

The MyFreelap app can share timing data with other accounts in real time. This is accomplished by creating a group and adding other member accounts to the group. It is possible to create multiple groups with different members in each group. Groups can be created in either the myfreelap.com account using a browser or in the MyFreelap app on a mobile device. The steps below show how to create a group using the MyFreelap mobile app. The steps to create a group in the myfreelap.com account are similar.

How to Create a Group

  1. Start the MyFreelap app on a mobile device.
  2. Press the Groups tab at the bottom of the screen.
  3. Press the AddGroup icon on the menu bar.
  4. Type a group name, select an activity, add an optional description, and press Create.
  5. Select the new Group.
  6. Press the AddMember icon on the menu bar.
  7. Type a Username.
  8. Select the member.
  9. Press the checkmark on the menu bar to add the member to the Group.
  10. An invitation to join the Group will be sent to the member in their mobile app.
  11. The member then accepts the invitation to join the Group.
  12. Repeat the steps above to create another Group or add more members to an existing Group.

How to Share in Real Time

  1. Start the MyFreelap app on a mobile device.
  2. Start a Workout.
  3. Press the three dots on the menu bar and select Share.
  4. Search for a Group name or member name.
  5. Press Share on the menu bar.
  6. Group members will receive invitations.
  7. Group members then accept the invitation.
  8. Group members will receive all the Workout timing data in real time.
  • « Go to Previous Page
  • Page 1
  • Interim pages omitted …
  • Page 120
  • Page 121
  • Page 122
  • Page 123
  • Page 124
  • Interim pages omitted …
  • Page 164
  • Go to Next Page »

Primary Sidebar

Latest Posts

  • How to Jump Higher
  • The Six Absolutes of Perfect Technique
  • Building a Better High Jump: A Review of Stride Patterns

Topics

  • Changing with the Game
  • form and technique
  • Game On Series
  • Getting Started
  • high jump
  • Jump training
  • Misconceptions Series
  • Out of My Lane Series
  • Plyometrics
  • Rapid Fire
  • Resistance training
  • Summer School with Dan Mullins
  • The Croc Show
  • track and field
  • VBT
  • What I've Added/What I've Dropped Series

Categories

  • Blog
  • Buyer's Guide
  • Freelap Friday Five
  • Podcasts

COMPANY

  • Contact Us
  • Write for SimpliFaster
  • Affiliate Program
  • Terms of Use
  • SimpliFaster Privacy Policy
  • DMCA Policy
  • Return and Refund Policy
  • Disclaimer

Coaches Resources

  • Shop Online
  • SimpliFaster Blog
  • Buyer’s Guide
  • Freelap Friday Five
  • Coaches Job Listing

CONTACT INFORMATION

13100 Tech City Circle Suite 200

Alachua, FL 32615

(925) 461-5990 (office)

(925) 461-5991 (fax)

(800) 634-5990 (toll free in US)

Logo of BuyBoard Purchasing Cooperative. The word Buy is yellow and shaped like a shopping cart, while Board and Purchasing Cooperative are in blue text.
  • Facebook
  • Instagram
  • Twitter
  • YouTube

SIGNUP FOR NEWSLETTER

Loading

Copyright © 2025 SimpliFaster. All Rights Reserved.