[mashshare]
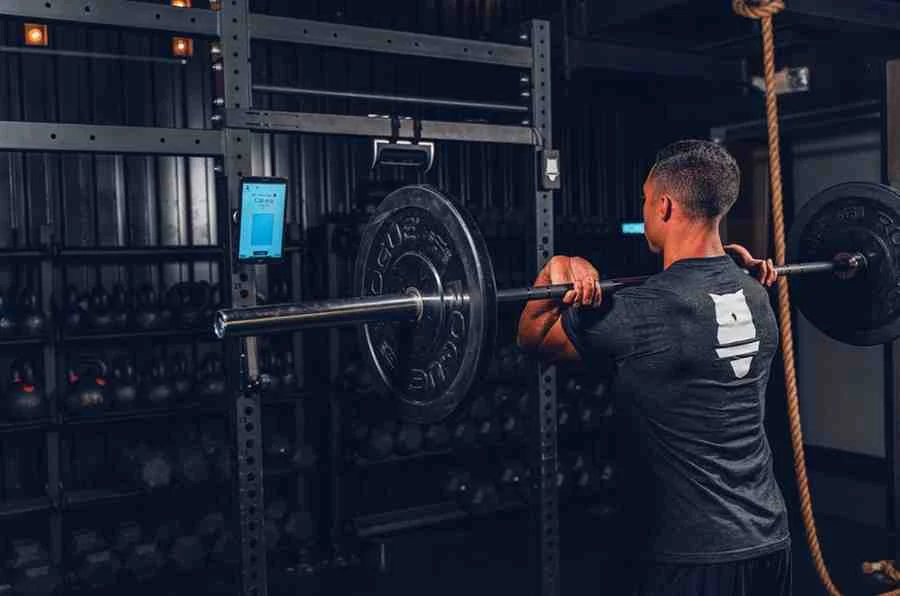
Before training begins for any athlete, a full movement analysis of each individual joint should be done. For me, if there is any joint that is not fully prepared from a standpoint of overall health (balance of strength and active range of motion), then we need to ready the health of the unhealthy joints prior to training.
Ensuring the proper health of all joints prior to training allows us to get as close as possible to improving the longevity of the athlete through their collegiate career. This is THE MOST IMPORTANT STEP in training and preparation. Those who get caught up in “getting the athlete strong” without proper screening (because getting the athlete strong helps prevent injury) are setting their athletes up for failure at some point down the line.
Ensuring the proper health of all joints prior to training allows us to get as close as possible to improving the longevity of the athlete through their collegiate career, says @coachjbrewer. Share on XAt this phase, we need to get as much information as possible to get as close as we can to predicting a possible injury (even though we can never entirely predict it or entirely prevent injuries from occurring). In this case, our job is to fully understand:
- What each joint should be capable of compared to current joint ability.
- The health history of each individual athlete (collaboration with ATC staff).
- The consistent or typical injuries that occur within the sport (for me, soccer)— when and how they occur.
Once these are complete, then I create a warm-up with movements that will aid in teaching the athletes how to move safely. From there, I move to programming. Here, I will focus on assessing an athlete and moving toward ACL mitigation.
My Evaluation Process for Athletes
One thing that has not and will never change is the anatomy of a human being. A shoulder will always be multiaxial, an elbow will always be a fixed hinge, knee flexors will always flex, etc.
Many people prefer to start training athletes without doing this evaluation process, using the initial general conditioning phase to get an idea of where the athlete is. The philosophy of these coaches is that they will evaluate as they train and adjust from there, because they say there isn’t enough time to evaluate. John Wooden said it best: “If you don’t have time to do it right, when will you have time to do it over?” I prefer to have a complete diagram of what I’m working with before I get started with any athlete.
Assessing Each Joint
When I screen an athlete, it typically takes about 10–15 minutes. The evaluation screen hits the following areas:
Shoulder Flexion: The screen for this shows me how much movement into shoulder flexion the athlete can do. If they are not able to pass the ear (in a lying position), then I will not load them with exercises above the head. Instead, I give them correctives that will increase their ability to move into flexion.
Lying Hip Flexion Holds: This shows me how much active range of motion is possible due to the flexibility of the hamstrings and strength of the hip flexors. I ask for 80 degrees of movement from each athlete. If they do not possess that, then I give them stretching assignments and correctives along with modifications of all loaded hamstring exercises.
Lying Hip Internal Rotation: As the athlete lies on their back, has one leg prone and the other hip flexed to 90 degrees, and the knee at 90 degrees, I ask them to rotate the heel away from the midline of the body, moving into internal rotation. The acceptable range is 30–40 degrees. Athletes who are below this number receive extra internal rotation exercises along with external rotation stretches.
Lying Hip External Rotation: As the athlete lies on their back, has one leg prone and the other hip flexed to 90 degrees, and the knee at 90 degrees, I ask them to rotate the heel inward into external rotation. The acceptable range is 40–60 degrees. Athletes who are below this number range are given external rotation strengthening exercises and internal rotation stretches.
Groin Straight Leg Abduction: I have the athlete lie flat on their back and then abduct one hip as far as possible with no compensation movement. I then place my foot inside theirs and have them squeeze into my foot. This helps me gauge if they possess any strength or if they may have closing angle pain. The desired movement here is 30–50 degrees. This assesses the groin muscles that are more active when the leg is straight. If weak, I give them isometric exercises. If not in the desired range of movement, I give them extra stretching of the groin in a straight leg fashion.
Groin Bent Leg: I have the athlete in the same starting position as the internal/external test. I place my hand with pressure on the opposite leg hip and have them abduct as much as possible. I then apply pressure with my other hand on the inside of the abducted knee as they try to adduct back against me. This helps me assess adductor strength and closing angle pain. The desired movement here is 30–50 degrees. This assesses the groin muscles that are more active when the leg is bent. If weak, I give them isometric exercises, and if not in the desired range of movement, I give them extra stretching of the groin in a bent knee fashion.
Ankle Dorsiflexion (in relationship with the knee): Each athlete starts in a kneeling position with the back knee in line with the front heel. With the front leg, they then push the knee into anterior displacement until the point at which the heel wants to come off the ground. The desired movement is having the knee at least 4–5 inches in front of the toe. If they cannot move further than this distance, I give them extra Achilles stretches to do prior to our warm-up, and I keep their heel elevated (stepping on an elevated surface) when we do a front or overhead squatting variation.
Ankle Controlled Articulation Rotation: The athlete sits on the ground with a bent leg. I have them start in an inverted ankle position, then roll slowly into plantar flexion, then finish in an everted position. This gives me an idea of the movement and control they have from inversion to eversion. If the ankle is jumpy while rotating, they lack active ranges of motion while moving. (I have yet to see a soccer player with this concern.) If this is the case, I give them active exercises and stretches to help with the issue.
Knee Controlled Articulation Rotation: The athlete sits on the ground and starts with one knee bent and dorsiflexed as much as they can. I have them attempt to shift the heel out and the toes in (internally rotate) and then slowly extend the leg. Prior to reaching a knee-locked position, I have them rotate the other direction, then flex the leg back toward the body. If I do not see a significant amount of rotation, I then prescribe a knee controlled articulation rotation (CAR) exercise with more intense contractions. If they lack any movement, I do a series of stretches with isometric contractions in order to stimulate more passive and active ranges of motion.
Standing Hip Flexion (with Strength Assessment): The athlete locks their body in an upright position, and then I have them rapidly flex one hip (knee/toe up). Once they reach maximum height, I have them freeze the hip flexed position. This rapid hip flexed movement shows me the position the athlete naturally places their knee in when braking and raises their knee to during sprinting. I watch each athlete from the front and then push down on their knee to assess the level of strength. The red flag of this test is when the athlete’s knee moves to the midline, and the foot, when dorsiflexed, externally rotates. Imagine an athlete moving at a rapid pace and trying to brake, then change direction from this compromised position—injury is inevitable.
From a standpoint of muscle balance, I would like to see the knee move vertically and the hip actually take over with some external rotation and/or slight abduction, where it would begin to pull and balance the movement. This is where most female athletes fail. Therefore, I spend much of my time working the abductors and external rotators of the hip and increasing dorsiflexion of all the athletes.
Note that, if the athlete experiences closing angle pain in any of the assessments (pain on the joint side as the angle gets smaller), I refer them to the ATC staff.
While this assessment process may look like a lot, all of it is necessary for us to understand where to go when it comes to training, explains @coachjbrewer. Share on XThis assessment process looks like a lot, but the body is a complex moving machine. All of this is necessary for us to understand where to go when it comes to training. Cooperatively, all movements in the weight room require prerequisites. If an athlete cannot properly flex the shoulder, then they shouldn’t be doing weighted overhead movements because it will lead to injury since they do not possess the active range of motion prerequisite. This seems to be true, from my experience, for all joint movements.
This process also allows me to educate each individual athlete on their weaknesses and imbalances. For those with glaring needs (really weak areas or range of motion issues), I then provide them with a small list of exercises to use when they first go to the weight room or things they can do after the workout or at home on their own time. Over time, they start to balance the health of the joint. (Joint health can be defined by both the active range of the joint and its articular strength and capsule space.)
As a Functional Range Conditioning® mobility specialist, I follow the FRC flowchart created by Dr. Spina1 (the founder of the FRC® system). This flowchart allows for proper progression as far as bringing back the health of a joint and preparing it for more complex movements. The main two points of the FRC® system are:
- Increase functional mobility through articular strength and neurological control.
- Increase articular resilience with increased tissue-bearing capacity and, therefore, better preparation for competition in an effort to limit or prevent injury.
This helps truly increase functional mobility. We need to train the entire joint system, as all joints will eventually work with each other at some random time in the action of sport.
When it comes to movement patterns, we cannot fully program the body to do something exactly the same way in repeated fashion; there will always be errors in movement and uncontrollable variables that will affect movements in sport action. Bernstein’s “repetition without repetition”2 suggests any complete repetition is impossible because of the uncontrollable variables in the body (muscle firing mechanisms), along with constant variable environmental factors (flooring, weather, speed, angles, etc.). Latash, et al., later added to this literature by stating: “A motor task does not prescribe a particular motor pattern.”3
I try to provide athletes with more degrees of freedom in their joints, to be more consistent while adapting to more variables. This makes them safer and more efficient movers during play. Share on XDue to these findings, I try to provide my athletes with more degrees of freedom in their joints, to be more consistent while adapting to more variables. This, in turn, makes them safer and more efficient movers during play. This process with proper progressive overload creates tissue adaptation and protection and provides injury mitigation, improved neurologic function, and better articular health and longevity (Dr. Spina, FRC® system1).
A Balance of Strength
As many of us know by now, the main anatomical difference of a female athlete compared to a male athlete is the wider hip base and, therefore, the increase in valgus angles to the knee. Along with other factors explained below, this is the principal contributing factor to the ACL injury epidemic, as it puts extra stress on the MCL and ACL during landings and braking periods in sport. My goal is to greatly reduce this risk by gathering information on why non-contact ACL injuries occur and then begin to train toward prevention.
This starts with properly assessing the health of the joints (hip/knee/ankle). If you do not possess the ability to assess these correctly, then please allow someone who does (ATC staff, ortho, more seasoned trainer/strength coach) to conduct the assessment. As stated earlier, assessment of health is based on two factors: active range of motion and the strength within the active range of motion. Next, I focus on balancing the strength of all the muscles involved that support and move each joint.
If you do not possess the ability to evaluate the health of an athlete’s joints correctly, please allow someone who does to conduct the assessment, says @coachjbrewer. Share on XBryan Mann, in his NSCA presentation from 2018, showed research that supports my philosophy and practice, with his application of exercises to strengthen and balance the joint to oppose the weaknesses in the area.4Mann concluded that the mechanisms of an ACL tear need to be narrowed down to three areas: hip adduction, hip internal rotation, and tibial anterior translation.4Causation factors are then applied—accumulated fatigue (through the season and through single competitions) and outside stressors (physical, academic, emotional).
His recommendation for a solution is to counter the mechanisms of the tear; in this case, by balancing the stress through the strengthening of the opposing muscle groups. The main areas of focus are, of course, increasing the strength of the abductors, external rotators, VMO (vastus medialis obliquus), and hamstrings, and utilizing preventative warm-ups such as FIFA 11 and other inclusions.
I take this one step further and suggest that you need to keep the joints healthy by maintaining a balance of strength, in addition to combatting the injuries plaguing the sport. This approach allows me to train holistically (train a human to be a better human) and then focus on sport-specific entities (i.e., energy zones, movements, game duration, etc.). It makes my programming from sport to sport much simpler and more universal.
My selection of exercises begins with these muscle groups in the weight room, and I spend a majority of my initial weeks (regardless of training season) teaching athletes how to properly brake/absorb from all angles, speeds, and heights for both one- and two-leg landings. I build each athlete to a proper body positioning and encourage proper muscle sequencing.
Warm-Ups for Stability and Mobility
Let’s start with the warm-ups. This is where we begin to build good movement habits and more stability (click exercises for linked videos).
- Straight Leg Raise Hold – Flexing the hip creates a movement where the hamstring, as the antagonist, needs to contract eccentrically in order to stop the hip from flexing too much. If done right, the leg in use should be shaking.
- Straight Leg Raise Pump – Same routine as above, but now in a ballistic manner.
- Glute Bridge Banded Abduction – Extension of the hips firing up the entire posterior chain, then abduct against band tension.
- Upright Hip Rocker – Constant activation of internal and external rotation of the hips while sitting upright.
- Hip Roller – Lie on back with arms out for stability. Using 90-degree flexed hips and knees, roll hips to the right and then the left. This activates the internal and external obliques, as well as the spinal stabilizers.
- Cat Cow
- Outside Edge Walk
- Inside Edge Walk
- Side Heel Walk
- Full Foot Roll – Heel to Toe Walk
- Tip Toe Walk
- Band Abduction Walk
- Band Monster Walk
- Reverse Banded Monster Walk
- Standing Band Extension/Abduction
From here, I usually filter in exercises that mimic what we have on the training card as far as the lifts of the day go, but these warm-ups give us a great start on balancing the hips, knees, and ankles.
Exercise Selection
The exercises of emphasis to combat the ACL injury epidemic focus on the hips and knees/hamstrings.
Squatting Hip Stabilizer Exercises
Almost every squatting movement of mine, whether it’s unilateral or bilateral, is done with a knee-out emphasis, which asks more of the abductors, external rotators, and VMO.
Almost every squatting movement I have athletes do has a knee-out emphasis, which asks more of the abductors, external rotators, and VMO, says @coachjbrewer. Share on XHere are a few that I utilize:
- Banded Squat
- Band Abduction Walk
- Standing Band Extension/Abduction
- Banded Monster Walk, Reverse Banded Monster Walk
- Fire Hydrant, Banded Fire Hydrant
- Prone Lying Banded Abduction
- Glute Heel Tap
- Simple Lunge Variations (walking, small steps, flat back, repel, etc.)
For external rotation, a 90/90 PAIL/RAIL with a focus on the externally rotated hip, isometric dog pointers, RDLs, full-range squats, and full-range front squats. The full-range squats require a fair amount of external rotation of the hips, allowing the body to be able to sink down rather than pushing the hips back.
Knee Flexors (Hamstrings/Calves)
These cover the exercises I have athletes do to work the posterior side of the legs.
- Eccentric Pistol Squat
- Ball Hamstring Curl, Two-Leg
- Split Hamstring Curl
- Split Leg Manual Hamstring, Eccentric Resistance
- SL RDL, Locked T-Spine
- KB RDL
- Barbell RDL, Explosive Concentric Emphasis
- Anterior Draws Lunge with Stomp
- Repel Lunge with Deceleration Emphasis
- Partner Nordic Hamstring
- Sorinex Roller Hamstring Curl
- Banded Glute Bridge Raise/Hold
Braking/Absorbing
As a former track coach (for 14 years), I fully understand and can program excellent sprint mechanics, help develop more efficient strides, and enable faster sprinters. The thing I learned coaching football (for 17 years) is that many players are not taught how to properly slow down or even stop safely. This is more important for female soccer athletes, due to anatomical disadvantages as well as the variable nature of the sport, where change of direction and speed are constant needs. By learning the proper way to land/brake/absorb force (which is flexion of the hip, flexion of the knee, and dorsiflexion of the ankle with an abducted hip), the athletes can move closer to reacting properly during play in this absorption position.
My coaching cues are always flex your butt, then flex everything else with the knee out. By cueing the athlete to flex their butt, it increases the chance of them firing up the abductors and external rotators of the hip to move the stress away from the knee and toward the hip. The “knee out” cue intentionally moves the knee away from the unsafe valgus position and fires up the VMO, along with paying extra attention to the abductors and external rotators of the hip.
I then remind athletes of the importance of dorsiflexion (pulling the toes up toward the knee), as this can draw attention to the Achilles as it’s being stretched. Additionally, this fires up the calves and adds extra attention (even though they are weak knee flexors) to the muscles that cross the back of the knee. This process helps counter the anterior movement of the tibia and gives tension to the ACL, which helps strengthen it over time.
Strength coaches need to treat the braking series like weightlifting or plyometrics, in that all tissues, including ligaments, will adapt to stress and increase in strength, says @coachjbrewer. Share on XStrength coaches need to treat the braking series just like weightlifting or plyometrics, in that all tissue, including ligaments, will adapt to stress and increase in strength. This makes the entire joint more stable and better ready for the stress it will endure during the season. I have found isometric positioning followed by eccentric loading to be the best way of progressing into heavy plyometric exercises. The two additional key points to remember here are straight out of any textbook covering strength and conditioning:
- Principle of Progressive Adaptation: Incremental loads imparted on tissue results in adaptation of said tissue such that the load absorption capacity improves.
- Principle of Specificity: The adaptation is specific to the demand.
Much like every other sport, repetition is key to improving the athlete’s ability to cope with variable environmental stimulus (different speeds, vectors, levels)—i.e., better prepared to stop and change direction safely—in this case, a soccer player. Here are a few progressive exercises I use:
- Isometric Hold of the Proper Landing Position (One-Leg Squatting Position)
- Isometric Holds of the Proper Landing Position (Two-Leg Squatting Position)
- Plate Catch Drill
- Hip External Rotation/Extension (Intro to Braking)
- SL to Two-Leg Landing
- Angle Bound with Stick
- SL Rotation Jump, Outside Leg Landing
- Angle Leg Braking
Once the process of landing/braking/absorbing is complete, I tend to filter in minimal accelerations (1–2 walking steps of momentum, creating linear/lateral/hopping movement). During this training phase, I stay until the athletes have mastered the stopping (no sign of compensation). This process will typically take 2–4 weeks, and then I move to more complex movements and change of direction drills.
If there are individuals who still look behind, I have them come in and do extra work to get them caught up. Based on research findings, “dynamic movement patterns are very important factors contributing to ACL injury.”5Therefore, we need to give athletes as many variables as possible in their training to stay clear of the possible injury. In order for your athletes to gain the ability to stabilize, you must continue to add stimulus.
From here, I move to a “nudge” series, where the athletes hop and land with the added stimulus of a partner knocking them slightly off course. This slowly gives them more confidence landing in crowded areas. I then move to higher speeds and harder pushes, until they are completely stable with a wide variety of uncontrollable stimulus:
- SL Landing Nudge Variation
- SL Braking Nudge Outside Leg
- Moving SL Braking Nudge Variation
- Moving SL Braking Forward Nudge Variation
Aiming for a ‘Healthier’ Season
After we have taught the athlete to properly position themselves when braking, the next step is to really dig into the training process with full-speed accelerations and vertical and horizontal plyometrics, and tie all of these together with change of direction drills. If you have allowed the athlete to adhere to the Principle of Adaptation and you yourself have stayed true to the Principle of Specificity, then your athletes will be on track for a healthier season as it relates to non-contact injuries.
As I stated earlier, I have this progression, no matter the training season. This is due to the many fluctuations in every training cycle that we, as strength professionals, don’t have control over. This includes winter break, spring break, NCAA break periods, summer break, busy practice schedules, enduring practices, enduring game performances, etc.
Obviously, the more the athletes have been subjected to the exercises and movements, the more adaptation speeds up. Upperclassmen will be further along in the training progression than incoming freshmen and transfer athletes. This is why it is necessary to separate your athletes by training age as it pertains to ACL prep programming, along with all new inclusions in a strength and conditioning environment.
On the path to prevent all injuries, there needs to be an extensive screening process followed by careful planning to balance the athletes’ deficiencies, says @coachjbrewer. Share on XIn summary, I firmly believe that on the path to prevent all injuries (most importantly, the ACL), there needs to be an extensive screening process followed by careful planning to balance the deficiencies of the athletes. You can then move them into a holistic training program that includes “sport specific” needs such as proper energy systems and movements within the sport.
I have done this (with many revisions over the years) with all sports I have worked with, and the health of the athletes throughout the playing season has shown excellent numbers (as it pertains to joint health). There have been only three non-contact ACL injuries in 18 years of the sports I have had strength and conditioning control over, followed by a short list of common muscle pulls, strains, sprains, and other minor injuries that occur within full contact sports.
Since you’re here…
…we have a small favor to ask. More people are reading SimpliFaster than ever, and each week we bring you compelling content from coaches, sport scientists, and physiotherapists who are devoted to building better athletes. Please take a moment to share the articles on social media, engage the authors with questions and comments below, and link to articles when appropriate if you have a blog or participate on forums of related topics. — SF
[mashshare]
References
1. Dr. Andreo A. Spina, Founder of FRC® and FR® systems. FRC Training, Denver, CO. (2019)
2. Bernstein, N.A. (1967) The Co-ordination and Regulation of Movements. Oxford, Pergamon Press.
3. Latash M.L., Scholz J.F., Danion F., and Schöner G. “Finger coordination during discrete and oscillatory force production tasks.” Experimental Brain Research. 2002; 146(4): 419–432.
4. Mann, Bryan. “The ACL Epidemic that Never Needed to Happen.” Presentation at NSCA 2018 Coaches Conference, January 2018.
5. Journal of Orthopaedics Editorial.“The female ACL: Why is it more prone to injury?” 2016; 13(2): A1–A4.