For coaches, it can be easy to get caught using specific sprinting drills or techniques just to check off a box, all while hoping your athletes adapt to it the way you intend. Sometimes, ensuring your athletes improve can be fixed with just a little bit more attention to detail, but achieving that isn’t easy if you or your athlete don’t know where you are going to take it next.
From my experience working with team sport athletes, they like to have a goal and know what is coming next. So, just like in the weight room, you need to have a way to both categorize and progress what technique drills you choose. Taking this extra step will help you explain to your athletes the purpose of certain drills and how they will progress down the line.
You need to have a way to both categorize and progress what technique drills you choose, says @CoachJacobDubU. Share on X
Categorization
First, let’s tackle the categorization of technique drills. I am not sure if I have seen anyone else do it exactly this way, but I think it is a vital first step to understanding how and where to put certain drills in a progression. I split drills into three main categories, which helps me decide where and when to use them.
1. Posture/Position Drills
Regardless of the level of the athlete, this is always my starting point for technique drills. These are your base-level drills, where as the title implies, we are looking to establish proper posture and positioning. Posture I define as what happens with the torso in relation to the lower body, without the movement of the limbs. Positioning I define as what positions the limbs need to get into after establishing your posture. Examples of drills that fall into this category include:
- Wall marches
- Wall holds
- Walks
- Paused walks
- Marches
- Paused marches
With team sport athletes, this is your bread and butter. The majority of team sport athletes—unless they have a track background—will struggle at first getting these positions down. I have quite literally seen NBA athletes struggle with these concepts at first. Something as simple as dorsiflexion at the ankle can be something you find yourself yelling about all the time. But, forcing them to slow down and feel those positions will speed up that learning curve tremendously.
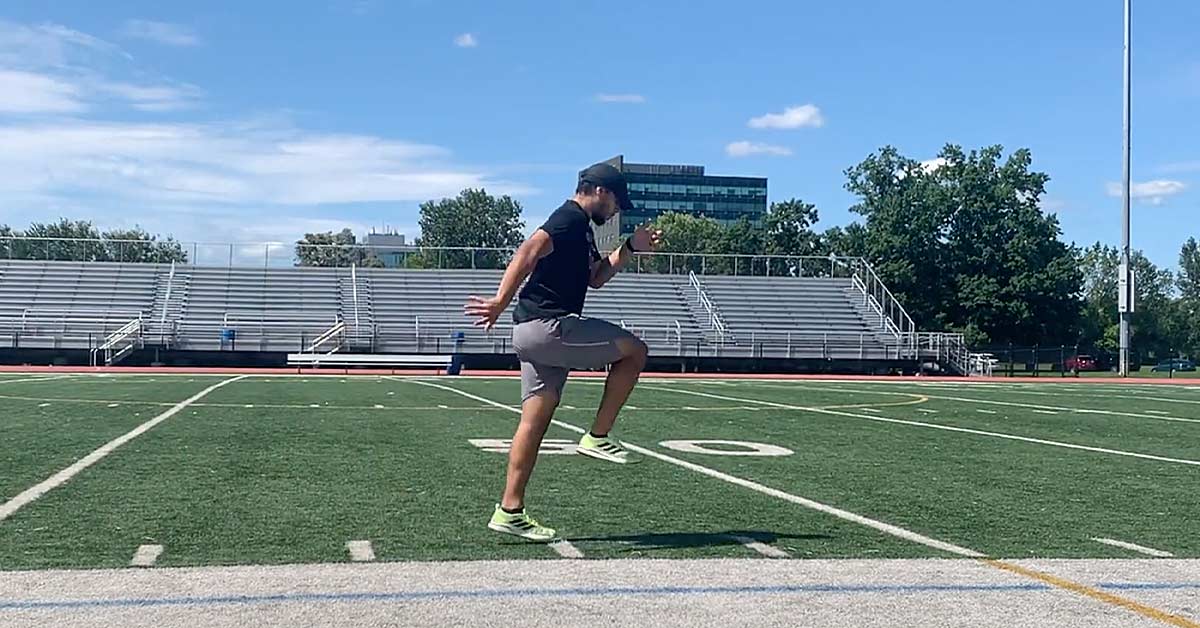
Video 1. The A-March, used to establish posture and positioning for sprinting.
2. Force Drills
You cannot talk about sprinting fast without talking about putting force into the ground—this is where the rubber meets the road. We take our posture and positioning and then attempt to apply force into the ground efficiently. A few examples of these would be:
- Exchanges (single, double, triple)
- Single side marches
- Wall Exchanges (single, double, triple)
For team sport athletes, this is where you will start to see some breakdown of what you worked on in the earlier drills. But this time they have reference points and cues you have established with your posture drills. Especially for football players, once you tell them to do something with power, they will tense up. Constantly reference one or two points of emphasis from the posture drills and reinforce the necessity to maintain those positions.
You cannot talk about sprinting fast without talking about putting force into the ground, says @CoachJacobDubU. Share on XRecalling and helping your athletes make that mental link is vital to bridging that mind–movement connection.
Video 2. The double-exchange drill, focusing on a violent switching action of the limbs.
3. Rhythm Drills
Finally, rhythm drills are where we add pace and varying rhythms to the postures and positions we established with our previous set of routines. Getting to a confident posture and position is one thing, but now you need to challenge your athletes to maintain it by adding or changing the rhythm.
Sprinting is a naturally rhythmic movement; therefore, we must address the ability to have some type of rhythm. If you can dance well, these will come a bit easier. Some basic rhythm drills are:
- A-Skips
- B-Skips
- A-Runs/High Knees
- Dribbles
All of these sprint progression drills will challenge your athlete’s ability to establish a rhythm and maintain their posture and positioning through that rhythm. So, be prepared to look for more breakdowns in posture or position when you progress to these drills. Their CNS is attempting to solve the more complex problem of how do I take all of the posture drills and start to translate them to sprinting.
Be prepared to look for more breakdowns in posture or position when you progress to rhythm drills, says @CoachJacobDubU. Share on XVideo 3. The A-Skip drill to improve rhythm and timing in sprint training.
This order is exactly how I progress my intra-session technique progression. Each session, I will touch on one or two of each of these drill-types, depending on the day’s goal. For example, an acceleration day early in the training cycle may feature two posture drills and two force drills. And on a max-velocity day, I may use two posture drills and two rhythm drills. By simply categorizing the drills, I can begin to create a fluid progression that builds on itself—this allows me to see what adaptations I need to prime for that day and pick my sprint progression drills accordingly.
Next, inter-session progression!
Progressing the Drills
There are three rules I will follow here, and I take zero credit for these—they are a combination of concepts I picked up from Hunter Charneski and one of my mentors, Adam Menner. These rules are simply ways to guide your thinking and see how things can start to fit together:
- Slow to Fast (Pace and Rhythm)
- Short to Long (Distance, Contacts, etc.)
- Soft to Hard (GCT and Surface)
Again, these are guides not laws, so don’t take them as such. Also, make a note to treat these as relative terms and not absolutes. These can be followed for both your intra- and inter-session progression, so let’s break them down.
Slow to Fast
This is simply pace and rhythm, starting with your slower-paced and less complex drills and working to your faster-paced and more complex drills. Focus on slowing down the movement to allow your athletes to feel, correct, and understand their actions. This is exactly what we discussed in the above section. A sample intra-session progression could look something like this:
- Paused Wall A-Walk
- Wall A-March
- A-Skip
Now, after doing that series for some time, you may look to progress to new exercises. Again, work off what you had and progress to a faster or more complex drill; however, don’t be afraid to progress laterally as well, as in the drill can go from a wall march to a stationary march. You still progressed, but are working on the same concepts. Your next progression may look like this.
- Wall A-March
- Single Exchange
- A-Run/High Knee
Relatively simple idea. The primary usage is being able to mentally and visually understand the placement and purpose of each drill within the context of sprint progression training as a whole.
Short to Long
This one is straightforward, but is often overlooked. Start with shorter distances and progress to longer distances—or, if you track ground contacts, fewer contacts to more contacts. The biggest benefit to following this rule is fatigue management. Fortunately (or unfortunately), I can confirm this as I have experimentally broken this rule. Because team sport athletes have to work so hard to understand and work on achieving the right positions, I have found it drains their CNS. This leaves them depleted by the time you start sprinting—no good.
Just like in lifting, start with a less volume and progressively overload it over time. This is that same concept, and you can get creative with how you choose to do that. Whether by contacts, distance, or time, adding a little bit here and there over time will build an ability to withstand fatigue. Mind you, I never do more than four drills in a day. As I said before, the mental focus team sport athletes need to put into these is draining enough, you only want to focus on a few concepts at a time. Here is an example of one of my go-to progressions for technique drills:

Especially with technical work, I will always add volume with sets before distance. The reason being that it just gives your athletes time to rest a bit. Again, team sport athletes tend not to be accustomed to these movements if they haven’t done them elsewhere.
Especially with technical work, I will always add volume with sets before distance, says @CoachJacobDubU. Share on XSoft to Hard
This rule references ground contact and the relative stress and force applied to each during a drill. For example, a walk or marching drill will have “softer” ground contacts than a skipping or running exercise. Again, the main reason for having this rule is to manage fatigue. Occasionally, we can underestimate the actual amount of stress that simply doing technique drills can have on an athlete. Especially if you look at all that is required to perform something as simple as a quality A-Skip—include the number of reps you can get in a 10-yard distance, and it adds up quickly.
Within a single session, this also acts as a way to prepare the tissues and tendons before they get to the actual work. Starting with walks and marches (which are a lot easier on the body) before getting into your skips will act as a warmup for the warmup. The benefits of progressive overload are well documented and can be applied for sprinting as well.
The benefits of progressive overload are well documented and can be applied for sprinting as well, says @CoachJacobDubU. Share on XPutting it All Together
We have all been there: working something because we read “you gotta do these if we want to get our athletes better!” I have even caught myself working six to eight sprint drills in a session because “the kids need more exposure to get the technique down.” But that was not the issue—quite the opposite, in fact. I was overdoing it because I had not categorized and established the adaptations I was specifically looking to achieve. Once I implemented this strategy, my athletes and I began to work more in sync and understand the principles we were looking to accomplish.
When you start to put everything together, categorizing and having a few guidelines on how to progress makes programming an easier task. You can begin plugging in drills and asking yourself, where does it fit? Does it build on a previous adaptation? And so on. By doing so, you can take something that, initially, may have seemed overwhelming and make it far more digestible.
Since you’re here…
…we have a small favor to ask. More people are reading SimpliFaster than ever, and each week we bring you compelling content from coaches, sport scientists, and physiotherapists who are devoted to building better athletes. Please take a moment to share the articles on social media, engage the authors with questions and comments below, and link to articles when appropriate if you have a blog or participate on forums of related topics. — SF


